Exterior natural stone veneer projects reveal a specification gap that most buyers don’t anticipate: the difference between a product that looks right in the sample room and one that performs correctly on a wall for two decades comes down to decisions made before a single panel is set. This exterior natural stone veneer guide walks you through those decisions systematically — material selection, substrate compatibility, finish choices, sealing strategy, and the UV considerations that determine how your facade holds its appearance over time. Whether you’re specifying for a residential accent wall or a full commercial facade system, the variables are the same; only the scale changes.
Understanding What Exterior Veneer Actually Is
Natural stone veneer for exteriors is a thin-profile stone product — typically ranging from ¾ inch to 1½ inches in thickness — bonded or anchored to a structural substrate. It’s not load-bearing in the conventional sense; its job is to transfer environmental loads (wind, moisture, thermal movement) to a backup wall system while presenting a finished stone face. That functional distinction matters enormously when you’re specifying, because veneer behaves differently from full-bed masonry in nearly every performance category.
The materials used in natural stone veneer exterior facades span a wide range: limestone, sandstone, quartzite, slate, basalt, and select igneous stones. Each carries its own absorption rate, thermal expansion coefficient, and surface stability under UV exposure — and those variables don’t always correlate with visual appeal. A stone that photographs beautifully can be a poor performer on a south-facing facade if its open pore structure wicks moisture and its surface chemistry is reactive to prolonged UV exposure.
- Veneer thickness under ¾ inch requires engineered anchor systems — adhesive-only applications are typically limited to interior use
- Full-bed installation (mortar to substrate) suits thicker profiles; thin-set systems are appropriate for processed panels with consistent back geometry
- Stone absorption rates above 6% (ASTM C97) typically require pre-sealing before installation in wet climates or on north-facing exposures where moisture retention is prolonged
- Thermal expansion coefficients vary: limestone runs approximately 4.4 × 10⁻⁶ per °F, quartzite runs closer to 6.8 × 10⁻⁶ per °F — a meaningful difference when calculating joint spacing on large panels
Material Selection for Exterior Facades
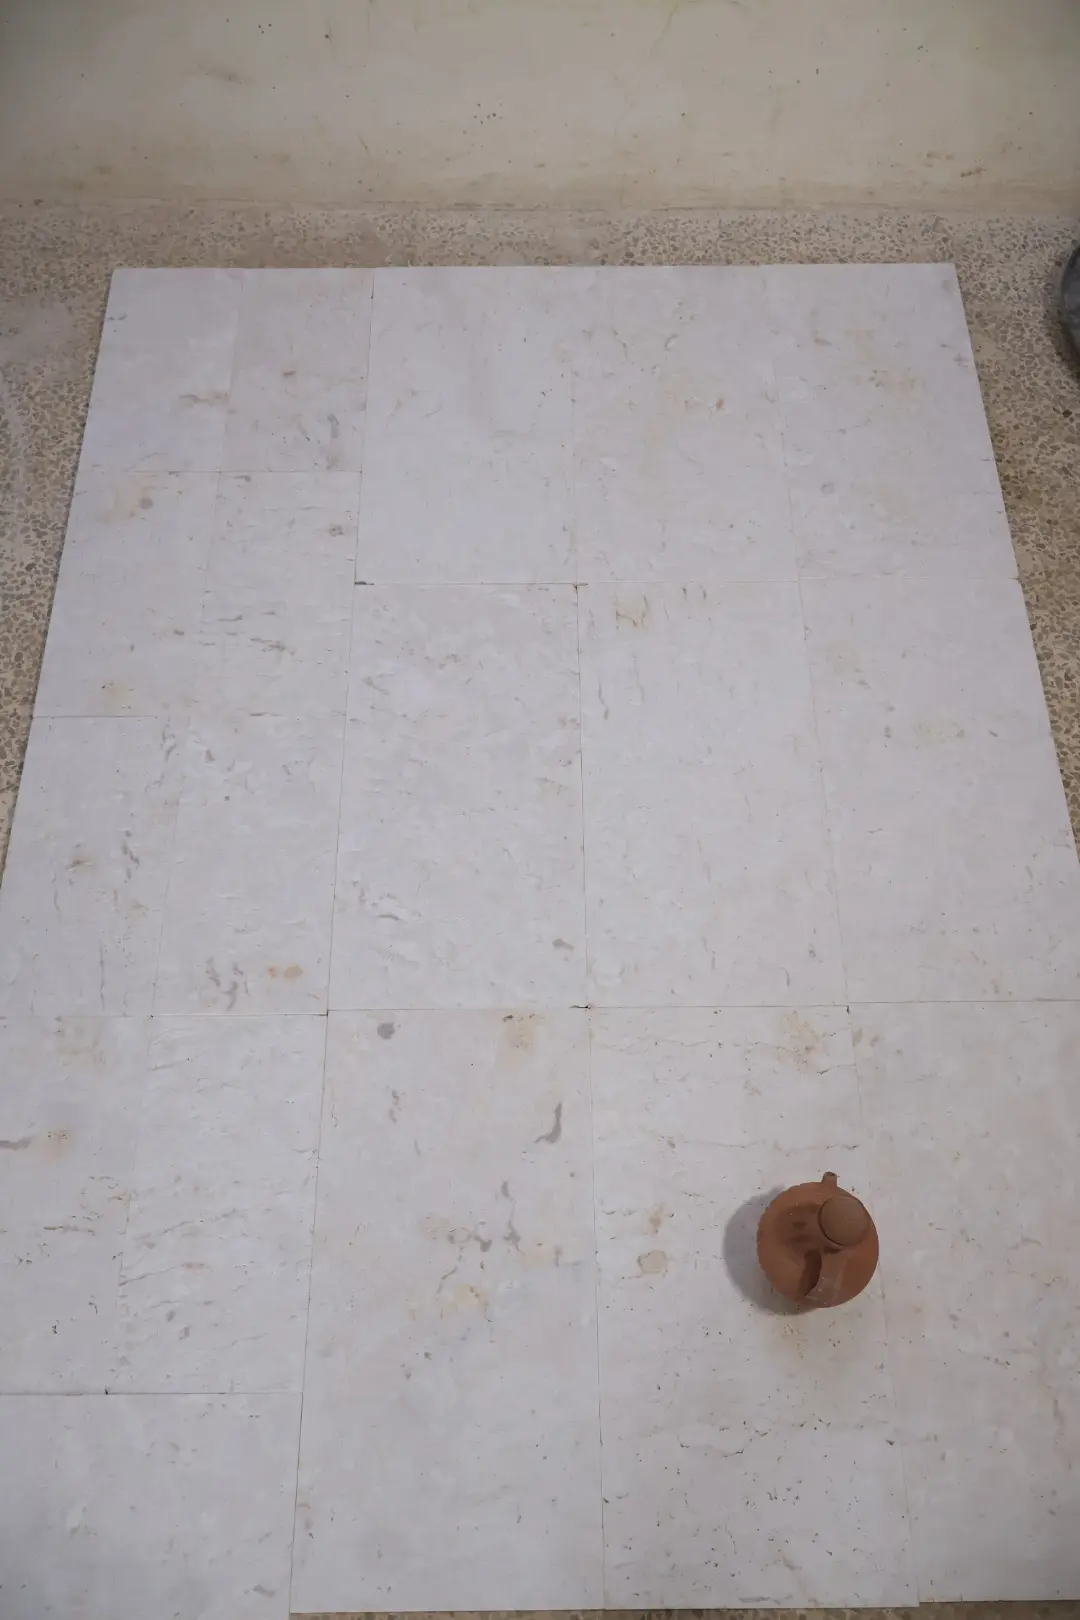
Your material choice for natural stone veneer exterior facades needs to be driven by performance criteria first, aesthetics second. That’s not a philosophical position — it’s a practical one. A limestone veneer that oxidizes from buff to orange-grey within three years of installation, or a sandstone that begins spalling at freeze-thaw interfaces, creates remediation costs that dwarf the original material savings.
According to Natural Stone Institute veneer installation and wall stone guidance, material selection for exterior applications should account for compressive strength, modulus of rupture, and absorption coefficient in combination — not as isolated metrics. A stone with excellent compressive strength but high absorption can still underperform in exposed facade positions where freeze-thaw cycling is a recurring condition.
Here’s how the primary veneer materials compare in real-world exterior conditions:
- Limestone: Excellent UV stability in dense, low-absorption varieties; high-absorption limestone can develop surface carbonation and biological growth on shaded walls
- Quartzite: Outstanding abrasion resistance and very low absorption; colour consistency can vary significantly between quarry cuts, so warehouse stock verification before large orders is essential
- Slate: Strong laminar structure is both an advantage (natural cleft face) and a risk (delamination in high-freeze environments if water infiltrates the cleavage plane)
- Basalt: Exceptionally dense and UV-stable; limited finish options and typically higher material cost, but minimal long-term maintenance
- Sandstone: Wide availability and strong visual character; absorption rates vary widely by formation — specify only varieties with absorption below 4% for exterior facade use
Substrate Compatibility and Backup Wall Systems
The substrate is the part of this equation that most buyers underinvest in. Your stone veneer panels are only as stable as the wall system behind them, and the interface between those two elements — the bond, the anchor, the moisture management layer — is where the majority of veneer failures originate.
Steel-stud framing with cement board sheathing is the most common backup system in contemporary construction. It performs well when you maintain a proper air gap between the stone and the sheathing to allow moisture that penetrates the stone face to drain freely. Without that drainage plane, moisture accumulates at the bond line, compromises adhesive or mortar integrity over time, and creates conditions for biological growth behind the panel face.
- CMU (concrete masonry unit) backup walls are the most forgiving substrate — high dimensional stability, compatible with both mortar-set and mechanical anchor systems
- Steel stud systems require rigid sheathing (minimum ½ inch cement board) and a drainage mat or drainage plane layer before stone application
- Wood-frame backup requires moisture-resistant sheathing, a vapor-permeable weather-resistant barrier, and mechanical anchors rather than adhesive-only systems — especially for panels exceeding 15 pounds per square foot
- Direct application to foam insulation is not appropriate for natural stone veneer; foam lacks the shear strength to support stone panel loads long-term
The Masonry Society natural stone wall construction standards address anchor design requirements for various substrate types in detail — particularly relevant when you’re specifying panels in seismic design categories or high-wind exposure zones.
Finish Options and Their Effect on Outdoor Performance
Your finish selection determines far more than visual character — it directly governs how the stone responds to UV exposure, moisture cycling, and surface contamination over years of outdoor service. This is one area where the aesthetic preference and the performance requirement sometimes pull in opposite directions, and understanding that tension will save you from costly mistakes.
Polished finishes are appropriate for sheltered exterior applications — covered entries, protected courtyards — where direct UV exposure is minimal. In exposed positions, polished stone faces show UV-induced colour shift more visibly because the reflective surface amplifies any tonal change. Iron-bearing stones shift from warm gold to a dull bronze within five to seven years in high-UV installations if the surface isn’t maintained with UV-resistant penetrating sealers on a regular schedule.
- Honed finish: Flat, matte, no directional texture — excellent all-around performer; UV-induced colour change is less visually dramatic than on polished surfaces; suitable for most exterior positions
- Natural cleft / split face: Maximises surface texture and drainage; UV weathering creates a natural patina that many designers specify intentionally; minimal maintenance
- Bush-hammered: Mechanically textured surface increases slip resistance and reduces surface reflectivity; very UV-stable because the textured matrix scatters light uniformly
- Flamed finish: High-heat thermal treatment creates a rough, open texture; best suited to granite and dense quartzite; eliminates sheen-based UV glare; minimal resealing requirement
- Sandblasted: Controlled abrasion creates a consistent matte texture; opens the surface pore structure slightly, increasing absorption — factor this into your sealing schedule
UV Exposure, Color Retention, and Sealing Strategy
Sun-exposed stone facades face a consistent adversary: photochemical degradation of surface minerals and organic compounds. The mechanism isn’t the same for every stone type, but the outcome — gradual colour shift, surface oxidation, and in some cases micro-cracking of surface crystals — follows predictable patterns that you can manage if your sealing programme is correctly specified from day one.
Iron-bearing stones (many sandstones, some limestones, and buff quartzites) are the most UV-reactive. The iron compounds in these stones oxidize progressively under UV exposure, shifting surface tone toward orange-brown over time. This isn’t a defect — it’s a mineralogical reality — but it can be significantly slowed with penetrating impregnator sealers that reduce the moisture needed to carry dissolved iron compounds to the surface.
For south- and west-facing facades in high-UV environments, here’s the sealing programme that delivers meaningful colour retention:
- Initial application: Apply a fluorocarbon-based penetrating impregnator before installation — pre-sealing from the back face reduces moisture ingress from the substrate side
- Surface application: Apply a UV-stable penetrating impregnator to the face within 30 days of installation, once mortar/adhesive has fully cured
- Resealing interval: Perform a water-bead test annually on the most exposed panels; when water no longer beads and sheets, reapply sealer — typically every 3 to 5 years depending on UV intensity and stone porosity
- Avoid topical film-forming sealers on exterior stone: they trap moisture behind the film, which accelerates exactly the spalling and delamination you’re trying to prevent
- For dark-coloured stones (black basalt, dark slate), UV exposure can cause surface micro-bleaching — a UV-stable colour-enhancing impregnator applied every 4 to 5 years maintains depth of tone
The relationship between finish and UV performance is worth emphasising: textured finishes naturally scatter UV radiation, reducing concentrated photochemical activity at any single surface point. When specifying stone veneer for unshaded south or west facades, a textured finish paired with a quality impregnator outperforms polished stone with even the best topical sealer over a 15-year horizon.
Installation Variables That Determine Long-Term Performance
Your material and finish decisions can be exactly right, and the installation can still undermine them. Exterior stone veneer installation requires tighter tolerances than most general contractors anticipate, particularly around joint design and movement accommodation.
Expansion joints in exterior veneer systems are non-negotiable — and the spacing that appears in generic specifications is usually too generous. For panels on steel-stud framing, horizontal relief joints at every floor line and vertical expansion joints every 15 to 18 feet are the working standard. On CMU backup walls with lower thermal movement, you have slightly more latitude — 20 to 24 feet vertically — but eliminating them based on visual preference is never acceptable. Building movement accommodation into your exterior natural stone veneer specification from the outset is far cheaper than cutting remedial joints into an installed facade.
- Joint width should account for the thermal expansion coefficient of your specific stone type — limestone and basalt run on the lower end; quartzite and lighter granites run higher
- Use a backer rod and exterior-grade sealant in all movement joints — not grout; grout has no elasticity and will fail at the first significant thermal cycle
- Mortar for exterior veneer should be Type S — stronger than Type N but not as rigid as Type M; Type M is appropriate for at-grade applications but can be too rigid for elevated facade panels
- Back-buttering thin veneer panels is essential; full mortar coverage on the back face (minimum 95% coverage per ANSI A108) prevents hollow spots that accumulate moisture and accelerate freeze-thaw damage
The IBC Chapter 21 masonry and veneer building code requirements establish the structural parameters for anchored veneer systems — including maximum panel sizes, anchor spacing, and tie requirements — that your specification should reference explicitly.
Sourcing, Lead Times, and Project Planning
Natural stone veneer for exterior facades carries sourcing complexity that most buyers don’t factor into their project schedules until they’re already behind. Stone is a natural material — lot consistency, colour matching across multiple shipments, and thickness uniformity within a profile all require active management rather than passive ordering.
For large facade projects, consolidate your order from a single quarry run wherever possible. Natural stone veneer exterior facades specified across multiple shipments from the same SKU can still show visible colour variation if those shipments come from different quarry faces or different extraction depths. Requesting material certificates that identify quarry face and batch number is standard practice on commercial specifications — don’t skip it on residential projects either if visual consistency is a priority.
Citadel Stone sources exterior veneer material directly from selected quarries, including quarries from the Middle East known for dense, low-absorption limestone varieties, as well as domestic and European quarry sources. Our warehouse team performs incoming quality checks on every pallet — checking for thickness consistency, back geometry, and surface defects before material ships to your project. That verification step matters because it catches batch irregularities before they reach your installation crew, not after.
- Lead times from warehouse stock to truck delivery typically run 1 to 2 weeks for in-stock profiles; custom-cut or special-profile orders may require 6 to 10 weeks for quarry production
- Order a minimum 10% overage on all veneer material — natural stone breakage during handling and cutting is unavoidable, and reordering small quantities to match an existing installation is disproportionately expensive
- Confirm truck access to your site before scheduling delivery — large veneer pallets require a truck with liftgate capability or a forklift-accessible receiving area; narrow site access can cause costly redelivery delays
- Store veneer panels flat on pallets under cover — standing panels on edge creates fracture risk at the unsupported edges
Explore our stone veneer facade collection for current warehouse inventory across multiple stone types and profile sizes — including split-face and honed options suitable for direct exterior specification.
Detailing Around Penetrations and Transitions
The most common field failures in exterior stone veneer installations don’t happen in the open field run of the facade — they happen at the transitions. Window heads, sill conditions, outside corners, roof-to-wall intersections, and penetrations for mechanical, electrical, and plumbing elements are the locations where water finds entry paths and where thermal movement concentrates stress.
At window heads, you need a through-wall flashing that extends at least 4 inches beyond the opening in each direction and directs any infiltrating water to the outer face of the veneer through weep holes or weep ropes spaced no more than 24 inches apart. This detail is frequently omitted on residential installations and is almost always the point of origin when moisture damage appears inside the wall assembly 3 to 5 years after installation.
- Outside corners: Use natural stone corner pieces (L-shaped returns) rather than mitered field cuts — miters in stone veneer are maintenance liabilities because the sealant joint at the miter is the thinnest point in the assembly
- Sill conditions: Stone sill caps should overhang the veneer face by a minimum of ¾ inch and slope outward at a minimum 15-degree angle — pooling water on a flat sill cap is the fastest way to accelerate surface degradation directly below it
- Penetrations: Seal all penetrations with a compatible flexible sealant, backer rod, and a rigid sleeve where the penetration passes through the wall — movement in the penetration sleeve and movement in the veneer are not synchronized, so the sealant needs to accommodate differential movement
- Base of wall: Maintain a minimum 2-inch clearance between the lowest course of veneer and any adjacent hardscape — direct contact with grade-level concrete or paving creates a capillary pathway for ground moisture
Common Specification Errors and How to Avoid Them
Reviewing exterior stone veneer installations — both successful and failed — consistently surfaces the same recurring errors. Most of them are specification errors, not installation errors, which means they’re entirely preventable if you catch them at the drawing stage.
The most persistent error is specifying panel size without accounting for the structural capacity of the anchor or bond system. Large-format veneer panels — anything exceeding 4 square feet per piece — require engineered mechanical anchors on most backup wall types. Relying on mortar adhesion alone for large panels, particularly on steel-stud substrates, is a code violation in most jurisdictions and a foreseeable failure waiting to happen.
- Specifying polished finish for exposed exterior positions without a UV-stable sealer protocol — the result is visible colour shift within 3 to 5 years that the owner perceives as a product defect
- Omitting movement joints in the mistaken belief that the material is stable enough to eliminate them — all stone moves thermally; the question is whether it moves within the joint or through a crack in the panel
- Selecting material on the basis of a small sample without confirming full-pallet or full-shipment colour range — natural stone veneer exterior projects can show significant colour variation within a single SKU
- Failing to specify mortar type — leaving “mortar” unspecified on drawings invites the installation crew to use whatever is on the truck, which may be Type N interior mortar on an exterior application
- Not coordinating the stone veneer specification with the waterproofing specification — the two systems need to be designed together, not independently by different subcontractors
Getting Your Exterior Stone Veneer Specification Right
Exterior natural stone veneer delivers long-term performance when your specification addresses material selection, substrate compatibility, movement accommodation, and UV management as an integrated system rather than as separate checklist items. Every decision in this chain affects the others: your finish choice influences your sealing schedule, your sealing schedule influences your material maintenance costs, and your anchor system choice determines whether your panel-size aspirations are structurally feasible.
Treat this exterior natural stone veneer guide as a decision framework, not a shopping reference. The material conversation should come after you’ve established your substrate conditions, your UV exposure level, and your long-term maintenance budget. Stone selected in that sequence consistently outperforms stone selected on appearance alone — and the difference becomes visible within the first five years of service.
For sourcing questions and technical specification support on exterior veneer projects, Citadel Stone’s team works directly with architects, contractors, and project managers from sample selection through truck delivery. Your project’s natural stone scope may also extend to flooring applications — how slate tile options compare for interiors covers another dimension of natural stone specification that often runs parallel to a facade project. For facades in climates with significant temperature swings, Citadel Stone recommends reviewing thermal cycling behavior before selecting a veneer profile.
Related reading: blue stone · slate outdoor tile guide.