Why Stone Selection Defines Your Wall Before You Break Ground
Most landscaping wall stone projects that fail within a decade don’t fail because of poor construction — they fail because the stone selection ignored one critical variable: the relationship between unit weight, bed depth, and the lateral soil pressure the wall actually has to resist. You’ll need to understand that relationship before you order a single pallet. A wall stone that performs beautifully as a decorative garden border will buckle under the hydrostatic and surcharge loads of a terraced slope, so the selection decision isn’t aesthetic — it’s structural from the first course up.
Understanding Landscaping Wall Stone Types and Their Structural Roles
Natural stone for walling breaks into three working categories, and the category you choose shapes every downstream decision. Fieldstone and rubble are irregular in profile and rely on interlocking mass rather than uniform geometry — they’re forgiving to lay but demand more skill to achieve consistent batter. Ashlar-cut wall stone delivers predictable coursing heights and tighter joints, which simplifies your mortar schedule and helps you hit level checks faster. Dry-stack veneer panels are the third category: thin-section stone bonded to a structural block core, useful when your retaining load is carried by concrete and you’re adding the stone purely for finish.
- Fieldstone and rubble: compressive strength varies widely — verify minimum 8,000 PSI before specifying for walls over 24 inches
- Ashlar-cut: uniform 2–4 inch bed depths simplify base course planning and allow predictable coursing arithmetic
- Dry-stack veneer: not a structural option — the block behind it carries the load, not the stone face
- Dimensional wall block: quarried and cut to consistent heights, best for projects where tight tolerances matter
According to the Masonry Society natural stone wall construction standards, properly constructed dry-laid stone walls distribute lateral earth pressure through mass and friction rather than tensile bond — which is why batter angle and stone weight per unit are more important than any adhesive when you’re building for the long term.
Base Preparation: The Work Beneath the Work
Your base is where walls succeed or fail, and it’s almost always underdone. For a freestanding garden wall under 36 inches, you’re looking at a minimum 6-inch compacted aggregate base — 3/4-inch clean crushed stone, not bank-run gravel. For a retaining wall carrying any meaningful surcharge load, that base depth should be 12 inches minimum, with the first course buried at least one-third of its height below finish grade. That buried base course is your anchor against forward rotation, which is the most common failure mode in dry-laid landscaping wall stone installations.
- Compact aggregate in two lifts — never try to compact 12 inches in a single pass
- Check level across the base before setting any stone — a 1/4-inch variance at the base translates to 2+ inches of error by course 8
- For clay-heavy subgrades, add a geotextile separation layer between native soil and aggregate to prevent migration
- Drainage aggregate directly behind the wall face is non-negotiable for retaining applications — no drainage equals hydrostatic buildup equals wall movement
The IBC Chapter 21 natural stone masonry and veneer building code requirements outline minimum embedment and base dimensions for structural masonry applications — worth reviewing if your wall exceeds 4 feet in height, since that threshold triggers engineering requirements in most jurisdictions regardless of material type.
Laying Technique, Batter, and the Mechanics of a Stable Wall
Batter — the slight backward lean you build into a retaining wall — is your single most effective structural tool. For a dry-laid landscaping wall stone retaining wall, target a batter of 1 inch per vertical foot of height. A 36-inch wall should lean back 3 inches from face-bottom to face-top. Sounds like a small number; it makes an enormous difference to how the wall handles lateral soil pressure over a freeze-thaw cycle or a heavy rain event. You can verify your batter with a simple batter board setup, which is faster and more accurate than trying to eyeball it course by course.
Running bond — offsetting vertical joints by at least one-third of the unit length — is the other non-negotiable. Stacked joints (continuous vertical lines through multiple courses) create planes of weakness that allow differential movement to split the wall. Every professional who has pulled apart a failed garden wall can show you exactly where the stacked joints were. Don’t let time pressure convince you to sacrifice bond pattern for speed.
- Set your largest, flattest stones in the base course — irregular faces belong higher up where they read as character, not at grade where they create instability
- Capstones should be your longest available units, bedded in a full mortar setting bed even on an otherwise dry-laid wall — the cap takes the most abuse from foot traffic and weather
- Tie-back stones (stones that run perpendicular into the wall body) every 4–6 horizontal feet and every other vertical course hold the wall face to its core
Stone Selection for Garden and Retaining Applications
Choosing the right landscaping wall stone for a garden setting balances three factors simultaneously: visual character, compressive strength, and freeze-thaw durability. Limestone is the most commonly specified option for freestanding garden walls — its natural stratification means it splits to relatively flat beds, which makes coursing easier and gives you more usable yield per ton. Granite brings higher compressive strength (typically 19,000–25,000 PSI versus limestone’s 8,000–12,000 PSI range) and exceptional frost resistance, making it the preferred choice in regions with severe winter cycling.
For front yard white stone landscaping ideas that move beyond the ordinary, consider blending stone types: granite base courses for structural integrity and a lighter limestone upper section for visual contrast. The two materials course well together when you’ve standardized your bed depths. Natural Stone Institute guidance on landscape stone variety selection confirms that mixed-material walls perform reliably when the structural courses follow the higher-specification material’s requirements throughout. Browse our garden retaining stone to see the range of dimensional options available for exactly these kinds of mixed-material specifications.
- Limestone: best for decorative and low-retaining applications, naturally flat bed faces, easier to work in the field
- Granite: superior for high-load retaining walls, excellent abrasion resistance for caps that take foot traffic
- Fieldstone: highest visual character, most variable performance — always verify individual unit strength before specifying structural courses
- Sandstone: attractive for garden walls but avoid in high-moisture or freeze-thaw environments — its layered structure absorbs water and delaminates under repeated cycling
Mortar vs. Dry-Stack: Making the Right Call for Your Project
The mortar-versus-dry-stack decision gets oversimplified constantly. Here’s the real calculus: dry-laid landscaping wall stone handles drainage naturally — water moves through the wall body rather than building pressure against it, which is a structural advantage. Mortar creates a stiffer, higher-strength assembly, but it also creates a barrier that forces water to find other paths, often through the base. For retaining walls, dry-stack with proper drainage aggregate behind the wall face outperforms mortared walls in most residential applications specifically because of that drainage flexibility.
The calculus shifts when your wall needs to carry point loads — a gate post, a light fixture, a built-in planter — or when you’re building in a high-traffic area where stone displacement is a safety concern. In those cases, a full mortar bed with Type S mortar (minimum 1,800 PSI) is the right call. You can also hybrid the approach: mortar the base two courses and cap, dry-stack the middle. That gives you the structural anchor and the drainage benefit in the same wall.
Cost Factors, Sourcing, and What Actually Drives Your Project Budget
Your stone budget on paper rarely matches your stone budget at completion, and the gap is almost always freight. Landscape supplies stone that weighs 2–4 tons per pallet — and that’s before you account for the handling equipment, delivery access constraints, and the fact that your delivery vehicle might not be able to back all the way to the work site. Freight distance from the quarry or distribution point to your project location can shift material cost by 15–30% in either direction. If you’re sourcing from a supplier with regional warehouse inventory rather than shipping direct from the quarry, lead times compress from 6–8 weeks to 1–2 weeks, and freight costs are typically lower because you’re drawing from existing warehouse stock rather than a dedicated shipment.
Labor-to-material cost ratios for natural stone walling typically run 60–65% labor, 35–40% material in most markets — which means a 10% reduction in material cost only moves your total project cost by 3–4%. A better value-engineering target is labor efficiency: tighter coursing tolerances, consistent bed depths, and pre-sorted stone delivered to the site reduce the time your mason spends selecting and fitting units, which is where the real savings are. At Citadel Stone, we pre-sort wall stone by approximate bed depth before it leaves the warehouse, which consistently reduces field sorting time and keeps installations on schedule.
- Request delivered pricing, not per-ton pricing — freight adds a variable that matters more than the base material rate for heavy stone
- Factor 10–15% waste into your quantity estimate for irregular fieldstone; 5–8% for dimensional ashlar
- Ask your supplier about warehouse stock levels before confirming a project start date — back-ordered stone on a landscape project creates expensive crew downtime
- Stone garden landscaping projects with phased scopes should confirm consistent lot availability upfront — color and texture variation between lots from different quarry pulls is real and visible
Drainage and Waterproofing: What Goes Behind the Wall Matters as Much as the Face
The most common cause of premature landscaping wall stone failure isn’t the stone — it’s the drainage assembly behind it. Your wall is holding back soil and, more critically, the water that saturates that soil after rain. Without adequate drainage aggregate and a collection path for that water, hydrostatic pressure builds until it finds the path of least resistance, which is usually through or under your wall. The standard specification is a 12-inch-wide column of clean 3/4-inch crushed stone directly behind the wall face for its full height, with perforated pipe at the base discharging to daylight at both ends of the wall run.
Filter fabric wrapped around the drainage aggregate prevents fine soil particles from migrating into the aggregate over time — a detail that’s often skipped on residential projects and almost always regretted. According to the Natural Stone Institute stone veneer installation and wall stone guidance, proper drainage management behind natural stone retaining assemblies is the primary factor in long-term wall stability, outweighing material selection in most residential failure analyses. Plan your drainage before you pour your base, not as an afterthought when the wall is half-built.
- Perforated pipe should be 4 inches minimum diameter, sloped at 1% minimum toward outlet
- Drain outlets need to discharge to a location that doesn’t undermine your wall’s base — route them away from the wall footprint
- In clay-heavy soils, increase drainage aggregate width to 18 inches — clay soil transmits water slowly, so pressure builds faster than in sandy conditions
- Annual inspection of drain outlets is a maintenance task worth building into your client’s care schedule — debris blockages are the most common reason drainage systems fail after installation
Finishing Touches and Long-Term Maintenance for Stone Garden Walls
Your cap detail is the final technical decision and the one most visible to the client, so it deserves more thought than it usually gets. Caps should overhang the wall face by 1–1.5 inches to create a drip edge — without it, water runs down the face of the wall and deposits mineral staining over time. For mortared caps, a slight forward pitch (1/4 inch per foot) drains water away from the wall body. Dry-set caps need to be heavy enough that they won’t shift under foot traffic — minimum 3 inches thick for any cap that might see regular use as a seat wall.
Sealing is optional for dry-laid landscaping wall stone in most applications, but penetrating sealers applied every 5–7 years on limestone walls in high-moisture environments reduce efflorescence and slow biological growth significantly. Don’t use topical film-forming sealers on wall stone — they trap moisture behind the face and accelerate spalling in freeze-thaw conditions. For ongoing maintenance, repoint any mortar joints that show cracking or recessing every 10–15 years, and check your drainage outlet annually to confirm it’s clear. A well-built wall with consistent maintenance is realistically a 40–50 year installation with no structural intervention required. Stone garden landscaping that incorporates front yard white stone landscaping ideas — including seat walls, tiered borders, and entry features — benefits from the same cap and drainage principles that apply to retaining applications. If you’re planning complementary stone features around your landscaping project, stone steps built for the long term covers how Citadel Stone materials perform in step and tread applications that often tie directly into wall features on sloped sites.
Getting Your Landscaping Wall Stone Specification Right
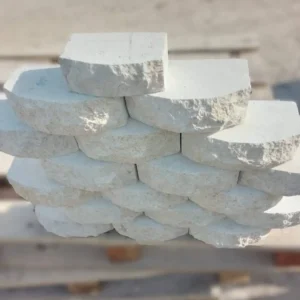
Getting a landscaping wall stone feature right comes down to decisions made before the first stone is placed: the right material for the structural role, a base that accounts for drainage and load, a coursing plan that eliminates stacked joints, and a drainage assembly that handles water before it becomes pressure. The finishing details — cap overhangs, batter consistency, tie-back frequency — are what separate installations that look good at the ribbon cutting from ones that still look good in year twenty. Your material budget is real, but your labor efficiency and your drainage specification will define the outcome more than your stone cost per ton. Wall stone from Citadel Stone holds low retaining courses firmly, letting you terrace sloped beds without mortar.
Related reading: hardscape vs softscape landscaping · small rocks vs fake rocks · low maintenance front yard rock landscaping.