

Substrate deflection is the variable that ends more large format tile for shower projects than any material defect ever will. Most specifiers focus on tile size and finish, but the real performance threshold sits underneath — in how much flex the floor system allows before the tile bond fails. Understanding this upfront changes every decision that follows, from which tile dimensions you spec to how you configure the drain.
What Large Format Actually Means in a Shower Context
The tile industry defines large format as any tile with at least one edge exceeding 15 inches. In shower applications, you’ll commonly encounter formats from 24×24 up to 48×24 or larger slab-style panels. Each jump in size introduces a different set of installation demands, and the relationship between format and subfloor stiffness is not linear — it’s exponential. A 24×24 tile is far more forgiving than a 48×24 on the same substrate.
Your format selection directly affects how many grout joints appear on the finished surface. This is one of the strongest practical arguments for going large: fewer joints mean fewer channels where moisture can work its way into the setting bed over time. In a steam shower or a walk-in enclosure that sees daily use, that reduction in joint line footage is a measurable performance benefit, not just an aesthetic one. Large format tile for shower enclosures also simplifies surface cleaning compared to smaller mosaic formats with high grout-to-tile ratios.
Substrate Requirements for Large Shower Tiles
The Tile Council of North America sets deflection limits for tile substrates at L/360 of the span — meaning a 10-foot joist span can flex no more than one-third of an inch under load. For large format tile in a shower, treat that as a minimum threshold, not a target. According to TCNA installation standards, thicker and heavier tiles amplify the consequences of borderline deflection, and large bathroom tiles for shower walls face unique risks that floor tiles don’t because the bond mechanism works against gravity rather than with it.
Concrete backer board at minimum ½-inch thickness is the industry baseline for shower wall substrates. For floors, the best outcome comes from a mud bed — either a traditional mortar float or a pre-sloped foam system — because both give you a rigid, dimensionally stable base that doesn’t move with humidity cycles the way plywood does. Uncoupling membrane systems have earned their place in large format shower installations because they allow minor independent movement between the structural floor and the tile layer, which matters when you’re tiling across framing bays.
- Deflection limit: L/360 minimum, target L/480 for tiles over 24 inches
- Substrate bonding surface must be flat within 1/8 inch over 10 feet — and within 1/16 inch over 24 inches for rectified tiles
- Moisture barriers must be continuous and lapped correctly at all horizontal-to-vertical transitions
- Floor slope must achieve 1/4 inch per foot minimum toward the drain — more with larger tile formats
Mortar and Setting Bed Selection for Heavy Formats
Large format tile for shower installations demands full mortar coverage — 95% minimum on the tile back, not the 80% that standard residential specs permit for smaller tiles. This isn’t a preference; it’s a structural necessity. Any unsupported void behind a large tile in a wet environment becomes a water pocket over time, and water pockets behind natural stone or large-format porcelain tiles eventually cause hollow spots and debonding.
Medium-bed mortars are formulated specifically for this application. Standard thin-set has insufficient body to level out minor substrate irregularities under large tiles, and the excess shrinkage during cure creates differential stress across the tile back. Medium-bed products allow 3/8 to 3/4 inch coverage depth while maintaining bond integrity. Mortar selection should also account for whether the tile is highly absorbent natural stone or low-absorption porcelain — the open time and polymer content requirements differ significantly between the two.
- Minimum 95% mortar coverage behind any large format tile in a wet area
- Back-butter the tile in addition to combing the substrate — use a flat trowel to eliminate ridges on the tile back before placing
- Large-format natural stone requires non-sag medium-bed mortar on walls — standard thin-set will slump before it sets
- Epoxy mortars offer superior bond strength in steam showers or high-temperature applications but require faster working pace
Large Bathroom Tiles for Shower Floors: The Slope Challenge
Here’s what most tile contractors underestimate: achieving code-compliant slope to a center drain with large bathroom tiles for shower floors is geometrically harder as tile size increases. A 24×24 tile laid to a center drain on a flat substrate will rock across the drain — because the drain plane intersects the tile at different heights across the tile’s surface. This is not a setting error; it’s a geometry problem that needs a designed solution before installation begins.
Pre-sloped foam shower systems solve this elegantly. They’re manufactured with the slope already built in, and the tile sits on a consistently angled surface rather than a hand-floated attempt at achieving uniform pitch. For linear drains, the geometry simplifies significantly — you’re sloping in one direction only, which allows larger tile formats without the rocking problem. Many specifiers now choose linear drain configurations specifically because they unlock larger floor tile options without compromising drainage geometry.
- Linear drains allow single-direction slope — ideal for large format shower floor tiles
- Center drains with large tiles require a four-way sloped mud bed, which is harder to achieve with precision
- Pre-sloped systems must match your tile format to keep cuts at walls manageable
- Minimum 3/4-inch drain lip height should be confirmed before selecting your shower floor tile thickness
Natural Stone Versus Porcelain in Large Format Shower Applications
The material decision for large format tile in a shower involves more variables than most buyers initially consider. Porcelain in large-format panels offers extremely low water absorption — typically below 0.5% — which reduces the sealing maintenance cycle compared to natural stone. Natural stone, particularly marble, travertine, and limestone, brings a visual warmth and material authenticity that porcelain reproductions have not yet replicated convincingly in highly polished or honed finishes. The Natural Stone Institute ASTM tile specifications cover absorption, modulus of rupture, and breaking strength thresholds that help you evaluate whether a given stone slab is appropriate for shower wall versus floor use.
Natural stone in large shower formats requires sealing on installation and periodic resealing — annually in heavy-use showers, every two to three years in secondary bathrooms. Marble and limestone are reactive to acidic cleaners, so the maintenance protocol matters as much as the setting materials. For clients who want the look of marble in a high-use master shower, honed finishes in a slightly larger surface texture tend to perform better over time than mirror-polished finishes, which show etching and water marks more readily.
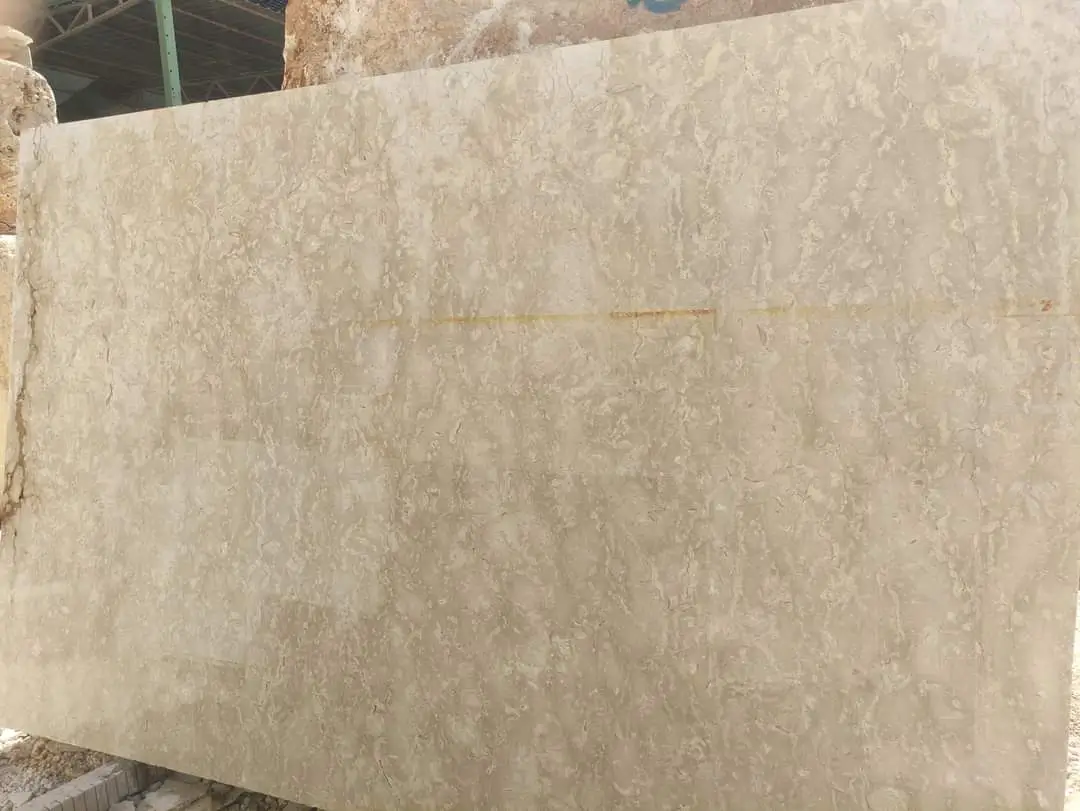
When evaluating travertine for a large-format shower wall, the filled-and-honed version is the appropriate specification — unfilled travertine has open voids that become grout traps and moisture pathways in wet enclosures. You can explore options for wall-scale natural stone panels, including Large Travertine Tile, to understand what format sizes and finishes are available before committing to a final specification.
Marble Mosaic Tile Shower Floor as a Complement to Large Wall Formats
One of the most effective design strategies for large format tile shower enclosures is pairing large-scale wall tiles with a marble mosaic tile shower floor. The mosaic format — typically 1×1 or 2×2 on mesh backing — handles the slope geometry of a center drain without the rocking problem that plagues large floor tiles. The smaller individual tile units conform naturally to the sloped surface, and the additional grout lines actually assist drainage by directing water flow.
Visually, the contrast between expansive wall panels and a detailed mosaic floor creates a spatial hierarchy that reads as intentional rather than compromised. Choosing a marble mosaic tile shower floor that references the veining color in the wall stone ties the enclosure together without exact matching — exact matches in natural stone are rarely achievable and often look forced when attempted. This approach has strong resonance with contemporary interior styles that favor textural contrast: the large, quiet wall plane against the fine-grained mosaic floor reads cleanly in both minimalist and transitional design vocabularies.
- Marble mosaics on mesh backing conform to sloped surfaces that large tiles cannot
- Select mosaic grout color to either blend with the tile tone or contrast intentionally — avoid muddy mid-tones that read as faded over time
- Specify unsanded grout for mosaic joints under 1/8 inch — sanded grout scratches polished marble surfaces during installation
- Seal mosaic floors after grouting and before occupancy — the higher ratio of grout surface to tile surface makes sealing especially important
Grout Joint Sizing for Large Format Shower Tile
Rectified tiles — those ground to a precise edge dimension — allow joints as tight as 1/16 inch. Non-rectified tiles, where slight size variation occurs naturally during the firing or cutting process, typically need 3/16 to 1/4 inch joints to accommodate those variations and keep grout lines visually consistent. Natural stone tiles are almost always rectified when supplied in large formats, but verify this before specifying joint width.
The choice of epoxy versus cement-based grout in shower applications carries real performance implications. Epoxy grouts are highly resistant to staining and moisture penetration and don’t require sealing — but they’re unforgiving during installation because they set quickly and bond aggressively to stone surfaces if not cleaned promptly. Cement-based grout with polymer additives is the more common choice in residential shower work and performs well when sealed correctly. For large bathroom tiles for shower floors and walls with minimal joint widths, epoxy grout’s stain resistance often justifies the additional installation discipline it demands.
Design Integration and Aesthetic Considerations
The scale of the enclosure and the broader design language of the bathroom should guide tile format selection as much as technical requirements do. In rooms with high ceilings and generous footprints, 48×24 panels create a seamless, gallery-like enclosure that feels proportional. In standard 8-foot ceiling bathrooms, 24×24 or 24×48 (vertical orientation) achieves a similar sense of height and openness without the tile format overwhelming the space.
Color palette and material character connect the shower enclosure to the broader interior and, in open-plan bathrooms, to the surrounding landscape view. Warm-toned limestone and travertine read well against natural wood elements and earth-toned palettes — a material combination that suits desert-modern interiors and warm-climate homes where indoor-outdoor continuity is a design priority. Cooler-toned stones — white marble, grey basalt, blue-veined calcatta — integrate naturally with modern minimalist spaces where the material’s precise geometry and restrained palette carry the aesthetic. The ASTM natural stone tile testing standards provide a useful framework for evaluating absorption and modulus of rupture across different stone types, helping you narrow material options to those appropriate for your enclosure’s moisture exposure level.
- Vertical tile orientation elongates the visual height of shower walls — especially effective with 24×48 tiles in standard-height rooms
- Continuous floor-to-ceiling tile in one format reads as architectural rather than decorative
- Book-matched stone panels — where adjacent tiles mirror the same slab face — require sourcing matched pairs and adds cost but produces a dramatic result
- Niche recesses in the shower wall should be tiled before the surrounding field to allow proper waterproofing integration at all transitions
Waterproofing Systems and Movement Joint Placement
A large format tile for shower installation is only as good as the waterproofing layer behind it. Liquid-applied membranes — roll-on or brush-applied products that cure to a continuous elastomeric layer — have largely displaced sheet membrane systems in residential shower work because they conform to corners, curbs, and penetrations without folding or bridging. Sheet membranes remain appropriate for high-traffic commercial applications or large custom shower builds where additional redundancy is justified.
Movement joints are non-negotiable in large format shower installations. Tile and substrate expand and contract at different rates with temperature and humidity changes, and without a soft joint to absorb that differential movement, the tile assembly will crack — not immediately, but within three to five years in most cases. Place movement joints at all changes of plane: every wall-to-floor transition, every interior corner, and every point where tile meets a fixed element like a curb or bench. Mid-field movement joints are required in large enclosures — place them every 8 to 12 linear feet in each direction, filled with a flexible sealant that matches the grout color as closely as possible.
- Liquid-applied membranes must extend a minimum of 6 inches up the wall at floor transitions — higher in steam showers
- All corners must be reinforced with fabric membrane tape embedded in the liquid waterproofing layer before tile installation
- Movement joint sealant must be a polymer-modified caulk — never grout — to maintain flexibility through thermal cycling
- Steam showers require a fully enclosed waterproofing system on all six surfaces, including the ceiling
Logistics and Planning Your Large Format Order
Large format natural stone tiles are heavier and more fragile in transit than smaller formats. Delivery planning should account for truck access at the jobsite — a flat-bed delivery truck carrying 48×24 stone slabs needs adequate turning radius and a hard, level surface for unloading. Most residential sites can accommodate a standard truck, but narrow driveways, steep grades, or restricted alley access can complicate delivery enough to require staging at a nearby location and hand-carrying panels.
Citadel Stone maintains warehouse stock across standard large formats, which typically compresses lead times significantly compared to custom-ordered stone arriving by container. Verify current warehouse availability before finalizing your project schedule — large format natural stone panels in specific materials can deplete quickly during peak construction seasons, and back-orders in this product category routinely run six to eight weeks. Order 10–15% overage to account for cuts, breakage, and future repairs. Natural stone tiles from the same batch will never match perfectly if you reorder months later.
- Confirm truck access at the delivery address before placing your order — note any weight limits on shared driveways or access roads
- Store large format stone panels upright on edge with proper support — flat stacking leads to stress fractures in large-format natural stone
- Acclimate stone tiles in the installation environment for 24 hours before setting, especially in temperature-controlled spaces
- Check each panel for lippage variation before installation — even rectified stone tiles have minor thickness variations that require mortar bed adjustment
Decision Points for Large Format Tile Shower Specifications
Your specification for large format tile in a shower resolves into a sequence of decisions, each of which constrains the next. The substrate comes first — if your floor system doesn’t meet deflection requirements, no tile selection resolves that gap. Once the substrate is confirmed, your drain configuration determines which floor tile formats are geometrically viable. From there, material choice, finish, and joint specification follow naturally from the enclosure’s use intensity and the design intent.
At Citadel Stone, we recommend confirming material availability and warehouse stock levels before finalizing your design drawings — format and material combinations that look straightforward on paper occasionally have lead time implications that affect project scheduling. For projects that combine shower stone with exterior hardscape, understanding how materials behave across different applications deepens your overall specification confidence. As you evaluate your broader stone program, paving stone versus cobblestone choices covers a different but related dimension of natural stone selection — the same material-performance principles that govern large format shower tile apply when choosing between surface finishes and formats for exterior applications.
Big-format panels from Citadel Stone reduce the number of grout joints in a shower enclosure, which limits moisture pathways and simplifies long-term surface cleaning.
Related reading: Large Tile vs Standard Tile: Which Floor Works Best? · Marble Look Porcelain vs Stone: Which Should You Choose?.