Sealing travertine tile correctly comes down to timing, product selection, and surface prep — get any one of those wrong and you’ll find yourself resealing in 18 months instead of five years. The porosity of travertine varies significantly depending on the quarry source and cut orientation, which means a single sealing protocol doesn’t apply across all travertine installations. Understanding how to seal travertine tile properly requires you to treat each project as its own specification exercise rather than a quick box-check at the end of installation.
Why Travertine Needs Sealing — and What Happens Without It
Travertine’s open-pore structure is what gives it that characteristic warmth and texture — but it also makes it one of the most absorbent natural stones used in residential and commercial installations. An unsealed travertine tile will absorb cooking oils, cleaning products, and moisture within minutes of contact. Over time, that absorption leads to staining that’s difficult to reverse without aggressive grinding or honing, which changes the finish entirely.
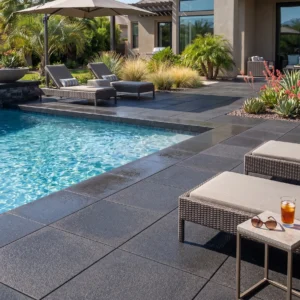
The stakes get higher outdoors. UV exposure accelerates calcium carbonate degradation on unsealed surfaces, causing a chalky surface oxidation that strips the stone’s natural color depth. You’ll see this most clearly on south-facing terraces or pool decks — the surface takes on a bleached, washed-out appearance that no amount of cleaning restores. A penetrating sealer locks the pore structure against both moisture infiltration and UV-driven surface breakdown, preserving color richness and structural integrity across seasons.
- Absorption rates on unfinished travertine typically range from 3% to 8% by weight — high enough for staining within the first 15 minutes of spill contact
- Without sealer, outdoor travertine exposed to direct sun shows measurable surface deterioration within 18 to 24 months depending on UV intensity
- Interior travertine without sealer collects grease, soap residue, and mineral deposits in the pores, making routine cleaning increasingly ineffective
- Sealed travertine tile is easier to maintain, reduces long-term refinishing costs, and preserves the stone’s investment value over decades
Choosing the Right Sealer for Travertine Tile
There are two broad categories you’ll work with: penetrating sealers (also called impregnators) and topical sealers. For most travertine installations — especially in kitchens, bathrooms, and outdoor patios — a penetrating, water-based impregnator is the professional standard. These sealers work below the surface, filling the pore network without altering the finish appearance or creating a film layer that can peel, yellow, or trap moisture beneath it.
Topical sealers have their place — primarily on high-polish commercial floors where surface protection against heavy foot traffic matters more than breathability. The downside is significant: topical coatings trap vapor below the stone, and in exterior installations exposed to freeze-thaw cycling or ground moisture, that trapped vapor can cause spalling or delamination within a few seasons. For outdoor sealing travertine tile projects, penetrating impregnators are the only defensible choice.
- Solvent-based impregnators penetrate more deeply than water-based on heavily filled or grouted travertine, making them the better choice for very dense fills
- Water-based impregnators are preferred for indoor use where VOC exposure is a concern — they perform equally well on open-vein travertine
- Color-enhancing sealers deepen the stone’s natural tones by a half to one shade — useful on tumbled or brushed travertine where you want to recover warmth lost during honing
- A travertine tile sealant with a built-in mold and mildew inhibitor adds meaningful value in wet zones like showers and pool surrounds
- Avoid one-coat “permanent” sealers marketed with 10–15 year guarantees — real-world performance on porous travertine consistently falls short of those claims
According to NSI travertine properties and paving guidance, travertine’s calcium carbonate composition and interconnected void structure make it particularly responsive to penetrating impregnators, which chemically bond within the pore matrix rather than forming a surface film. That bond is what gives properly sealed travertine its long-term stain resistance without altering the stone’s natural appearance.
Surface Preparation Before Sealing
The most common sealing failure isn’t a product failure — it’s a prep failure. Applying a sealer over a travertine surface that’s still contaminated with installation adhesive residue, grout haze, or cleaning chemicals creates a barrier between the sealer molecules and the stone’s pore walls. The sealer cures, but it doesn’t bond properly, and the protection life drops from five years to under two.
Your prep sequence should work from coarse to fine. Start with a stone-safe alkaline cleaner to strip any organic contamination — cooking oils, wax residues, or previous sealer breakdown products. Follow that with a grout haze remover if you’re working on a freshly installed floor. Then neutralize with a pH-neutral rinse and let the stone dry completely. On dense fills, surface moisture is rarely an issue after 24 hours; on open-vein travertine or large-format tiles, allow 48 to 72 hours before applying your sealer for travertine tile to make sure the pore network is fully dry and open.
- Test dryness with a simple plastic sheet test — tape a 12-inch square of plastic sheeting to the stone and check for condensation after one hour; any visible moisture means the surface isn’t ready
- Grout haze from epoxy grouts requires a specific epoxy haze remover — standard acidic cleaners won’t break it down and may etch the travertine surface
- Sand or abrasive residue in the pores from grinding or honing must be vacuumed and rinsed thoroughly before sealing — trapped grit blocks impregnator penetration
- Existing sealer coatings that have broken down require a chemical sealer stripper before reapplication — sealing over degraded product is a waste of materials
How to Seal Travertine Tile: The Step-by-Step Process
Start with a water absorption test on a clean, dry section of tile. Pour a few tablespoons of water on the surface and watch the absorption rate. If the water darkens the stone within two to three minutes, the travertine is ready to seal and will accept the impregnator well. If the water beads or sits for more than five minutes before absorbing, there’s residual contamination or an existing sealer layer still present — you need to strip back further before proceeding.
Apply your penetrating impregnator using a low-nap roller or a clean applicator pad, working in 4-by-4-foot sections. Don’t flood the surface — a thin, even coat is what you’re after. You want the sealer to be pulled into the pores by capillary action, not sitting on the surface pooling. Work it across the tile and slightly into the grout joints. Allow the sealer to penetrate for the manufacturer’s specified dwell time — typically 5 to 15 minutes depending on product viscosity and stone porosity.
- Before the sealer flashes off completely, buff the surface with a clean dry cloth to remove any excess — residual sealer on the surface will cure into a hazy film that’s difficult to remove
- On highly porous travertine, apply a second coat immediately after buffing the first — the first coat opens the pores further and the second coat builds the protection depth
- When sealing travertine tile in shower enclosures, apply three thin coats rather than two heavier ones — vertical surfaces need more passes to achieve the same pore saturation
- In low-temperature conditions below 50°F, penetrating sealers cure more slowly — allow additional dwell time and don’t open the space to foot traffic for at least 4 hours after the final coat
- Seal grout joints with a dedicated grout sealer after the stone sealer has cured — most stone impregnators don’t provide sufficient protection for cement-based grout
For larger format travertine installations, a great reference for sealing travertine tile on 12×12 Travertine Tile covers the specific application considerations for that format, including sealer volume calculations and recoat timing specific to that tile size.
Indoor vs. Outdoor Sealing: Where the Specs Diverge
Indoor travertine tile needs sealer primarily for stain resistance and easy cleaning — the environmental stressors are comparatively mild. You’re working against cooking oils, cleaning products, and foot traffic abrasion. A good penetrating impregnator applied every three to five years handles indoor installations reliably, and you won’t need to adjust your sealing schedule unless the surface sees unusually heavy use.
Outdoor installations are a different specification entirely. Sun exposure is the dominant factor most specifiers underweight. UV radiation breaks down the organic chemistry of many sealers faster than moisture or physical wear does — particularly on south or west-facing exposures that receive direct afternoon sun. For these applications, specify a UV-stable impregnator formulated with inorganic silicone or fluorocarbon chemistry rather than organic solvent-based carriers. The UV-stable formulations maintain their pore-sealing performance for significantly longer under direct sun exposure, often holding a two- to three-year service life compared to 12 to 18 months for standard penetrating sealers on exposed outdoor travertine.
- Pool deck travertine needs a travertine tile sealant that handles both UV degradation and repeated wet-dry cycling — look for formulas rated for immersion-adjacent conditions
- In freeze-thaw regions, the sealer must allow moisture vapor to escape outward from the stone — use only fully breathable penetrating impregnators, never film-forming topicals
- Outdoor sealing travertine tile on shaded patios can follow the same 3 to 5 year indoor schedule — direct sun exposure is the primary accelerator that shortens resealing intervals
- Honed outdoor travertine holds sealer longer than tumbled or brushed finishes because the tighter surface has less exposed pore area per square foot
UV Exposure, Color Fading, and Sealing Schedules
Here’s what most guides miss about travertine installed in high-sun environments: the color fading you see isn’t the stone itself bleaching — it’s the sealer degrading and exposing unprotected calcium carbonate to UV oxidation. Once that surface oxidation layer forms, it scatters light differently than fresh stone, producing the flat, chalky appearance that looks like fading but is actually a surface chemistry change.
The practical implication is that your outdoor sealing schedule should be driven by UV exposure, not calendar years. A travertine terrace in a high-UV climate may need resealing annually; the same installation under a covered pergola might hold for four years. Citadel Stone’s technical team advises clients to perform a water drop test every spring as a reliable field indicator — if water absorbs in under two minutes, the sealer has degraded and it’s time to recoat, regardless of when you last applied it. This approach prevents the oxidation cycle from establishing and keeps the stone’s color depth consistent year after year.
- Matte and honed finishes on outdoor travertine show UV-related oxidation earlier than polished finishes, which have a denser surface layer
- Color-enhancing sealers help restore depth on travertine that has already experienced mild UV surface oxidation — they won’t reverse deep oxidation but slow further progression
- In hot, dry climates with intense UV exposure, a summer mid-season inspection is worthwhile on high-traffic outdoor installations
- Sealer breakdown on outdoor travertine typically shows first at grout joint edges and on raised surface texture points — check these areas specifically during your spring test
The ASTM C1527 travertine dimension stone standard includes absorption and durability criteria that inform how travertine behaves over time in outdoor conditions, reinforcing why sealer maintenance intervals can’t be treated as one-size-fits-all across climate exposures.
Common Sealing Mistakes That Shorten Protection Life
Over-application is the most consistent field error. Applying too much sealer in a single coat leaves excess product curing on the surface rather than in the pores — the result is a streaky, hazy residue that dulls the finish and requires buffing or light abrasion to remove. The stone absorbs only what it can take in during the dwell window; anything beyond that is waste at best and an aesthetic problem at worst.
Sealing too soon after grouting is the second most common mistake. Standard cement grout needs a minimum 72 hours of cure time before sealing — some installers push this to 24 hours to meet schedule pressure, and the result is sealer interfering with grout hydration chemistry, which weakens the grout joint and causes premature cracking. Check your grout manufacturer’s guidance and hold to it, even on fast-track projects.
- Applying sealer in direct sunlight on hot surfaces causes the carrier solvent to flash off before penetration occurs — always seal in shade or during cooler morning hours for outdoor work
- Using an acidic stone cleaner immediately before sealing etches the travertine surface and leaves a reactive chemistry that interferes with impregnator bonding — always follow with a pH-neutral rinse and full dry time
- Sealing over unfilled voids in open-vein travertine creates sealed pockets that trap water — fill all voids with matching travertine filler or grout before applying any sealer for travertine tile
- Skipping the test patch on an inconspicuous area is a risk not worth taking — color-enhancing sealers in particular can shift tone more than expected on some travertine colors
According to TCNA natural stone tile installation standards, surface preparation quality is one of the leading determinants of long-term sealer performance on porous natural stone — a point that holds true across tile formats and installation environments.
Maintaining Sealed Travertine Tile Over the Long Term
Proper sealing is the beginning of a maintenance relationship, not a finish line. Your daily cleaning routine affects how long the sealer performs — aggressive cleaners that are too alkaline or acidic break down the impregnator chemistry progressively, shortening resealing intervals without any obvious sign of damage until the stone starts staining. Use a pH-neutral, stone-safe cleaner formulated for sealed natural stone, and avoid vinegar, bleach, or citrus-based products on travertine surfaces entirely.
At Citadel Stone, we recommend clients keep a small quantity of their specified sealer on hand for spot maintenance between full resealing cycles. High-traffic areas — thresholds, kitchen work zones, shower floors — experience faster sealer depletion than surrounding surfaces. Spot-sealing those zones annually extends the protection life of the full installation without requiring a complete resealing project every year. Warehouse stock of most penetrating sealers carries a shelf life of three to five years when stored correctly, so holding reserve product is a practical option.
- Annual water drop testing across multiple zones of the installation gives you a realistic picture of where sealer is depleting fastest
- Felt pads under furniture legs prevent point-load abrasion that accelerates sealer wear on polished travertine floors
- Outdoor travertine tile benefits from a rinse-down after extended dry periods to remove airborne particulate that can act as an abrasive during foot traffic
- Sealing travertine tile in high-moisture interior zones like bathrooms requires checking the grout joints separately — cement grout typically needs resealing more frequently than the tile surface
Sealer Selection, Ordering, and Project Timeline Planning
Calculate your sealer volume before ordering — most penetrating impregnators cover 150 to 250 square feet per litre depending on travertine porosity. Highly porous open-vein travertine consumes sealer faster than filled and honed versions, so always test coverage on a sample section if you’re working with an unfamiliar stone. Order 15 to 20 percent more than your calculation suggests to account for the higher absorption on cut edges and grout joint margins.
Citadel Stone maintains warehouse inventory of travertine tile across multiple formats and finishes, which means project scheduling isn’t complicated by long lead times. Your installer can typically sequence surface prep, grout cure, and sealing within the same project week rather than waiting weeks for material. Truck delivery logistics are worth confirming early — large-format tile pallets require level ground access and a forklift-capable truck in some configurations. Aligning your delivery schedule with your installer’s prep window prevents the common scenario where stone sits on-site too long and accumulates construction dust in the pores before sealing begins.
- Plan your sealing work for a low-humidity window — relative humidity above 75% slows impregnator cure and can cause hazing on the surface
- For commercial projects, confirm your sealer’s VOC rating against local building code requirements before ordering — some interior applications have restrictions on solvent-based product use
- Budget sealer quantities separately for initial application and the first maintenance resealing — having product on hand ensures you match the original specification exactly
Getting Your Travertine Tile Sealing Specification Right
The decisions that determine long-term performance of sealed travertine tile come down to three variables: sealer chemistry matched to the installation environment, surface prep that leaves the pore network fully clean and dry, and a maintenance schedule calibrated to actual UV exposure and traffic rather than a generic calendar. For outdoor installations in high-sun environments, that means UV-stable impregnators and field-tested resealing intervals rather than assuming a fixed annual or biennial rhythm applies universally.
Your interior travertine floors need the same initial discipline even if the ongoing maintenance demands are less aggressive. A properly sealed interior installation with pH-neutral routine cleaning should hold its sealer integrity for three to five years before a full recoat is warranted. Whether you’re working on a kitchen floor, a bathroom surround, or a sun-exposed terrace, the spec logic is the same: match the product to the porosity, prep to a clean dry surface, and apply in thin penetrating coats rather than heavy flooding passes. For related decisions around material selection — particularly if you’re comparing natural travertine against engineered options — how real travertine compares to porcelain alternatives covers the specification trade-offs worth understanding before committing to a material. Porous travertine supplied by Citadel Stone generally benefits from a second sealer coat applied within 30 minutes of the first on newly installed floors.