

Threshold dimensions are where most honed basalt installations quietly fail — not at the stone itself, but at the joint between subfloor heights that nobody measured carefully before the slab was cut. A honed basalt threshold works as a precision component, and that means your reveal calculations, your substrate tolerance checks, and your adhesive bed depth all need to be confirmed before you place the order. Getting the sizing sequence right at the specification stage is the difference between a threshold that sits flush and one that rocks, chips at the edge, or telegraphs every subfloor irregularity underfoot.
What Makes Basalt Work as a Threshold
Basalt is a fine-grained volcanic stone with a consistently dense mineral structure — a characteristic that shows up clearly when you compare it to softer sedimentary options like limestone or concrete-cast thresholds. That density means the stone machines cleanly to tight tolerances at the quarry, so cut edges stay crisp and a honed face holds its matte surface without developing the micro-scratching pattern you sometimes see in softer stones after a season of foot traffic. For a threshold specifically, this matters because the piece sits at a transition point where shoes, furniture legs, and door sweeps all make contact at the same narrow zone.
The honed finish itself — produced by stopping the grinding sequence before the polishing stage — leaves a smooth but non-reflective face. That texture works well at thresholds because it reads as intentional and refined without drawing attention to itself, which is exactly what a transition piece should do. According to USGS data on basalt volcanic rock properties, basalt’s tight crystalline composition contributes to its low absorption characteristics, which is a practical advantage in a threshold location where wet shoes, mopping water, and cleaning agents cross regularly.
Your finish choice at a threshold also carries functional implications. A honed finish is appropriate here for interior dry-to-dry transitions and interior wet-to-dry transitions where the threshold itself stays dry. For thresholds at exterior door openings where rain drives in, consider a brushed finish — Brushed 36 Grit or Brushed 80 Grit depending on the exposure level — rather than honed, since the open, matte texture of a brushed surface performs differently under intermittently wet conditions. Make no safety claims on that decision; the finish affects surface texture and that texture is one variable among many. ANSI A326.3, measured wet, is the current standard that governs slip performance evaluation; request the test report for any specific finish from your supplier.
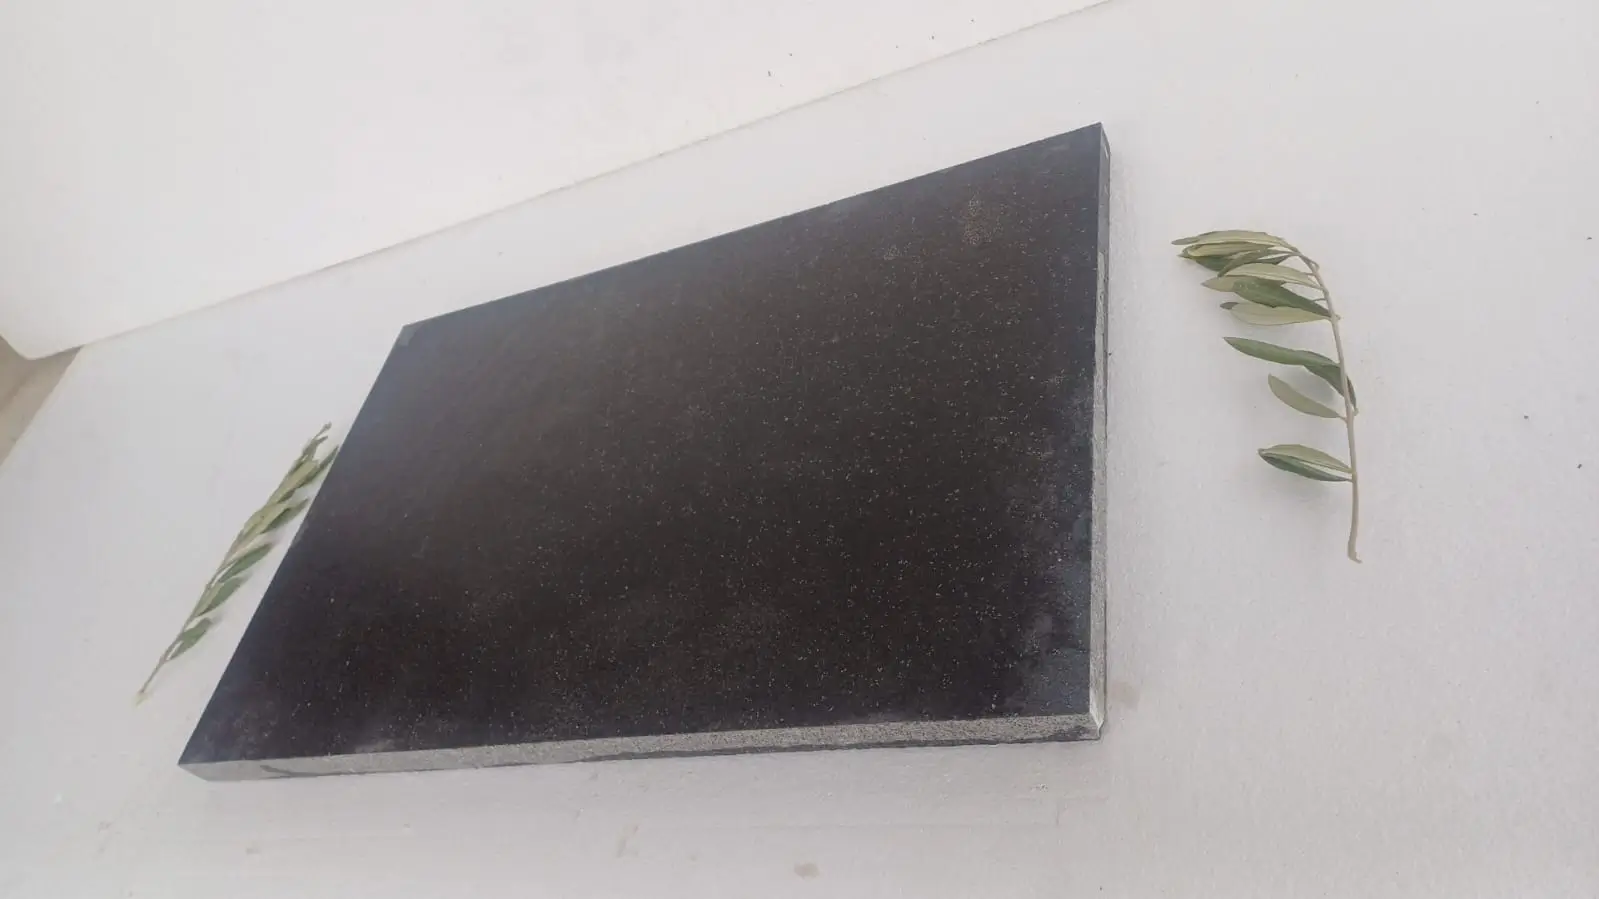
Sizing the Honed Basalt Threshold Correctly
The dimensional conversation for a honed basalt threshold starts with three measurements that most specifiers take in the wrong order: width, then length, then thickness. Field experience says you should reverse that sequence. Confirm thickness first, because it is the most constrained variable — it has to reconcile the finished floor heights on both sides of the opening, the adhesive bed depth, and any door hardware clearance simultaneously. Once thickness is locked, width and length follow from the opening geometry.
Thickness and Reveal Calculations
Threshold thickness typically ranges from ¾ inch (19 mm) at the thin end — suitable for tight-reveal situations where both adjacent floors are nearly flush — up to 1½ inches (38 mm) or more where there is a meaningful height differential to bridge. Your calculation starts at the subfloor: measure the height of each finished floor surface above its respective subfloor, subtract the adhesive bed depth you intend to use, and the resulting differential tells you the minimum threshold thickness required to sit flush or to form a controlled bevel. Note that a feathered-edge detail — where one face of the threshold tapers to a very thin reveal — is achievable in basalt but requires a minimum face width of around 2 inches to retain structural integrity at the edge. Thinner tapers on a narrow piece can fracture at the corner under point loading from a door stop or a rolling suitcase wheel.
The Natural Stone Institute publishes technical guidance on stone step and threshold specifications that is worth reviewing before you finalise the reveal detail; NSI stone specifications for design professionals covers flexural considerations that inform edge profile decisions. For basalt specifically, a test report on flexural strength (MOR) is available on request — never rely on a generalised figure, and never conflate compressive strength with flexural performance at thin cross-sections.
Width and Door Opening Geometry
Standard interior door openings in residential construction run between 28 and 36 inches clear, but the threshold width you order should be the rough opening width minus the jamb thickness on each side, then minus a small working tolerance — typically 1/8 inch per side — so the piece installs without forcing and without leaving a visible gap behind the door stop. For commercial openings, door frames often include a threshold rabbet that defines the seating dimension precisely; measure that rabbet width directly rather than the nominal door width.
Honed basalt door thresholds are commonly available in standard nominal widths, but the more reliable approach for a finished installation is to order cut-to-size pieces from the slab. A piece cut to your exact net dimension eliminates the grinding and edge-dressing work that happens on site when a standard piece is trimmed to fit, and it avoids the contamination risk that comes from cutting dense basalt with an angle grinder in a finished space.
Length and Projection
Threshold length is the dimension that runs parallel to the door face. For a standard door opening, length equals the distance between inside jamb faces. Where the threshold projects past the door stop to cover a grout joint or a substrate transition, add that projection to the ordered length — but keep in mind that an unsupported projection longer than about 1 inch beyond the last full contact point creates a cantilever condition that increases edge-chip risk under impact. If the transition geometry requires a longer projection, increase the thickness proportionally or specify a thicker adhesive bond bed across the full length.
Substrate Preparation Before You Set
Your substrate is doing more work under a threshold than under field tile, because the threshold spans a joint between two different assemblies that may have different deflection characteristics. A concrete subfloor on one side and a plywood subfloor on the other — a common condition in renovation work — will move differently under live load, and that differential movement concentrates stress at the threshold’s edges. Bridging that joint with an uncoupling membrane on both sides of the transition, extended a minimum of 6 inches each way, is the specification detail that prevents edge cracking in the first few years of service.
Flatness matters here more than in field tile because a threshold is narrow enough that any low spot in the bed shows as a visible rock when weight shifts across it. Use a straightedge across the full width of the opening before you bed the stone, and screed the adhesive to a consistent depth. For a piece this size, a full-coverage trowel application — back-buttering the stone and keying the substrate — is standard practice. Spot bonding under a threshold is the shortcut that produces hollow-sounding pieces and eventual fracture.
Basalt’s low absorption means the window for adhesive open time behaves differently than with a more porous stone. The adhesive skins faster on a non-absorbing back face, so you need to work within the adhesive manufacturer’s stated open-time window rather than extending it based on experience with limestone or concrete pavers. Check the adhesive data sheet for the specific product and ambient temperature on the day of installation.
Edge Profiles and Transition Details
The edge profile on a honed basalt threshold is a specification decision that affects both the visual read of the transition and the long-term durability of the piece. Four profiles cover the majority of threshold applications:
- Square edge — the simplest cut, appropriate where the threshold sits flush with adjacent tile and the grout joint itself handles the visual transition
- Eased edge — a small chamfer or light arrissing on the top corners, which removes the sharpest part of the corner without creating a visible bevel; this is the standard detail for interior residential thresholds
- Bevelled or ramped edge — one or both faces cut at an angle to create a gradual height transition; used where floors on each side differ in height and ADA accessibility clearances apply
- Bullnose — a rounded top edge, more common at step nosings than thresholds, but occasionally specified where the threshold is exposed on both faces as a border element
The eased edge is the default recommendation for interior honed basalt thresholds. It reads as clean and intentional without drawing attention, and it performs better at the corner than a pure square edge because it removes the micro-fracture initiation point that forms at a perfectly sharp machined corner when foot traffic applies lateral shear.
Setting Sequence Step by Step
The installation sequence for a honed basalt threshold is short but sequence-dependent — skipping a step creates problems that cannot be corrected without removing the stone.
- Dry-fit first: place the threshold without adhesive, check the reveal on both faces, check door hardware clearance, and confirm the piece is square to the opening
- Mark the threshold position on the substrate with pencil before lifting — alignment marks save time and prevent drift during the set
- Apply adhesive to the substrate and back-butter the stone; use a notched trowel sized to give full coverage after the piece is pressed down
- Press and tap the threshold into position using a rubber mallet and a beating block — never tap directly on the honed face
- Check level across the width and along the length before the adhesive begins to set; a honed basalt threshold that is even marginally out of plane will read as a defect once the door is rehung
- Allow full adhesive cure before grouting — check the adhesive manufacturer’s minimum cure time, which varies with temperature and humidity
- Grout the joints to the adjacent tile using the same grout colour and joint width as the field tile on the higher-traffic side of the opening; a contrasting grout at the threshold joint draws the eye to the transition rather than letting the stone itself carry the detail
Cost Factors and Sourcing Decisions
Budget planning for honed basalt thresholds involves more variables than the material unit price suggests. Freight distance is a significant factor for a dense stone sourced from Middle East quarries — basalt is heavy per linear foot of threshold, and the freight cost as a proportion of total material cost is higher than for lighter stone types. For projects where you’re ordering a small number of thresholds alongside a larger tile order, consolidating the threshold cut into the same shipment as your field tile is the most cost-effective approach. A standalone threshold order carries freight cost that can equal or exceed the material value for small quantities.
Labor market conditions affect the total cost calculation as well. In markets where skilled stone installers command higher hourly rates, the precision work of setting a threshold — the dry-fit, the reveal calculation, the full-coverage adhesive bed — represents a meaningful share of the installed cost. In those markets, specifying cut-to-size pieces that arrive at net dimension is genuinely value-engineering: you reduce the on-site labor time for fitting and edge-dressing, and you reduce the risk of a costly replacement if a site-cut goes wrong. The material-to-labor ratio for threshold work runs higher than for field tile installation, which makes the upfront investment in a precisely cut piece defensible on a cost basis.
For design professionals and contractors ordering across multiple projects, Citadel Stone honed basalt is cut to order at our selected quarries, which means the threshold dimensions you specify on the order are the dimensions that arrive on the pallet. Lead times are quoted with the order and confirmed before the cut begins, so your delivery scheduling can align with the installation sequence rather than working around it.
Sealing and Ongoing Maintenance
Basalt’s low absorption rate relative to limestone or sandstone does not eliminate the need to seal a threshold — it changes the sealer selection and the application frequency. A penetrating impregnator formulated for dense, low-porosity stone is the correct product type; film-forming sealers on a honed basalt face can alter the surface appearance and may peel at the edges where foot traffic creates abrasion. Test the sealer on a spare offcut before applying to the installed piece.
According to the Natural Stone Institute’s stone care guidance, application frequency for penetrating sealers on dense igneous stone depends on traffic intensity and cleaning chemical exposure rather than a fixed calendar interval. A threshold in a high-traffic hallway with frequent wet mopping will need resealing more often than one at a bedroom door. The practical test: pour a small amount of water on the surface — if it beads and sits on the face, the sealer is still performing; if it absorbs within a few minutes, it’s time to reseal. Follow the sealer manufacturer’s stated interval as the minimum, and adjust based on this field test.
Cleaning a honed basalt threshold daily is straightforward: a damp cloth or a neutral pH stone cleaner is sufficient. Avoid acidic cleaners, vinegar-based products, or any cleaner formulated for grout that contains bleach or acid — these attack the mineral surface and dull the honed finish over time. The honed face shows cleaning product residue less than a polished surface would, but it still benefits from a rinse after cleaning to remove any surfactant film.
Common Specification Mistakes to Avoid
Field experience with stone threshold installations surfaces the same set of errors repeatedly. Knowing them in advance keeps your project off that list.
- Ordering to nominal door width rather than measured net opening — the resulting gap behind the door stop or the forced fit against the jamb are both avoidable with a single careful measurement
- Specifying thickness based on the adjacent tile thickness rather than the actual subfloor height differential — these two figures are often different, especially in renovation work over existing layers
- Using the same adhesive open time for basalt as for a porous tile — basalt’s low absorption means you work faster, not slower, to the adhesive manufacturer’s stated window
- Grouting the threshold joint immediately after setting rather than waiting for full adhesive cure — movement in the adhesive during cure phase can crack fresh grout at the joint
- Applying a film-forming sealer on a honed basalt face without testing on an offcut — the appearance change can be significant and is not always reversible
- Skipping the dry-fit step to save time — the five minutes invested in a dry-fit prevents the thirty minutes of corrective work that follows a misaligned set piece
The specification mistakes that show up most often in remediation work trace back to assumptions rather than measurements. A honed basalt threshold tolerates almost no imprecision in the sizing and setting sequence — the stone itself is dimensionally stable, so any visible defect in the finished installation is a substrate or installation error, not a material failure. Identifying those variables before the stone arrives is the work that actually determines the outcome. The Britannica overview of basalt volcanic rock formation provides useful context on the material’s crystalline structure that informs why cut tolerances behave differently in basalt compared to sedimentary stone.
Getting Your Honed Basalt Threshold Specification Right
A well-specified honed basalt threshold is one of the more satisfying details in a stone installation — it reads as precise and deliberate, it ages well with minimal intervention, and it handles the transition between spaces without announcing itself. The sizing sequence, the substrate preparation, the edge profile, and the sealing program each contribute to an outcome that holds up over decades of service. None of those elements is complicated in isolation; what makes threshold installations succeed or fail is the discipline to work through them in order rather than making assumptions on site.
Delivery scheduling is worth confirming early, particularly if the threshold order is shipping alongside a larger stone consignment — offloading arrangements and pallet staging at the opening affect whether the stone arrives ready to install or requires additional handling. For entryway applications where basalt transitions from a foyer into an adjacent space, the same specification principles apply across the full floor assembly. Explore basalt tile for entryway floors for additional guidance on how the material performs across a complete entry specification. A honed basalt threshold from Citadel Stone gives a clean, matte transition between rooms, cut from our selected Middle East quarries.
Related reading: honed granite vs basalt · honed basalt vs polished concrete · flamed basalt tile finish.