

Getting a basalt cobble drainage channel to perform over the long haul comes down to how precisely you manage the geometry between the channel bed, the surrounding substrate, and the cobble face heights. Most site drainage failures aren’t material failures — they’re geometry failures where uneven cobble setting lets water back up at the margins and saturate the base. Understanding this at the planning stage, before the first cobble is bedded, separates a channel that sheds water cleanly for decades from one that needs resetting after the first wet season.
Why Basalt Cobbles Work for Drainage Applications
Basalt’s crystalline microstructure makes it particularly suited to drainage channel construction. The mineral composition — primarily plagioclase feldspar and pyroxene — produces a very low absorption rate that keeps the cobble body stable when water flows across it continuously. Where limestone might show surface dissolution over time under constantly moving water, basalt holds its dimensional integrity through extended wet exposure. That matters for channel work because the material is in near-constant contact with water during any significant rain event.
The density of basalt also works in your favor when you’re building a channel that will take the mechanical stress of storm surges and wind-driven sheet flow. Heavy rainfall across large hardscaped areas concentrates into channels at rates that can physically dislodge lighter materials. Basalt cobbles, with their mass and tight-fitting joints, stay locked in position even when flow velocity climbs. According to USGS basalt volcanic rock properties and composition, basalt forms from rapid cooling of low-viscosity lava, which gives it its characteristic density and tight mineral grain structure — both factors that contribute to exceptional durability in demanding outdoor conditions.
You’ll also find that basalt’s dark color reads well against the surrounding paving or planting, giving the channel a deliberate, architectural quality rather than the utilitarian look of a concrete swale. That matters on higher-spec residential and commercial projects where drainage has to look intentional.

Planning the Channel Geometry Before You Set a Single Cobble
Your channel cross-section and gradient determine everything downstream of that decision. A basalt cobble drainage channel needs a consistent longitudinal fall — typically at least 1% slope and ideally 1.5% to 2% on residential runs — so that water doesn’t pond at low points between cobbles. Mark your fall line with a string and laser level before excavation. Don’t rely on eye-level visual checks; even experienced crews misjudge by enough to create flat spots that trap debris and standing water.
Channel width is a hydraulic sizing question, not an aesthetic one. You need to calculate the contributing catchment area and the design storm intensity for your region to determine the cross-sectional area required to pass peak flow. A civil engineer or landscape architect can run that calculation quickly; skipping it is the shortcut that leads to overtopping during the first major storm event. For most residential patio or garden drainage applications, a channel between 12 in and 18 in wide with a cobble bed sits well within the typical design range, but confirm with your own site drainage calculation.
- Set the invert level (bottom of the channel) first, then work upward to set your cobble bed height
- Allow for the mortar bed depth plus the cobble height when calculating your excavation depth
- Mark the channel edges with timber or metal profile boards to hold the line during excavation and setting
- Plan the outfall point before you start — the channel’s effectiveness depends entirely on having a clear discharge point into a soakaway, storm drain, or collection area
Base Preparation: The Stage That Decides Long-Term Performance
Your channel base is the most consequential part of the build, and it gets buried where nobody sees it. Excavate to a depth that allows for a compacted aggregate sub-base of at least 4 in, a concrete bed of 4 in to 6 in, and your cobble height above that. For a channel carrying concentrated storm runoff, the concrete bed is non-negotiable — a mortar-only or sand-only bed won’t hold the channel profile under sustained flow. Mix or specify a concrete bed appropriate for external drainage work; your concrete supplier can advise on the right specification for your soil conditions and expected loading.
Compact the sub-base thoroughly in lifts no thicker than 4 in. If you’re working in clay-heavy soils, consider a geotextile membrane between the native ground and your aggregate — it keeps the aggregate layer from migrating into the clay under cyclic wetting and drying. That’s the kind of detail that adds an hour to the site work but prevents years of differential settlement in the channel profile. According to Natural Stone Institute igneous stone paving technical standards, proper base preparation and load distribution are critical to the long-term stability of igneous stone installations including basalt.
Once your concrete bed is poured and screeded to the correct channel profile, give it the full cure time before setting cobbles. Rushing into cobble placement on green concrete pulls the bed geometry out of level as it moves under the cobble weight and the tapping mallet.
Selecting and Sizing Your Basalt Cobbles for Channel Work
For a drainage channel application, you want cobbles with a consistent height dimension so the channel bed presents an even surface to water flow. Irregular top heights create turbulence, trap debris, and make the channel harder to clean. When specifying a basalt cobble drainage channel build, request cobbles in a nominal size range where the height tolerance is tight — typically ±5 mm is workable; looser tolerances mean more mortar adjustment at each cobble, which slows the work and introduces variation.
The cobble format also affects the channel’s hydraulic behavior. Rounded cobbles allow water to flow more smoothly across the bed, while split-face or rougher cobbles create more turbulence, which can be useful for slowing flow velocity on steeper gradients. For most standard residential drainage channels on slopes under 5%, rounded or slightly irregular cobbles set with tight joints work well. On steeper runs, the additional roughness of a split-face cobble actually helps dissipate energy and prevents the kind of high-velocity scouring that can undercut joint mortar over time.
Explore our black basalt cobble range to see the available sizes and formats that suit channel construction — the dimensions are the starting point for your channel bed specification.
- For channel beds: look for cobbles in the 4 in × 4 in to 6 in × 6 in face size range with consistent height
- For channel walls or side cheeks: a taller, more rectangular cobble profile locks together better and resists the lateral pressure of adjacent soil
- Verify color consistency across your supply batch — basalt can vary from near-black to dark grey-green, and a mixed-batch channel reads as patchy
- Basalt cobble drainage channel build projects benefit from ordering 10–15% surplus to account for cuts at the channel ends, curves, and transitions
Mortar Mix and Joint Specification for Channel Durability
The joint specification in a drainage channel is not the same as for a standard paved surface. Your joints are going to carry running water across them for their working life, which means joint mortar needs to be mixed at the correct ratio for external wet applications and tooled to a durable finish. A recessed joint that channels water down between the cobbles and into the sub-base is a base-saturation problem waiting to develop. Tool your joints flush to the cobble face, or very slightly proud, so water is directed across the joint surface rather than into it.
Use a cement-based mortar appropriate for external drainage work and mix it consistently — varying the water content between batches changes the workability and the final strength, which shows up as differential joint weathering years later. In climates that see freeze-thaw cycling, a slightly richer mix gives better frost resistance at the joint face. Don’t substitute a general-purpose mortar for one rated for external, wet-area use; the absorption characteristics differ in ways that matter to long-term joint integrity.
Expansion joints deserve more attention in drainage channels than they typically get on paved areas. The channel concentrates temperature differentials — the stone heats in sunlight and cools rapidly during rain events — so thermal movement across the channel length can be significant. Place a compressible expansion joint at intervals your project engineer specifies and at any change of direction. Skipping expansion joints is one of the more common reasons a basalt cobble drainage channel develops cracking along the channel length rather than at a controlled joint location.
Setting Cobbles: The Step-by-Step Process
Start setting cobbles from the lowest point of the channel and work uphill. This keeps your reference point fixed — you’re always setting each cobble slightly higher than the last, and any mortar adjustment works in your favor. Starting from the top and working down is harder to control and more likely to produce flat spots.
- Apply a consistent mortar bed on the concrete base — butter the underside of each cobble or use a spot-bed method, but make sure you achieve full contact across the cobble base; voids beneath the cobble concentrate load and lead to cracking
- Tap each cobble level in both directions and check the face height against your string line or laser reference before moving to the next cobble
- Maintain consistent joint widths by using spacers or a consistent tapping technique — erratic joints make the channel harder to clean and look unresolved
- Check your longitudinal gradient every 1.5 m to 2 m with a spirit level; minor errors compound over a long channel run
- Clean mortar smears from cobble faces before they set — basalt’s dark surface makes dried mortar staining particularly visible, and it’s much harder to remove once cured
- Allow full mortar cure before pointing the joints — usually 24 to 48 hours depending on temperature and humidity
Point the joints with a firm, dry-ish mix that you can pack in without it slumping. Wet, sloppy pointing mortar smears across the cobble faces and doesn’t compact properly into the joint, leaving voids that water exploits during the next storm event. A slightly dry mix, compressed firmly with a pointing tool, produces a dense joint that sheds water rather than absorbing it.
Edge Restraint and Storm Resilience
A basalt cobble drainage channel sits in the path of concentrated water flow during every significant weather event, and in exposed locations, wind-driven rain adds lateral pressure to the channel cheeks and edge restraints. The edge restraints on either side of the channel need to be robust enough to hold the channel profile against the hydraulic load of a storm surge flowing into the channel mouth.
Concrete haunching along the outside edges of the channel is not optional in any location that will see meaningful storm runoff. Haunching fills the zone between the channel structure and the adjacent paving or planting base, preventing the channel from spreading laterally under load. In locations exposed to wind, the cobble cheeks on the windward side take additional lateral load from wind-driven water moving across the surface before it enters the channel. Taller cobble cheeks with deeper mortar beds and a full concrete backing resist this load adequately; low or shallow cheeks bedded in mortar alone may move under repeated storm loading over several seasons.
The basalt volcanic rock formation and construction properties covered by Britannica explain why basalt’s tight mineral grain structure gives it the impact resistance to handle the mechanical stress of debris-laden storm water without the surface spalling that softer sedimentary stones can show after repeated high-velocity water events. That’s a real performance advantage in drainage applications where the material is taking a sustained mechanical load rather than just foot traffic.
Finish Selection for Channel Cobbles
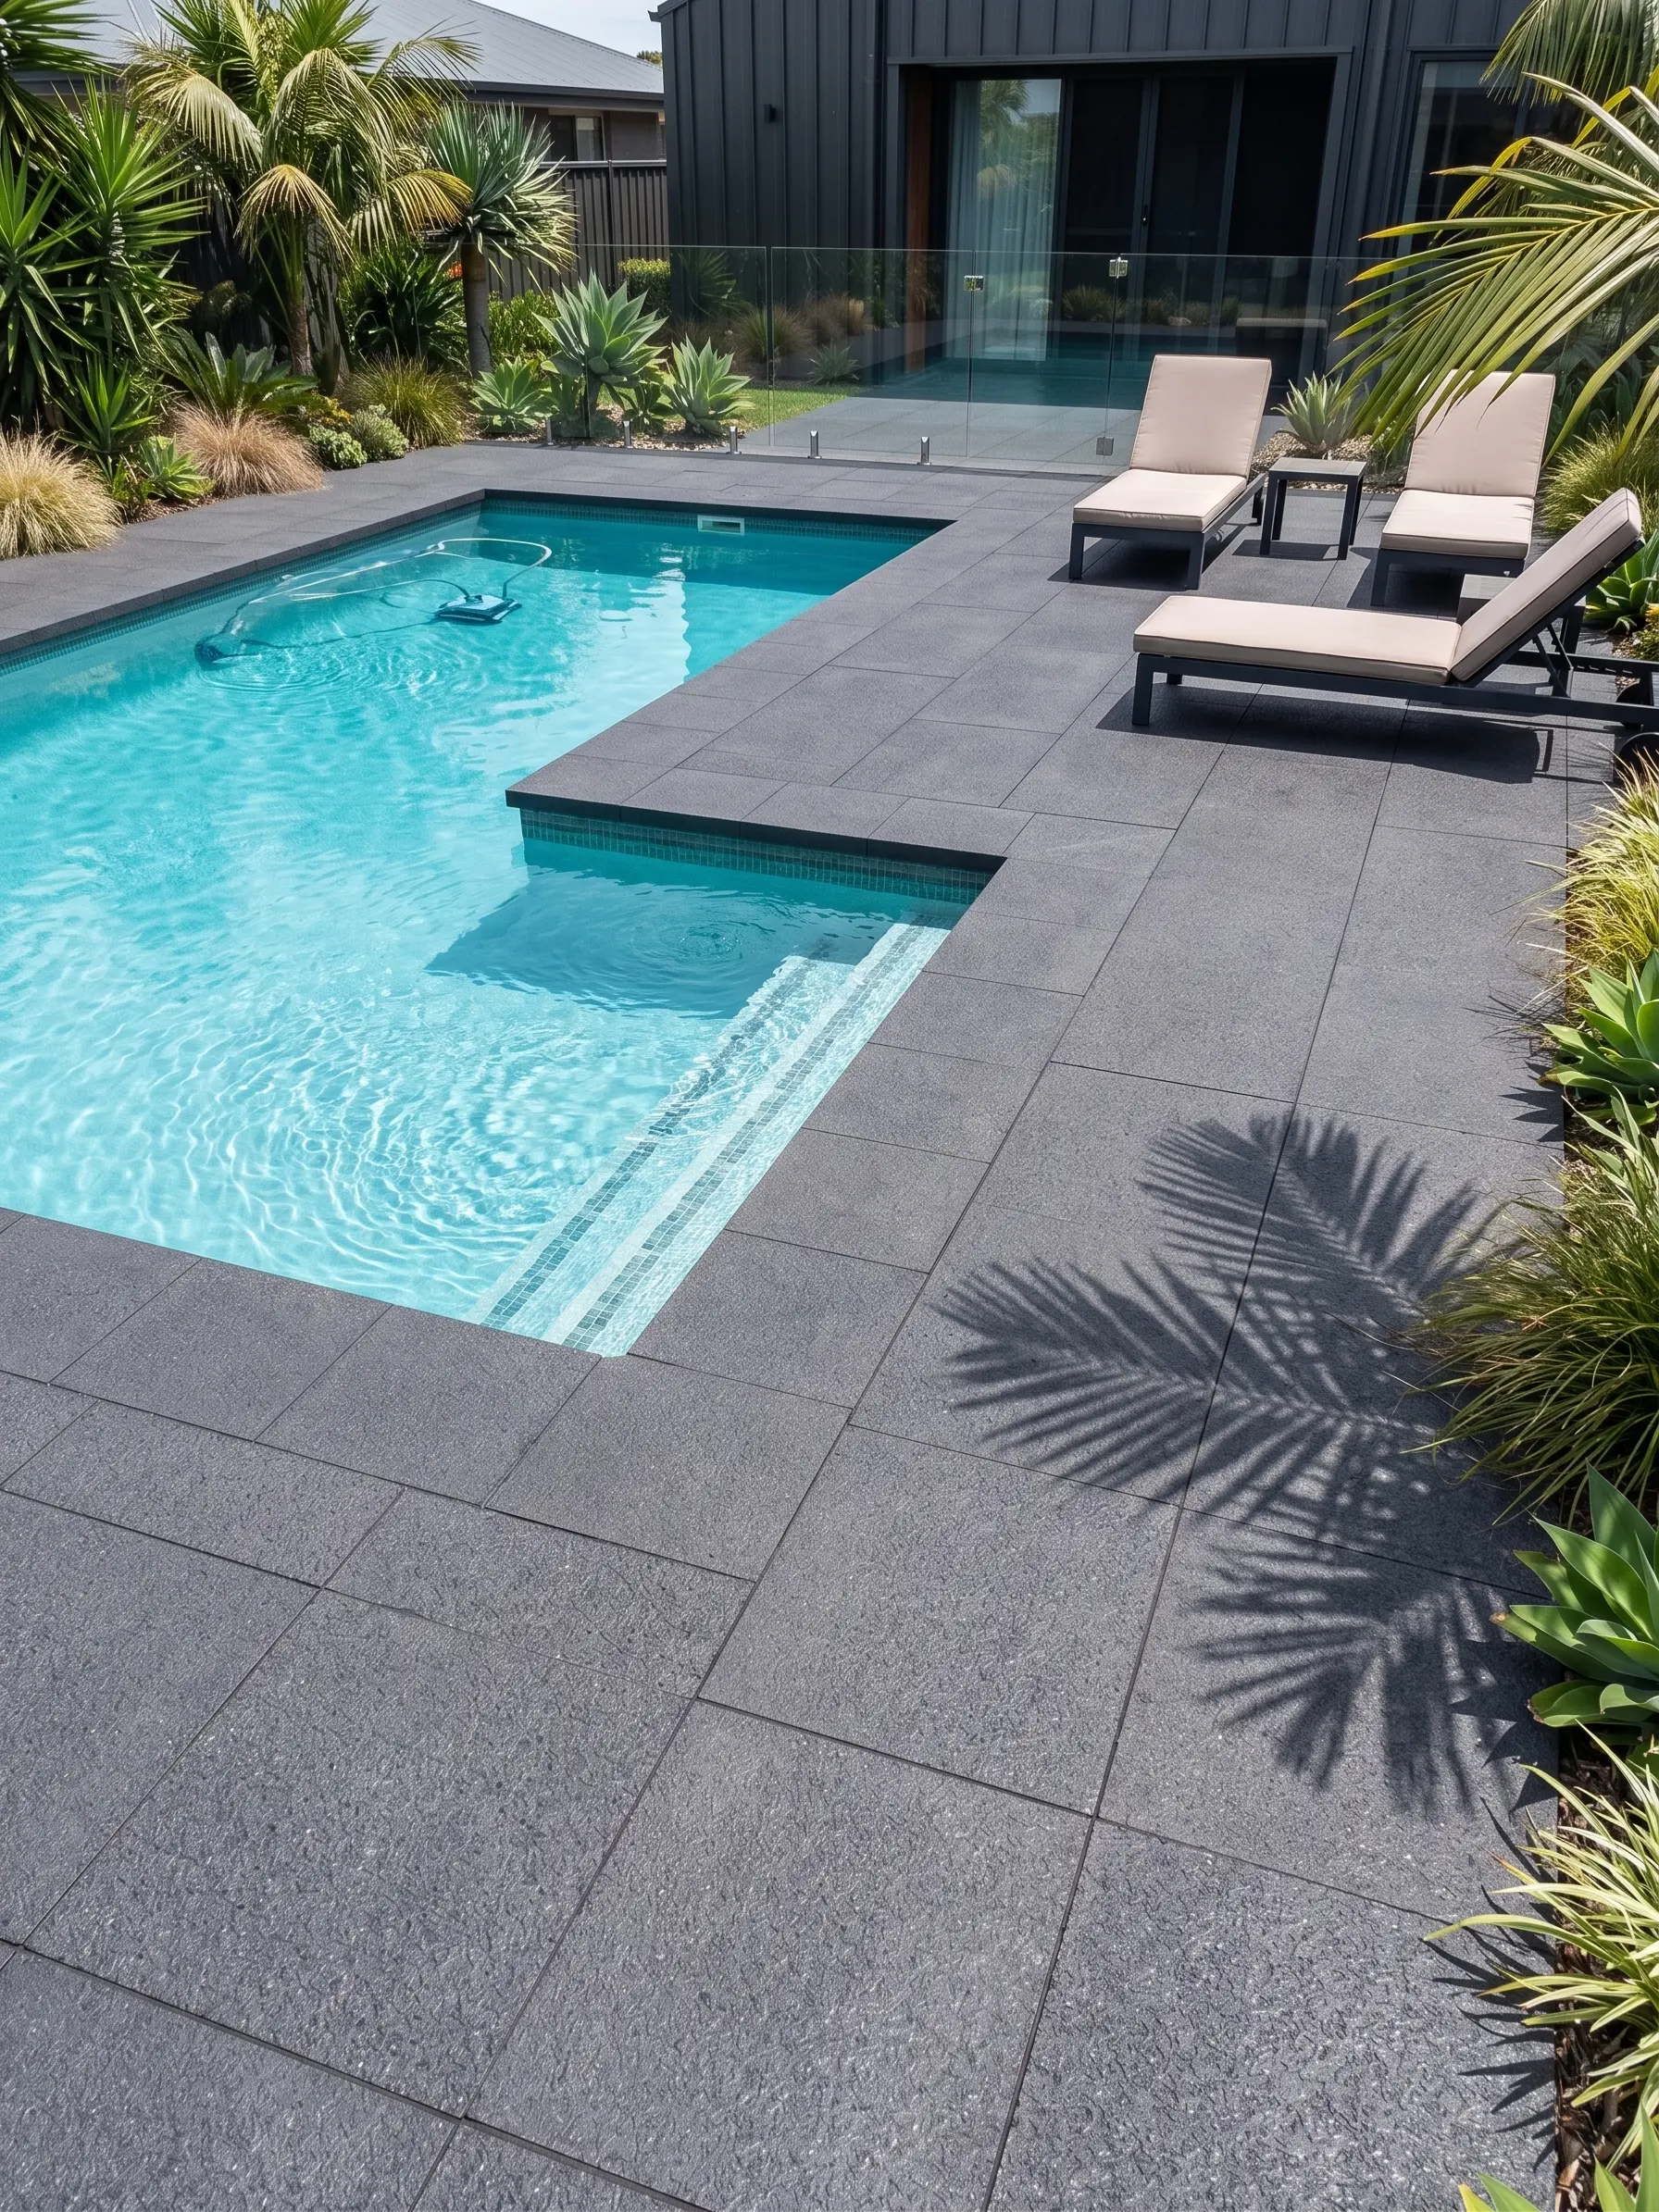
For pool decks, wet steps and slopes, choose a bush-hammered finish. For other outdoor paths, bush-hammered or brushed in our coarsest grit both work; check a sample. In a drainage channel specifically, the finish question is about flow hydraulics and cleanability rather than aesthetics alone. A smoother brushed finish allows debris to be flushed through more cleanly; a rougher bush-hammered finish creates more friction at the bed surface, which slows water velocity on steeper channel gradients and may actually reduce erosion of the joint mortar under high-flow conditions.
For the channel cheeks and any adjacent paving that directs water toward the channel, a bush-hammered finish gives the open, matte texture that is appropriate for surfaces that will be wet regularly. A polished finish is for dry indoor surfaces only and has no place in any external drainage application. The finish decision should follow your hydraulic design logic — match the surface texture to what the flow conditions actually require at that point in the channel.
- Bush-hammered finish: suited to steeper channel gradients, wet public areas, areas adjacent to channel entry points
- Brushed 36 Grit: works for channel cheeks in lower-gradient, residential garden channel applications
- Split face: appropriate for channel walls in feature drainage channels where the texture is part of the design expression
- Avoid polished on any external drainage surface — the surface becomes extremely slippery when wet and does not hold mortar as reliably
Maintenance and Long-Term Care for Your Basalt Cobble Channel
Your basalt cobble drainage channel needs two types of maintenance: hydraulic maintenance to keep it functioning, and structural maintenance to keep the joints and edge restraints intact. On the hydraulic side, leaf litter and fine sediment accumulate in the channel bed over each season and progressively reduce the effective flow cross-section. Clear the channel at least twice a year — once before the main wet season and once mid-season if leaf fall is heavy in your climate.
Structural maintenance focuses on joint repointing. Inspect the joints annually, looking for sections where the mortar has washed back below the cobble face. Repoint any recessed joints promptly — a joint that’s 5 mm below the cobble face allows water to track behind the cobble and can begin undermining the mortar bed beneath. Repointing is a straightforward job that most property maintenance teams can handle, but it needs to happen on a consistent cycle rather than waiting until obvious displacement occurs.
Sealing basalt in a drainage channel is generally not recommended unless you’re in a context where staining from iron-rich soil or fertilizer runoff is a specific concern. A breathable penetrating sealer applied to the channel bed and joints can reduce staining in those cases; follow your sealer manufacturer’s reapplication interval and use only a product rated for external, wet-area stone. Never use a topical or film-forming sealer in a drainage channel — it degrades rapidly under flow, creates an uneven surface, and traps moisture beneath the film.
Ordering, Cutting, and Delivery Logistics
Getting your cobble order staged correctly saves significant site time. Calculate your channel volume precisely — length × width of channel bed + the area of both cheeks — then add your 10–15% surplus. Order all the material for the channel in a single batch where possible; cobbles from different production batches can show color variation that’s particularly noticeable in the confined geometry of a channel.
Citadel Stone cuts basalt cobbles to order from stock at our selected quarries, which means you can specify the size tolerance and nominal dimensions that your channel design requires rather than adapting your design to whatever standard sizes happen to be available. Lead times are quoted with the order, so build that window into your site program from the planning stage — don’t leave the stone order to the week before you need to start setting.
Your site access should be planned before the delivery is confirmed. A loaded vehicle carrying cut basalt cobbles is heavy, and the access route to the point of offloading needs to be clear and capable of taking that load without damaging adjacent paving or soft landscaping. Offloading arrangements, including any crane lifts or telehandler requirements, should be confirmed before the delivery date. Pallet positions close to the channel run reduce double-handling, which with basalt is a physical consideration — this is a dense stone and pallets are heavy.
- Confirm vehicle access to your site and the offloading zone before placing your order
- Specify your size tolerance in writing with the order — verbal confirmations are insufficient for cut-to-order stone
- Request color samples from the production batch before the full order ships where color consistency is critical to your design
- Plan material storage on site to keep cobbles clean — stacking directly on clay soil risks surface staining before installation
Expert Summary: Getting Your Basalt Cobble Drainage Channel Right
The performance of a basalt cobble drainage channel over its service life traces directly back to three decisions made at the planning stage: the gradient and hydraulic sizing, the concrete bed specification, and the joint mortar and expansion joint layout. Get those three right and the subsequent installation work follows a logical sequence. Miss any of them and the channel will tell you — through ponding, joint failure, or lateral movement — within the first two or three wet seasons.
Basalt earns its place in drainage channel construction through density, dimensional stability under continuous wet exposure, and an ability to handle the mechanical load of storm-driven debris and flow without surface degradation. It’s a material that rewards a properly specified and executed base; it won’t compensate for an inadequate foundation regardless of how carefully the cobbles are set. Test reports for absorption and compressive strength are available on request — specify the ASTM test method with your order documentation and request the report from your supplier so your specification is backed by real data, not a general description.
For projects where the cobble format itself is the starting point, understanding how size and proportion affect both the channel hydraulics and the installation geometry is worth covering in detail before you lock in a specification. basalt cobblestone sizing options covers the dimensional considerations that shape your channel design choices. Cobbles from our selected quarries in the Middle East arrive cut to order, with lead times quoted with your order for site planning.
Related reading: basalt raised garden beds · stony basalt texture guide · smooth basalt stone blocks.