Slope Geometry and Step Planning
Granite landscape steps construction demands precision at the planning stage — mistakes in rise-and-run calculations compound over the entire staircase and are nearly impossible to correct once stone is set. The standard rise sits between 6 and 7.5 inches, with a tread depth of 12 to 16 inches for exterior landscape applications. Deviate from these ratios and you introduce a gait-disruption hazard that no amount of good stonework can fix after the fact.
Start by measuring your total vertical change with a level and tape — not by estimation. Drive a stake at the top of the slope and run a level string line to the bottom stake, then measure the vertical drop. Divide that number by 6.5 inches (your target rise) to get an approximate step count, then adjust your actual rise evenly so every tread is identical. Uneven risers cause trips, and that consistency matters even more on exterior granite where wet-weather foot traffic is a real daily variable.
- Measure total vertical change at three points across the slope width — slopes are rarely uniform
- Target rise of 6 to 7 inches and tread depth of 13 to 15 inches for comfortable exterior circulation
- Account for tread overlap of 1 to 2 inches beyond the riser face to create a natural shadow line
- Factor in the full tread depth plus base material when calculating horizontal run consumed per step
- Sketch a cross-section profile before ordering material — this reveals excavation volume early
Selecting Granite for Landscape Steps
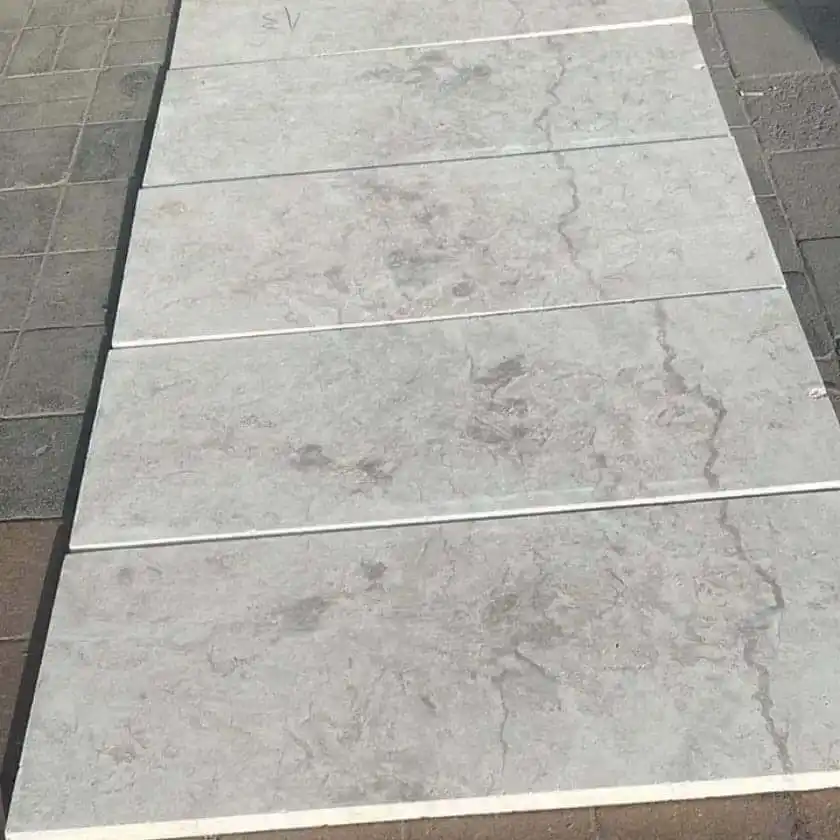
Your granite selection for landscape steps is a structural decision first and an aesthetic one second. Granite landscape steps construction performed well over decades depends on slab thickness, finish type, and density — not just color. For exterior treads handling regular foot traffic, specify a minimum 3-inch nominal thickness. Thinner material in the 1.5 to 2-inch range works for interior applications, but a cantilevered exterior tread at that thickness will flex under point load and eventually crack at mid-span.
According to NSI granite durability and application data, granite’s crystalline igneous structure gives it compressive strength exceeding 19,000 PSI in most commercial grades — well above the threshold for outdoor stair applications. That strength matters specifically when treads span more than 24 inches without a central support, which is common when granite landscape steps are built into a wide garden slope. Flamed or thermal finishes give you a coefficient of friction that satisfies most exterior slip requirements, and they hold their texture longer than honed granite under foot-traffic abrasion.
- Minimum 3-inch thickness for treads spanning more than 18 inches without continuous substrate support
- Flamed finish preferred over honed for slip resistance in wet or shaded conditions
- G603 and G654 grades are widely stocked and provide consistent density for structural use
- Avoid highly polished finishes on exterior treads — the surface coefficient drops below safe thresholds when wet
- Check that your selected color is available in consistent lot depth — color variation between lifts in the same project is visually jarring
Excavation and Base Preparation
The base is where granite landscape steps construction either succeeds long-term or begins a slow failure cycle. You’re building on a slope, which means every step has a different bearing relationship with the surrounding soil. Excavate 8 to 12 inches below your finished tread elevation for each step — more in areas with expansive clay soils. Your compacted gravel base needs to be engineered, not poured and walked away from.
Use a 3/4-inch clean crushed stone compacted in 3-inch lifts. A plate compactor handles this well on most residential slopes. The critical detail most builders overlook is the keystone step — the bottom step must be set below grade on a compacted footing that’s essentially the same spec as a small foundation. That bottom step carries lateral load from the entire staircase during freeze-thaw movement and during the kind of wind-driven storm events that saturate slope soils and change bearing capacity overnight. Get that footing right and the rest of the staircase has a stable anchor.
- Excavate 8 to 12 inches below finished grade for each tread bearing area
- Compact gravel base in 3-inch lifts — never dump full depth and compact once
- Set the bottom step on a footing that extends at least 6 inches below local frost depth in freeze-thaw regions
- Use landscape fabric between native soil and gravel base to prevent fines migration that softens the base over time
- Create a slight backward pitch on each gravel bed — no more than 1 percent — to seat treads flat after final setting
Cutting and Fitting Granite Treads
Field cutting granite is unavoidable on most slope installations. Your slope may turn, the width may taper, or you may need to accommodate an existing landscape feature like a tree root or a utility line. The right blade makes the difference between a clean cut and a shattered tread — use a 14-inch continuous-rim diamond blade rated for hard stone, not the segmented blades sold for concrete. Run the cut wet and go at roughly 60 percent of your saw’s maximum feed rate to avoid micro-fracturing the crystal structure along the cut edge.
Mark your cut lines with a chalk snap line, not pencil — chalk is visible on dark granite and washes off cleanly. Make multiple shallow passes rather than one deep cut when you’re within 2 inches of a finished edge, especially on flamed material where the surface texture can cause the blade to deflect slightly. For the front nosing edge, a 1/8-inch chamfer from a handheld angle grinder removes the sharp arris without softening the tread appearance significantly, and it prevents edge chipping under foot impact over time.
Setting Granite Treads on the Slope
Setting procedure is where granite landscape steps construction either looks and performs beautifully or reveals every shortcut taken in the base prep phase. Each tread goes down on a full mortar bed — not spots, not five-point setting. A 1-inch mortar bed using a Type S mix gives you the coverage and bond strength needed for exterior use. Tap the tread level side-to-side and set with a 1-percent forward pitch toward the nosing edge so surface water runs off the tread face rather than pooling at the riser joint.
For broader reference on how natural stone performs under structural loading in outdoor stair applications, ASTM C615 granite dimension stone standards provide the compressive and flexural strength benchmarks that inform proper tread sizing for each span configuration. Check each tread with a 4-foot level before the mortar begins to set — you have roughly 20 to 30 minutes depending on ambient temperature. Use rubber mallets, not steel hammers, to adjust position. Steel-on-granite at setting pressure can introduce invisible micro-cracks that only reveal themselves after the first hard freeze.
Browse our granite steps for landscapes to see the available sizes, thicknesses, and finishes that work for slope installations of this type — warehouse stock includes standard tread dimensions that reduce field cutting on most residential projects.
- Use full mortar beds — 1 inch of Type S mortar across the entire bearing surface
- Set each tread with 1-percent pitch toward the nosing for positive drainage
- Allow 24 hours of cure before foot traffic and 72 hours before heavy loads
- Back-butter the riser face before setting the next tread’s back edge — this prevents hollow voids at the riser joint that collect moisture
- Check plumb on the riser face of each step — a riser that leans back more than 2 degrees creates a visual distortion across the whole flight
Joint Integrity and Storm Durability
Landscape steps on exposed slopes face mechanical stress from weather that a standard patio installation never sees. Wind-driven rain enters joints at high pressure, particularly on the riser-to-tread interface, and if that joint isn’t properly filled and sealed it becomes a water pathway directly into your base material. Over repeated cycles of saturation and drainage, the base softens locally, the tread rocks slightly, and the mortar bond fractures. You then have a settlement pattern that begins at the weakest joint and progresses upward through the staircase.
Fill all exposed joints with a sanded grout matched to the granite tone, then apply a penetrating silane-siloxane sealer to both the tread surface and the joint faces. This sealer penetrates the granite’s crystal matrix and reduces water absorption without changing the surface texture or appearance. Reapply every 3 to 5 years depending on exposure. On open hillside installations where the steps face prevailing storm directions, a mortar cap on the top-step riser prevents wind-driven water from peeling the riser away from the hillside over time — it’s a 30-minute detail that eliminates a common 5-year failure mode.
- Fill riser-to-tread joints fully with sanded grout — no partial fills or surface-only application
- Apply penetrating silane-siloxane sealer within 30 days of installation after mortar has fully cured
- Inspect joints after the first significant rain event — gaps indicate incomplete mortar coverage below
- On exposed hillside installations, consider a mortar cap at the top riser to resist wind-driven water intrusion
- Hail and impact from wind-carried debris rarely damages granite treads due to the stone’s surface hardness, but it can chip poorly supported nosing edges — full mortar beds eliminate the unsupported nosing problem
Drainage Design Around Granite Steps
You can set perfect treads on a perfect base and still see step failure within five years if the surrounding drainage isn’t addressed. Slope water converges toward any grade disruption — and your step flight is exactly that. Without a designed drainage path, storm runoff channels behind the steps, saturates the slope soil above the top step, and applies hydrostatic pressure to the riser faces from the hillside side. That pressure is slow and silent, but it’s relentless.
Install a French drain across the full width of the staircase at a point 18 to 24 inches above the top step. Route it laterally to daylight on both sides of the staircase. At the base of the flight, a catch basin or gravel sump prevents runoff from eroding the soil in front of the bottom step. These two features cost relatively little at installation time and eliminate the most common cause of hillside step settlement. The ASLA’s hardscape design guidance consistently identifies surface drainage design as the primary factor in long-term landscape stone performance on grades — and field experience confirms this without exception.
ADA Considerations and Handrail Anchoring
Depending on where your granite landscape steps connect — to a residential entry, a commercial landscape, or a shared path — accessibility standards may apply. Even where they don’t apply legally, designing your steps to meet accessibility principles produces a safer, more usable installation. Keep risers consistent to within 3/8 inch across the entire flight. Tread depth variation beyond that threshold creates a trip hazard that even familiar users encounter over time.
Handrail post anchoring into granite treads requires a core drill with a diamond bit and a two-part epoxy anchor system rated for stone. Standard expansion anchors in granite fail under the lateral loads that handrails experience in daily use and storm conditions. Drill perpendicular to the tread face, clean the hole of granite dust with compressed air, and inject epoxy fully before inserting the post. Allow the full epoxy cure time before applying any load — typically 24 hours at standard temperatures. Post spacing of 4 to 6 feet along the rail run keeps deflection within structural limits under the lateral loads typical of handrail use on exterior stairs.
Ordering, Logistics, and Project Timing
Granite landscape steps construction timelines collapse most often at the material delivery stage, not during installation. Confirm warehouse stock levels for your specified tread size, thickness, and finish before you schedule excavation. Running a base prep crew while waiting on a delayed stone delivery adds cost without progress. Citadel Stone maintains granite tread inventory available for nationwide delivery, which typically keeps lead times to one to two weeks rather than the six-to-eight-week cycle that import orders require.
Truck access conditions at the job site matter as much as the order itself. Granite treads in the 3-inch thickness range at 16 inches by 48 inches weigh roughly 200 pounds per piece. A truck delivering palletized stone to a property with a narrow or steep driveway may not be able to get close enough to the work area for a standard pallet drop. Discuss delivery access with your supplier before the order ships — offloading point and site distance to the actual installation area will affect your labor budget for material handling. On steep or narrow access sites, consider ordering in smaller, more manageable tread dimensions rather than large-format pieces that require multiple handlers for every placement.
- Confirm warehouse stock in your specified thickness and finish before scheduling excavation
- Order 10 to 15 percent overage to account for field cutting waste and breakage
- Review truck access at your site — pallet drops at the road’s edge can mean significant hand-carry distance on constrained properties
- Stage pallets as close to the work area as safely possible to reduce material-handling fatigue during installation
- Verify that mortar and sealer are on site before stone arrives — a dry run without setting materials wastes the delivery window
Long-Term Performance of Granite Landscape Steps
Every phase of granite landscape steps construction — from slope geometry to drainage design to joint sealing — contributes to the long-term performance of the finished staircase. The material itself is essentially indestructible under normal conditions, but the system around it is not. Base depth, mortar coverage, drainage routing, and joint integrity are where installations differentiate themselves between a 10-year replacement cycle and a 40-year maintenance-light installation. Granite steps done well don’t look like they were built — they look like they belong to the land they’re set into.
As you move forward with your broader landscape hardscape plan, related stone features can inform material and installation decisions across your site. granite landscape blocks for walls and raised beds explores how complementary granite elements perform in adjacent landscape applications — worth reviewing before you finalize your overall material spec for any project that pairs steps with retaining walls or raised planting beds. Setting each granite tread on a compacted gravel base with a slight forward pitch, as Citadel Stone advises, prevents water pooling and keeps steps stable through freeze-thaw cycles.
Related reading: how to install granite landscape edging · decomposed granite landscape pros and cons · crushed granite landscape guide.