Granite stain removal gets mishandled more often than most people realize — not because the chemistry is complicated, but because the wrong cleaner applied to the wrong stain type can permanently etch a surface that would have otherwise cleaned up in twenty minutes. Knowing how to remove granite stains correctly starts with one key variable: whether you’re dealing with a surface deposit or something that has actually migrated into the stone’s pore structure. Understanding that distinction is what separates a fast, effective cleaning from a months-long remediation project.
Why Granite Stains the Way It Does
Granite is an igneous stone with a relatively low absorption rate — typically between 0.1% and 0.4% by weight — which is dramatically lower than travertine or limestone. That low porosity is one of granite’s best features, but it doesn’t make the surface stain-proof. It makes granite stain removal a race against time. The longer a substance sits on unsealed or thinly sealed granite, the deeper the penetration into those pore channels. A coffee spill you catch within ten minutes lifts off with warm water and a soft cloth. That same spill left overnight can require a full poultice cycle to draw out.
The mineral matrix of granite — primarily quartz, feldspar, and mica — interacts differently with acidic, oily, and organic contaminants. Acidic substances don’t etch granite the way they etch limestone, but they can still discolor by reacting with iron-bearing mineral inclusions. Oils penetrate the silicate structure and darken the immediate zone. Tannin-based stains from coffee, tea, and plant matter bind to feldspar crystals. Knowing which category you’re dealing with determines every product and technique choice that follows.
Identifying the Stain Type Before You Touch It
The fastest path to a clean surface is correct identification upfront. Misdiagnose the granite stain and you risk spreading it, setting it deeper, or introducing a reactive chemical that causes secondary damage. Run through this diagnostic sequence before reaching for any product.
- Oil-based stains (cooking grease, body oil, motor oil) create dark, wet-looking patches that don’t fade at the edges — the discoloration has a defined border and the stone looks saturated
- Organic stains (coffee, tea, wine, food, leaves) leave brownish or pinkish residue that tends to lighten when the surface dries slightly — they respond well to hydrogen peroxide-based treatment
- Metal stains (rust from iron furniture, copper from fixtures) appear as reddish-brown or green streaks that radiate outward from a fixed point like a chair leg or pipe joint
- Inorganic deposits (hard water minerals, efflorescence) leave white or grey haze that may feel slightly gritty and typically don’t penetrate deeply into the pore structure
- Biological growth (mold, mildew, algae) presents as dark grey or green patches, often in areas with poor drainage or persistent moisture
Your cleaning approach branches entirely from this identification step. Applying an alkaline degreaser to a rust stain won’t help; using a commercial rust remover on an oil stain is equally pointless. Take two minutes here and save hours later.
Surface Cleaning: The First Response
For any fresh granite stain — anything that occurred within the last twelve hours — start with the least aggressive intervention. Blot liquid spills immediately with a clean cloth; never wipe, as wiping spreads the contaminant laterally and drives it toward open pores. For dry or semi-dry deposits, use a plastic scraper or the edge of a credit card to lift the material before it gets wet.
Warm water with a small amount of pH-neutral dish soap handles most recent surface stains on sealed granite without any risk to the sealer. Apply, let it dwell for sixty seconds, and blot with a clean white cloth. Avoid colored cloths — dye transfer onto wet stone is a real issue with dark-colored rags. Rinse thoroughly, because soap residue left to dry will leave its own haze.
According to Natural Stone Institute granite durability and application specifications, granite’s low absorption rate means surface contamination often responds to gentle cleaning methods when addressed promptly. This reinforces why the first response matters as much as any specialized treatment.
How to Remove Granite Stains with a Poultice
A poultice is the standard tool for any granite stain that has migrated below the surface — and it’s the technique you’ll return to repeatedly for tough organic, oil-based, or metal stains. The concept is straightforward: mix an absorbent powder with a chemical agent appropriate for your stain type, apply it over the stain, cover it, and let capillary action draw the contaminant back out of the stone as the poultice dries. Done correctly, this method is remarkably effective for removing granite stains. Done wrong — wrong chemical, wrong dwell time, wrong powder ratio — it can push the stain deeper or introduce new discoloration.
Poultice Ingredients by Stain Type
- Oil-based stains: mix diatomaceous earth or white kaolin clay with acetone or mineral spirits — the solvent breaks down the oil while the powder absorbs it as the mix dries
- Organic stains (coffee, wine, tea, food): use 12% hydrogen peroxide with kaolin clay or flour as the powder base — the peroxide oxidizes the organic pigment compounds
- Rust and iron stains: use a commercial iron stain remover (oxalic acid-based products work) mixed with flour or diatomaceous earth — test in an inconspicuous area first since granite with heavy iron mineral content can react unexpectedly
- Ink stains: isopropyl alcohol or acetone mixed with an absorbent powder works on most inks, though water-based inks respond better to hydrogen peroxide
- Biological stains: dilute bleach (5:1 water-to-bleach ratio) in diatomaceous earth addresses mold and mildew, but avoid bleach on dark granites as extended contact can lighten certain mineral inclusions
Step-by-Step Poultice Application
Mix your chosen powder and chemical agent to a thick peanut-butter consistency — too thin and it runs off vertical surfaces and evaporates before it can draw anything out; too thick and it won’t make adequate contact with the stone surface. Apply a layer approximately 6–8mm thick over the stain, extending at least 25mm beyond the stain perimeter in all directions.
Cover the poultice with plastic film (cling wrap works well) and tape all four edges to the stone surface. This slows evaporation, extending the active dwell time. For oil-based stains, leave the poultice covered for 24–48 hours. For organic stains, 12–24 hours is usually sufficient. After the covered period, remove the plastic and allow the poultice to air-dry completely — this drying phase is when actual extraction happens, so don’t rush it. A fully dried poultice will appear lighter in color and may crack slightly at the surface.
Remove the dried material with a plastic scraper, rinse the area with clean water, and evaluate. Significant improvement is common after the first application. Severe or old granite stains may require two or three poultice cycles. Reapply as needed, allowing the stone to dry completely between applications. At Citadel Stone, we recommend a minimum 24-hour drying window between cycles — attempting to repoultice over a still-damp surface defeats the extraction mechanism entirely.
Specific Removal Techniques by Stain Category
The poultice approach handles most situations, but a few specific stain types have nuances worth knowing before you start.
Removing Rust Stains from Granite
Rust stains deserve special attention because they’re among the most visually alarming and the trickiest to treat. The iron that creates the stain is often coming from a site source — a metal planter, iron furniture leg, or steel hardware in contact with the stone. Before you treat the stain, remove or isolate the iron source, or you’ll be cleaning the same area indefinitely. Oxalic acid-based removers are effective but require careful handling; they can lighten certain granites and should never be used at full concentration. Dilute to manufacturer specifications and limit contact time to 5–10 minutes before rinsing thoroughly.
Oil and Grease Stains on Kitchen Granite
Kitchen countertop granite sees the heaviest oil loading of any application — cooking oil, butter, and food residue accumulate in patterns around the cooktop and food prep zones. The dark wet-looking patches are the telltale sign. For fresh oil, the poultice approach with acetone or mineral spirits works reliably. For old or repeated oil buildup, starting with a commercially prepared alkaline stone degreaser before the poultice step loosens the surface layer first and lets the poultice work on the deeper penetration.
Hard Water Deposits and Mineral Haze
Hard water deposits aren’t technically stains — they’re calcium and magnesium mineral buildup sitting on top of the surface, not inside it. They respond to dilute white vinegar or a pH-balanced hard water remover specifically formulated for natural stone. Important caveat: acidic cleaners safe for granite removal of mineral deposits are still inappropriate for prolonged contact. Apply, let dwell for two to three minutes, agitate gently with a soft-bristle brush, and rinse completely. Repeat as needed. The surface should never feel tacky or dull after rinsing — if it does, a residue remains.
Outdoor Granite: Stain Considerations Specific to Exterior Use
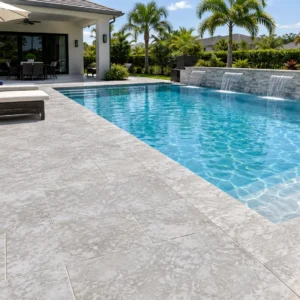
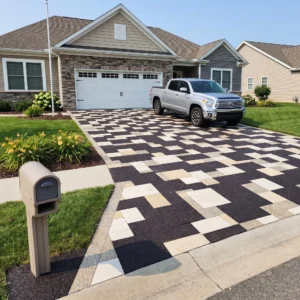
Exterior granite surfaces — pool surrounds, patio slabs, driveway pavers — develop staining patterns that indoor surfaces don’t. Biological growth thrives where drainage is poor, water pools, or shade keeps the surface damp for extended periods. In regions experiencing heavy seasonal rainfall, monsoon cycles, or prolonged wet periods, this biological loading accelerates significantly. Algae and lichen establish themselves in low spots where water can’t drain freely, and their root structures physically intrude into the pore network over time.
Good drainage design is the real preventive measure here. A consistent 2% slope away from structures keeps water moving and eliminates the standing-water zones where biological staining starts. For granite stain removal on exterior surfaces already affected by algae or lichen, a sodium hypochlorite solution (1 part bleach to 5 parts water) applied with a soft brush and rinsed with a low-pressure wash addresses most cases. High-pressure washing at close range can erode the polish on honed or polished finishes — keep the nozzle at least 300mm from the surface and use a fan tip rather than a pencil jet.
Exterior granite stain removal and sealing requirements also change in climates with extreme precipitation variability — areas cycling between drought conditions and intense rain events experience accelerated sealer degradation because the stone expands and contracts with moisture content changes. Plan for more frequent resealing in these environments: annually rather than every two to three years.
Sealing Granite After Stain Removal
Stain removal and sealing belong together in the same workflow. Removing a granite stain from an unsealed or poorly sealed surface and then leaving it unprotected is setting yourself up for the same problem within weeks. The sealing step is what makes the cleaning work durable. According to ASTM C615 granite dimension stone quality standards, dimensional granite’s absorption characteristics vary by source and finish — honed surfaces absorb at higher rates than polished, which directly affects how quickly sealers deplete and how vulnerable the stone is between sealing cycles.
For granite stain removal and sealing as a combined process, ensure the stone is completely dry before applying sealer — residual moisture from cleaning, especially poultice work, needs 24–48 hours to fully evacuate the pore structure. Applying an impregnating sealer to a damp stone traps moisture beneath the sealer film, which creates a whitish haze that’s difficult to remove without stripping the sealer entirely. Use an impregnating (penetrating) sealer rather than a surface film sealer for interior granite — impregnators don’t alter the appearance and don’t peel or delaminate under thermal cycling. Explore our sealed granite slabs if you’re sourcing stone that arrives ready for installation with pre-applied protection already in place.
Apply the sealer according to manufacturer instructions, typically two thin coats with a 20-minute dry time between applications, then buff the surface dry with a clean cloth before the sealer can skin over. The water test confirms adequate sealer coverage: droplets should bead visibly. If water soaks in within 3–4 minutes, the surface needs another coat.
What Not to Use on Granite
The list of products that cause secondary damage to granite is longer than most people expect. Part of professional granite stain removal is knowing what to leave on the shelf.
- Bleach at full concentration damages sealers and can lighten lighter-colored granites — always dilute to 5:1 or lower for spot treatments
- Vinegar and citrus-based cleaners are acidic enough to deplete impregnating sealers over time, even though granite itself resists acid etching better than limestone
- Ammonia-based glass cleaners strip sealers and leave a film that attracts particulates — a popular choice that causes more problems than it solves
- Abrasive scrubbing pads and steel wool scratch polished finishes and create micro-grooves that accelerate future staining
- Generic multi-surface bathroom cleaners often contain surfactant compounds that leave buildup in the pore structure over repeated use
- Steam cleaners applied without proper technique can force contaminants deeper into the pore network rather than extracting them
According to USGS granite production and construction use statistics, granite remains one of the most widely specified dimensional stones across the country — which means the volume of incorrect cleaning advice circulating online is substantial. When in doubt, pH-neutral stone-specific cleaners are the safe default.
Decision Points
Knowing how to remove granite stains effectively comes down to three decisions made in sequence: identify the stain type correctly, match your chemical agent to that type, and give the poultice or cleaner enough time to work without rushing to the next step. Most failed attempts skip one of these three. The identification step gets rushed, the wrong product goes on, and the dwell time gets cut short because results aren’t visible fast enough. Slow down the process and the results are consistently better.
Your sealing regimen is equally important as a follow-through step. A surface with a robust impregnating sealer doesn’t eliminate granite stain risk, but it changes the timeline dramatically — you go from a ten-minute window on an unsealed surface to hours on a well-sealed one. Citadel Stone maintains warehouse inventory of granite products nationally, which means lead times on replacement material or sealed slabs typically run one to two weeks rather than the six to eight weeks associated with direct import orders. For projects where matching existing stone matters, that supply consistency is worth factoring into your planning. As you complete your granite maintenance or specification work, finish details can shape both aesthetics and longevity at slab edges — granite edge profile options covers how profile selection affects both appearance and long-term durability at slab terminations.
When a stain persists after poultice treatment, the stone’s porosity may be the root cause — Citadel Stone advises reviewing sealing frequency before assuming permanent damage.
Related reading: Granite Density Explained: What Buyers Must Know · Granite Slab Size Guide: Plan Cuts and Seams.