Slab thickness and spacing geometry determine whether a stepping stone path stays level for two decades or starts rocking underfoot within the first wet season. A solid garden stepping stones guide has to address these structural variables before anything else, because surface selection — however beautiful — means little if the base work fails. The decisions that separate a 25-year path from a 10-year replacement come down to material density, joint width, and how water moves beneath each stone.
Size and Shape Fundamentals for Natural Stone Paths
Your stone dimensions drive the entire feel of a pathway. Stepping stones in the 16-inch to 24-inch square or round range suit most residential walkways, delivering a confident stride without requiring the oversized slab handling that anything above 30 inches demands. Irregular shapes — the flagstone-cut and freeform slabs — introduce a naturalistic quality that formal square cuts don’t replicate, but they require more precision in setting to avoid trip hazards at uneven edges.
The relationship between stride length and stone spacing is where most garden paths go wrong. A 24-inch center-to-center spacing accommodates an average adult stride comfortably, but drop below 18 inches and you’re creating a path that forces short, choppy steps. Beyond 28 inches, longer strides become necessary and the path starts to feel like an obstacle course rather than a welcoming route through the garden.
- 16–20 inch stones work for secondary garden paths and decorative winding routes
- 20–24 inch stones suit primary walkways with regular foot traffic
- 24–30 inch large-format slabs create statement entrances and formal approaches
- Irregular flagstone cuts offer design flexibility but require careful edge profiling
- Round stepping stones spaced through groundcover plantings need 2–3 inch thickness minimum for stability
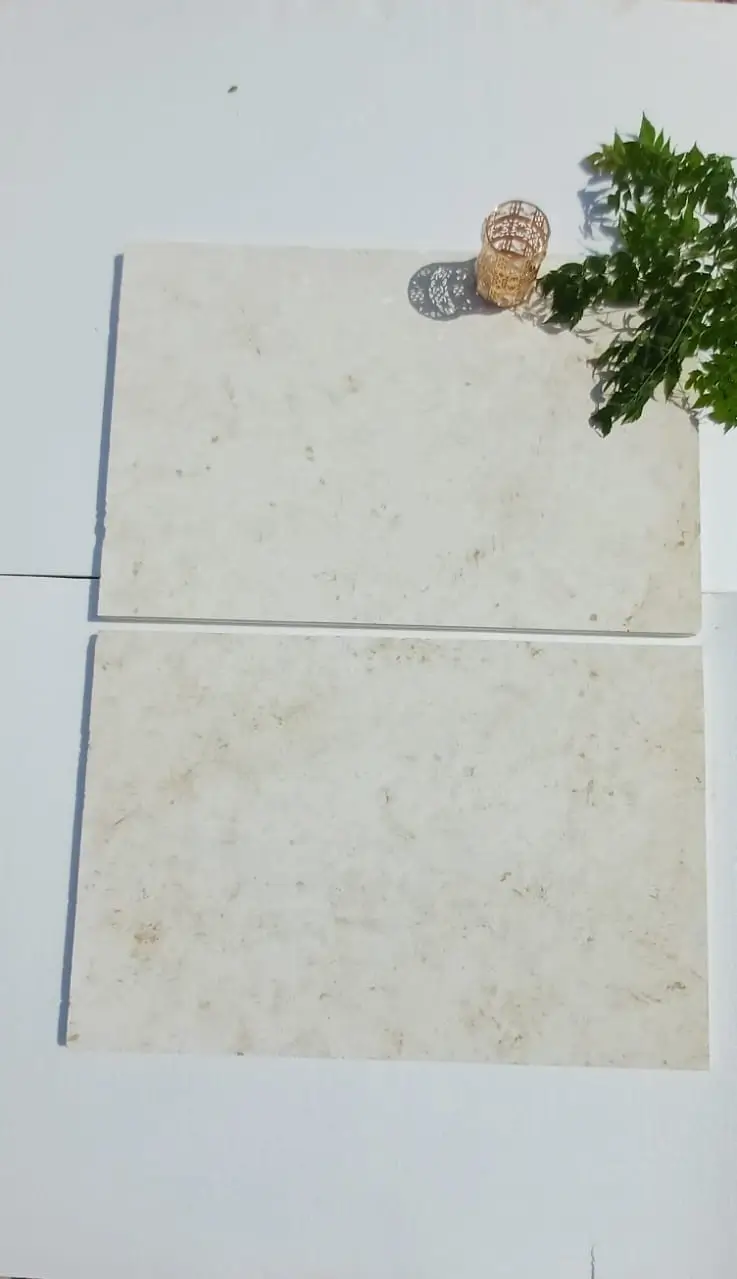
Material Options Explained: What Each Surface Actually Delivers
Natural stone for garden stepping stones spans a performance range that synthetic alternatives can’t match — each material brings a distinct combination of density, texture, and weather response. The specification question isn’t which stone is best in the abstract; it’s which stone fits your specific load requirements, maintenance appetite, and aesthetic goals.
Limestone: The Workhorse of Garden Paths
Limestone delivers compressive strength in the 8,000–15,000 PSI range depending on quarry source and density classification, making it entirely suitable for residential foot traffic. Its natural surface texture provides coefficient of friction values that keep footing secure even when the stone is wet — a practical advantage that polished materials can’t match in an outdoor context. According to NSI limestone properties and specifications, the material’s crystalline structure and absorption characteristics directly affect long-term surface weathering and suitability for exterior applications.
Tumbled limestone edges soften the formal look of cut stone and integrate naturally into cottage or informal garden styles. The trade-off is dimensional inconsistency — tumbled pieces vary in thickness by 5–8mm, which means your bedding layer needs to accommodate variation rather than assuming a uniform depth.
Bluestone: Density and Durability in One Package
Bluestone’s dense, fine-grained structure makes it one of the most dimensionally stable options you can specify for a stepping stones for gardens application. Thermal expansion coefficients stay low — typically in the 4–5 × 10⁻⁶ per °F range — which means freeze-thaw regions see minimal joint movement over the years. The surface holds up to abrasion better than softer sedimentary options, and the natural cleft finish provides excellent grip underfoot without any additional texturing treatment.
Flagstone: Natural Variation as a Design Feature
Flagstone stepping stones offer something that uniform-cut materials don’t — the visual authenticity of genuine geological variation. Each piece differs in color tone, veining, and edge character. The practical challenge is that flagstone thickness can range from ¾ inch to 2½ inches within the same pallet, so your base preparation needs to accommodate shimming and leveling work that uniform-cut slabs don’t require. As noted in ASLA natural stone walkway and stepping stone design guidance, material selection for walking surfaces should account for both surface texture performance and the underlying drainage design that keeps paths stable across seasonal moisture cycles.
Granite: When Longevity Is the Priority
Granite stepping stones are the specification choice when you want to set the path once and walk away. Compressive strength commonly exceeds 19,000 PSI, abrasion resistance is outstanding, and the material shows virtually no absorption — meaning freeze-thaw spalling simply isn’t a concern. The weight-per-piece demands careful handling during installation, and the higher material cost reflects genuine performance longevity. For high-traffic garden entries and formal paths that need to look sharp for decades, granite justifies the investment.
Thickness Requirements for Long-Term Stability
Here’s where specifiers routinely undersell their installation. The structural minimum for a garden stepping stone used in typical foot traffic is 1.5 inches — but that’s a floor, not a target. At 1.5 inches, any stone with natural fissures or inconsistent density is vulnerable to fracture when point-loaded at its unsupported center. A 2-inch nominal thickness is the professional standard for reliable performance, and 2.5 inches is appropriate for larger format slabs (anything over 24 inches across).
The physics are straightforward: a stepping stone’s load-bearing capacity scales with the square of its thickness. A 2-inch slab doesn’t just offer 33% more capacity than a 1.5-inch slab — it offers roughly 78% more resistance to flexural stress at mid-span. That distinction matters most for large irregular flagstones, where unsupported spans between aggregate contact points can be significant.
- 1.5 inch minimum for small-format stones under 16 inches across, stable aggregate base only
- 2 inch standard for most garden stepping stones in the 16–24 inch range
- 2.5 inch recommended for large-format slabs over 24 inches or irregular flagstone with thin sections
- 3 inch specification appropriate for vehicular-adjacent paths or areas with significant soil movement
Base Preparation and Drainage: The Hidden Variables
You can select the finest slab in the quarry and still end up with a failed path if the base work doesn’t account for how water moves beneath each stone. This is the assigned angle for good reason — drainage design is genuinely the most consequential factor in stepping stone longevity, and it gets underweighted in most installation discussions.
The base structure for a garden with stepping stones needs to perform two distinct functions: distribute point loads laterally to prevent settlement, and allow sub-surface water to escape rather than accumulate. These aren’t competing goals, but they do require specific aggregate selection. A well-graded crushed stone base (typically ¾-inch clean crushed stone, 4–6 inches compacted depth) accomplishes both. Fine limestone screenings or stone dust, by contrast, compact beautifully and feel stable initially — but they can become hydrophobic when saturated, trapping water beneath each stone and accelerating frost heave in freeze-thaw climates or surface erosion in heavy rain regions.
How Rainfall Patterns Affect Base Depth
Regions with heavy rain seasons — whether driven by monsoon patterns, hurricane-track precipitation, or extended wet periods — place different demands on your base structure than drier climates. In areas where soil can receive 4–6 inches of rain in a 24-hour event, you’re not designing a base for average moisture; you’re designing for saturation. Your aggregate base needs to be thick enough that saturated soil settlement beneath it doesn’t translate into surface movement at the stepping stone level.
A 4-inch compacted base handles most residential conditions in moderate rainfall zones. Step that up to 6 inches in high-precipitation environments, and consider a geotextile fabric layer between subgrade soil and aggregate to prevent fines migration upward over time. In areas prone to standing water or flooding risk, stepping stones set directly on aggregate without any mortar are actually preferable — they allow the path to flex slightly with ground movement rather than crack at a rigid mortar bond.
At Citadel Stone, we recommend specifying stepping stone thickness and base depth together as a system rather than treating them as independent decisions. The base and the slab interact — a thicker base compensates somewhat for a thinner slab, but you can’t make a 1-inch stone perform like a 2-inch stone regardless of what’s underneath it.
- Moderate rainfall zones: 4-inch compacted crushed stone base, no geotextile required for most clay-free soils
- High-precipitation zones: 6-inch compacted base, geotextile fabric between subgrade and aggregate
- Drought-cycle climates: Focus on crack-resistant dense stone; shrink-swell soils demand thicker base regardless of precipitation
- Heavy seasonal rain regions: Dry-set installation preferred over mortared setting to allow sub-surface drainage flexibility
- Areas with flooding risk: Elevate path slightly above surrounding grade; use permeable jointing material between stones
Spacing and Joint Design for Garden Stepping Stone Paths
Joint width between stepping stones affects both function and aesthetics in ways that aren’t always obvious until after installation. The purely functional question is: how wide a gap allows groundcover, grass, or gravel to establish between stones without compromising trip safety? The aesthetic question is: does tight spacing read as a continuous paved surface, or does the space between stones become a design element in itself?
For flush-set stepping stones through lawn, tight joints of ½ inch to 1 inch let grass establish cleanly between stones, keeping the path looking intentional rather than accidental. For stepping stones set through a gravel garden or between low groundcover plantings, generous joints of 2–4 inches invite planting material to fill and soften the path edge. Make this decision before setting your stones, because it determines your center-to-center spacing and therefore your overall path rhythm.
Explore the full range of natural stone options available for paths and walkways — Citadel Stone stepping stones for gardens offers materials across size ranges and finishes suited to every garden style, from formal rectangular cuts to naturalistic flagstone and irregular stepping pads.
Finish Selection and Slip Resistance
Surface finish is where aesthetics and safety intersect, and it’s a decision with real consequences in a garden context where surfaces get wet reliably. The finish hierarchy for outdoor stepping stones, from safest to least safe when wet, runs: natural cleft → sawn and flamed → honed → polished. Polished surfaces are inappropriate for any exterior stepping stone application, full stop.
Natural cleft finishes — the split face you get with flagstone, slate, and some limestone — deliver the highest natural coefficient of friction because the micro-texture is irregular and deep. Sawn surfaces that have been flamed or brushed add mechanical texture back to a machine-cut face. Honed finishes sit in a middle range: smooth enough to read as refined, but still providing adequate grip for most users on a level surface. The CDC slip-and-fall prevention guidelines for outdoor walking surfaces reinforce that surface texture and drainage design together determine actual slip risk — even a textured stone becomes hazardous if water can’t drain away from the surface efficiently.
- Natural cleft: Highest slip resistance, most natural appearance, slight variation in surface plane
- Flamed or thermal: Excellent outdoor grip, uniform surface plane, works with formal and informal designs
- Brushed: Good grip, slightly refined appearance compared to flamed
- Honed: Adequate for dry climates, marginal in wet conditions on level surfaces, not recommended for sloped paths
- Polished: Unsuitable for exterior stepping stones regardless of material
Sourcing, Warehouse Stock, and Project Planning
Material consistency across a stepping stone path matters more than most clients expect at the specification stage. Stones from the same quarry batch share the same color range, thickness tolerance, and surface character — mix batches and you can end up with a path that looks like it was assembled from two different projects. Your sourcing decision should include confirming that the supplier can fulfill your full quantity from a single production run.
Warehouse stock levels directly affect your project schedule. Citadel Stone maintains national warehouse inventory for the most popular stepping stone materials, which typically compresses lead times to 1–2 weeks versus the 6–8 week import cycle that special-order stone requires. Verify your material is in stock before finalizing your installation dates — a truck delivery that arrives three days into an installation because the stone was back-ordered costs more in mobilization delays than any price difference between stocked and special-order material.
Calculate your quantity with a 10–15% overage on top of your measured coverage area. Stepping stone installation involves on-site cutting for irregular edges, the occasional slab that reveals an internal fracture once it’s moved off the pallet, and the practical reality that you want spare material on hand for future repairs rather than scrambling to match discontinued stock years later. Your truck delivery should arrive with complete quantity plus overage — splitting delivery into two shipments doubles your handling costs and risks a color-variation mismatch between runs.
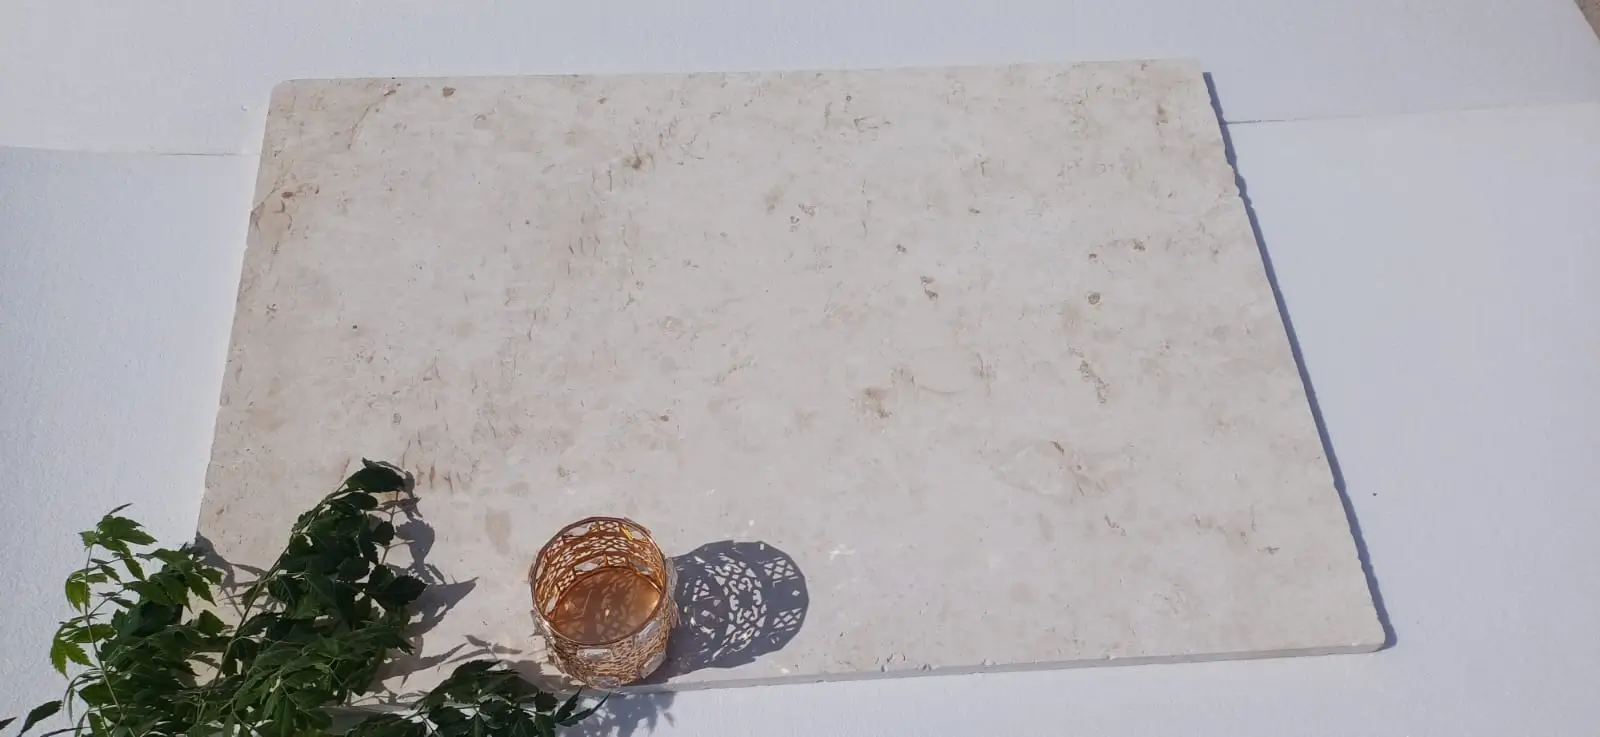
Setting Methods Compared: Dry-Set Versus Mortared Installation
The choice between dry-set and mortared stepping stone installation shapes both the installation process and the long-term maintenance profile. Dry-set stones — seated directly on a compacted aggregate bed with jointing sand or gravel between them — can shift slightly with ground movement and are straightforward to relay when settlement occurs. Mortared stones bond rigidly to a concrete substrate, which eliminates minor movement but means any significant ground shifting causes cracking rather than displacement.
For most garden stepping stone applications, dry-set is the professional recommendation. Garden soils are living systems that expand, contract, and shift with seasonal moisture and root growth. A rigid mortar installation fighting against that movement will eventually crack — the only question is when. Dry-set installations, done properly with a stable compacted aggregate base, last as long as mortared work in typical residential conditions and are far easier to repair when maintenance is needed.
As the ADA walkway surface firmness and accessibility standards note, stability and firmness of walking surfaces depend significantly on how well the base structure is maintained beneath the finished surface layer — not just the surface material itself. This principle applies equally to residential garden paths: the aggregate base is doing the structural work; the stone surface is expressing the design intent.
- Dry-set on compacted aggregate: Best for most garden paths, forgiving of seasonal ground movement, repairable
- Mortar-set on concrete slab: Appropriate for formal high-traffic entries where rigid stability is prioritized
- Sand-set with polymeric joint sand: Good middle option that resists weed intrusion while maintaining drainage flexibility
- Adhesive-set on existing concrete: Only viable where existing substrate is structurally sound and free of cracks
Maintenance and Long-Term Care
Natural stone stepping stones are low-maintenance compared to most landscape materials, but “low” doesn’t mean “none.” Your maintenance schedule depends primarily on the stone type and whether you’ve applied a surface sealer. Dense materials like granite and bluestone require minimal intervention — a biennial inspection to check for settlement or rocking, and occasional cleaning to remove organic debris accumulation. More porous stones like limestone and certain flagstone varieties benefit from a penetrating sealer applied every 3–5 years to slow surface absorption and reduce biological growth (moss, algae) in shaded sections.
The most common maintenance issue covered in any garden stepping stones guide is stone settlement — individual slabs that have sunk or tilted over time. This is almost always a base preparation issue rather than a stone quality issue. Resetting a settled stone involves lifting it, adding material to the low side of the aggregate bed, re-compacting, and re-setting. It’s a 30-minute job when you catch it early; it’s a much larger intervention if multiple adjacent stones have settled and the path geometry has shifted significantly.
- Inspect for rocking or settlement annually — address early before adjacent stones are affected
- Clean biological growth (moss, algae) with a diluted pH-neutral cleaner; avoid acidic cleaners on limestone and travertine
- Apply penetrating sealer every 3–5 years on porous materials in wet or shaded locations
- Top up jointing sand annually — loss from rain runoff and biological activity is normal
- Check edge stones seasonally where they border lawn — grass root intrusion can gradually shift stone alignment
Getting Your Garden Stepping Stone Specifications Right
The best stepping stone path is the one where every specification decision — size, thickness, material, finish, base depth, and setting method — was made as part of a coherent system rather than a series of independent choices. Material selection gets most of the attention in the planning stage, and it deserves that attention, but it’s the base preparation and drainage design that quietly determine whether your path looks as good in year fifteen as it did when it was installed. A garden with stepping stones done well reads as effortless and permanent; done poorly, it starts showing its problems in the second wet season.
Your project may also involve other natural stone elements beyond the path itself — and understanding how different materials perform across applications helps you make consistent decisions throughout the landscape. For a different dimension of natural stone selection, choosing marble for interior stone surfaces explores how Citadel Stone materials perform in a contrasting but complementary context. Choosing the right stone from Citadel Stone means considering not just appearance but how spacing and slab depth affect long-term path stability.