

Most of the failures we see in basalt pavers over concrete trace back to decisions made before a single paver is set — specifically, whether the existing slab was properly assessed for levelness, structural integrity, and drainage geometry. Laying basalt pavers on a concrete slab is a legitimate and highly efficient installation method, but the slab beneath your pavers is doing real structural work, and ignoring its condition at the outset is the single fastest way to end up relaying the job within a few seasons.
Assessing the Existing Slab Before You Start
Your first step is a methodical survey of the concrete surface — not a quick visual pass, but a deliberate check with a straightedge and a level. You’re looking for three things: surface deviation across any two-metre span, active cracking that indicates ongoing movement, and low spots where water pools after rain.
Surface deviation matters because your setting material has a finite tolerance for variation. Most polymer-modified mortars bridge small hollows reasonably well, but anything beyond roughly 10 mm under a two-metre straightedge will transfer that irregularity upward into your paver plane unless you correct it with a skim of patching compound first. Active cracks — ones that widen and close seasonally or show vertical displacement between faces — are a more serious concern. A dormant crack that has been stable for years can be bridged with a movement joint directly above it, but an active crack needs to be assessed by a structural engineer before you proceed.
- Check the slab slope: a minimum 1% fall away from the structure is the baseline for drainage; less than that and you need to address ponding before laying anything over it
- Tap the surface systematically with a hammer — a hollow sound reveals delaminated concrete that will eventually telegraph movement into the overlay
- Inspect the perimeter: a slab edge that has settled relative to adjacent paving will create a level mismatch at your threshold that is very difficult to correct after the fact
- Check for existing expansion joints in the slab — their positions must be honoured with matching movement joints in your basalt paver installation above
Why Basalt Works Well as a Concrete Overlay
Basalt’s dense, low-absorption volcanic structure makes it particularly well-suited to mortar-bonded overlay applications. Its dimensional stability across temperature variation means the paver itself contributes less differential movement than softer, more porous stones would. According to USGS basalt volcanic rock properties, basalt forms through rapid cooling of volcanic lava, producing a fine-grained, highly dense igneous structure with low void content — characteristics that translate directly to a stable, exacting overlay paver.
The concrete slab provides the rigid base that a mortar-bonded stone overlay requires. Unlike a sand-set installation, which needs a correctly graded granular sub-base built from grade up, a mortar bond to an existing concrete slab gives you a proven structural platform. The key trade-off is that the two materials — basalt and concrete — have slightly different coefficients of thermal expansion. That difference is manageable with correctly spaced movement joints; it becomes a delamination risk when those joints are omitted or under-sized.
For the broader context of how volcanic stone performs in dimensional paving applications, basalt volcanic rock formation and construction properties details the mineralogical composition that gives the stone its characteristic hardness and low porosity — both relevant when you are specifying an overlay on an outdoor slab exposed to weather cycling.
Choosing Your Setting Material and Bed Depth
The standard approach for basalt pavers on a concrete slab is a polymer-modified mortar bed, sometimes called a semi-dry mix or a slurry-and-mortar system depending on the paver thickness you are using. Your mortar bed depth needs to be coordinated with your finished surface height — this is particularly relevant when you are overlaying an existing patio where door thresholds, step edges, and drainage grate heights are already fixed.
A bed of between 25 mm and 40 mm is typical for an overlay scenario, allowing enough body to bed the paver flat while still leaving room for minor surface correction. Thinner beds — under 20 mm — are difficult to work with because any surface variation in the concrete pushes through and you lose the ability to back-butter effectively. Thicker beds beyond 50 mm add dead load and can increase thermal mass in a way that slows the curing schedule in cold conditions.
- Use a polymer-modified mortar rated for exterior stone; standard grey OPC mortar without a polymer additive has lower bond strength and is more prone to failure at the paver-mortar interface when the assembly cycles through seasonal temperature change
- Prime the concrete slab with a bonding agent before laying — this is the step most installers skip on small jobs, and it consistently reduces long-term bond reliability
- Back-butter each paver individually; comb-only application leaves voids under the paver that collect water and freeze in cold climates, eventually fracturing the bond line
- Check coverage on the first few pavers by lifting them immediately after pressing — you should see mortar transfer across at least 85–90% of the back face
What Thickness Should Your Basalt Pavers Be?
Thickness selection is the specification decision that most directly links to your finished height constraint. Basalt pavers on a concrete slab in a pedestrian patio context are typically supplied in 20 mm or 30 mm nominal thickness. The 20 mm format suits installations where the overlay height budget is tight — a door threshold that cannot be raised, or a step edge that dictates a maximum overlay build-up. The 30 mm format gives you a more robust paver body, reduces the risk of edge chipping during installation, and allows slightly more tolerance in the mortar bed flatness.
You can browse thickness options and format sizes across our basalt paving collection and match them to your overlay height budget before committing to a mortar bed design. Citadel Stone cuts basalt pavers to order at our selected quarries, so format and thickness can be coordinated with your project drawings rather than adapted to stock dimensions.
For driveway applications — if your existing concrete extends into a vehicle access area — the specification changes: use setts or cobbles at least 3.5 in (4 in standard) thick on a compacted base, or pavers 2 in (5 cm) or thicker mortar-bonded to a reinforced concrete slab. A pedestrian-grade 20 mm or 30 mm paver is not appropriate for vehicle loads regardless of how strong the underlying concrete is.
Movement Joints: The Detail That Holds the Installation Together
Here’s what most installers underestimate on concrete overlay jobs: the slab beneath already has its own thermal and moisture movement history baked into it. Any existing cracks are records of that movement. Your new paver assembly is going to experience its own movement cycle on top of that, and the two systems need to be decoupled at regular intervals through movement joints filled with a compressible sealant — not grouted with rigid mortar.
The general rule is to honour every existing slab control joint with a movement joint directly above it. Beyond that, movement joints in the paver field are typically spaced to suit the paver format and the site’s exposure — a fully exposed south-facing patio with dark basalt will accumulate more thermal movement than a shaded courtyard installation, so joint spacing should be tighter on the former. Your setting material manufacturer’s technical data sheet will carry spacing guidance calibrated to their product’s modulus; use that rather than a generic rule of thumb.
- Movement joints must be filled with a polyurethane or silicone sealant — never rigid grout or mortar
- Perimeter joints where the paver field meets a wall, step riser, or fixed structure are just as important as field joints; bond the paver to the wall and you create a point of concentrated stress when the assembly expands
- Joint width should accommodate the full movement range of the assembly; too narrow a joint and the sealant gets overstressed; too wide and it looks unfinished — your sealant manufacturer publishes minimum and maximum joint widths for each product
- In freeze-thaw regions, movement joints are especially critical because water that gets into a partially open joint freezes and expands, progressively widening the failure
Drainage and Water Management Across the Paver Surface
The drainage geometry you inherit from your existing concrete slab largely determines how water behaves across your finished basalt paver surface — and this is worth thinking through carefully before you lay a single paver. A mortar-bonded overlay is effectively an impermeable surface. Water does not pass through it; it runs across it. That means whatever fall exists in the original slab is carried forward into the paver surface, modified only by the flatness of your mortar bed.
In regions with significant rainfall — whether from seasonal monsoon patterns or prolonged wet winters — a slab that was originally graded to drain adequately when bare may prove insufficient once covered with a flush-jointed stone overlay. Grout joints in a tight-jointed paver field shed water faster than the slab’s original broom finish did, which can concentrate runoff at low points or toward structures. Review your drainage geometry before laying, and consider whether channel drains or slot drains at the perimeter are warranted to handle peak rainfall without backing water against the building.
Basalt’s low absorption characteristics mean the stone itself is not the variable in the drainage equation. The layout geometry, the grout joint width, and the surface fall are the controlling factors. In drought-cycle climates where rain arrives in intense, infrequent bursts, drainage design becomes even more important because the soil immediately adjacent to the slab may not be conditioned to absorb runoff quickly when rain finally comes.
- Confirm the slab’s existing fall direction and rate before ordering; a 1.5% to 2% fall is workable for most covered patio and courtyard applications
- Low spots that pool water will eventually compromise the mortar bond through sustained moisture exposure, especially in climates with frequent wet-dry cycling
- In flood-risk or high-rainfall zones, specify continuous perimeter drainage rather than relying on surface run-off alone
- Check that your downspout discharge points do not direct water onto the paver field; concentrated discharge across stone and mortar accelerates joint erosion
Choosing the Right Finish for Your Application
Finish selection is one of the most consequential decisions in a basalt paver overlay project, and it is worth making deliberately rather than defaulting to whatever is most readily available. The finish affects texture, maintenance frequency, and how the paver surface reads aesthetically once laid.
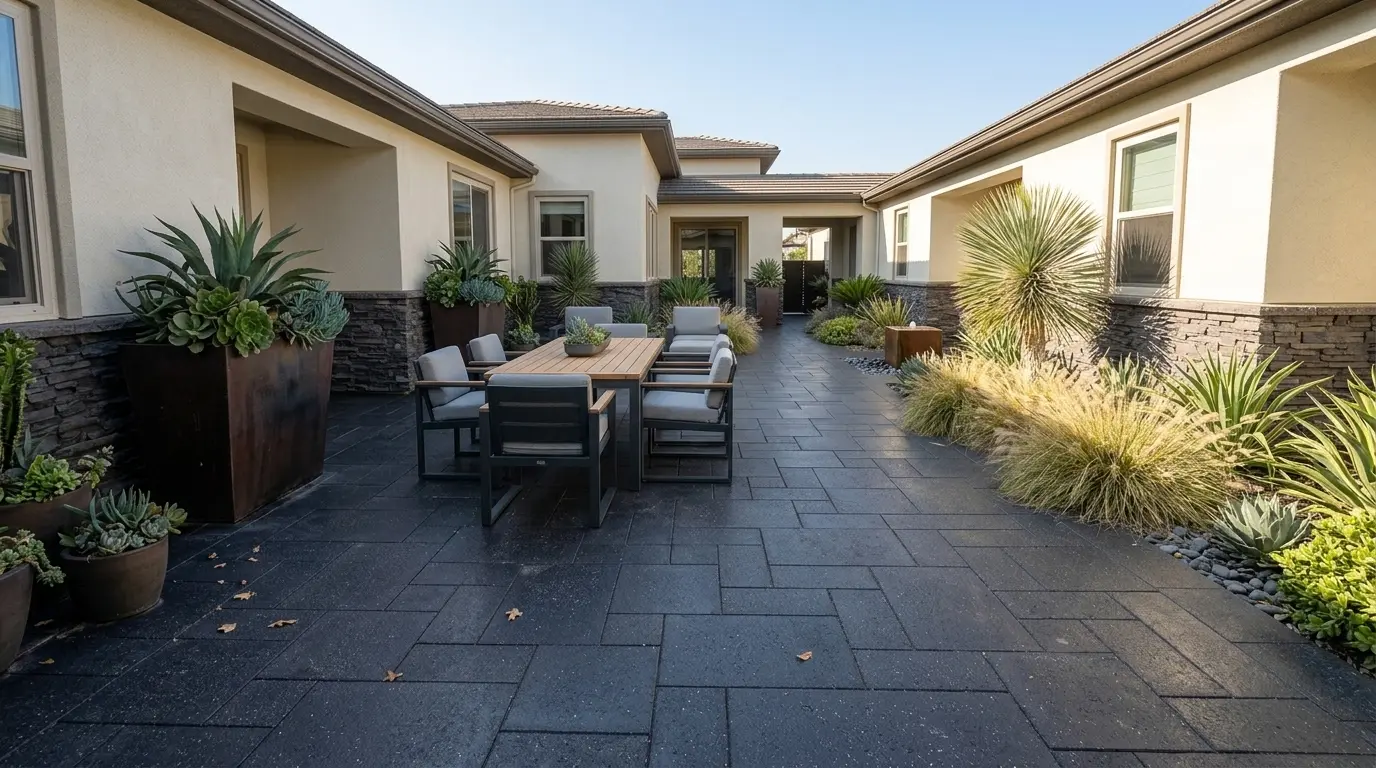
For covered patios, indoor-outdoor transitions, and dry external surfaces, a Honed 60 Grit or Honed 120 Grit finish gives you a clean, refined appearance that suits both contemporary and traditional settings. For exposed outdoor patios and terraces that get wet in rain, a Brushed 36 Grit or Brushed 80 Grit finish leaves a more open matte texture — the Brushed 36 suits patios and pool surrounds, while the Brushed 80 works well for barefoot terraces and pool house approaches. For pool decks, wet steps, and any sloped surface that stays wet, choose a bush-hammered finish. For other outdoor paths, bush-hammered or brushed in the coarsest grit both work — check a sample.
A polished finish is appropriate only for dry indoor surfaces: interior floors, feature walls, fireplace surrounds, and vanity tops. Never specify a polished basalt finish for an exterior concrete overlay that will be exposed to rain. The Natural Stone Institute’s guidance on igneous stone paving technical standards reinforces the principle that finish selection should be matched to the application’s exposure conditions — not chosen purely on aesthetics.
Grouting, Sealing, and Ongoing Care
Once your basalt pavers on a concrete slab are bedded and the mortar has cured fully — typically a minimum of 48 to 72 hours depending on temperature and humidity — grouting can proceed. Use a grout formulated for natural stone and exterior use; standard ceramic tile grouts often lack the flexibility and density needed for outdoor stone joints subject to thermal cycling. A polymer-modified grout with a joint width matched to your paver layout is the standard specification here.
Sealing basalt is strongly recommended for exterior overlay installations. Basalt’s absorption is relatively low compared with limestone or sandstone, but it is not zero, and an impregnating sealer applied to a clean, dry surface will reduce staining uptake and slow the rate of efflorescence that can appear in the first months after mortar installation. Apply sealer to the interval your sealer manufacturer states — typically every two to five years depending on exposure and traffic level. Do not apply sealer to a surface that has not fully dried and cured, or you will trap moisture below the stone and risk the bond line.
- Efflorescence — the white mineral deposit that migrates through mortar joints in the first season — is normal and does not indicate a failed installation; treat it with a dilute acid wash formulated for natural stone and reseal afterward
- For basalt pavers on a concrete slab in shaded or damp locations, check periodically for biological growth; a mild biocide appropriate for natural stone is the correct treatment, not a pressure washer at close range, which can erode grout joints over time
- Avoid de-icing salts on basalt overlays in freeze-thaw climates; salt crystallisation in the grout joints and mortar bed is a progressive failure mechanism
- Inspect movement joints annually and re-seal any that show signs of sealant shrinkage or adhesion failure before water gets into the joint body
Project Planning, Ordering, and Delivery
Calculating your order quantity accurately is straightforward but deserves a careful pass before you confirm. Measure the net paver area, add a cutting allowance — typically 10% for a straightforward rectangular layout, up to 15% for diagonal patterns or irregular perimeter shapes — and confirm the format and thickness with your drawings. Citadel Stone stocks basalt at our selected quarries and cuts to order, so lead times are quoted with the order and should be confirmed early in the project schedule.
Your project’s access constraints are worth confirming before your delivery date is set. Basalt pavers are dense material and arrive on pallets; a standard delivery requires adequate access for the delivery vehicle and a safe offloading zone within reasonable distance of the installation area. If your site has restricted access — a narrow driveway, a gated community, or limited turning space — communicate that clearly when placing your order so that the delivery can be arranged appropriately. Offloading arrangements are confirmed before the delivery date to avoid delays on the day.
Plan your installation sequence to work in manageable bays rather than attempting to lay the entire field in one session. Working in bays of a size you can complete before the mortar bed approaches its initial set time keeps you in control of the surface level and reduces the risk of lipping between adjacent pavers.
Key Considerations for Basalt Pavers Over Concrete
Laying basalt pavers over concrete is one of the more efficient overlay systems available for transforming an existing patio — but the outcome is determined almost entirely by the preparation work that precedes the first paver. Assess the slab condition thoroughly, design your movement joints to honour the slab’s existing joint pattern, coordinate your paver thickness to your finished height constraints, and match your finish to the surface’s actual exposure conditions.
Drainage geometry deserves the same attention as structural adequacy. A well-graded slab that sheds water cleanly will deliver decades of service from a correctly laid basalt overlay. One that ponds water will put continuous stress on the mortar bond, the grout joints, and the sealant — regardless of how well the stone itself performs. Build the drainage design into your specification before you order, not as an afterthought after the pavers are down.
If your project extends to other areas of the outdoor space, natural stone works well across a range of complementary applications. basalt fire pit surround options and edging covers how the same material performs in a related hardscape context, including the cut sizes, finishes, and layout approaches that suit a fire pit or outdoor entertaining setting. Before covering an old slab, check its levels and cracks, then choose Citadel Stone basalt pavers in a thickness that suits the finished height.
Related reading: large format basalt pavers · how basalt is formed · basalt rock type explained.