

What Your Stone Type Reveals Before Installation Begins
Natural stone tile flooring rewards the specifiers who understand what the quarried slab is telling them before a single tile is set. Absorption rate, modulus of rupture, and surface texture aren’t just laboratory numbers — they’re the variables that determine whether your floor looks identical in year fifteen as it did on install day. Most purchasing decisions focus on colour and format, which is understandable, but the projects that age gracefully are the ones that started with a material analysis, not a mood board.
Your material category shapes every downstream decision. Limestone, travertine, basalt, and slate each carry a distinct performance profile that affects adhesive selection, grout joint width, sealing schedule, and even the installation window you should be targeting. Getting fluent in those differences early means fewer surprises mid-project and zero costly retrofits once the floor is in service.
Limestone and Travertine: Reading the Performance Data
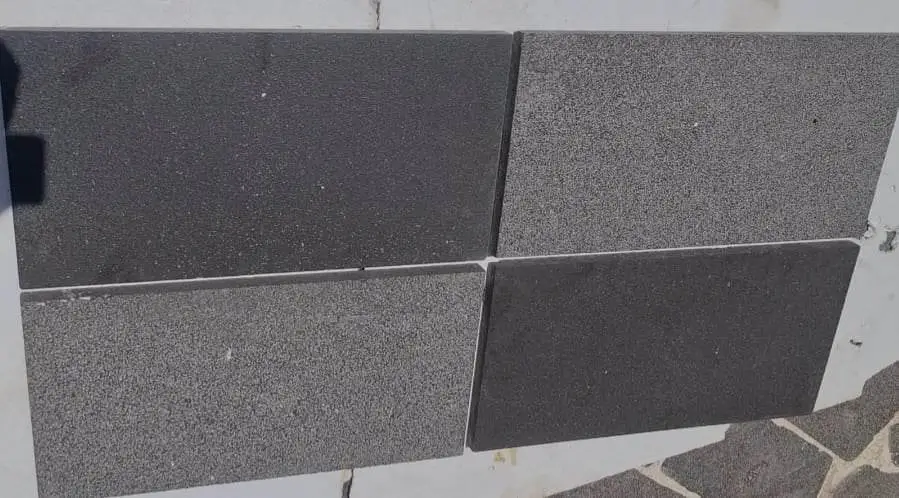
Floor tiles limestone represents one of the broadest performance spectrums in natural stone. Dense, fine-grained limestone from high-pressure geological formations — compressive strengths above 8,000 PSI — performs reliably under heavy foot traffic, trolleys, and point-loaded furniture. Porous, oolitic varieties from shallower deposits may test below 4,000 PSI compressive strength, which makes them a specification risk in commercial or high-traffic residential contexts. The NSI ASTM stone tile standards detail absorption and flexural strength benchmarks — reviewing those thresholds before you commit to a limestone product is time well spent.
Travertine introduces a different challenge: the void structure. Those characteristic pits are open pore channels that vary in density from vein-cut to cross-cut faces, and filling protocol matters more than most installers acknowledge. Epoxy-filled travertine holds up in wet areas; unfilled travertine in a shower recess will harbour moisture and degrade grout faster than any other variable you can control. Your specification sheet should state fill type explicitly, not leave it as a field decision.
- Limestone absorption rate (ASTM C97) below 3% is the threshold for most interior wet-area applications
- Travertine modulus of rupture should meet or exceed ASTM C1502 minimums for flooring use
- Cross-cut travertine shows tighter void distribution than vein-cut — relevant for polished finishes in high-traffic corridors
- Grey stone limestone in honed finish typically achieves a DCOF above 0.42 — meeting the ANSI A326.3 minimum for wet interior floors
Format and Thickness Decisions That Drive Real Performance
Large-format natural stone tile flooring — anything from 24×24 inches upward — demands a flatter substrate than smaller formats. The industry’s accepted maximum lippage for rectified large-format tiles is 1/32 inch for tiles with less than a 15-inch side; that tolerance tightens for the 24×48-inch and 32×32-inch slabs appearing in contemporary interiors. Your subfloor flatness assessment isn’t optional here — it’s the single most common root cause of cracked tiles and hollow-sounding installations that show up three to six months post-install.
Thickness selection ties directly to your subfloor type and load scenario. Standard 3/8-inch (10mm) tiles suit most residential concrete slabs. Jump to 3/4-inch (20mm) or 1-1/4-inch (30mm) when you’re dealing with uneven screeds or situations where point loads exceed 500 PSI — think commercial entrances with trolley traffic. Tumbled limestone floor tiles in the 3/4-inch range also give you the mass to resist edge chipping in high-wear transition zones; the tumbled profile already softens the corner geometry, but thickness is what prevents fracture propagation under impact.
- Substrate flatness tolerance: no more than 3/16 inch deviation over a 10-foot span for large-format stone
- 3/8-inch tiles on concrete slab — standard residential application
- 3/4-inch and above for commercial corridors, entry vestibules, and uneven mortar beds
- Rectified edges require tighter lippage control than calibrated or tumbled edges
- Nominal tile sizes run 1/8 inch smaller than stated dimensions — confirm actual dimensions with your supplier before planning grout joint layout
Finish Selection and Slip Resistance: What the Numbers Mean
The finish you specify isn’t just aesthetic — it’s a safety and maintenance decision that spans the floor’s lifetime. Polished limestone offers very little underfoot texture, and can fall below the 0.42 wet DCOF threshold of ANSI A326.3 in wet-entry conditions. Honed and brushed finishes carry meaningfully more texture, which gives you wet-floor safety margin in kitchens, bathrooms, and covered entries. The ANSI A326.3 — and the updated BOT-3000E dynamic test — provide the measurement framework your specification should reference.
Tumbled limestone floor tiles operate at the upper end of the traction range because the surface micro-texture created by the tumbling process interrupts the boundary layer that makes polished stone slippery when wet. That texture does, however, trap fine particulate more readily than honed surfaces, which means your cleaning protocol needs a softer-bristle approach and a more frequent schedule in entry zones. Plan for that maintenance reality before the client signs off on the finish selection.
- Polished: DCOF typically 0.35–0.45 dry — suited to low-traffic interior areas away from water ingress
- Honed: DCOF typically 0.50–0.58 — the standard recommendation for bathrooms, kitchens, and covered entries
- Brushed: DCOF typically 0.55–0.65 — suitable for most commercial interiors and wet-risk zones
- Tumbled: highest traction of the four finishes — preferred where barefoot use and wet floors coincide
- Always request the specific DCOF test result from your supplier — finish names vary between quarries, and actual traction values differ
Adhesive and Mortar Selection for Natural Stone
Your adhesive choice carries more consequence with natural stone tile flooring than with porcelain because stone is reactive. White or grey stone with iron mineral content will bleed rust staining through white-bodied mortars when moisture is present — a problem that typically appears six to twelve months post-installation and requires costly remediation. Specify non-reactive, polymer-modified thin-set for all ferrous-mineral stone types: most dark limestones, some grey basalts, and any stone with visible iron-oxide veining. The TCNA natural stone tile installation standards address mortar compatibility by stone type and provide the method specifications your installer needs to follow.
Coverage matters as much as mortar type. The TCNA standard requires 95% mortar contact for wet areas and 80% for dry interior floors. Field checks on large-format stone consistently find installers achieving 65–70% contact when back-buttering is skipped — which is exactly why lippage and hollow tiles develop. Require back-buttering on all tiles larger than 15 inches on any side, and perform random bond tests during installation to verify actual coverage.
For the Citadel Stone tile flooring range, our technical team reviews adhesive compatibility against each stone’s absorption profile before recommending installation systems — because a floor that performs well starts with the right mortar, not just the right stone.
Grout Joint Width, Movement Joints, and Thermal Cycling
Movement accommodation is where most natural stone tile flooring specifications fall short. Natural stone expands and contracts with temperature — limestone has a coefficient of thermal expansion around 4–8 × 10⁻⁶ per °F depending on density and mineral composition. A 20-foot run of limestone tile with zero movement joints and a 40°F seasonal temperature swing will generate stress that the grout joint simply cannot absorb. The result is grout cracking, then tile cracking, then substrate failure — typically in year two to four of a 20-year floor.
The standard practice is a perimeter movement joint at every wall interface and intermediate expansion joints at maximum 20-foot intervals in each direction on interior slabs. For radiant-heated floors — where the thermal cycling is daily rather than seasonal — reduce that interval to 12–15 feet and specify a flexible sealant rated for the expected temperature range rather than standard cementitious grout. Your installer should also understand that the thermal mass of natural stone means the floor surface temperature lags 15–20 minutes behind the radiant system cycle, which affects morning warm-up performance in freeze-thaw regions during winter months.
- Minimum grout joint for calibrated limestone: 3/16 inch — do not specify 1/8-inch joints for natural stone
- Tumbled limestone floor tiles require wider joints — 3/8 inch to 1/2 inch — to accommodate dimensional variation
- Movement joints at all wall/floor interfaces, columns, and changes in substrate type
- Intermediate movement joints every 20 feet on standard interior slabs; 12–15 feet on radiant-heated floors
- Flexible polyurethane or silicone sealant in movement joints — never cementitious grout
Seasonal Installation Timing and Temperature Windows
Adhesive and grout manufacturers publish curing temperature ranges, but those ranges assume a stable environment — which is rarely what your job site delivers during shoulder seasons. Standard polymer-modified thin-set specifies a substrate and ambient temperature window of 50°F to 90°F. Below 50°F, hydration of the cementitious component slows dramatically and early bond strength can fall 30–40% below rated values, which often won’t be apparent until foot traffic reveals hollow tiles weeks later. Above 95°F substrate temperature — common on slabs exposed to direct sun during summer — open time drops from the standard 20–30 minutes to as little as 8–10 minutes, which creates coverage failures on large-format tiles before the installer can adjust and back-butter effectively.
Scheduling your installation around these windows isn’t a luxury — it’s the difference between a first-attempt floor and a warranty callback. Early morning starts on warm-weather projects give you the best substrate temperature window: slab surfaces at 7:00 AM are typically 10–15°F cooler than at 1:00 PM, and that gap matters significantly for open time management. Conversely, in colder periods, afternoon installation after the slab has warmed for several hours produces more consistent results than early morning work on a cold concrete base.
- Optimal substrate temperature for most polymer-modified thin-sets: 55–85°F
- Check substrate temperature with a surface thermometer — not just ambient air temperature
- Morning installation preferred in warm periods: cooler slabs extend open time and improve coverage consistency
- Afternoon installation preferred in cool periods: slab has absorbed daytime warmth and cures more reliably overnight
- Grout curing is equally temperature-sensitive — protect freshly grouted floors from temperature swings below 50°F for a minimum of 72 hours
- Confirm warehouse delivery timing against your installation window — stone arriving in winter on an unheated truck should acclimatise to the installation environment for 24 hours before setting begins
Sealing Protocols and Long-Term Maintenance
The sealing decision for natural stone tile flooring is not one-size-fits-all, and the single biggest mistake is applying a topical sealer to a stone that needs an impregnating penetrating sealer — or vice versa. Penetrating sealers work below the surface to reduce absorption without altering the stone’s appearance or traction properties; they’re the correct choice for honed limestone, brushed travertine, and most exterior-grade applications. Topical sealers sit on the surface and can create a sacrificial layer that enhances gloss — appropriate for some interior polished applications but problematic outdoors where freeze-thaw cycling will delaminate the coating.
Your sealing schedule should be driven by the stone’s actual absorption rate, not a generic annual calendar. A densely packed grey stone variety might need resealing every three to four years; a more porous light-coloured limestone in a kitchen — where cooking oils and acidic liquids present daily — will benefit from biennial resealing. A simple water-droplet absorption test every 12 months tells you what no calendar can: if water absorbs in under 60 seconds, reseal. The NSI limestone maintenance and specification guidance provides the framework for matching sealer chemistry to stone absorption class.
- Penetrating impregnating sealer: correct choice for honed, brushed, and tumbled finishes
- Topical sealer: limited to specific polished interior applications — not for exterior or wet areas
- Apply sealer before grouting to prevent grout haze penetrating the stone face
- Re-apply when water droplets absorb in under 60 seconds at the surface — regardless of calendar schedule
- Acid-based cleaners will destroy sealers and etch calcite-based stone — specify pH-neutral cleaners in your maintenance documentation
Ordering, Warehouse Logistics, and Project Planning
Your project schedule depends on understanding the supply chain behind natural stone. Imported stone moves on 6–8 week ocean freight cycles, and any specification change after the container is loaded means a full-cycle delay. Citadel Stone maintains warehouse inventory of core limestone and stone tile products, which reduces lead times to 1–2 weeks for in-stock items — a significant scheduling advantage when your installation window is constrained by other trades or seasonal timing.
Order 10–12% overage on all natural stone tile flooring projects — not the 5% that works for uniform porcelain. Natural stone has inherent colour and vein variation between production batches, and a repair tile pulled from a different batch six months post-completion will never match the installed floor perfectly. That 10–12% buffer also covers the cuts around hearths, curved walls, and door frames that are almost always more wasteful than they look on the layout plan. Coordinate truck delivery access with your site logistics team early — large-format stone pallets typically weigh 1,500–2,500 lbs each, and a truck that can’t reach the building entry means manual re-handling that risks edge chipping before a tile ever reaches the subfloor.
- Order 10–12% overage for natural stone — not the 5% standard for porcelain
- Confirm lot numbers match across your entire order — natural stone varies between production runs
- Verify warehouse stock availability before committing your installation date to the project schedule
- Coordinate truck delivery access, pallet weight, and unloading equipment requirements in advance
- Store pallets on a flat, level surface under cover — do not double-stack pallet loads
Getting Natural Stone Tile Flooring Specifications Right
Natural stone tile flooring selection comes down to matching material performance to real project conditions — not selecting a colour sample that looks right under showroom lighting. Your specification should start with absorption rate, compressive strength, and finish traction data; move through mortar compatibility, movement joint planning, and seasonal installation windows; and finish with a sealing and maintenance protocol that the building owner will actually follow. Every one of those decisions has a measurable effect on how long the floor performs before it needs intervention. As you refine your project scope, natural stone installations often connect to broader hardscape decisions — paver patio layout ideas for outdoor spaces can inform how your interior stone selection extends to adjacent exterior applications. Product from Citadel Stone is finish-tested for foot traffic, so natural stone tile flooring holds up across busy interiors.
Related reading: why does limestone turn black · black limestone rock explained · outdoor patio tiles cheap.