Masonry stone veneer specifications hinge on a variable most buyers underestimate from the start — the difference between full-bed and adhered thin-veneer systems isn’t just thickness, it’s an entirely different structural logic. Get that distinction wrong at the specification stage and you’ll find yourself troubleshooting delamination, mortar bond failures, or substrate cracking well before the material reaches the end of its useful life. Understanding how masonry stone veneer behaves as a cladding system — not just as a decorative layer — is the foundation every successful installation rests on.
What Is Masonry Stone Veneer?
Stone veneer in a masonry context refers to a non-structural facing of natural stone applied over a backing wall or substrate to deliver the visual and tactile properties of full-stone construction at a fraction of the weight and material cost. The distinction between masonry stone veneer and full masonry construction matters enormously for engineering: veneer carries no structural load, but it must transfer its own weight reliably to the substrate through mechanical attachment, mortar beds, or both. According to The Masonry Society’s natural stone wall construction standards, the anchorage system — not the stone itself — is often the governing design element in veneer assemblies.
Natural stone veneer comes in two primary formats. Full-thickness veneer runs 3 to 5 inches deep and is used in applications where thermal mass, impact resistance, or a structural appearance is required. Thin veneer — typically 3/4 inch to 1.5 inches — is adhered directly to the substrate using polymer-modified mortars and is far more common in residential and light commercial projects. Each system has a distinct installation logic, and confusing one for the other is the most common field error seen in masonry stone veneer projects.
Material Types and Stone Selection
Material selection determines not only the aesthetic outcome but the long-term maintenance schedule, the sealing frequency, and how the installation responds to UV exposure over time. Natural stone veneer options range from sedimentary materials like limestone and sandstone to dense igneous options like granite and basalt. Each category performs differently under sustained sun exposure — and that matters significantly when specifying exterior-facing applications.
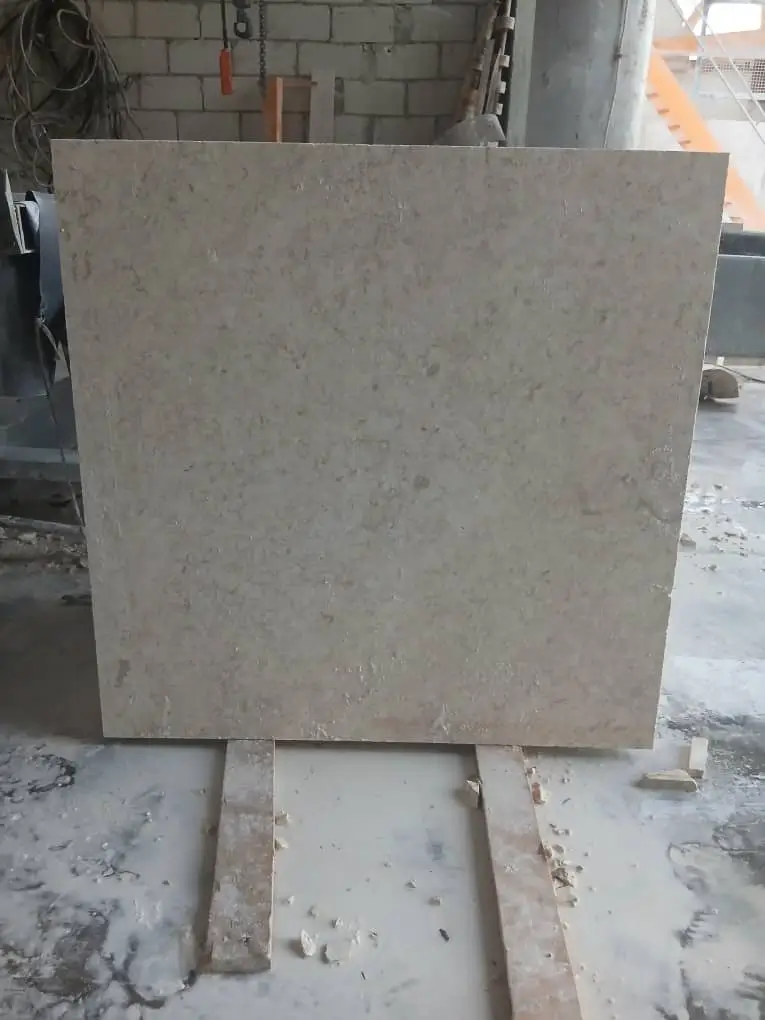
Limestone veneer is the most widely specified natural option for exterior walls in stone work masonry. Its consistent bedding planes allow clean splitting into veneer slabs, and its calcium carbonate composition gives it moderate porosity — typically 3 to 7 percent absorption by weight depending on formation. That porosity is beneficial for mortar bond development but requires a proper sealing schedule in exterior applications, particularly south- and west-facing walls where UV index is consistently high across spring and summer months.
- Limestone: absorption 3–7%, compressive strength 4,000–16,000 PSI, ideal for adhered thin veneer systems
- Sandstone: absorption 5–15%, softer surface prone to UV-driven surface oxidation if left unsealed beyond 18 months post-installation
- Granite: absorption under 0.5%, highly resistant to water to moisture and UV degradation, highest cost per square foot
- Basalt: dense igneous material, absorption under 1%, handles UV-exposed vertical installations with minimal color shift
- Travertine: open-pore structure, 5–10% absorption, requires filled-face veneer pieces for exterior vertical use to prevent water infiltration behind the mortar bed
Color retention under UV exposure is a genuine specification consideration, not just an aesthetic one. Lighter iron-rich stones — some sandstones and certain warm-toned limestones — will show surface oxidation as orange or rust-toning within 3 to 5 years on unprotected south-facing elevations. Apply a UV-stable penetrating sealer to these materials within 30 days of installation completion and repeat on a 2- to 3-year maintenance cycle.
Thin Veneer vs. Full-Bed Systems: Making the Right Call
The choice between thin adhered veneer and a full-bed system comes down to three factors: substrate type, wall height, and the load path available in the assembly. Thin veneer adhered with polymer-modified mortar is suitable for most residential applications below 30 feet in height, provided the substrate meets flatness tolerances of 1/8 inch over a 10-foot straightedge. Exceed that tolerance and hollow spots appear in the mortar bed — the earliest sign of a delamination risk that may not manifest visibly for 18 to 24 months.
Full-bed masonry stone veneer systems use mechanical ties anchored into the backup wall at every 2.67 square feet of veneer area — the requirement outlined in IBC Chapter 21, which governs natural stone masonry and veneer building code requirements. These ties maintain the veneer’s position independently of the mortar bond, which is why full-bed systems are mandatory in seismic design categories C through F and in all installations above 30 feet.
- Thin adhered veneer: max piece weight 15 lbs per square foot, substrate must be rigid, non-deflecting CMU or concrete preferred
- Full-bed anchored veneer: mechanical ties every 2.67 sq ft, 1-inch air gap minimum between veneer and backup wall required for drainage
- Engineered bracket systems: used for large-format panels over 15 lbs/sq ft — require structural engineer sign-off on the bracket spacing and fastener pull-out values
- Both systems require code-compliant flashing at base courses and above all penetrations
The substrate matters as much as the stone selection. Wood-framed walls require cement board or a scratch coat over metal lath before adhered veneer can be applied. The metal lath must be fastened at 6-inch vertical spacing to framing members, and the scratch coat must cure for a minimum of 48 hours before veneer is set. Skipping the full cure period is the field shortcut that most commonly leads to premature bond failure.
Finishing and Surface Selection for Exterior Walls
Understanding what is a stone masonry assembly in practice requires thinking about finish as a performance decision, not just an aesthetic preference. The finish specified on exterior veneer directly controls UV reflectance, surface temperature under direct sun, and the frequency of sealing maintenance required over the life of the wall.
Split-face and tumbled finishes have micro-relief that diffuses UV radiation across the surface rather than concentrating it at a single focal plane. This matters because polished or honed flat surfaces on exterior veneer absorb and re-emit solar energy more intensively, which can accelerate thermal cycling at the mortar joint interfaces. Over time, repeated micro-expansion and contraction at those joints can cause hairline cracking that allows moisture ingress — particularly problematic in freeze-thaw regions where water trapped in a compromised joint expands and widens the crack.
- Split-face: natural texture, maximum UV diffusion, easiest sealer penetration — preferred for exterior applications with high sun exposure
- Tumbled: rounded edges reduce stress concentration at corners during thermal cycling, good for high-character residential applications
- Honed: flat matte surface, higher UV absorption, requires annual sealer reapplication on sun-exposed elevations
- Polished: not recommended for exterior masonry stone veneer — accelerates thermal cycling damage at joints and presents a slip hazard on base courses
For walls receiving more than 6 hours of direct sun daily, specify a penetrating silane-siloxane sealer rather than a film-forming topcoat. Film formers trap moisture vapor in the stone body on hot days and can blister or peel within 2 to 4 years in high-UV environments. Penetrating sealers maintain vapor permeability while blocking liquid water ingress — the balance that keeps exterior veneer performing across decades.
Mortar Selection and Joint Detailing
Mortar selection is where many masonry stone veneer projects quietly fail. Type S mortar — compressive strength of 1800 PSI — is the minimum standard for exterior veneer below grade and at base courses. Type N at 750 PSI is appropriate for above-grade veneer protected by adequate roof overhang, but in exposed applications it’s undersized for the lateral loads and thermal movement seen in service. Type S across the board is a safer default for exterior stone work masonry.
Joint width directly affects how the installation manages thermal expansion. Natural stone expands at rates between 3.3 and 5.6 × 10⁻⁶ per °F depending on material type — granite at the lower end, limestone closer to the mid-range. A standard 3/8-inch mortar joint accommodates typical thermal movement, but in dark stone veneer on south-facing walls where surface temperatures can peak 60 to 80°F above ambient air temperature, widening joints to 1/2 inch or introducing control joints at 20-foot intervals prevents spalling at joint edges.
- Type S mortar: use at all base courses, below-grade, and in any application with freeze-thaw exposure
- Type N mortar: acceptable above-grade on sheltered elevations with minimal moisture exposure
- Polymer-modified mortars: mandatory for thin adhered veneer on CMU or concrete substrates — improves bond strength by 40 to 60% over standard Portland mixes
- Control joints: required every 18 to 20 linear feet on exterior veneer, filled with backer rod and a UV-stable polyurethane sealant — not mortar
- Tooled joints: concave tooling is superior to raked joints for water shedding — raked joints collect debris and retain moisture against the stone face
Explore our thin stone veneer range to see how Citadel Stone sources and grades natural veneer materials, with specification data sheets available for every product in the collection. At Citadel Stone, we evaluate each quarry batch through warehouse quality checks that confirm dimensional consistency, absorption rates, and freeze-thaw durability before any material ships.
Substrate Preparation and Base Detailing
Base detailing is where the installation either gets waterproofed correctly or sets up for long-term moisture problems. Every exterior masonry stone veneer assembly must incorporate a weather-resistive barrier behind the scratch coat or directly behind adhered veneer on rigid substrates. Code minimum is a single layer of Grade D building paper, but a self-adhering modified bitumen membrane is worth specifying on any wall that will receive consistent water exposure — base courses, window surrounds, and projections.
Flashing at the base course is non-negotiable. The flashing must extend a minimum of 4 inches behind the weather-resistive barrier and project out past the face of the veneer with a drip edge. Weep holes or open vertical joints at the base course allow any moisture that enters the cavity to drain out rather than accumulating behind the veneer. Spacing weep holes at 24-inch intervals is standard; in high-exposure elevations, 16-inch spacing provides better drainage performance.
- Weather-resistive barrier: self-adhering membrane preferred over Grade D paper at base courses and window surrounds
- Flashing: minimum 4-inch embed behind WRB, extend past veneer face with positive drip
- Weep holes: 24-inch spacing standard, 16-inch in high-exposure applications
- Scratch coat: minimum 3/8 inch thick, cover metal lath completely — voids in the scratch coat become voids in the mortar bond
- Corner treatment: use pre-fabricated corner pieces or field-cut pieces with minimum 4-inch return — never butt joints at outside corners
Flatness tolerance of the prepared substrate should be verified before stone setting begins. Any deviation beyond 1/8 inch over a 10-foot span will require back-buttering individual pieces to fill the gap — not an acceptable substitute for proper substrate preparation, but an acceptable field correction on isolated low spots up to 3/4 inch deep.
Sealing Schedules and Long-Term UV Maintenance
Masonry stone veneer on exterior elevations exposed to strong sun needs a sealing program, not just a one-time application at installation. The interaction between UV radiation and unsealed stone surfaces is cumulative: UV breaks down the natural organic compounds at the stone surface, accelerating iron oxidation in iron-bearing materials and bleaching the surface tone of carbonate stones over a 5 to 10 year period if left unprotected. The Natural Stone Institute’s stone veneer installation and wall stone guidance consistently identifies sealing schedule adherence as a top factor in long-term exterior appearance retention.
Initial sealing should happen within 28 to 30 days of installation — after the mortar has fully cured but before the first significant UV season exposure. Applying sealer to green mortar joints traps curing moisture and can cause efflorescence to bloom behind the sealer film within 6 to 12 months. Let the mortar cure fully, then seal the entire assembly including the joint faces. Joints are porous and represent the highest UV and moisture exposure points in the assembly.
- First application: 28 to 30 days post-installation, after full mortar cure
- Reapplication cycle: every 2 to 3 years for south- and west-facing elevations, every 4 to 5 years for north- and east-facing walls
- Sealer type: penetrating silane-siloxane for all exterior applications — maintain vapor permeability
- Dark stones on sun-exposed elevations: check sealer performance annually by water-drop test — if water absorbs rather than beads, reapplication is needed
- Efflorescence treatment: if white salt deposits appear, address the moisture source first — sealing over efflorescence traps salts and worsens the condition
Color fading in sun-exposed masonry stone veneer is often misdiagnosed as a material quality issue when it’s actually a maintenance gap. Sedimentary stones that receive proper silane-siloxane sealing on a consistent schedule retain their original color depth far longer than unsealed stones — field observations across multiple projects show meaningful visual difference between maintained and unmaintained panels of identical material at the 7 to 10 year mark.
Ordering, Logistics, and Project Planning
Material ordering timeline significantly affects whether a project stays on schedule. Natural stone veneer sourced directly from quarries in Turkey and the broader Middle East — the primary origin of much of the premium limestone and travertine veneer available nationally — carries an import cycle of 6 to 10 weeks from order to delivery under normal shipping conditions. Planning the veneer order to arrive 2 to 3 weeks before the scheduled installation window gives time to inspect the shipment, stage material by elevation, and identify any pieces with shipping damage that need replacement before work begins.
Citadel Stone maintains warehouse stock of key masonry stone veneer profiles, which reduces lead times to 1 to 2 weeks for standard materials. That warehouse inventory availability matters most when a project encounters an accelerated schedule or when a substrate inspection reveals more prep work than anticipated — situations where waiting 8 weeks for a re-order isn’t an option. Verifying warehouse stock levels before finalizing the subcontractor schedule is worth a 10-minute conversation with your supplier.
- Order quantity: add 10 to 12% overage for cuts, waste, and pattern matching — 15% for complex elevations with multiple penetrations
- Truck delivery: confirm site access for flatbed or curtain-side delivery before scheduling — pallets of stone veneer typically require a forklift or telehandler on site
- Staging: store pallets flat on level ground, covered with breathable tarpaulins — avoid plastic sheeting that traps condensation against the stone face
- Acclimation: allow stone to reach ambient temperature before installation if it has been in a cold warehouse — cold stone set in warm mortar can cause thermal shock bonding issues
- Batch matching: order all material for a single elevation from the same quarry batch — color variation between batches on the same wall face is a common source of client dissatisfaction
Truck access constraints at urban infill sites or narrow residential lots can force smaller delivery loads, which increases per-unit freight cost. Factor delivery logistics into the project budget early — freight for natural stone veneer on smaller projects can add 8 to 15% to the landed material cost depending on site conditions.
Parting Guidance for Masonry Stone Veneer Projects
The specifications that separate a 25-year masonry stone veneer installation from one that needs attention in year 8 are consistent: the right system for the substrate, properly cured mortars, verified substrate flatness, code-compliant anchorage, and a sealing maintenance program that starts within 30 days of completion. None of those elements are complicated — but each one requires deliberate decision-making at the specification and field supervision stages. Skipping the mortar cure window, ignoring weep hole placement, or selecting a film-forming sealer for an exposed south elevation are the small choices that compound into expensive remediation work.
As you move into detailed specification, budget planning is often the next practical step. Related stone wall projects benefit from early cost benchmarking — masonry wall cost breakdowns can help you frame material and labor budgets before your quotes come in. Stone for nationwide projects, sourced from premium quarries in Turkey and the broader Middle East region, gives masonry stone veneer a natural face and even bedding.
Related reading: ancient stone masonry techniques · types of masonry stone · rubble masonry explained.