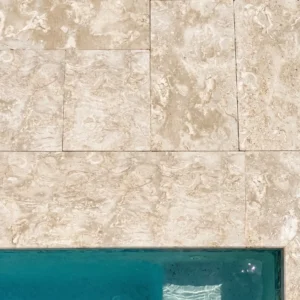
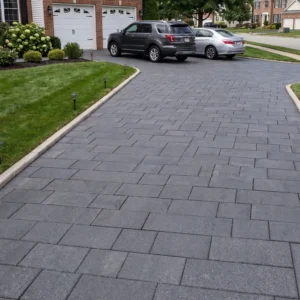
Most paving stone failures trace back to decisions made before the first stone is ever placed. The base preparation window — that critical sequence of excavation depth, aggregate compaction, and bedding sand calibration — determines whether your installation holds its line for two decades or starts rocking and settling within three years. Getting how to lay paving stones right means understanding that the stones themselves are almost secondary to everything that happens underneath them. The steps outlined here reflect what actually works across varied soil conditions and project scales.
Tools and Materials You’ll Need Before You Start
Your tool selection directly influences the precision and longevity of the finished installation. Cutting corners on equipment leads to inconsistent joint spacing, uneven bedding, and surfaces that shed water in the wrong direction. Pull these together before breaking ground:
- Plate compactor — minimum 3,000 lb. compaction force for base aggregate
- Rubber mallet for stone seating — never a steel hammer directly on natural stone
- String lines and line level for grade reference across the entire field
- Screeding pipes (1-inch diameter) for consistent bedding sand depth
- Tamping tool for manual compaction along edges and in tight areas
- Paver splitter or angle grinder with a diamond blade for cuts at borders
- Long spirit level (4-foot minimum) and shorter torpedo level for individual stones
- Broom for spreading polymeric joint sand after laying
Natural stone paving requires more care than concrete pavers because surface variation between pieces is real — even within the same order. At Citadel Stone, we inspect pallets at the warehouse before dispatch because thickness variation beyond 3mm across a batch is a bedding problem waiting to happen. Knowing what’s in your order before installation day saves adjustment time on site.
Excavation Depth and Base Preparation
The excavation depth you choose depends on your intended use, your soil type, and the thickness of your chosen stone. For a standard pedestrian patio, you’re looking at a minimum total depth of 7 to 9 inches from finished surface to subgrade — that’s your stone thickness, plus 1 inch of bedding sand, plus at least 4 to 6 inches of compacted crushed aggregate base.
Driveway applications push that aggregate layer to 8 inches or more. Clay-heavy soils need the deeper end of that range because clay holds moisture and expands — a shallow base over clay is a recipe for heaving in freeze-thaw regions. Sandy or well-draining soils give you slightly more flexibility, but don’t let that tempt you into skimping on compaction depth. According to Natural Stone Institute paving stone technical standards, proper sub-base preparation is the single greatest predictor of long-term stone paving performance.
Compact the subgrade itself first — before any aggregate goes in. Run your plate compactor in overlapping passes across the entire excavated area. Then add your crushed stone base in two layers, compacting each separately. A single thick pour of aggregate does not compact uniformly; you’ll have a dense surface and a loose middle.
Setting the Right Slope for Drainage
Every paved surface needs a fall of at least 1 to 2 percent away from structures. That’s roughly 1/8 inch per foot, or about 1 inch across an 8-foot run. Establish this slope in your base layer — not by grinding or tilting individual stones later. String lines set at your finished grade reference tell you exactly where your compacted base surface needs to sit before sand goes down.
Drainage planning also affects material cost. Projects in areas where the ground stays saturated seasonally may need a geotextile fabric between subgrade and base aggregate to prevent soil migration into the stone base over time. That extra material cost at the start protects a significantly larger investment in the finished surface.
Getting the Bedding Sand Layer Right
The bedding sand layer serves one purpose: to give each stone a precise, adjustable cushion that allows fine-tuning of height and level during laying. Use coarse concrete sand — not fine beach sand, not stone dust in isolation. Fine materials compress unevenly under load, which causes individual stones to tip or settle at different rates.
Screed your sand to exactly 1 inch deep using pipes as guides. Pull a straight screed board across the pipes and then carefully remove the pipes without disturbing the surface. Do not walk on screeded sand before laying paving stones — every footprint creates a low spot that shows up as an uneven stone after seating. This sounds obvious, but it’s the most common field mistake on residential installations.
- Use 1-inch diameter pipes spaced 6 to 8 feet apart as screed guides
- Fill pipe channels with sand after removing pipes and smooth by hand
- Keep screeded sand consistent — thickness variation beyond 1/4 inch creates level problems later
- Screeding one section at a time is more reliable than screeding the full area at once
How to Lay Paving Stones: Pattern and Placement
Start laying paving stones from a fixed, straight reference edge — typically a house wall, a pre-set edging restraint, or a chalk line. Work outward from that reference so cuts land at the perimeter where they’re less visible and less structurally significant. Random or running bond patterns are more forgiving of minor size variation in natural stone; grid patterns demand tighter dimensional consistency across every piece.
Place each stone without sliding — set it down onto the sand and press it into place. Sliding disturbs the sand bed and creates ridges beneath the stone that throw your level. Seat each stone with firm mallet taps across the full surface, checking level in both directions and diagonally. A stone that rocks on a corner hasn’t made full contact with the bedding sand — pull it up and address the sand beneath before moving on.
Browsing our stone paving range before finalising your layout gives you a clear sense of available formats and thicknesses — thickness consistency across your order is worth checking before the project starts rather than discovering variation on site.
Joint Spacing for Natural Stone
Natural stone is not manufactured to identical dimensions, so joint spacing needs to flex slightly as you work across the field. A target joint width of 1/8 to 3/8 inch works well for most natural stone paving stones laid on a sand bed. Wider joints give you more tolerance for size variation; narrower joints demand more consistent stone dimensions. Use plastic spacers in the first few rows to establish your rhythm, then lay by eye once you’ve developed a feel for the material.
Laying Paving Stones on Dirt vs. Proper Base
The question of laying paving stones on dirt comes up often, and the honest answer is that bare, uncompacted soil is not an acceptable base for any paved surface you expect to last. Soil settles, shifts, and responds to moisture changes in ways that no surface stone can compensate for. Even in dry climates, the biological activity in topsoil — roots, insects, organic decomposition — continuously undermines any surface laid directly on it.
The minimum acceptable preparation for a low-traffic application is to excavate topsoil completely, compact the subgrade soil, and install a compacted aggregate base. Skipping the aggregate and going straight to sand over compacted soil is a compromise some low-budget projects use for garden paths — but it reduces longevity significantly and isn’t appropriate for any area that takes foot traffic regularly. According to USGS dimension stone production and use data, natural stone paving installed with appropriate base systems consistently outperforms alternatives over 20-plus year life cycles — and base preparation is the variable that most determines where a given installation falls on that curve.
- Remove all topsoil and organic material — typically 6 to 10 inches below finished grade
- Compact the exposed subgrade soil with a plate compactor before aggregate goes down
- Install crushed stone base in lifts of 4 inches, compacting each lift separately
- Never skip the aggregate base to reduce cost — it’s the cheapest part of the job relative to its impact on lifespan
Cutting Stones for Borders and Obstacles
Border cuts are where natural stone paving projects either look professional or fall apart visually. Plan your layout before laying so that you understand where cuts will land — ideally no cut piece should be smaller than half a stone width. Cuts narrower than that are fragile and look wrong at the perimeter.
Use a diamond-blade angle grinder or a wet-cut paver saw for clean edges. Score the cut line first with a dry pass, then make your full cut wet. Natural stone cuts cleanly with sharp blades but generates significant dust — respiratory protection and eye protection are non-negotiable. The cut edge will be slightly rougher than a factory edge, which is normal and actually helps it key into the joint sand at borders.
Budget and Sourcing Considerations for Your Project
Material cost is only one part of your total project budget. The ratio of material cost to labor cost shifts significantly depending on where you source your stone. Freight distance is the variable most buyers underestimate — truck delivery from a national warehouse to job sites across the country can add meaningfully to per-square-foot cost compared to sourcing from a regional yard, but national suppliers often carry broader inventory and more consistent stock depth than local stone yards.
For projects where the stone specification is flexible, value engineering often involves matching the stone format to the labor market. Large-format slabs (24×24 inches and up) cover area faster and reduce laying time, which can offset a higher material cost per square foot when labor rates are elevated. Smaller cobble-format stones increase labor hours but reduce per-unit material cost. Factor both sides of that equation before locking in your specification. Citadel Stone maintains warehouse stock across standard paving stone formats, which helps narrow the gap between order date and truck delivery — typically 1 to 2 weeks for in-stock material, versus 6 to 8 weeks for imported product ordered to specification.
According to ASLA outdoor paving material guidance, sourcing decisions that account for total lifecycle cost — including installation, maintenance, and expected longevity — consistently favour natural stone over lower-cost alternatives on projects with a 15-plus year horizon.
Final Compaction and Polymeric Joint Sand
Once all stones are laid and checked for level, run a plate compactor over the entire surface with a rubber or foam pad between the compactor plate and the stone surface. This final compaction seats every stone firmly into the bedding sand and eliminates any minor high spots. Make two passes in perpendicular directions for even seating across the full field.
Polymeric joint sand is the correct finishing material for most natural stone paving installations. Spread it dry across the surface and work it into joints with a stiff broom in multiple directions. Blow off the surface with a leaf blower to remove excess from stone faces, then mist the surface lightly with water to activate the polymer binders. Polymeric sand resists erosion from rain and surface water far better than regular joint sand, and it significantly reduces weed germination in joints — one of the most common maintenance complaints on older installations filled with plain sand.
- Run the compactor over laid stone before filling joints — not after, which can displace set polymeric sand
- Fill joints in two passes: initial fill, blow clean, second fill, blow clean again, then activate with water
- Keep the surface dry for 24 hours after activation to allow the polymer to cure fully
- In hot, dry conditions, joints may need a second water application 30 minutes after the first to ensure full polymer activation depth
Putting Down Paving Stones: Edge Restraints and Long-Term Stability
Edge restraints are what prevent your paved field from spreading laterally over time. Without them, the bedding sand migrates outward under foot traffic and the whole field slowly loosens from the outside in. Plastic paver edging pinned into the base aggregate with 10-inch steel spikes is the standard solution for most residential and light commercial applications.
Install edge restraints before you screed your sand, not after. The restraint sets your final boundary and holds your sand in place during screeding. Position it so the top sits at or just below your planned finished surface elevation. On curves, use flexible edging in short sections to follow the arc without kinking. For heavier applications — driveways or commercial pathways — concrete edge beams poured against the base are a more robust solution that doesn’t depend on plastic retaining its shape under load over many years.
What Matters Most When Laying Paving Stones
Every element of how to lay paving stones connects back to base preparation and compaction — those two steps dwarf everything else in their impact on long-term performance. The stones, the pattern, and the joint sand all matter, but they operate on top of a foundation that either supports them or undermines them. Get the excavation depth right for your soil, compact every layer before adding the next, and use polymeric joint sand to lock the system together at the surface. These aren’t shortcuts or upgrades — they’re the baseline for an installation that holds up through years of seasonal movement and regular use. As you finalise your project plan, the related question of how your stone cuts will behave at borders is worth addressing early — cutting paving stones cleanly covers the blade selection and technique that determines whether your border cuts look deliberate or rough. Setting Citadel Stone paving directly on compacted sand rather than bare dirt gives joints the stable base they need to resist settling over multiple seasons.