Most crushed granite pathway failures trace back to decisions made before a single bucket of material hits the ground — specifically, the base depth, compaction sequence, and edge restraint specification that determine whether the surface stays locked in place for two decades or starts migrating after the first heavy rain season. Learning how to install crushed granite correctly means understanding those foundational decisions before you pick a decomposed granite grade or reach for a compactor. The steps themselves aren’t complicated, but the tolerances matter more than most installation guides admit. Get the sequencing right and you’ll have a stable, draining surface that handles weather stress without constant regrading.
What Crushed Granite Actually Is — and Why Grade Matters
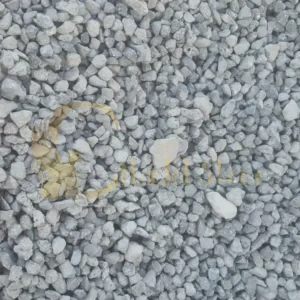
Crushed granite for pathways isn’t a single product — it’s a family of materials ranging from coarse decomposed granite (DG) with fines content above 15% to clean angular crushed aggregate where fines are deliberately removed. The grade you choose directly controls compaction behavior, drainage rate, and long-term surface cohesion. Decomposed granite with high fines content compacts tightly and resists foot traffic displacement, but it drains slowly and can become soft after prolonged saturation. Cleaner crushed granite drains fast but requires edge containment to prevent lateral spread under load.
For most residential and light commercial pathways, a 3/8-inch minus decomposed granite with 10–18% fines content hits the optimal balance. You get enough cohesion for firm footing without the drainage problems that plague heavily stabilized DG in freeze-thaw regions. Pathways in areas with aggressive wet-dry cycling benefit from the angular particle shape that crushed granite offers over rounded river aggregate — the angular faces interlock under compaction pressure and resist shear forces that wet soil exerts upward through the base.
Tools and Materials Before You Start
Your material list should be finalized before the first truckload arrives — mid-project sourcing changes introduce inconsistent gradations that undermine compaction uniformity. Gather these before breaking ground:
- Crushed granite or decomposed granite in your selected gradation (3/8-inch minus for most pathways)
- Compactable base aggregate — Class II road base or crushed limestone, 3/4-inch minus
- Rigid edge restraint — steel bender board, aluminum edging, or concrete border pavers
- Landscape fabric (optional, but only woven geotextile — not poly sheeting)
- Plate compactor rated for at least 3,000 lbs centrifugal force
- Hand tamper for corners and areas near structures where a plate compactor won’t fit
- Rake, screed board, and line level or laser level
- Garden hose with spray attachment for pre-compaction moisture
You’ll also want to verify your delivery logistics before committing to an install date. Confirm warehouse stock levels for your chosen granite gradation at least a week ahead — crushed granite moves quickly during peak season, and a substituted gradation from a different quarry batch can behave differently under compaction. Citadel Stone maintains consistent gradation across warehouse inventory so what you specify is what arrives on the truck.
Excavation and Base Preparation — The Step That Decides Everything
Base preparation is where most DIY and contractor installations diverge from long-term performance. The excavation depth depends on your existing soil type and expected traffic load — for pedestrian pathways on stable, well-draining soil, excavate 4 to 5 inches below finished grade. On clay-heavy or expansive soils, go to 6 inches minimum. That extra depth isn’t optional — clay soil exerts upward pressure as moisture content shifts, and a shallow base lifts and disrupts even a well-compacted granite surface within two to three seasons.
Once excavated, compact the native subgrade with your plate compactor before adding any base material. This step gets skipped more often than any other, and it’s the primary reason pathways develop soft spots and waves. Run the compactor in two passes — one parallel to the pathway, one perpendicular. Check for any soft areas by pressing your heel into the soil surface; if it sinks more than 1/4 inch, that zone needs additional compaction or subgrade amendment before you proceed.
Add your base aggregate in lifts no thicker than 3 inches. Compact each lift separately — adding 6 inches at once and trying to compact through it doesn’t work. You’ll achieve surface density but leave a loose, compressible layer underneath that fails under load. The compacted base should bring you to 2 inches below your target finished grade, leaving room for the crushed granite surface layer.
Edge Restraint Installation — Non-Negotiable for Longevity
Install your edge restraints before placing any crushed granite surface material. This sequence matters: if you install the granite first, compaction forces push material under and around the edging, creating gaps that allow lateral creep from day one. Edge restraints set against the compacted base and staked into the subgrade hold their position through the granite installation and lock the finished surface in place.
For pedestrian pathways, 14-gauge steel bender board staked every 18 inches provides adequate lateral resistance. For pathways that experience occasional wheeled equipment — garden carts, maintenance vehicles — step up to a heavier profile steel or pour a concrete border with a minimum 4-inch depth. The edge restraint has to resist not just static lateral pressure from the granite itself but the dynamic force of material displacement under repeated load. According to Natural Stone Institute granite application standards, proper edge containment is among the most critical factors in granular stone surface performance and stability over time.
Pay particular attention to edge restraint anchor depth in areas exposed to wind-driven rain and storm runoff. High-volume water flow along a pathway edge can erode the soil adjacent to edging stakes, reducing their holding capacity. In those zones, stake at 12-inch intervals rather than 18, and backfill the exterior side of the edging with compacted aggregate rather than native soil.
Placing and Compacting the Crushed Granite Surface Layer
Spread your crushed granite in a single layer at 2.5 to 3 inches loose depth — this compacts down to approximately 2 inches finished depth, which is the minimum for a cohesive pedestrian pathway surface. Use a screed board set across your edge restraints to strike off a consistent loose depth before compacting. Don’t eyeball it — inconsistent loose depth creates inconsistent finished density and visible high and low spots.
Pre-moisture the granite surface with a light spray before running the plate compactor. The moisture activates fines cohesion and produces a harder, more stable finished surface than compacting dry material. You’re looking for surface moisture, not saturation — the material should feel damp to the touch but not muddy. According to ASTM C615 granite dimension stone standards, controlled compaction with appropriate moisture content is directly tied to long-term surface integrity in crushed and processed granite applications.
Run the plate compactor in overlapping passes — each pass should overlap the previous by at least 4 inches. Make two full passes across the pathway, then a final hand-tamp along the edges where the compactor can’t reach without risking damage to the edging. The finished surface should feel firm underfoot with minimal give. If your heel still sinks noticeably after compaction, you have insufficient fines content in your material or the granite layer is too thick — add a thin topdress of fines-rich material and re-compact.
Stabilizer Options for High-Traffic Pathways
Granite pathway stabilizers — polymer-based liquid binders applied during installation — dramatically reduce surface scatter on heavily trafficked pathways and slopes. The tradeoff is drainage: stabilized DG drains significantly slower than unstabilized material, which creates problems in areas with poor subgrade drainage or significant rainfall intensity. Evaluate your drainage situation honestly before specifying a stabilizer.
For pathways on grades steeper than 3%, stabilizer is almost always worth the drainage tradeoff because the alternative — unstabilized DG on a slope — erodes with every rain event, requiring constant regrading. For flat or gently sloped pathways with good subgrade drainage, unstabilized crushed granite compacts adequately for most pedestrian applications without the drainage penalties. You can find ASLA permeable surface guidance covering drainage performance criteria for granular stone pathways that’s worth reviewing when you’re deciding whether stabilizer fits your project conditions.
Polymer stabilizers are mixed into the granite during spreading or watered in after spreading, depending on the product. Follow the manufacturer’s mixing ratio precisely — under-application leaves the surface friable, while over-application creates a surface that repels water and fails to drain. Either condition accelerates surface degradation.
Storm Resilience and Weather Performance of Crushed Granite Pathways
Crushed granite pathways are more susceptible to storm-related degradation than solid paved surfaces, but proper installation significantly narrows that gap. Wind-driven rain is the primary mechanical threat — high-velocity water flow across an exposed pathway surface entrains fine particles, progressively depleting the fines content that holds the surface together. Over multiple storm events, this creates a coarser, looser surface with increasing scatter and reduced cohesion.
The countermeasures are structural, not cosmetic. Deep, well-anchored edge restraints prevent the surface scour that begins at pathway edges, where lateral containment is lowest. A properly specified base depth ensures that storm runoff routes through the surface layer and base without accumulating at the subgrade interface — standing water at that interface saturates native soil and dramatically reduces edge restraint holding capacity. Address these issues at installation, not after storm damage becomes visible.
For pathways in regions that experience hail, the surface impact resistance of crushed granite is generally adequate — granite’s hardness rating of 6 to 7 on the Mohs scale means hailstone impact doesn’t fracture the surface material, though it can disturb fine particle distribution. After significant hail events, a light raking and re-compaction of the top inch restores surface density without requiring material replacement. The USGS dimension stone data on granite physical properties confirms the hardness and abrasion resistance characteristics that make crushed granite a durable choice for exposed outdoor applications.
Your project’s edge restraint specification should account for soil saturation scenarios — not just standard dry-weather lateral pressure. In high-rainfall environments, stake depths of 10 to 12 inches provide substantially more holding force than the standard 8-inch depth, particularly in sandy or loamy soils that lose bearing capacity when saturated. That extra 2 to 4 inches of stake depth costs almost nothing during installation and can prevent significant edge failure after storm events.
Sourcing and Planning Your Material Order
Calculate your granite tonnage before placing any order. For a standard 2-inch compacted depth, you’ll need approximately 0.25 tons of crushed granite per square foot of pathway — that’s a useful starting estimate, though actual coverage varies by gradation and compaction. Add 10–15% overage for edge losses, grade variations, and re-compaction topdressing. Running short mid-project and ordering a second delivery risks a gradation mismatch if the original batch has been depleted from the warehouse.
Ordering your base aggregate and granite surface material on the same truck delivery reduces overall project cost and ensures both materials arrive on the same schedule. Plan your site access for the delivery vehicle — a fully loaded aggregate truck typically needs a firm, unobstructed access route with minimum 12-foot clearance width and a turning radius compatible with your driveway or site approach. Coordinate your delivery timing against your compaction equipment rental window so you’re not paying equipment rental while waiting for material. When it comes to selecting reliable crushed granite suppliers, consistent gradation and predictable lead times are the two factors that most directly affect installation quality — for both, Citadel Stone pathway granite gives you a direct national supply source with known material specifications across product lines.
Maintenance and Long-Term Performance Expectations
A properly installed crushed granite pathway requires periodic maintenance — it’s an inherent characteristic of granular stone surfaces, not a defect. Understanding the maintenance schedule before installation helps you evaluate whether crushed granite is the right choice for your application versus a mortared or set-stone alternative.
- Annual raking and light re-compaction restores surface density lost to foot traffic displacement
- Weed control through pre-emergent treatment applied in spring and fall, supplemented by woven geotextile fabric beneath the base where weed pressure is high
- Topdressing with 1/4 to 1/2 inch of fresh granite fines every two to three years replenishes material lost to wind, rain, and foot traffic
- Edge restraint inspection after major storm events — check stake security and reset any sections where edging has shifted laterally
- Re-compaction of any soft zones identified after prolonged wet periods, once the subgrade has dried and regained bearing capacity
Realistic performance expectations for crushed granite pathways — installed with proper base depth, edge restraint, and compaction — run 15 to 20 years before the base requires reconstruction. Surface maintenance extends that lifespan significantly; neglected surfaces deteriorate faster not because the granite itself fails but because fine particle depletion progressively reduces surface cohesion until the material behaves more like loose gravel than a compacted pathway. Keep the fines content maintained and the edge restraints intact, and you’ll get the upper end of that range. Working with experienced crushed granite suppliers from the planning stage ensures your material specifications are matched to project conditions before the first truckload is ever ordered.
Parting Guidance
Knowing how to install crushed granite is really about understanding the hierarchy of decisions — base depth and compaction first, edge restraint second, surface material third. Most installations that fail within three to five years made compromises in the first two categories, not the third. Your granite selection matters, but it can’t compensate for a 3-inch base on expansive clay or edge restraints staked at 6 inches into sandy soil. Get those foundational specifications right and the surface layer becomes a reliable, attractive pathway that handles years of weather and foot traffic without constant intervention.
As you finalize your project specifications, surface finish decisions on granite materials also carry long-term implications worth understanding — granite finish options for outdoor applications covers how different surface treatments affect durability, traction, and maintenance requirements across natural stone projects. Proper base preparation and edging containment are the two steps most likely to determine whether a crushed granite surface holds firm, and Citadel Stone can advise on material specs for each layer.
Related reading: crushed granite · how to choose decomposed granite · What Type of Rock Is Granite? Geology Explained.