Base failure accounts for the majority of cobblestone paver installations that develop rocking, settling, or surface irregularity within the first five years — and in nearly every case, the problem was set in motion before a single sett hit the ground. Learning how to install cobblestone pavers correctly means understanding that the stone itself is almost never the weak point; the layers beneath it are. Get those layers right and you’re looking at decades of service life. Rush them and no amount of quality material will compensate.
Understanding Your Cobblestone Paver Options
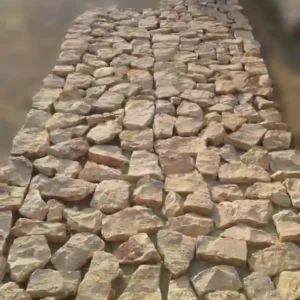
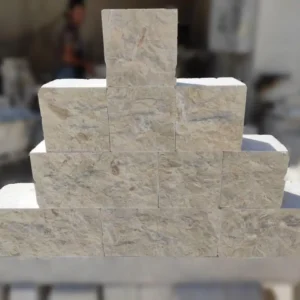
Cobblestone pavers aren’t a single product — they’re a family of naturally quarried stone units that range from rough-tumbled rounds to precision-cut granite setts. The format you choose shapes every downstream installation decision, from bedding depth to jointing method. Rounded field-style cobbles demand a thicker, more forgiving bedding layer because their irregular undersides don’t sit flat. Cut granite setts, by contrast, offer consistent thickness and a flat bed contact that makes screeding faster and re-levelling less frequent.
- Tumbled cobblestones: irregular base, requires 1.5–2 inch bedding sand for float adjustment
- Granite setts: consistent thickness, tighter dimensional tolerance, easier to screed level
- Limestone cobbles: slightly softer than granite, highly resistant to abrasion but more sensitive to acid-based cleaners
- Basalt cobbles: exceptionally durable, dense grain structure, lower water absorption than most natural stone options
Your material choice also affects jointing — rounded cobbles leave wider, more variable gaps than cut setts, which means you’ll use more joint material and need to compact in stages rather than one pass. Factor that into your timeline from the start.
Tools and Materials You’ll Need Before You Start
Pulling together the right equipment before breaking ground saves you mid-job delays that cost more than the tools themselves. Here’s what a complete cobblestone paver installation requires:
- Plate compactor (minimum 4,000 lb centrifugal force for base compaction)
- Rubber mallet and dead-blow hammer for sett setting
- Long-handled screed rails and a 6-foot straightedge
- String lines and batter boards for grade and alignment control
- Hand tamper for perimeter areas the plate compactor can’t reach
- Landscape fabric or geotextile for subgrade separation in problem soils
- Crushed angular aggregate (3/4-inch compactable gravel) for the paver base
- Coarse concrete sand (not play sand) for the bedding layer
- Polymeric joint sand or granite dust for finishing
- Wet saw or angle grinder with diamond blade for cuts
Verify warehouse stock on your cobblestone order before confirming your project start date. Lead times from the warehouse can extend if you’re sourcing a less common profile or a specific quarry finish, and a week’s delay mid-project costs far more than a phone call beforehand.
Site Assessment and Layout Planning
Your layout plan determines whether the finished surface looks intentional or improvised. Start by establishing a fixed reference point — typically a building edge, an existing curb line, or a permanent landscape feature — and run your string lines from there. Cobblestone paver patterns read differently at full scale than they do on paper, so it’s worth dry-laying a small section before committing to the full run.
Slope is non-negotiable. You need a minimum 1% cross-slope (about 1/8 inch per foot) away from structures and toward a drainage outlet. Anything flatter and you’ll get water pooling in the joints, which accelerates freeze-thaw damage in colder climates and accelerates joint sand washout everywhere else. Mark your finished grade with stakes before you excavate — it’s far easier to set drainage geometry before the hole is dug than after.
For pattern selection, running bond (staggered rows) handles curves better than herringbone, which requires more cutting at perimeter edges. Herringbone at 45° or 90° locks the field together under traffic loads more effectively than straight stack bond, which can rack under repeated point loading. Choose your pattern based on application first, aesthetics second.
Excavation and Subgrade Preparation
Excavation depth drives the structural performance of the entire installation. A rule of thumb for residential pedestrian areas is 10–12 inches total excavation depth — accommodating 6 inches of compacted paver base, 1 inch of bedding sand, and the sett thickness (typically 2–4 inches depending on the product). Driveways and areas with vehicle access need 12–16 inches minimum, and that base depth should increase if your soil is expansive.
Here’s where soil type becomes the critical variable that most installation guides gloss over. Expansive clay soils — common across the mid-continent and in regions with pronounced wet-dry seasonal cycles — swell when saturated and shrink when dry. That movement translates directly into heave and settlement in your cobblestone surface. In clay-heavy subgrades, you have two practical options: over-excavate by an additional 4–6 inches and replace with compactable gravel, or install a geotextile separation layer between native soil and aggregate base to prevent clay migration upward into the base over time.
- Sandy soils: excellent drainage, low bearing capacity — increase base depth and consider a stabilising geogrid layer
- Expansive clay: high movement risk — over-excavate, replace with engineered fill, or use geotextile separation
- Caliche (hardpan): difficult to excavate but stable once broken — scarify and compact rather than removing entirely
- Rocky or gravelly subgrade: excellent native bearing, reduce base depth accordingly but maintain bedding sand layer
- Organic or fill soils: highest risk — remove entirely and replace; never build on uncompacted fill
According to NSI granite cobblestone specifications, subgrade stability directly affects long-term dimensional tolerance in sett installations — a point that’s easy to undervalue when the stone itself looks perfect straight off the delivery vehicle.
Building the Paver Base for Cobblestone Pavers
The aggregate base is where the structural integrity of your cobblestone paver installation actually lives. Use angular crushed stone — not rounded river gravel. Angular aggregate interlocks under compaction; rounded stone shifts under load. This distinction matters more than aggregate depth in terms of long-term stability.
Install and compact the base in lifts of no more than 4 inches each. A single 8-inch dump of gravel compacted in one pass will always have a soft zone in the middle that a plate compactor can’t reach effectively. Two 4-inch lifts, each compacted to refusal (when the machine stops sinking and the surface stops vibrating), give you a genuinely uniform paver base. Check compaction with a steel rod probe — it should meet resistance within 2 inches across the full area before you move on.
- Base aggregate: 3/4-inch compactable crushed stone or road base material
- Lift thickness: maximum 4 inches per compacted pass
- Compaction target: 95% Modified Proctor density for vehicle areas, 90% for pedestrian zones
- Edge restraint: install before screeding — pavers without a hard edge will migrate outward under load
Edge restraints deserve more attention than they typically get. Plastic snap-edge systems work for gentle residential curves; for driveways or heavy-use areas, a concrete band or natural stone border course is significantly more reliable. Your cobblestone field will push outward against the edge restraint with every load cycle — make sure it can push back.
How to Lay Cobblestone Pavers: Screeding the Bedding Layer
The bedding sand layer is your final grade-adjustment tool — it is not a structural layer and should not be treated as one. One inch of coarse concrete sand, screeded flat, is the target. More than 1.5 inches of uncompacted sand under a paver creates a soft bed that allows individual stones to rock and settle under load over time.
Set your screed rails at the correct finished grade, accounting for sett thickness. Pull the screed in long, smooth passes without overworking the surface — loose sand that’s been disturbed multiple times is harder to screed true than sand that’s been set once and left. Once screeded, do not walk on the bedding layer. Footprints create depressions that will telegraph through to the finished surface as low spots. Lay a board across screeded sections if you need to cross them.
This is also the stage where the how to lay cobblestone pavers process becomes tactile — you’ll develop a feel for the bedding layer quickly. Coarse sand screeds with more drag than fine sand, which is actually useful because it tells you when you’re pulling through properly compacted material versus a soft spot that needs more base work underneath.
Setting the Cobblestone Pavers
Start from a fixed edge or corner and work outward. Set each sett or cobble with a firm downward press — don’t slide them into position sideways, as this disturbs the screeded sand beneath adjacent stones already set. Use a rubber mallet to seat each piece to final height; two or three firm taps are enough. You should feel the stone firm up as it seats into the sand.
Maintain your joint width consistently as you go. For cut granite setts, 3/8 to 1/2 inch is standard. For tumbled cobbles with irregular edges, 1/2 to 3/4 inch is more realistic. Wider-than-planned joints are almost always a sign that your pattern layout was off at the start — which is why establishing a reference line every 6–8 feet and snapping chalk lines through the work helps you catch drift before it compounds into a visible problem.
For the best selection of profiles and sizes, browse our Cobblestone Pavers range — you’ll find both tumbled and cut options suited to pedestrian and driveway applications alike.
- Work from a corner or straight edge — never from the middle outward
- Check level across every 4–5 stones with a straightedge and level
- Pull and re-set any stone that rocks — don’t leave it and hope jointing fixes it
- Save cut pieces for perimeter borders, not the interior field
- Maintain a consistent gap — use spacers if working with cut setts for precision
Compaction and Jointing the Finished Surface
Initial compaction sets the cobblestones into the bedding sand and locks the field together. Run the plate compactor over the laid surface in overlapping passes — use a rubber pad attachment or a piece of carpet under the plate to prevent surface scarring on softer stones like limestone. Keep the compactor moving; dwelling in one spot can crack thinner setts.
After the first compaction pass, sweep dry joint sand or polymeric sand into the joints. Work it in with a stiff brush, blowing any excess off the surface before the second compaction pass. This second pass drives the sand deeper into the joints and further seats the stones. Repeat the sweep-and-compact cycle until joints are filled to within 1/8 inch of the surface. The ASLA cobblestone and block paving guidance notes that well-filled joints are a primary factor in the long-term interlock performance of natural stone paving systems.
Polymeric sand is worth the additional cost for driveways and high-use areas — it resists washout from rainfall and reduces weed germination in joints significantly better than plain kiln-dried sand. Activate it with a fine water mist per the manufacturer’s specification; don’t saturate it or you’ll wash it out of the joints before it sets.
Drainage and Long-Term Subgrade Performance
Drainage geometry is the variable that determines whether your installation looks the same in year fifteen as it did in year one. Even a perfectly executed paver base will degrade if water has nowhere to go and is instead forced to pond, saturate the base, and cycle through freeze and thaw. Design drainage in before excavation, not as an afterthought once the surface starts settling.
In regions with clay-heavy soils, consider installing a perforated drainage pipe at the bottom of the base aggregate layer, sloped at 1% minimum toward an outlet. This keeps the native subgrade from reaching saturation during heavy rain events — the moment that triggers the most subgrade movement in expansive soils. French drain systems alongside driveways and pathways work on the same principle and add meaningful protection in high-rainfall areas.
For sandy subgrades, the drainage problem reverses — water exits too quickly, carrying fine particles with it and leaving voids beneath the base aggregate over time. A non-woven geotextile at the subgrade–aggregate interface prevents this migration while still allowing water to pass through freely. The USGS dimension stone data confirms that natural stone paving performance in varied soil conditions is heavily influenced by subsurface drainage management rather than the stone specification alone.
- Minimum 1% surface slope away from structures in all directions
- Perforated pipe at base of aggregate layer in clay or low-permeability soils
- Geotextile separation layer in sandy or silty soils to prevent particle migration
- Inspect joints and surface grade annually in the first two years — early correction is always easier than full re-laying
Sealing and Ongoing Maintenance
Sealing cobblestone pavers is optional but recommended for installations where appearance matters or where surface staining from vehicles, organic matter, or iron-rich water is a realistic concern. A penetrating impregnator sealer (silane-siloxane based) works into the stone’s pore structure without forming a film on the surface, which means it won’t alter the natural texture or create a surface that requires stripping before reapplication.
Apply sealer to a clean, dry surface — moisture trapped beneath sealer causes haze and adhesion failure. Allow new installations to cure for at least 28 days before sealing; fresh joint sand needs time to fully set, and sealer applied too early can lock in moisture that migrates from the bedding layer. Reapplication intervals vary by stone type and traffic level, but every 3–5 years is a practical baseline for most exterior cobblestone applications.
- Use a penetrating impregnator, not a topical film-forming sealer, for exterior cobblestone
- Apply in two thin passes rather than one heavy coat
- Avoid acid-based cleaners on limestone cobbles — they etch the surface and accelerate pore opening
- Re-sand joints whenever they drop more than 1/4 inch below the surface
- Check perimeter edge restraints annually and re-pin any sections that have shifted
Getting Your Cobblestone Paver Installation Right
A cobblestone paver installation executed correctly from subgrade preparation through final jointing will outperform virtually any alternative hardscape surface in durability, character, and longevity. The steps are sequential for a reason — skipping or shortcutting any one of them creates a compounding problem that shows up later when it’s expensive to fix. Citadel Stone maintains consistent warehouse inventory on cobblestone profiles, which means you can confirm availability, request samples, and plan delivery timing without building extended lead times into your project schedule. Your project may also benefit from exploring complementary natural stone options — how porcelain compares to natural stone is worth reviewing if you’re weighing material options for adjacent interior or covered outdoor spaces. Installers working with Citadel Stone cobblestone generally find that uniform sett thickness reduces the need for re-levelling during the jointing and compaction stages.