

Cobblestone edging pavers fail more often at the planning stage than the installation stage — and the gap usually comes down to one overlooked decision: whether the border system is designed to resist lateral migration or simply placed to look good on day one. A well-engineered cobblestone edge holds its geometry through years of ground movement, seasonal drainage cycles, and vehicle overrun pressure. A poorly planned one creeps outward within two growing seasons, leaving gaps that undermine the entire border’s structural purpose.
Why Border Geometry Determines Long-Term Performance
Your edging line is only as stable as the material mass behind it. Cobblestone edging pavers bring a natural weight advantage — dense stone resists displacement forces that lightweight plastic or timber edging simply cannot match. The mass-to-contact-ratio matters here: a cobble set at full depth with at least two-thirds of its height below grade creates a mechanical interlock with the compacted base that behaves more like a buried anchor than a surface ornament.
The depth of burial is the variable most installers shortchange. Setting cobblestones at half-depth saves time during installation but introduces a lever-arm problem — any lateral pressure from soil expansion, freeze-thaw cycling, or root intrusion amplifies at the exposed upper section and rotates the stone outward. Setting at two-thirds to three-quarters depth eliminates that lever arm almost entirely, and field experience confirms that installations done this way stay plumb for decades without reintervention.
- Minimum burial depth: two-thirds of stone height below finished grade
- Bedding layer: 1-inch compacted coarse sand over a stable aggregate sub-base
- Joint spacing: 3/8 to 1/2 inch for stable lateral interlock between adjacent cobbles
- Backfill compaction: tamp both sides of the edging run before any adjacent paving is placed
- Haunch the back side with compacted angular gravel — not topsoil — to lock the base position
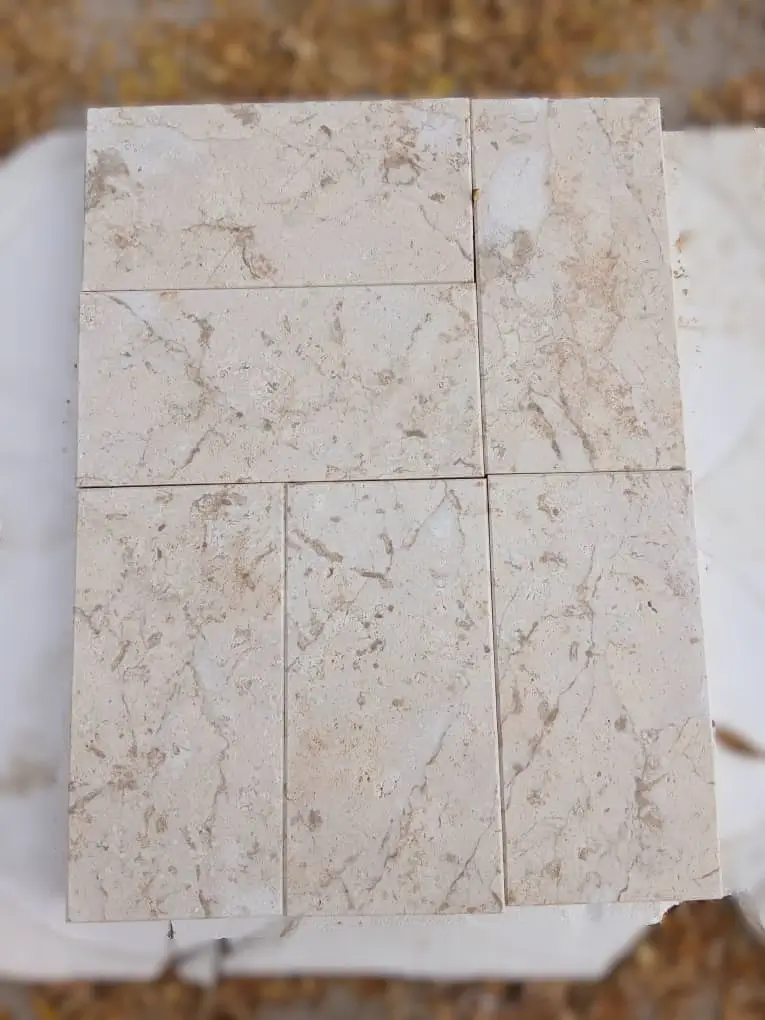
Material Selection for Cobblestone Edging Applications
Not every cobblestone translates equally to an edging role. The performance requirements for a border stone differ from those of a field paver: the edging takes concentrated lateral stress, cycles between wet and dry conditions at its exposed face, and sits at the transition zone where soil chemistry changes from the compacted sub-base to the planted bed. You need a stone with low absorption and high density to handle that boundary-zone moisture cycle without spalling.
Granite cobblestone edging pavers are the benchmark choice in high-traffic border applications. The crystalline structure of granite resists surface degradation at the exposed face, and its low absorption rate — verifiable through test report on request — keeps moisture from penetrating the stone body where it can cause internal fracturing during freeze-thaw events. According to Natural Stone Institute granite durability specifications, granite’s interlocked crystal matrix makes it one of the most physically resilient options for outdoor paving and edging applications where sustained mechanical and environmental stress is expected.
Basalt cobblestone edging is a strong alternative in climates that combine heat and moisture. Its extremely fine-grained structure limits surface absorption, and the darker tonal range reads cleanly against both light-coloured field pavers and planted borders. Limestone cobblestone edging works well in drier, sheltered applications — the material’s warmth and texture read beautifully in garden settings, though you’ll want to verify absorption data before specifying it in consistently wet border zones.
- Granite: optimal for driveways, high-traffic borders, freeze-thaw exposed sites
- Basalt: well-suited to heat-exposed borders with occasional moisture cycling
- Limestone: effective in sheltered garden borders — check absorption test data before wet-zone use
- Avoid soft sedimentary cobbles in any application where vehicle wheels may track across the edging
Driveway Paver Edging: Where the Spec Gets Serious
Driveway paver edging sits in the most demanding position of any residential border application. Vehicle tyres routinely ride up onto the edging course when drivers cut corners, applying point loads that a standard garden border never sees. Your driveway specification needs to account for this load scenario explicitly — not treat the edging as decorative trim that happens to be adjacent to the driveway surface.
For driveway paver edging, the cobblestone size matters more than most specifiers realise. A larger cobble — 4 to 6 inches in plan dimension — distributes point loads across a greater base contact area, which reduces the pressure per square inch transmitted to the bedding layer beneath. Smaller cobbles, while visually appealing, concentrate those same loads on a narrower base and are more likely to tip under repeated vehicle overrun. Combine that larger cobble size with a haunched concrete toe on the outer (non-paving) side, and you create a border that resists both outward drift and vertical rotation simultaneously.
The USGS dimension stone production and use data confirms that granite setts and cobblestones have historically served as primary driveway edging material in municipal and residential applications across the USA, a testament to the material’s dimensional stability and load-transfer performance in traffic-adjacent positions.
- Specify 4-to-6-inch cobbles for driveway edges — not the smaller 3-inch tumbled variety
- Concrete haunch on the outer face: 4 inches wide, poured against undisturbed sub-grade
- Set cobbles in a stiff mortar bed for driveway-adjacent runs — dry-set is appropriate for garden borders, not traffic-adjacent edging
- Allow a 1/2-inch positive reveal above the adjacent driveway surface to create a tactile and visual boundary for drivers
Paver Edging Ideas Across Different Project Scales
The strongest paver edging ideas share one characteristic: they treat the border as a structural element first and a design detail second. That sequencing matters because it changes how you plan the installation. A border designed structurally from the outset accommodates design expression freely — you can curve it, stagger it, mix stone sizes, or step it across grade changes without compromising stability. A border designed aesthetically first and shored up structurally afterward is always a compromise.
Consider a soldier-course layout for straight runs along paths and patios — cobblestones set end-grain out, perpendicular to the edging line, create maximum burial depth per stone and the cleanest linear profile. For curved garden borders, a running-course layout where cobbles are set parallel to the edging line allows gentle curves without the visual interruptions of cut stone. Staggered-height edging — alternating two stone sizes in a repeating rhythm — works particularly well at the transition between patio and planted bed, creating a visual step that also functions as a physical root barrier.
You can also explore Cobblestone Pavers from our full collection to match your edging material to the field paving — maintaining consistent stone character across both elements produces a more cohesive result than mixing stone types between border and field.
- Soldier course: perpendicular-set cobbles for maximum depth and a formal linear profile
- Running course: parallel-set cobbles for gentle curves and informal garden borders
- Staggered height: alternating sizes for visual rhythm and root-barrier function
- Double-course border: two rows of cobbles for wider visual weight and greater lateral stability at exposed corners
- Recessed edging: set the cobble top flush with grade for a seamless transition — effective where mowing crosses the border line
Terrain, Slope, and Drainage: Where Installations Go Wrong
Slope changes the entire drainage dynamic of a cobblestone edging installation, and this is the variable that catches most project planners off guard. On a flat site, water distributes evenly and the edging holds its position symmetrically. On a sloped site, water concentrates at the low end of every edging run, and the hydrostatic pressure against the downhill face of the border can generate enough force over time to migrate even a well-set cobble course outward at the toe.
Your drainage design needs to address this concentration point before the cobbles go in. The most effective approach on sloped sites is to intercept water uphill of the edging with a shallow swale or a perforated drain pipe running parallel to the border, keeping the hydrostatic load off the edging system entirely. Where terrain changes elevation across the edging run — common on hillside gardens and terraced driveways — you’ll need to step the edging course to follow grade rather than holding it level and risking differential settlement as the base compresses unevenly beneath stone set at varying effective depths.
The ASLA landscape edging and border stone design guidance addresses the relationship between permeable surfacing, grade management, and border stability — a useful reference for specifying cobblestone edging systems on sites with meaningful slope or drainage complexity. The core principle is that drainage should be designed before the edging layout is fixed, not retrofitted afterward.
- On slopes exceeding 3%, intercept water uphill of the edging with a linear drain before it loads the border
- Step edging courses at grade changes rather than holding a single level — prevents differential settlement
- Increase base depth at the low end of sloped runs by 1 to 2 inches to compensate for hydrostatic pressure accumulation
- On sites with clay subsoil, install a geotextile layer between native soil and aggregate base to prevent clay migration into the drainage layer over time
- Check finished grade across the edging run after base compaction and before cobble setting — correct any low points that will pool water against the border face
Base Preparation That Actually Holds
The aggregate base beneath cobblestone edging pavers does more work than most specifications acknowledge. It’s not just a levelling layer — it’s the primary load-transfer and drainage mechanism that keeps the cobble course in position through seasonal ground movement. Underbuild the base, and your edging migrates. Overbuild it with the wrong material, and you create a drainage trap that saturates during wet periods and undermines the bedding layer from below.
Compacted angular gravel — typically a 3/4-inch crushed stone — is the right base material for cobblestone edging in most conditions. Angular particles lock together under compaction in a way that rounded pea gravel never achieves, and the irregular voids between particles allow water to drain freely without retaining it against the underside of the bedding layer. Base depth varies with application: 4 inches compacted for garden border applications, 6 to 8 inches for driveway-adjacent edging where vehicle wheel loads may reach the border zone.
At Citadel Stone, we recommend confirming your sub-grade bearing capacity before fixing base depth — particularly on sites with imported fill or previously disturbed soil where compaction history is unknown. Our technical team can advise on base specifications once you confirm the site conditions and intended load scenario. Citadel Stone maintains warehouse inventory nationwide, which typically reduces lead times considerably compared to project timelines that depend on special-order import cycles — a practical advantage when base preparation is complete and you’re ready to receive material.
- Angular 3/4-inch crushed gravel: standard base aggregate for most edging applications
- 4 inches compacted: minimum for pedestrian garden borders
- 6 to 8 inches compacted: required for driveway-adjacent or vehicle-traffic-exposed edging
- Compact in lifts no greater than 4 inches — do not place and compact 8 inches at once
- Test compaction by walking the prepared base — no movement or deflection under foot pressure confirms readiness
- Bedding layer above the base: 1 inch of coarse concrete sand, screeded level
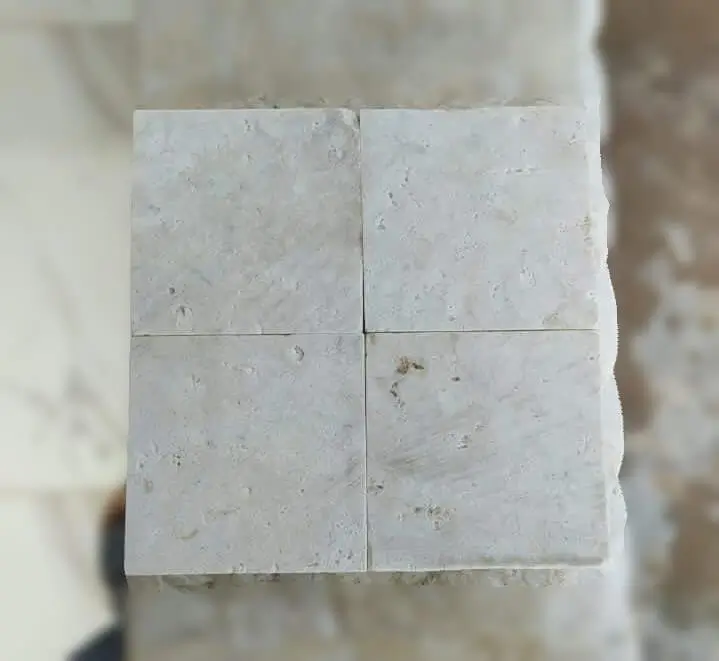
Patio Paver Edging Ideas: Achieving Visual and Structural Continuity
Patio paver edging ideas that work best are the ones where the border and the field paving share a material dialogue — not necessarily matching stone, but stone with a tonal or textural relationship that reads as intentional rather than arbitrary. A cobblestone edging border in dark basalt framing a light limestone patio creates a strong contrast edge that defines the patio perimeter with genuine authority. A granite cobble border in a complementary tone to the field paving produces a subtler transition that suits more formal garden geometries.
The reveal height — how far the cobble top projects above the adjacent patio surface — is a detail that carries more design weight than its simplicity suggests. A 1/2-inch positive reveal creates a clear visual edge without becoming a trip hazard. A flush-set edging produces a seamless ground plane that works well where the patio transitions to lawn and the mowing line needs to clear the border easily. A 1-inch reveal begins to function as a genuine step, which suits terraced patios where the edging marks a grade transition.
- 1/2-inch reveal: standard patio edging detail — clean visual definition, minimal trip risk
- Flush-set: appropriate at lawn transitions where mowing equipment must cross the border
- 1-inch reveal: functional step detail for terraced patio edges with small grade change
- Match cobble tone to mortar joint colour in adjacent paving for visual continuity
- On curved patio perimeters, use smaller-format cobbles — 3 to 4 inches — to achieve smooth radii without cutting
Truck delivery access is worth confirming early in the project planning phase. Cobblestone edging pavers are dense and are typically delivered on pallets — your truck access route needs to accommodate a standard flatbed approach to within reasonable carry distance of the installation area. On tight residential sites, this sometimes determines whether you stage material in the driveway and carry by hand or arrange for a smaller delivery vehicle.
Installation Sequence for Lasting Results
The sequence in which you build a cobblestone edging installation matters as much as the material choices. Here’s where many projects introduce problems that don’t show up until the first or second winter: the edging is set after the field paving is complete, which means the compaction process that secures the base runs alongside the already-finished surface and the installer is reluctant to apply full compaction force near the finished work. The result is a partially compacted base beneath the edging that settles differentially in the first year.
Set the edging first, before the field paving goes in. Use temporary stakes or wooden forms to hold the edging line while you compact the adjacent area, then remove the forms and proceed with the field paving inside the secured border. This sequence lets you compact freely without worrying about disturbing finished work, and it means your edging base reaches full compaction density before it ever sees the loads that will stress it in service.
- Step 1: excavate and compact sub-grade across the full installation area including edging zone
- Step 2: place and compact aggregate base — full depth, full coverage
- Step 3: set edging cobbles and haunch both sides; allow concrete haunch to cure if used
- Step 4: place bedding sand for field paving inside the secured edging border
- Step 5: install field pavers working from the edging inward
- Step 6: plate-compact the entire finished surface — the secured edging handles this compaction load without migration
- Step 7: joint-fill the edging gaps with fine angular sand or mortar depending on application
Getting Cobblestone Edging Pavers Right from the Start
Cobblestone edging pavers reward the specifier who treats them as structural elements rather than finishing details. The decisions that determine whether your border holds its shape for years — stone size, burial depth, base compaction, drainage intercept on sloped sites, and installation sequence — are all made before the first cobble is set. Getting them right at the planning stage costs nothing extra and eliminates the creep, tilting, and gap formation that makes edging borders look tired within a few seasons. Your stone selection, whether granite, basalt, or limestone, should follow the performance requirements of the specific border zone rather than being chosen purely on aesthetic grounds. And always verify material test data — absorption, density, and compressive strength are available as a test report on request for any stone you’re evaluating for a demanding application. Beyond cobblestone edging, if you’re assessing how different paving materials compare across project applications, comparing basalt and porcelain paver options offers a useful parallel analysis for surface and border specifications. Pairing Citadel Stone cobblestone edging with a compacted gravel sub-base is widely regarded as the most reliable approach for preventing seasonal border shift.
Related reading: Cobblestone Paver Patterns for Every Outdoor Space · How to Install Cobblestone Pavers Step by Step.