Travertine stone shower installations fail at a much higher rate than necessary — and the cause almost never traces back to material quality. The real culprit is usually inadequate waterproofing beneath the tile, compounded by grout and fill selection that works against travertine’s natural open-pore structure. Understanding what experienced installers know about moisture management and surface care is what separates a shower that looks pristine at fifteen years from one that’s grout-cracking and staining at four.
Why Travertine Reacts Differently in Wet Areas
Travertine natural stone is a sedimentary calcium carbonate material with an interconnected void network that distinguishes it from denser igneous or metamorphic alternatives. In a shower environment, that void structure means water has pathways that ceramic or porcelain simply don’t offer. The voids aren’t a defect — they’re geological — but they require a fundamentally different installation and maintenance protocol than most wet-area tile projects follow.
- Absorption rates for travertine typically range from 0.3% to 2.0% by weight depending on fill density and surface finish — a wider band than most installers account for when selecting sealers
- Unfilled travertine in a shower will wick moisture into the field from the back face, pressurising grout joints and accelerating efflorescence
- Honed and brushed finishes retain more micro-surface texture than polished cuts, which directly affects both sealer bond performance and cleaning protocol
- Calcium carbonate reacts adversely to acidic cleaners — a detail that rules out most common bathroom tile products without a second thought
Travertine’s porosity does provide one genuine advantage in wet areas: when properly sealed, the surface stays cooler underfoot than glass tile or dense stone alternatives. That thermal behaviour matters in heated-floor shower installations where surface temperature management improves the barefoot experience significantly.
Waterproofing Membrane Selection and Placement
The waterproofing layer is where most travertine stone shower projects either succeed long-term or fail quietly behind the tile. Sheet membranes bonded to the substrate before tile-setting are the current industry standard for natural stone wet areas — not surface-applied sealers, which only address the tile face, not the assembly. According to ASTM C1527 travertine dimension stone standards, proper substrate preparation and moisture management protocols are foundational to long-term travertine installation performance.
- Uncoupling membranes (foam-core bonded sheet systems) provide both waterproofing and a degree of crack isolation, which protects travertine’s inherently brittle calcium carbonate matrix from substrate movement
- Fabric-reinforced liquid waterproofing applied in two coats gives you better coverage in complex geometry — niches, curbs, floor-to-wall transitions — where sheet membranes require time-consuming detailing
- Pre-slope your shower floor to a minimum 1/4 inch per foot toward the drain before the membrane goes down — attempting to create slope after membrane application is one of the most common field errors in natural stone bathroom installations
- Niche backs and shelves demand independent waterproofing treatment; they’re the second most common failure point after drain surrounds
Your waterproofing system must be flood-tested before tile installation begins. Fill the shower pan to curb height, mark the water level, and check after 24 hours. Any drop indicates a breach you must locate and address before travertine natural stone goes down — remediation after tile installation is expensive and often requires full demolition.
Filling and Grouting Travertine for Shower Walls and Floors
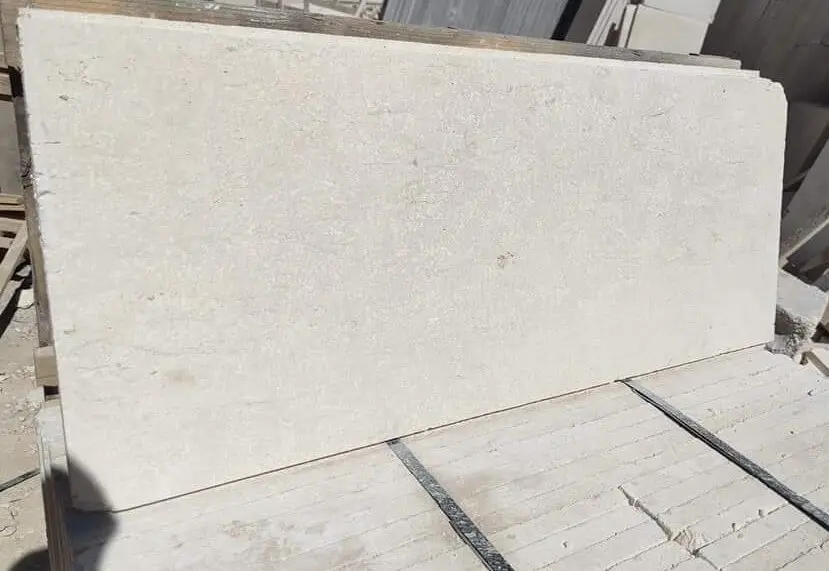
Specifying a travertine stone grey tile or an ivory-toned travertine for shower walls introduces a filling decision that most bathroom tile projects never require. Travertine leaves the quarry with natural voids — some filled by the producer, some left open depending on the product grade and cut type. For wet areas, filled travertine is the appropriate specification in nearly all cases.
Travertine’s calcium carbonate structure means your grout selection must be pH-neutral at installation and remain chemically stable in the alkaline shower environment long-term. According to the Tile Council of North America installation standards, natural stone tile in wet-area applications requires grout systems specifically evaluated for use with calcium carbonate substrates. Sanded grout for joints wider than 1/8 inch introduces abrasion risk to softer travertine finishes during grouting — unsanded or fine-sanded grout formulations protect honed and brushed surfaces.
- Epoxy grout offers the strongest chemical resistance in high-humidity environments but requires precise working-time management — travertine’s surface texture can trap epoxy residue if cleanup is delayed
- Cement-based grout sealed within 72 hours of cure provides adequate performance for most residential shower applications when the waterproofing assembly beneath it is correctly executed
- Any pre-existing voids in the travertine face must be filled prior to grouting — attempting to use grout as both joint filler and void fill produces inconsistent colour and compromised structural integrity at the void edges
For shower floors where travertine stone grey formats are common, match the fill compound colour to the stone as closely as possible before grouting. Colour mismatch between fill and grout becomes visible under directional shower light and is difficult to correct retroactively.
Sealing Protocols That Actually Hold in Shower Conditions
Surface sealing for a travertine stone shower operates under more demanding conditions than outdoor applications — daily water exposure, cleaning chemical contact, and temperature cycling from hot water. The sealer category matters more than the brand: penetrating silicone or fluoropolymer impregnators bond within the pore structure rather than forming a surface film, which means they don’t delaminate the way topical coatings do under sustained moisture.
Penetrating impregnators with fluoropolymer chemistry provide superior oil and water repellency for shower environments. Apply the first coat to fully cured, clean, dry travertine — at least 28 days after installation for cement-based mortar beds — and follow with a second application within the manufacturer’s wet-window, typically 5-10 minutes, to ensure saturation through the stone’s absorption depth. The Natural Stone Institute’s travertine guidance recommends sealer selection based on measured absorption rate — a field test with water droplets on the surface indicates when resealing is due as the stone begins absorbing rather than beading.
- Shower travertine should be resealed every 12–18 months under normal residential use — shorter cycles apply in high-use commercial showers or where hard water mineral deposits accumulate rapidly
- Allow 48–72 hours after sealing before exposing the surface to water — insufficient cure time produces white hazing at the surface that requires stripping and reapplication
- Test sealer compatibility on a small inconspicuous area before full application — certain finish types, particularly lightly brushed surfaces, can darken if sealer chemistry is not matched to the stone’s absorption profile
Drain Geometry and Drainage Design for Travertine Shower Floors
Drainage design has a direct impact on travertine longevity in shower applications — and it’s one area where site conditions genuinely vary the installation approach. In residential applications where bathroom plumbing is set at a fixed elevation relative to finished floor height, your floor drain must be positioned and set to allow the required pre-slope without compromising tile layout symmetry. Elevation constraints in the plumbing rough-in effectively dictate the maximum mortar bed depth available for slope creation.
Linear drains along one shower wall simplify slope management for large-format travertine tiles — a single-plane pitch to one edge avoids the four-directional slope required by centre-drain configurations, which introduces compound cutting complexity with natural stone. For shower floors with significant elevation differential from rough substrate to finished surface, a sloped mud bed system gives you the most control over achieving consistent 1/4-inch-per-foot pitch without over-building mortar thickness at the high end. You can explore our bathroom travertine range to assess available thicknesses — consistent slab thickness through the batch is critical for maintaining uniform mortar bed depth across sloped floors.
- Set the drain flange at the target finished floor elevation before any mortar work — adjusting drain height after mud bed installation is a common source of pooling at drain perimeters
- Large-format travertine tiles (24×24 and larger) require back-buttering in addition to full-coverage trowel application on the substrate — a hollow-sounding tile in a shower floor is a waterproofing failure waiting to happen
- Barrier-free shower designs with no curb require extended waterproofing zone width (minimum 36 inches from shower edge onto bathroom floor) — the absence of a curb removes the primary water containment line from the assembly
Daily Maintenance and Cleaning for Travertine Natural Stone Showers
The cleaning product choices made after installation determine long-term appearance as much as the original specification decisions. Travertine natural stone is chemically sensitive in ways that most homeowners don’t encounter with porcelain — and the products that dominate bathroom cleaning aisles are almost uniformly wrong for it.
- Avoid any cleaner with a pH below 7.0 — this eliminates vinegar, citrus-based products, and most commercial bathroom cleaners containing sulfamic acid, phosphoric acid, or hydrochloric acid; all etch calcium carbonate
- pH-neutral stone soaps are the appropriate daily maintenance product — apply diluted, rinse thoroughly, and squeegee the wall surface after each use to limit mineral deposit accumulation
- Hard water deposits (calcium and magnesium scale) require targeted treatment with a non-acidic mineral deposit remover specifically formulated for natural stone — standard lime scale removers are acid-based and will damage travertine finish irreversibly
- A daily shower spray containing a small percentage of alcohol and neutral surfactant keeps bio-film from establishing in grout joints and surface micro-texture without chemical attack on the stone
- Never use abrasive scrub pads on honed or polished travertine — surface micro-scratches scatter light and dull the finish permanently, requiring professional re-honing to restore
At Citadel Stone, we recommend that clients document their sealer product and application date at installation — it’s a simple step that prevents the most common maintenance mistake, which is reapplying incompatible sealer chemistry over an existing system that hasn’t been fully stripped first.
Finish Selection and Slip Resistance in Wet Environments
Finish selection for a travertine stone shower floor is a genuine safety specification, not just an aesthetic preference. Polished travertine, which achieves a coefficient of friction (COF) as low as 0.3 when wet, does not meet the DCOF threshold of 0.42 recommended for wet-area residential floors by current tile industry guidance. Honed, tumbled, and brushed finishes retain surface texture that keeps wet COF values in the 0.5–0.65 range — a meaningful safety margin for barefoot shower use.
The distinction between travertine stone grey finishes and lighter tones becomes relevant here: darker pigmentation doesn’t affect COF, but it does affect how surface deposits are visible during routine inspection. Mineral scale and soap residue on dark grey travertine are more visible, which actually functions as an indicator that resealing or cleaning is needed — a practical benefit in high-use showers. Citadel Stone maintains warehouse inventory of travertine in both honed and brushed finishes, typically allowing lead times of one to two weeks for residential shower projects rather than the six-to-eight-week import cycle custom orders require.
- Shower walls can use polished travertine safely — the COF concern applies to horizontal floor surfaces only
- For shower floors, specify minimum honed finish or tumbled texture — avoid polished tiles regardless of their visual appeal
- Mosaic formats (2×2 and smaller) introduce more grout joint area per square foot, which increases overall COF — a practical specification for bench tops or curved shower pan sections where larger tiles create layout complexity
Getting Travertine Shower Specifications Right
A travertine stone shower done right is a genuinely long-lived installation — one that improves aesthetically with careful maintenance rather than degrading from it. The variables that determine outcome are almost entirely in the specification and installation phase: waterproofing assembly integrity, correct fill and grout product selection, a penetrating sealer matched to the stone’s absorption profile, and a drain geometry that moves water efficiently without relying on the tile or sealer to do work they weren’t designed for. Get those decisions right before the first tile goes up, and the ongoing care requirements are modest. Beyond shower applications, travertine natural stone’s versatility in bathroom environments extends to vertical surfaces throughout the space — travertine backsplash applications offer a complementary technical read on how the material performs in similarly demanding wet-adjacent conditions. Shower travertine from Citadel Stone is offered in slip-conscious finishes selected for wet-area walls and floor pans.
Related reading: what type of stone is travertine · travertine stone colors · how to clean travertine stone.