Base preparation accounts for more patio failures than any other single variable — and most of those failures trace back to the first two hours of work, not the last. Getting how to lay paver patio stones right means understanding that the surface you see is only as stable as the substrate you can’t. The sequence of decisions beneath the stone determines whether your patio settles gracefully or develops a chronic heaving problem within three seasons.
Tools and Materials You Need Before You Start
You’ll waste significant time mid-project if your material list isn’t complete before the first shovel goes in. The tools required for patio paving stones installation are specific enough that substitutions create problems — a hand tamper, for example, won’t achieve the compaction density that a plate compactor delivers, and that gap in compaction is where settlements begin.
- Plate compactor (rental is fine — don’t substitute a hand tamper for the base layers)
- Laser level or long straightedge — minimum 8 feet for accurate slope verification
- Mason’s string line and line level for establishing grade references
- Rubber mallet for seating individual stones without fracturing edges
- Diamond blade wet saw or angle grinder with stone disc for cuts
- Screed pipes (1-inch diameter) for setting your bedding sand depth accurately
- Tamping sand, coarse concrete sand, and crushed stone aggregate for base layers
- Polymeric jointing sand rated for your expected joint width
Confirm your paver order and any warehouse stock availability before scheduling your excavation. Delivery lead times from the warehouse typically range from one to two weeks for in-stock material, and you don’t want exposed subgrade sitting unprotected while you wait on a second truck arrival.
Excavation Depth and Slope Requirements
Your excavation depth isn’t a single number — it’s calculated from your finished surface elevation working backwards through each layer. The formula is straightforward: finished paver surface elevation, minus paver thickness, minus 1 inch of bedding sand, minus compacted aggregate base depth. That aggregate base depth is where most guides give you a generic number. In practice, it depends on your soil conditions and expected load.
For residential patio use on stable, sandy or gravelly native soils, a 4-inch compacted aggregate base is often sufficient. On expansive clay subgrades or any soil with high plasticity, you need to go deeper — 6 to 8 inches minimum — because clay soils swell and shrink seasonally in ways that will telegraph directly through an undersized base. According to ASLA outdoor patio stone material selection and design guidance, proper subgrade preparation is the foundational factor in natural stone patio longevity, with base thickness calibrated to local soil bearing capacity.
Slope is non-negotiable. You need a minimum fall of 1/8 inch per foot, directed away from any structure. Many installers set string lines at this slope and then discover mid-project that their native grade fights them. Establish your slope references before excavation, not after.
Understanding Soil Conditions Before You Dig
Soil type shapes every base preparation decision you’ll make on a patio stone installation. Sandy or loamy soils drain freely and compact predictably — they’re cooperative subgrades. Clay soils are the opposite. High-plasticity clay expands when wet and contracts when dry, and those volume changes can be significant enough to shift a paver surface by half an inch or more over a single season. That kind of movement cracks mortar joints, disrupts drainage slope, and creates trip hazards that are difficult to correct without lifting and resetting large sections.
Caliche — the calcium carbonate hardpan common in drier regions — presents a different challenge. It’s not expansive, but it’s often irregular in depth, which means your excavation hits resistance in unpredictable patches. You may need a jackhammer or mini-excavator to break through caliche layers before you can establish a consistent subgrade elevation. Rocky soils create similar unevenness but are generally stable once you’ve established your grade.
- Sandy or gravelly soils: compact readily, drain well, 4-inch base typically sufficient
- Clay soils: require deeper base (6–8 inches), consider geotextile fabric between subgrade and aggregate
- Caliche subgrade: break through to establish consistent depth, generally stable once graded
- Organic or filled soils: remove entirely and replace with compacted aggregate — do not build on organic material
- High water-table areas: drainage assessment required before any stone installation begins
A geotextile separation fabric between your native subgrade and the aggregate base layer adds meaningful long-term protection on clay sites. It prevents clay migration into your aggregate — a process called pumping — that progressively degrades base compaction over years of wet-dry cycling.
Compacting Your Aggregate Base Correctly
The aggregate base is where the work actually happens, and this is also where most DIY installations cut corners they later regret. Crushed angular stone — typically 3/4-inch minus compactable aggregate — is the correct material. Round river gravel does not interlock when compacted and is not a substitute, despite being easier to source at some locations.
Place and compact the aggregate in lifts no deeper than 3 to 4 inches each. Running a plate compactor over 6 or 8 inches of loose aggregate in a single pass achieves surface density but leaves the lower material inadequately compacted. Make two or three passes with the compactor in overlapping rows, then add your next lift. Your finished compacted base should resist deflection when you walk on it — you should see zero footprint impression after compaction is complete. According to Natural Stone Institute outdoor stone paving specifications, adequate base compaction is cited as the most critical pre-installation variable in natural stone paving performance and longevity.
Once the aggregate base is complete, check your slope references again. Compaction can subtly shift grade — catching discrepancies at this stage is easy; catching them after the bedding sand is screeded is not.
Screeding Bedding Sand for Patio Stone Installation
Bedding sand depth should be consistent at 1 inch after compaction — not before. This is a detail that catches people off guard. Coarse concrete sand (not masonry sand, which is too fine) screeded at roughly 1.25 inches settles to approximately 1 inch once the pavers are set and the plate compactor makes its final pass over the surface. If you screed at a full inch and then compact, you end up short, which throws off your finished elevation relative to adjacent surfaces.
Use 1-inch diameter screed pipes as depth guides. Set them parallel at intervals your screed board can span, pull the screed board across the top of the pipes to establish a flat plane, then carefully remove the pipes and fill the channels with loose sand. Do not walk on screeded sand before placing stone. A single footprint creates a low spot that telegraphs through the finished surface.
- Use coarse concrete sand — not fine masonry sand, not stone dust
- Screed at 1.25 inches; expect settlement to 1 inch after final compaction
- Maintain your slope reference throughout the screeding process
- Work in sections you can pave without re-walking on the screeded area
- Do not wet the bedding sand before laying stone — moisture causes inconsistent compaction behaviour
How to Lay Paver Patio Stones in the Correct Sequence
Start from a fixed, straight reference edge — typically a house wall, a step, or a string line. Lay your first course along this reference and work outward. Trying to work from the middle outward creates accumulating alignment errors that compound over distance. Set each stone by placing it flat onto the screeded sand and pressing it down firmly — don’t slide it into position, as sliding disturbs the sand bed beneath adjacent stones already placed.
Check every third or fourth stone with your level. A single stone that’s slightly high or low is easy to correct at this stage: lift it, add or remove a small amount of sand, and reset. Correcting it after six more stones are placed around it is considerably more disruptive. For patio stones laying in a running bond or offset pattern, stagger your joints by a third or half the stone length — joints that align create a visual line that draws the eye to any slight unevenness in the surface.
Exploring the full material options available to you before committing to a stone type is worth the time. Browse our natural paving stone range to compare thicknesses, finishes, and format sizes that suit different patio layouts and structural requirements.
Cutting Patio Stones for Edges and Borders
Edge cuts are unavoidable unless your patio dimensions happen to fall on exact multiples of your stone size — which they rarely do. A diamond blade wet saw gives you the cleanest cut with minimal waste and reduced dust. For straight cuts on most natural stone pavers, this is the preferred method. For curves or irregular shapes, an angle grinder with a dry-cut diamond disc gives you the control that a stationary saw can’t.
Plan your cut layout before you reach the edges. Measure the remaining space at each border and calculate whether you can shift your starting point by an inch or two to avoid cuts smaller than half a stone. Cuts smaller than 40% of a full stone are fragile along the cut edge and difficult to seat securely in bedding sand. Where you can’t avoid a narrow cut, back-butter it with a small amount of mortar at the setting point for additional stability.
- Wet saw: best for straight cuts, clean edges, minimal stone fracture
- Angle grinder with diamond disc: best for curves and angled cuts
- Score-and-snap: acceptable for soft stones only, not recommended for dense natural pavers
- Avoid cuts narrower than 40% of the full stone width — they’re difficult to secure in sand
- Always wear eye protection and a dust mask regardless of cutting method
Jointing Sand and Final Compaction
Polymeric jointing sand is the standard for patio paving stones installation — it sets harder than regular sand when activated with water and resists washout from rain and irrigation. Joint width affects which product you choose: most polymeric sands perform correctly in joints between 1/8 inch and 4 inches, but check the manufacturer’s specification because the polymer binder technology varies by product and width range.
Sweep dry polymeric sand across the paved surface and work it into the joints with a stiff broom. Make two or three passes in different directions to ensure full joint fill. Then run the plate compactor over the entire surface one final time — this seats the stones firmly into the bedding sand and vibrates the polymeric sand deeper into the joints. Add a second sweep of sand to top up any joints that dropped after compaction, then activate the sand with a fine mist of water according to the product instructions. Don’t flood it — a fine mist applied in passes is more effective than a single heavy application. According to USGS natural stone properties and composition data, the density characteristics of different natural stones affect how they respond to compaction pressure, which is worth knowing when you’re calibrating your plate compactor pass count for denser materials.
Keep foot and furniture traffic off the surface for a minimum of 24 hours after jointing sand activation. Polymeric sand achieves its initial set quickly but reaches full cure strength within 24 to 48 hours depending on temperature and humidity. Disturbing it during cure creates soft spots that you’ll notice within the first season.
Getting Your Paver Patio Stones Specification Right
The core decisions in a successful how to lay paver patio stones project aren’t made at the surface — they’re made in the base. Your subgrade assessment, aggregate depth, compaction quality, and bedding sand consistency collectively determine whether your patio stones perform for two decades or develop problems within three years. The patio stones laying sequence and jointing process matter, but they can only perform as well as the foundation beneath them allows.
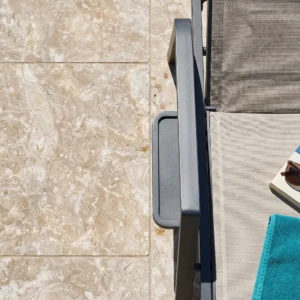
Natural stone pavers add a dimensional complexity that concrete units don’t share — slight thickness variation between pieces is normal, and your bedding sand is what accommodates it. Checking level frequently during the lay-out phase catches small adjustments before they become compounding errors. Keep your base lift compaction disciplined, your slope consistent, and your polymeric sand fill complete before activation.
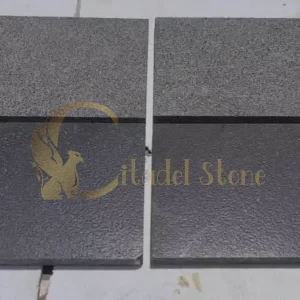
Planning your material quantities accurately before ordering prevents both shortage delays and excess stock. For help calculating how much material your project requires, our guide on patio stone quantity planning walks through the calculation method step by step. Sourced from quarries across the Mediterranean and Middle East, Citadel Stone pavers arrive dimensionally uniform for predictable joint spacing during installation.
Related reading: patio designs with stones · types of patio stones · cost of patio stones.