Why Placement Sequence Determines Everything
Knowing how to place large landscaping rocks correctly starts before the stone leaves the truck — the visual outcome is locked in by base preparation, positioning decisions, and burial depth established in sequence before any rock touches the ground. The single variable that separates a boulder installation that looks rooted from one that looks dropped is that sequence. Get it wrong and you’re fighting physics for the next decade.
Most placements fail not because the stone was wrong but because the site wasn’t engineered first. Large rocks redistribute load across the base soil, and without compaction or a stable sub-base, even a half-ton boulder will migrate over two to three frost cycles. The goal from day one is to create a system where the earth holds the stone, not the other way around.
Reading Your Site Before the First Rock Moves
Terrain dictates everything about how you place large rocks for landscaping — drainage path, burial angle, and equipment access all shift dramatically depending on whether you’re working a flat lawn, a sloped yard, or a hillside that drops more than two feet over a ten-foot run. Before ordering or placing a single stone, walk the site with a level and a probe rod and note where water naturally collects after a heavy rain. That tells you where boulders will create problems versus where they’ll anchor and frame drainage naturally.
For sloped sites, grade management is a non-negotiable first step. A boulder placed on an unmanaged grade without toe-compaction or a cut-bench in the slope will creep downhill over two to five years — not dramatically, but enough to open gaps, tilt the face angle, and let erosion undercut the base. On elevation changes steeper than a 3:1 slope, you’ll need a cut bench at minimum 30% of the boulder’s diameter to create a stable platform before any placement begins.
- Map water flow direction across the full installation zone before marking boulder positions
- Identify soft spots or areas with standing water — these require a gravel sub-base before placement
- On slopes, cut a horizontal bench into the grade at each boulder location to prevent downhill migration
- On flat sites with clay-heavy soils, plan for a compacted crushed stone base at least 4 inches deep beneath each boulder
- Note existing tree roots — large boulders placed over major root systems can cause long-term root damage and eventual destabilization
- Mark overhead utility lines and underground irrigation runs before committing to any equipment path
Equipment Access and Delivery Planning
Equipment and truck access constraints are often the most underestimated part of a large rock placement project. A skid-steer or mini-excavator can handle boulders up to about 600 lbs efficiently, but anything pushing 1,000 lbs and above typically requires a full-size excavator or a crane lift — and that machine needs a clear, compacted path to the installation zone. Plan that path first, not as an afterthought.
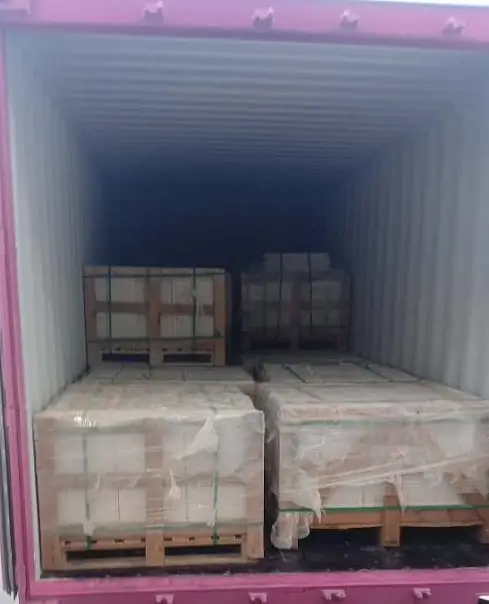
Citadel Stone ships large landscaping rocks on flatbed trucks, and delivery access directly affects what’s possible on-site. If your driveway or gate clearance limits truck size, flag this before your order is confirmed — warehouse staff can work with you on split deliveries or alternative drop points that reduce double-handling on-site. Double-handling large boulders with equipment costs time and increases the risk of surface chipping during repositioning.
- Measure gate widths, overhead clearances, and turning radii before scheduling delivery
- Confirm the truck’s unloading method — crane offload, conveyor, or manual lift — and ensure you have sufficient horizontal clearance for each
- Protect lawn and paving during equipment transit with ground protection mats or plywood runs
- Position a designated staging area close to the installation zone where boulders can be temporarily set before final placement
- For hillside sites, coordinate whether equipment will need to approach from above or below the installation zone — this changes your grading sequence
Base Preparation and Compaction for Stable Placement
Base preparation is where the long-term stability of your large rock landscaping ideas is either built or compromised. For boulders under 500 lbs on stable, non-clay soils, native compacted soil can sometimes suffice — but for anything heavier or on expansive soils, you need a minimum 4-inch compacted crushed stone base. Use angular crushed gravel rather than rounded pea gravel; angular aggregate interlocks under load and resists lateral movement in a way that rounded material simply cannot.
According to the Natural Stone Institute landscape stone variety selection guide, stone mass and base interaction are primary factors in long-term dimensional stability for outdoor stone features. This principle applies directly to boulder placement — the greater the mass above, the more critical the sub-base compaction becomes. A plate compactor run over the base area in two passes before placement is the standard field approach, and it’s worth every minute of the extra time.
- Excavate 4–6 inches below finish grade at each boulder location and fill with compacted angular crushed stone
- Compact in two lifts — compact the first 3 inches, add the remaining layer, and compact again
- For boulders over 800 lbs, extend the compacted base zone 12 inches beyond the boulder footprint in all directions
- On freeze-thaw-prone sites, increase base depth to 8 inches and use clean crushed stone that drains freely to prevent ice-lens formation beneath the stone
- On sloped sites, add a compacted gravel toe at the downhill edge of the bench to prevent the base from washing out under the boulder
Positioning, Face Angle, and Burial Depth
Positioning is the craft element of how to place large landscaping rocks — and it’s where field experience separates good placements from great ones. Natural boulders have a grain, a weathered face, and a flat base that accumulated over geological time. Your job is to read those features and orient the stone so the most interesting face presents outward, while the flattest, most stable face sits against the compacted base. Never place a boulder on a convex surface, even a slight one — always seat it into a shallow depression in the base material.
Burial depth is the detail most residential placements get wrong. A boulder that sits entirely above grade looks placed, not grown. The rule of thumb used across professional installations is to bury 20–30% of the total boulder mass below finish grade. For a three-foot boulder, that’s roughly 7–11 inches below grade. This isn’t just visual — gradual burial locks the stone against lateral shifting by using the surrounding soil and aggregate as a brace. For large rocks in a front yard landscaping context especially, proper burial transforms a decorative element into something that reads as permanent and intentional.
- Rotate the boulder before final placement to identify the most textured, naturally weathered face — this becomes the outward presentation face
- Tilt the face angle very slightly backward (2–5 degrees) so rainwater sheds away from the soil zone behind the stone
- Bury 20–30% of the boulder’s total height below finish grade as a minimum for stable, natural-looking placement
- After setting, backfill the excavated zone around the buried portion with compacted angular gravel, not loose topsoil
- On sloped sites, orient the boulder’s long axis parallel to the slope contour, not perpendicular — this reduces the downhill load vector and improves stability
Grouping and Composition for Natural-Looking Results
Large rock landscaping ideas built around single isolated boulders rarely read as natural — stone in nature clusters, with dominant masses flanked by secondary and tertiary pieces. A composition of one large anchor boulder with two mid-size companions and several smaller accent stones gives the eye multiple points to move between and creates the sense of an outcropping rather than a decoration. The American Society of Landscape Architects natural stone hardscape guidance consistently emphasizes naturalistic grouping as a principle that distinguishes high-quality landscape stone work from generic placements.
For Citadel Stone boulder selection, matching stone type and color family across the primary and secondary pieces in a grouping is critical — mixing incompatible stone types in a single cluster creates visual noise that undercuts the natural reading you’re aiming for. Within a single grouping, vary sizes dramatically: a 400-lb anchor piece works with 80–120-lb secondary stones and 20–40-lb accents, not with three similarly sized boulders lined up in a row.
- Use odd numbers — groupings of three, five, or seven stones consistently read as more natural than even-numbered arrangements
- Space groupings asymmetrically — equal spacing between stones reads as manufactured, not geological
- Vary burial depths within a grouping — some stones more exposed, some more embedded — to replicate natural outcropping variation
- Orient stones within a group at slightly different face angles, but maintain a general directional alignment that suggests a shared geological origin
- Leave intentional negative space between groupings — open ground between stone clusters prevents the landscape from reading as cluttered
Drainage Design Around Large Boulders
Large landscaping rocks redirect surface water — and without a plan for where that water goes, you’ll create erosion channels, pooling zones, and soil undermining that destabilize placements over time. This matters most on elevated terrain and sloped installations, but it’s relevant even on flat sites where a large boulder creates a micro-watershed on its uphill side. The standard field solution is to grade the soil away from the boulder base at a minimum 2% slope in all directions, then protect the graded zone with gravel mulch or ground cover that slows runoff velocity.
According to USGS natural landscape stone production and use in the USA, dimension stone used in outdoor landscape applications performs best when installed with drainage designed into the base and surrounding grade. On sites with heavy clay content, a French drain or perforated pipe run behind a boulder grouping on the uphill side can divert significant water volume and protect the compacted base from saturation. Saturated base material loses its load-bearing capacity and is the primary cause of boulder settlement in well-installed placements.
- Grade surrounding soil at 2% minimum slope away from each boulder base in all directions
- Install a gravel apron at least 12 inches wide around the boulder perimeter to absorb and disperse surface runoff
- On sloped sites, consider a perforated drain pipe uphill of large groupings to intercept and redirect sheet flow before it reaches the boulder base
- Avoid planting water-intensive groundcovers directly against boulder bases — root systems in constantly wet soil adjacent to large stones can destabilize placement over time
- Check drainage performance after the first significant rainfall and regrade any zones where water pools within 18 inches of a boulder base
Plant Integration and Mulching Around Boulders
The plant material you introduce around large landscaping rocks determines whether the installation ages gracefully or looks maintenance-intensive within two seasons. Low-growing plants that naturally colonize rocky terrain — ornamental grasses, creeping junipers, sedum varieties, and spreading ground covers — bridge the hard edge between stone and soil in a way that mimics geological reality. Avoid tall, upright plants placed immediately adjacent to boulders; they compete visually with the stone mass and often need staking or pruning that disturbs the ground directly around the boulder base.
Mulching within stone groupings requires care. Organic mulch directly against a boulder traps moisture at the stone-soil interface and, in humid environments, can accelerate biological staining on porous stone surfaces. A 2–3 inch gravel mulch within 18 inches of each boulder base is preferable — it suppresses weeds, regulates soil temperature, and keeps the base zone from becoming a water-retention problem. Beyond that 18-inch perimeter, organic mulch or ground cover plants can transition naturally.
- Select plants proportionate to the boulder scale — a 400-lb boulder paired with a 6-foot shrub creates an unresolved visual competition
- Use spreading ground covers to fill gaps between stone groupings rather than tall perennials that require regular management adjacent to large rocks
- Apply gravel mulch within the immediate boulder zone and transition to organic mulch or living ground cover at the perimeter
- Allow some plant material to grow partially over smaller accent stones — this accelerates the naturalistic appearance of a new installation
- Avoid plants with aggressive root systems near boulders that are buried at shallow depth — root pressure against the buried portion can gradually rotate the stone
Ordering, Logistics, and Project Timeline
The logistics side of a boulder project requires the same attention to detail as the installation itself. Warehouse inventory for large boulders varies — specific sizes and weights aren’t always in stock in the quantities a larger project needs, and lead times from the warehouse can run 1–2 weeks for in-stock material or extend further if specialty sizes or specific stone types need to be sourced. Confirm availability before finalizing your installation schedule, particularly if your project window is weather-dependent.
At Citadel Stone, we recommend confirming truck access requirements at the time of order rather than at delivery — gate widths, surface weight limits, and overhead clearances need to be communicated early so the right delivery configuration is arranged. Last-minute access surprises are the most common cause of project delays for large boulder deliveries. The ASLA outdoor stone material selection and design guidance also highlights site logistics as a factor in sustainable installation practice — reducing double-handling and repositioning on-site lowers both project cost and ground disturbance.
- Order 10–15% more stone mass than your design calls for — this accounts for selection rejects and allows you to choose the best face angles on-site
- Confirm warehouse stock and lead times at least three weeks before your installation date
- Schedule equipment rental to align with delivery day — same-day delivery and placement reduces the double-handling that risks surface chipping
- Have a cleared staging area ready at delivery — truck unload time is typically charged per hour if delays occur
- Photograph each boulder’s face options before final placement so your crew can reference the best angle without physically rotating the stone multiple times
Getting Large Rock Placement Right From the Ground Up
Knowing how to place large landscaping rocks is ultimately about respecting the weight, permanence, and natural character of the material. The decisions you make before the stone arrives — terrain assessment, base preparation, drainage design, and logistics coordination — determine the quality of the outcome far more than any finishing adjustment made after placement. A well-placed boulder grouping communicates a sense of geological inevitability: it looks like it belongs there, like it was always there, and like it will remain there without intervention. That effect only comes from getting the foundational work right.
Your next step after finalizing placement strategy is often refining the broader front yard composition — how boulders anchor a larger design, direct sight lines, and frame planting beds. For complementary ideas on how stone features work together across a front yard layout, front yard rock design concepts covers that dimension of landscape stone planning in useful detail. Properly placing heavy stone from Citadel Stone requires base compaction and gradual burial, which prevents shifting and gives boulders a grounded, permanent look.
Related reading: river rock landscaping · White vs Black Landscaping Rock: Which to Choose? · landscaping rock bulk cost.