

Surface texture determines far more than aesthetics in a tumbled travertine tile guide — it determines whether your installation performs reliably for two decades or starts showing wear and joint failure within five years. The tumbling process isn’t cosmetic; it rounds edges, creates micro-relief across the face, and closes the stress fracture risk at tile corners that polished or honed cuts leave exposed. Understanding what that process does to the material’s porosity, coefficient of friction, and long-term maintenance requirements is where specification decisions actually begin.
What Tumbling Does to Travertine at a Material Level
Travertine starts as a calcium carbonate deposit formed in mineral-rich springs, and its natural structure includes interconnected voids and pore channels running through the body of the stone. The tumbling process — rotating cut tiles with abrasive media — does three things simultaneously: it rounds sharp factory edges, it creates a worn, slightly undulating surface that mimics centuries of foot traffic, and it micro-fractures the immediate surface layer in a controlled way that actually increases friction compared to a honed finish. According to Natural Stone Institute travertine properties and outdoor suitability, travertine’s open-pore structure and absorption characteristics make finish selection one of the most consequential decisions in the specification process. Your finish choice doesn’t just affect how the tile looks — it affects how water moves across it, how it responds to freeze-thaw cycles, and how aggressively you’ll need to maintain it.
The rounded edges produced by tumbling deserve specific attention. Standard tile installation relies on grout joints to manage differential movement between tiles, but sharp-edged tiles are particularly vulnerable to corner chipping under point loads. Tumbled edges distribute those loads more gradually across the radius, which reduces corner loss in high-traffic zones. That difference is most apparent in commercial applications or pool surrounds where furniture legs and foot traffic concentrate stress at tile corners.
Noce tumbled travertine tile — one of the most specified colorways in the product family — demonstrates this edge behavior especially well because the walnut-brown coloration makes edge wear visible at a distance. Properly tumbled noce tile holds its edge profile for 15 to 20 years under normal residential load conditions when installed with correct base preparation.
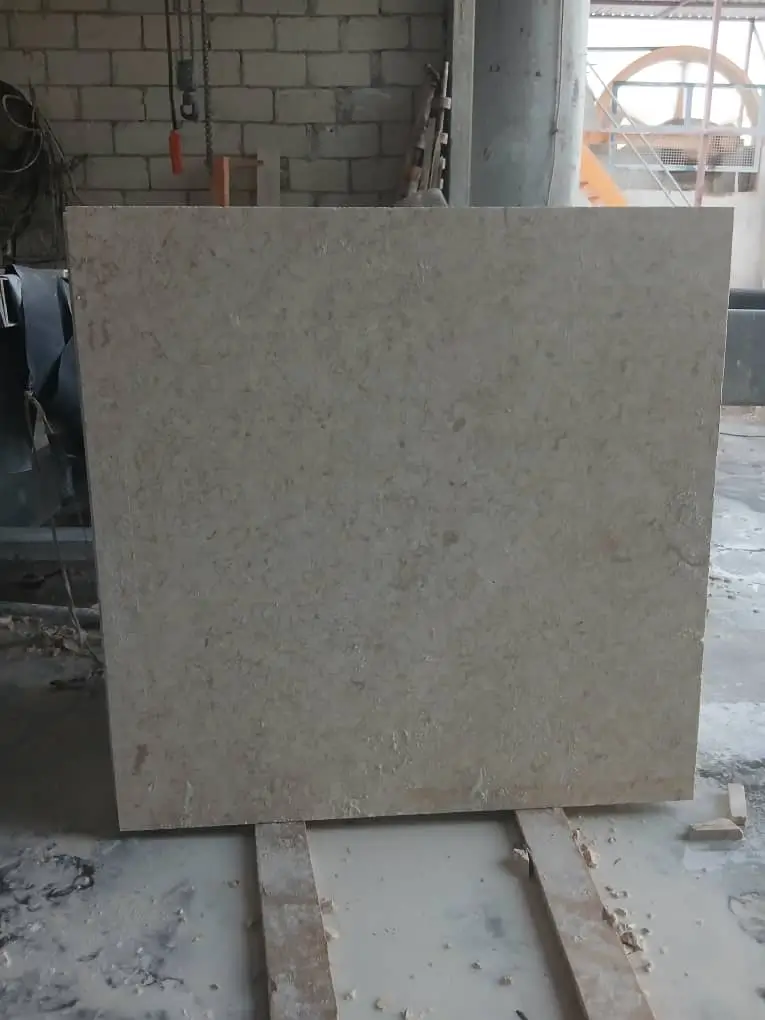
Travertine Texture and Slip Resistance: Reading the Numbers
Slip resistance in natural stone is measured by the Dynamic Coefficient of Friction (DCOF) under ANSI A326.3, and tumbled finishes consistently outperform polished and honed surfaces in wet conditions. Polished travertine offers very little underfoot texture when wet — adequate for interior dry applications but marginal for pool surrounds. Tumbled travertine texture pushes that value into the 0.55–0.72 range depending on the degree of tumbling and the tile’s natural vein density. That gap matters when you’re specifying for pool decks, outdoor shower areas, or any surface where water exposure is frequent.
The micro-relief created during tumbling is what drives that improvement. Rather than a flat, polished plane that allows a wet foot to hydroplane slightly, the tumbled surface creates dozens of micro-contact points per square inch that maintain friction even under a thin water film. The surface essentially engineers drainage at the tile level — water channels between the micro-ridges rather than forming a continuous film beneath the foot.
- Polished travertine: very little wet texture — suitable for interior dry-use flooring only
- Honed travertine: modest texture — acceptable for covered outdoor areas with limited water exposure
- Tumbled travertine: the most texture of the four — appropriate for pool surrounds, outdoor patios, and barefoot-traffic areas
- Brushed travertine: an intermediate texture — intermediate option where texture is desired with a flatter profile than tumbling produces
These comparisons assume unfilled tile. Filled-and-grouted tile with epoxy void fill can shift DCOF values slightly because the fill material’s texture differs from the stone face. Verify slip performance on filled installations separately before specifying for high-liability applications.
Where Tumbled Travertine Tile Performs Best
The application list for tumbled travertine is broader than most specifiers realize when they first encounter the material. Pool decks are the obvious starting point — the combination of barefoot traffic, constant moisture, and UV exposure demands exactly the properties that tumbling delivers. Equally strong performance arguments exist for covered outdoor kitchens, garden pathway systems, and interior flooring in entryways where wet-in traffic is a daily condition.
Pool surrounds deserve detailed attention because they concentrate multiple demands simultaneously. The surface must manage heat (travertine reflects rather than absorbs solar radiation), provide reliable wet traction, resist chlorine and saltwater chemistry, and hold up to furniture drag. Tumbled travertine tile handles all four well — though the chemical resistance story has a nuance most specifiers miss: travertine is calcium carbonate, which means prolonged contact with highly acidic pool chemistry (pH below 7.0) can etch the surface over time. Keep pool chemistry balanced and the material performs for decades.
- Pool decks and surrounds: optimal application, all four performance demands align
- Outdoor patios and terraces: excellent — texture handles furniture drag without the surface polish degradation you’d see with honed finishes
- Garden pathways and stepping stone runs: well-suited, especially in 16×16 or 18×18 formats where ground contact is distributed
- Interior entryways and mudrooms: strong performer where wet-in traffic is regular
- Covered outdoor kitchens: ideal combination of aesthetic warmth and functional texture
- Bathroom floors: strong choice, particularly in wet-room configurations
Where tumbled travertine tile underperforms: high-gloss commercial retail environments where a matte surface reads as dated, kitchen countertops where the void structure traps food residue, and driveways where vehicle point loads exceed the material’s appropriate load range for standard 3/4-inch thickness.
Water Management and Drainage in Outdoor Installations
Drainage design is arguably the most underspecified element in outdoor tumbled travertine installations, and it’s where projects in regions with high rainfall, monsoon seasons, or periodic heavy rain events develop their worst long-term problems. The tile itself handles moisture well — travertine’s absorption rate of 0.5–3.0% by weight gives it reasonable tolerance for wetting and drying cycles. The base system underneath is where drainage failures actually originate.
Your base design needs to account for two distinct drainage demands: surface drainage (water leaving the tile plane) and subsurface drainage (water moving through and away from the aggregate base). For surface drainage, a minimum 1/8-inch-per-foot fall toward drains or open edges is non-negotiable — flatten that slope below 1/16-inch-per-foot and you’ll have standing water problems within the first rain season. In regions with heavy monsoon-style rainfall or hurricane precipitation patterns, increase surface fall to 3/16-inch-per-foot to handle volume surge without ponding.
- Minimum surface drainage slope: 1/8 inch per foot (standard conditions)
- Recommended slope in high-rainfall climates: 3/16 inch per foot
- Aggregate base depth for standard residential patios: 4 inches compacted
- Aggregate base depth in freeze-thaw regions or high-rainfall zones: 6–8 inches compacted
- Sand setting bed depth: 1 inch nominal — do not exceed 1.5 inches as excess sand creates a compressible layer that promotes tile rocking
- Perimeter drain placement: required whenever the installation is adjacent to a structure’s foundation or retaining wall
Subsurface drainage failures are slower to manifest and harder to diagnose. They appear first as isolated tile rocking — one or two tiles develop movement while surrounding tiles remain solid. That pattern indicates localized base saturation where water couldn’t escape the aggregate layer fast enough, causing the sand bed to wash laterally. Installing a geotextile fabric between native soil and aggregate base prevents fines migration and keeps the drainage layer open over time. In areas with drought-flood cycles — long dry periods followed by intense short-duration rainfall — the soil expansion-contraction stress compounds this problem, making the geotextile layer even more critical.
Noce Tumbled Travertine: Specification Details That Matter
Noce tumbled travertine tile occupies a specific niche within the travertine product family — darker coloration in the walnut-to-chocolate-brown range, higher density variation between individual tiles, and a vein pattern that reads as more dramatic than ivory or white colorways. Those characteristics change several specification parameters in ways that catch specifiers off-guard when they transition from lighter travertine products.
Thermal expansion behavior shifts slightly with colorway. Darker stone absorbs more solar radiation, which means surface temperatures on noce tile can run 8–12°F higher than comparable ivory travertine in direct sun exposure. That thermal differential affects your expansion joint spacing — joints every 10–12 feet are appropriate for dark-colorway outdoor installations versus the 15-foot spacing that works adequately for lighter stones. Compress that joint spacing further in direct-sun pool deck applications where surface temperatures can reach 140–160°F on dark stone.
For a well-curated range of colorways and thickness options across the tumbled product line, Citadel Stone tumbled travertine selections provides a detailed overview of available formats and specifications. Reviewing warehouse stock levels before finalizing your order timeline helps avoid the 4–6 week delay that custom-quantity sourcing can introduce on specialty colorways like noce.
- Standard thickness range: 1/2 inch (interior), 3/4 inch (exterior standard), 1.25 inch (pool coping and heavy-traffic areas)
- Common formats: 12×12, 16×16, 18×18, 12×24, 4×4 (accent and border)
- Expansion joints for noce outdoor installations: every 10–12 feet, silicone-filled
- Colorway variation in noce: expect 15–25% visual variation between tiles — order blended pallets to ensure natural randomness rather than clustering similar tiles together
- Void fill recommendation: cement-based fill for exterior applications; avoid epoxy fill in areas with significant thermal cycling as differential expansion can cause pop-outs
Sealing Tumbled Travertine Correctly
Sealing protocols for tumbled travertine tile differ from standard stone maintenance because the tumbled surface has higher surface area than polished or honed alternatives, and the natural voids in unfilled tile create reservoirs that hold sealer pooling if applied incorrectly. The most common field mistake is applying sealer to tile that hasn’t fully cured its moisture content after installation — seal a damp installation and you’ll trap moisture vapor beneath the sealer film, creating haze and adhesion failure within 90 days.
Allow a minimum 28-day cure period after installation before applying any penetrating sealer. In humid conditions or where the installation followed rain events, extend that window to 45 days and test moisture content with a calcium chloride test kit — tile moisture should read below 3 lbs per 1,000 sq ft per 24 hours before sealing proceeds.
Penetrating impregnators are the correct sealer category for exterior tumbled travertine. They penetrate below the surface, occupy the pore structure, and create a hydrophobic barrier without changing the tile’s travertine texture or DCOF values. Topical sealers — the glossy film-forming type — are inappropriate for exterior tumbled surfaces because they fill the micro-relief that creates slip resistance, effectively converting your tumbled texture back toward a polished-surface coefficient of friction.
- Sealer type: penetrating impregnator (silane or siloxane base) — not topical film formers
- Application method: apply with low-pressure sprayer or lambswool applicator, allow 5–10 minutes dwell time, remove excess with clean microfiber before it dries
- Reapplication schedule: every 2–3 years for exterior applications, every 4–5 years for covered or interior installations
- Test before full application: apply sealer to a 2×2-foot test area and observe for hazing or color darkening — some travertine varieties show temporary darkening that fades within 24 hours, others require a color-enhancing sealer instead of a neutral impregnator
- Grout joint sealing: seal grout joints separately with a grout sealer compatible with the stone impregnator — joint porosity differs from tile porosity and requires different coverage rates
Installation Base Preparation: Where Most Projects Succeed or Fail
Base preparation for tumbled travertine tile follows different logic depending on whether you’re installing on a concrete substrate or a compacted aggregate bed. Both approaches work, but each has distinct failure modes that understanding in advance prevents costly callbacks.
Concrete substrate installations — the dominant approach for covered patios, interior floors, and pool surrounds poured as part of structural work — require close attention to substrate flatness. Tumbled tile’s irregular surface profile tolerates minor substrate variation better than polished tile, but the setting bed (typically a medium-bed mortar at 3/4 to 1 inch depth) shouldn’t be used as a correction layer for more than 1/4-inch substrate deviation. Beyond that threshold, grinding the high spots or applying a self-leveling underlayment is the correct approach — not packing mortar thicker in low spots, which creates a weak section prone to hollow-sounding tile.
According to TCNA natural stone tile installation standards, setting bed depth and coverage rate are among the most critical variables in large-format stone tile installations. For tumbled travertine in the 16×16 format and larger, 95% mortar coverage on the tile back is the required standard — not the 80% coverage that’s sometimes cited for smaller format tile. The additional coverage requirement exists because large-format tiles are rigid and don’t flex to accommodate low spots; a void beneath a large tile concentrates foot traffic loads at tile edges rather than distributing them across the full tile surface.
- Mortar coverage for tumbled travertine 12×12 and smaller: minimum 80% back coverage
- Mortar coverage for 16×16 and larger: minimum 95% back coverage — verify by lifting tiles randomly during installation
- Substrate flatness tolerance: 1/8 inch over 10 feet for tiles up to 15 inches on one side; 1/16 inch over 10 feet for tiles 15 inches and larger
- Movement joints: required at all changes of plane, perimeters, and every 8–10 feet in field areas — use ASTM C920 silicone, not grout
- Tile acclimation: travertine tiles should be stored in conditions similar to the installation environment for 24–48 hours before installation to minimize thermal shock cracking in setting mortar
Ordering, Logistics, and Project Planning
Planning your tumbled travertine tile order requires accounting for two variables that catch projects short: waste factor and production batch matching. Tumbled travertine’s dimensional variation — intentional, as part of the tumbling process — means your cuts generate more waste than you’d see with precision-cut porcelain. Budget a 15% waste factor for standard rectangular layouts and 20–25% for diagonal or pattern layouts where cut complexity increases significantly.
Production batch matching matters more with travertine than almost any other stone category because natural color and vein variation shifts between extraction batches. Two pallets from different batches of the same named colorway can show enough visual difference to be noticeable in an installed floor. Ordering all tile for a project from the same warehouse inventory batch — verifying the batch number with your supplier — prevents this problem entirely. At Citadel Stone, we inspect incoming stock by batch and can confirm batch availability before your order is finalized, which gives you certainty on large-format projects where partial reorders are common.
Truck delivery logistics deserve specific planning attention on projects with constrained site access. Full-pallet travertine orders ship on standard freight trucks, and the fork pockets on stone pallets assume ground-level offload with a pallet jack or forklift on site. If your project location lacks direct truck access — gated communities, narrow access roads, basement-level delivery areas — confirm truck dimensions and offload method with your supplier before the delivery date to avoid costly redelivery charges or damaged tile from manual handling over long distances.
- Waste factor for rectangular layout: 15%
- Waste factor for diagonal or herringbone layout: 20–25%
- Order overage recommendation: 5% buffer beyond calculated need for future repair matching
- Batch verification: request batch numbers when ordering and confirm all tiles ship from the same batch
- Standard pallet weight for 12×12 tumbled travertine: 2,200–2,800 lbs — verify floor load capacity for interior offload locations
- Lead times from warehouse stock: typically 5–10 business days for standard colorways; specialty or large-format orders may require 3–4 weeks if not in immediate inventory
Tumbled Travertine Tile Guide: Specification Decisions That Define Performance
Your tumbled travertine tile specification succeeds or fails on the decisions made before the first tile hits the substrate. Finish selection, base drainage design, sealer type, mortar coverage, and expansion joint placement form an interconnected system — compromise any one element and the others can’t compensate. The material itself is forgiving and long-lived when you give it what it needs: a stable, drained base, appropriate joint spacing for thermal movement, a penetrating sealer that preserves travertine texture and slip performance, and a maintenance schedule that stays ahead of resealing intervals.
Drainage is consistently the most underspecified element in outdoor installations. In regions that see concentrated rainfall seasons — whether short-duration monsoon patterns, extended hurricane-season precipitation, or spring thaw runoff — the base system’s ability to move water away from the tile plane determines whether the installation holds its integrity through repeated wet-dry cycles. Get the slope, the aggregate depth, and the perimeter drainage right, and travertine’s natural absorption characteristics become an asset rather than a liability. As you move from travertine into related natural stone applications around pools and water features, repairing loose or damaged pool tile covers the remediation side of tile performance near water — a useful reference when planning long-term maintenance protocols for any stone installation in wet environments. The tumbling process gives Citadel Stone travertine a matte, textured surface generally preferred where barefoot slip resistance is a priority.
Related reading: pool coping materials · swimming pool coping · pool tile installation guide.