Rectangular travertine tile sizes compared side by side reveal something most size charts don’t tell you: the performance gap between formats is more about grout line geometry and substrate interaction than aesthetics. You’re choosing not just a look but a structural behavior — how the tile bridges hollow spots, how it tolerates substrate flex, and how it reads across a floor plane at distance. Getting those decisions right means understanding what each format actually does under real conditions, not just how it looks in a showroom slab.
Why Format Matters More Than Finish
The dimensional format of rectangular travertine tile shapes every installation variable downstream of material selection. Larger formats span more substrate area, which reduces the number of grout joints visible across a room but increases the risk of lippage if your substrate isn’t flat within 1/8 inch over 10 feet. Smaller formats like the 4×8 tile tolerate substrate irregularity more forgivingly, but they introduce more grout line linear footage, which means more maintenance surface and more visual texture. Your finish choice — honed, brushed, or filled — amplifies or softens these format effects, but it doesn’t override them.
Travertine’s calcium carbonate matrix means it expands and contracts measurably with temperature variation. According to Natural Stone Institute travertine properties and outdoor suitability, the pore structure and absorption characteristics of travertine directly influence how surface dimensions respond to thermal cycling. A 6×12 tile in a heated floor system will behave differently from a 2×4 mosaic in the same system — format affects the cumulative movement at every joint, not just the visual result.
Here’s what often gets overlooked at the specification stage: the format you choose determines your expansion joint spacing. Larger tiles accumulate more thermal movement before the joint absorbs it, so you’ll need expansion joints at closer intervals than generic guidelines suggest — typically every 12 to 15 feet rather than the 20-foot span printed in standard references.
The 6×12 Format: What It Delivers
The 6×12 tile is the workhorse of rectangular travertine formats. Its aspect ratio — exactly 2:1 — makes it one of the most layout-flexible options in the travertine family. You can run it in a standard brick-offset, a herringbone, a horizontal stack, or a vertical stack, and each layout reads entirely differently in the finished space. That versatility is why designers reach for it first when a project needs dimensional interest without the complexity of a multi-format pattern.
From a structural standpoint, the 6×12 tile bridges substrate irregularities better than smaller formats because its longer dimension spans a wider area. You’re effectively averaging the substrate deviation across 12 inches rather than 8 or 4, which reduces the risk of individual tiles rocking or cracking over low spots in the mortar bed. The trade-off is that the format demands a flatter starting surface — any high points that fall within the tile footprint will telegraph as lippage at the leading edge, which is more visible in a longer tile than a square one.
- Aspect ratio of 2:1 supports herringbone, offset, stack, and mixed-direction layouts
- Longer span bridges substrate low spots more effectively than small-format tiles
- Fewer grout lines per square foot means faster installation and less grout maintenance
- Substrate flatness tolerance is tighter — 1/8 inch over 10 feet minimum
- Expansion joints required every 12–15 feet in heated or outdoor applications
- Weight per tile is manageable for wall applications up to standard stud spacing
For open-plan interior floors, the 6×12 tile delivers the clean visual field most designers are after. Fewer grout lines per square foot means the travertine’s natural veining and pore character reads across the surface without interruption. You can source the 6×12 Travertine Tile directly from Citadel Stone, where inventory is maintained across warehouse stock for consistent lot matching on larger orders.
The 4×8 Format: Where It Excels
The 4×8 tile occupies the middle ground in rectangular travertine tile sizes compared across typical project scales. Its smaller footprint makes it far more tolerant of substrate irregularity — the tile doesn’t need to bridge as much variation to sit flat, and any lippage is shorter in linear extent, which makes it less visible at eye level. This is the format you’ll specify for renovation projects where you can’t guarantee a freshly leveled substrate, or for applications where the existing floor has minor undulation.
The 4×8 tile also performs better on sloped surfaces. Drainage slopes on outdoor terraces and pool decks typically run at 1/8 to 1/4 inch per foot, and smaller tile formats track those gradients without the visual distortion that longer tiles can produce when the gradient crosses the tile’s long axis. That difference matters most on hillside installations or elevated terrace decks where drainage engineering mandates a cross-slope rather than a single-plane pitch.
- Tolerates substrate irregularity up to 3/16 inch over 10 feet without unacceptable lippage
- Tracks drainage slopes more cleanly than larger formats
- Easier to handle for one-person installation in confined spaces
- Higher grout line density increases traction coefficient on wet surfaces
- More forgiving layout for rooms with non-perpendicular walls or irregular geometry
- Waste factor on cuts is lower for rooms with multiple doorways or alcoves
The 4×8 tile is also the right call for bathroom wet areas and shower floors. The increased grout line frequency adds friction without requiring a textured tile finish, which lets you preserve the honed or brushed travertine surface while still meeting safety thresholds. According to ASTM C1527 travertine dimension stone standard specifications, travertine’s dimensional tolerances are held to tighter ranges in smaller formats, which means the tiles you receive will have more consistent thickness — a real advantage when you’re setting on a mortar bed where bed depth variation affects final surface flatness.
The 2×4 Format: Mosaic Logic and Field Applications
The 2×4 tile is a specialty format and should be specified with that framing in mind. Its primary application is mosaic field work — backsplashes, decorative borders, shower niches, and accent bands within larger-format field tile installations. The 2×4 format brings an entirely different visual scale to travertine; the pore and vein pattern that reads as elegant texture in a 6×12 tile becomes more abstract and pattern-like in a 2×4, because your eye perceives many small units rather than continuous stone surface.
Field performance in the 2×4 format depends heavily on mesh backing quality when tiles are supplied in sheets. Mesh-backed 2×4 mosaics allow the sheet to flex slightly over irregular surfaces, but that flexibility also means the adhesive grab must be evaluated more carefully — thin-set coverage needs to reach 95% or higher on the back of every tile in the sheet, which requires back-buttering individual sheets in most installations rather than relying on comb-trowel coverage alone.
- Best suited to accent bands, borders, backsplashes, and shower niches
- Mesh-backed sheets require 95% mortar coverage — back-butter every sheet
- Grout line density provides high friction coefficient for wet application safety
- Format minimizes waste on complex cuts around fixtures and penetrations
- Avoid specifying as primary floor tile in large open areas — visual scale reads as busy
- Sheet flatness must be checked before installation — warped mesh distorts alignment
One nuance that experienced installers catch early: the 2×4 format amplifies grout color decisions far more than larger tiles. With more grout surface area per square foot, a grout that reads neutral in a 6×12 installation will read as dominant pattern in a 2×4 application. Mock up grout color in the actual format before committing to a color selection.
Head-to-Head Performance Comparison
Putting rectangular travertine tile sizes compared in a direct performance framework helps clarify which format belongs in which application. The three formats — 6×12, 4×8, and 2×4 — each optimize for different performance criteria, and no single format wins across all categories.
- Substrate flatness requirement: 6×12 demands the flattest base; 2×4 tolerates the most variation
- Grout line linear footage per 100 sq ft: 2×4 generates roughly 3x the grout footage of 6×12
- Layout versatility: 6×12 offers the most pattern options; 2×4 is limited to stacked or offset
- Drainage slope compatibility: 4×8 and 2×4 track slopes cleanly; 6×12 can show gradient distortion
- Visual field continuity: 6×12 creates the most open, uninterrupted surface reading
- Installation speed per square foot: 6×12 is fastest; 2×4 sheet-by-sheet is slowest for floors
- Thermal movement accumulation: 6×12 requires tighter expansion joint spacing than smaller formats
- Slip resistance on wet surfaces: 2×4 and 4×8 outperform 6×12 due to more grout line contact
The decision matrix should start with substrate condition and application type, then move to visual intent. Specifiers who start with aesthetics and work backward to format often end up correcting substrate problems they could have avoided by leading with technical requirements.
Terrain and Elevation Effects on Format Selection
Slope and grade management introduce a format variable that flat-plan specifications routinely miss. Elevated terraces, hillside patios, and sloped pool decks require drainage gradients that interact with tile format in ways that affect both visual alignment and structural performance. Your tile format choice should be part of the drainage design conversation, not a downstream aesthetic decision.
On a sloped surface running at 1/4 inch per foot, a 12-inch tile dimension oriented perpendicular to the drainage slope will sit on a wedge of mortar — thicker at the high edge, thinner at the low edge. For a 6×12 tile with its long axis crossing the grade, that wedge spans 12 inches, creating a measurable thickness differential that can produce lippage without careful bed management. Orienting the long axis parallel to the slope direction reduces that effect significantly, which is one reason that tile orientation on sloped sites should be confirmed before layout lines are snapped.
- Orient the long axis of 6×12 tiles parallel to the slope direction on grades above 1/8 inch per foot
- Use 4×8 format on grades above 1/4 inch per foot to minimize mortar wedge effects
- On hillside installations, confirm base compaction before specifying any format — settlement differential causes more tile failures than format selection errors
- Drainage channels should be positioned to avoid forcing a cross-slope across the longest tile dimension
- On elevated decks, verify waterproofing membrane compatibility with tile adhesive before format is locked in
Base preparation on sloped sites also affects truck delivery logistics. Crushed aggregate base materials need to be placed and compacted in lifts, and on steep access grades, delivery scheduling becomes a site engineering factor. Confirm truck access and offload points before specifying large-format tiles for hillside projects — material staging on a grade adds handling time and increases chip risk before tiles reach the installation surface.
Sealing and Maintenance by Format
Sealing requirements shift meaningfully across rectangular travertine tile sizes because grout line density directly affects the maintenance surface area. A 100-square-foot 6×12 installation might have 180 linear feet of grout joint; the same area in 2×4 tiles could have over 550 linear feet. That’s not just a sealing labor difference — it’s a long-term maintenance commitment difference your client needs to understand before format selection is finalized.
Travertine itself requires penetrating sealer applied to the stone surface, but the grout requires its own sealer formulation. Using a stone sealer on sanded grout joints or a grout sealer on travertine produces suboptimal results — the penetration depth and surface tension requirements differ between the two substrates. In high-grout-line formats like the 2×4, you’ll spend more time and material on grout sealing than on stone sealing, which inverts the typical travertine maintenance ratio most clients expect. According to USGS limestone and travertine natural mineral formation, travertine’s calcium carbonate base responds to acidic cleaners and sealers differently than granite or basalt, reinforcing why product selection for travertine maintenance requires format-specific planning.
- Penetrating sealer for travertine: apply to clean, dry stone; allow 24-hour cure before traffic
- Grout sealer: apply separately after grout has cured for 72 hours minimum
- Resealing cycle: stone surface every 2–3 years; grout joints every 1–2 years depending on traffic
- Filled travertine requires sealer to prevent fill material from absorbing stain before the stone does
- Avoid acidic cleaners on any travertine format — pH-neutral products only for routine maintenance
At Citadel Stone, we recommend confirming sealer compatibility with the specific travertine finish before purchase — honed, brushed, and filled surfaces each have different absorption rates that affect sealer dilution ratios and application coverage. Our technical team can advise on the right sealer specification for each format and finish combination based on the project’s use conditions.
Ordering, Logistics, and Stock Planning
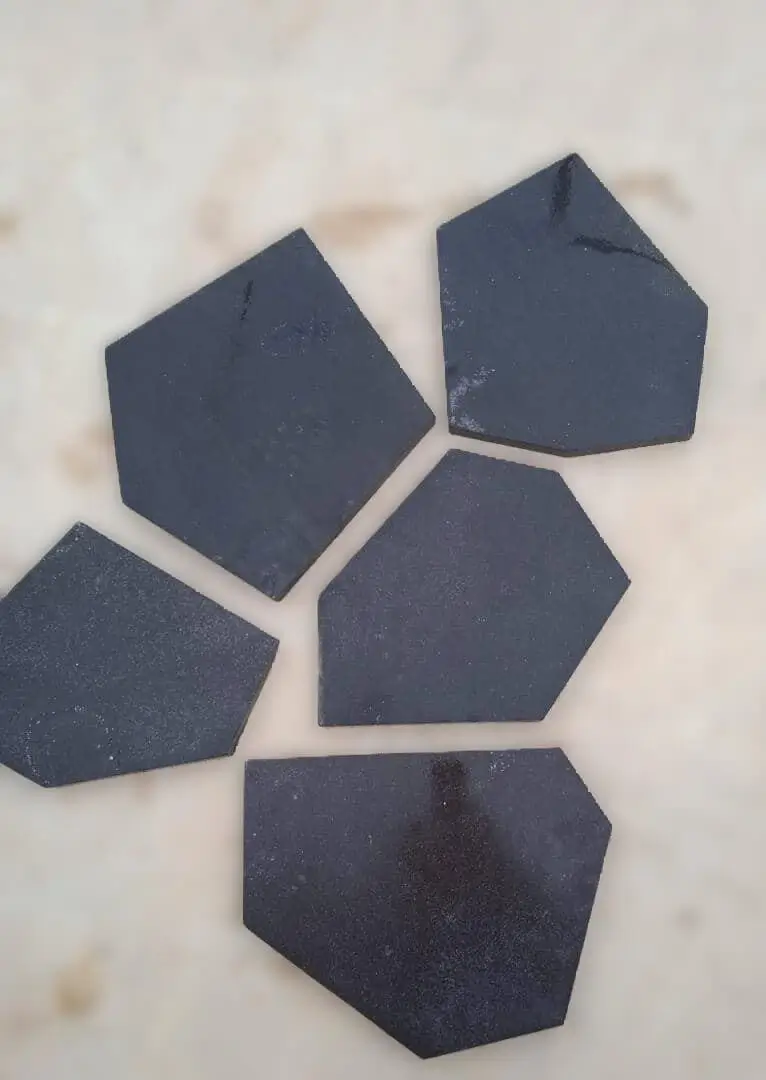
Format selection affects supply chain planning in ways that catch project managers off guard. The 6×12 format is the highest-volume rectangular travertine format in the market, which means warehouse inventory levels are typically deepest for that size — you’re less likely to face lot-matching problems on a large order. The 4×8 and 2×4 formats carry narrower stock depth at most suppliers, which can create lead time issues when a project requires more than 500 square feet of a single lot.
Your order should include a minimum 10% overage for cuts and breakage — bump that to 15% for the 2×4 format installed on mesh sheets, where corner chips during handling are more common. For 6×12 tiles on large projects, 10% is generally sufficient if your cutter is experienced with travertine, which cleaves more predictably than granite but less predictably than porcelain. Every order is cut to its own specification, so the schedule is quoted with the order rather than promised from a shelf.
- 6×12: deepest warehouse stock, 10% overage recommended, fastest replenishment if cuts exceed estimate
- 4×8: moderate stock depth, 10–12% overage recommended, confirm lot availability before finalizing tile count
- 2×4: shallowest stock in most warehouses, 15% overage minimum, order full project quantity upfront
- Lot matching: always request tiles from the same production lot — color variation between lots is common in natural stone
- Truck delivery: confirm pallet dimensions and weight before scheduling — travertine pallets typically run 2,200–2,800 lbs per pallet depending on format and quantity
On large projects with phased installation schedules, warehouse hold agreements are worth negotiating. Pulling the full tile quantity upfront and holding it in warehouse eliminates lot-matching risk even if installation extends over multiple months, which is common on commercial projects or multi-phase residential renovations.
Format Selection: Final Considerations
The head-to-head comparison of rectangular travertine tile sizes confirms what experienced specifiers already know: there’s no universally superior format. Your project’s substrate condition, drainage geometry, traffic demands, and maintenance expectations each push the decision toward a different format. The 6×12 tile excels on flat, well-prepared interiors where visual continuity is the priority. The 4×8 tile is the versatile field format that handles the widest range of real-world site conditions. The 2×4 tile belongs in accent applications where its scale and grout line density add design or functional value that larger formats can’t replicate.
As you finalize your format selection, reviewing how smaller rectangular formats work within specific layout systems will sharpen your specification. small travertine tile layouts and planning covers the layout geometry considerations that apply to the tighter formats discussed here and can help you resolve pattern decisions before installation begins. Designers often specify 6×12 formats from Citadel Stone for open-plan floors where fewer grout lines keep the visual field clean and uninterrupted.