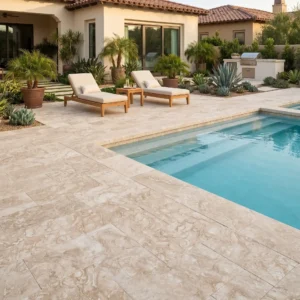
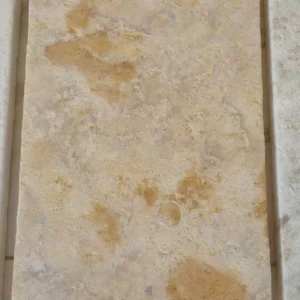
Why Ivory Travertine Sealing Problems Start Before the Sealer Hits the Stone
Ivory travertine sealing problems almost always originate in surface preparation decisions made hours or days before the sealer is ever opened — not in the sealer product itself. Travertine’s interconnected vein system and variable porosity across a single slab mean moisture trapped beneath the surface during installation will eventually compromise adhesion, causing peeling, clouding, or premature breakdown that frustrates homeowners and specifiers alike. Your preparation window is narrow, and skipping a single step collapses the entire system.
The porosity of ivory travertine typically falls between 4% and 12% depending on formation density and quarry origin — a range wide enough that the sealer appropriate for a dense filled tile may be completely wrong for a tumbled open-face paver. Recognizing this variance before you specify a product is what separates a long-lasting sealed surface from one that needs stripping and restarting within 18 months.
Matching Sealer Chemistry to Travertine Porosity
Travertine’s calcium carbonate structure interacts differently with solvent-based, water-based, and penetrating impregnator sealers. A topical film-forming sealer applied to a high-porosity tumbled ivory travertine paver will trap off-gassing from residual moisture and produce white hazing within weeks — one of the most common ivory travertine sealing problems reported in outdoor installations. The stone needs to breathe, and a film-former doesn’t allow that.
Penetrating impregnators — specifically fluoropolymer or siloxane-based formulas — bond below the surface rather than forming a film on top. They allow vapor transmission while blocking liquid water and oil infiltration. According to Natural Stone Institute travertine properties and outdoor suitability, travertine’s absorption rate and open-pore structure are the defining factors when selecting protective treatments for outdoor applications. Your sealer selection must account for that absorbency range, not just the manufacturer’s general application claim.
- Solvent-based penetrating sealers deliver deeper penetration on dense travertine but require extended dry time before foot traffic
- Water-based impregnators suit high-porosity tumbled ivory travertine better — they won’t oversaturate open-face pores and cause surface discoloration
- Topical sealers are only appropriate for interior polished travertine with low porosity — never specify them for exterior installations
- Two-part epoxy or urethane coatings create adhesion failure on travertine in freeze-thaw regions due to the stone’s natural movement at joint interfaces
The Moisture Test Most Installers Skip
Freshly laid travertine may look dry, but a reliable moisture content reading requires more than a visual check. Concrete substrates and mortar beds continue off-gassing moisture for 28 days after placement — and sealing before that window closes is the single most preventable source of delamination and clouding in travertine shower applications and exterior paver fields alike. A calibrated pin-type moisture meter reading below 4% is the field standard before sealer application begins.
The plastic sheet test offers a simple backup check: tape an 18-inch square of clear polyethylene film to the surface, seal all four edges, and wait 16 to 24 hours. Condensation forming on the underside of the film means the substrate is still releasing moisture. According to ASTM C1527 travertine dimension stone standard specifications, dimensional compliance and surface treatment compatibility both depend on moisture equilibrium being reached prior to finishing treatments. Rushing this step is where ivory travertine sealing problems compound quickly.
Filling Travertine Voids — Why Sequence Matters
Tumbled ivory travertine arrives with natural voids and pitting that are part of its character — but those voids require treatment before any sealer is applied. Grouting or filling the voids after sealing is a sequencing error that prevents the fill material from bonding to the stone. The sealer creates a barrier that the filler then sits on top of rather than adhering into, leading to pop-outs and cracking within the first season.
The correct sequence for void-filled travertine installations is straightforward: grout the voids first with a matching unsanded grout or travertine-compatible filler, allow a full cure per manufacturer data (typically 48 to 72 hours at 70°F), clean the surface with a pH-neutral stone cleaner, verify moisture content, then apply sealer. For unfilled travertine — a legitimate design choice that maintains the stone’s natural open texture — use a sealer specifically formulated for unfilled stone. Standard sealers designed for filled tiles will bridge across open voids and eventually crack when foot traffic flexes those thin bridges.
- Sequence: fill voids → cure fully → clean surface → verify moisture → apply sealer
- Matching filler color before sealing is critical — sealer changes the reflectance and can make a near-match filler look wrong under cured conditions
- Unfilled travertine requires higher sealer dosage rates — open pores absorb more product per square foot than filled surfaces
- Always test the filled and sealed mock-up panel in a concealed area before committing to the full installation
Application Technique Errors That Cause Long-Term Damage
Applying ivory travertine paver sealer in direct sunlight on a hot surface accelerates solvent evaporation, causing the product to skin over before penetrating the stone properly. The result is a partially bonded surface treatment that looks complete but fails under UV and thermal cycling within months. Target surface temperatures between 50°F and 85°F for application, and shade the work area if necessary during peak heat hours.
Flooding the surface with excessive sealer is equally problematic. Travertine absorbs sealer until saturation, and any excess product sitting on the surface after the absorption window — typically 15 to 20 minutes — must be wiped off completely. Missed pooling leaves sticky residue that attracts dirt and creates uneven sheen patches that are extremely difficult to remove without stripping. Apply thin, even coats with a clean lamb’s wool applicator or low-nap roller, and keep a dry microfiber cloth moving behind the application to catch any pooling.
When sourcing sealer and travertine together, browse our sealed travertine paver options to see finish-specific recommendations that align with the installation type. Specification confidence starts with knowing the product you’re sealing before selecting the treatment chemistry.
Resealing Intervals and Condition Monitoring
The water-bead test is the most reliable field indicator for resealing timing. Pour a small amount of water on the travertine surface — if it beads into tight droplets, the sealer is still performing. Flat absorption without beading means the sealer has degraded and resealing is overdue. For exterior ivory travertine paver installations in high-UV environments, expect this test to show degradation every 18 to 24 months under normal residential traffic. Travertine shower applications indoors degrade faster due to soap residue and daily cleaning chemistry — reassess those every 12 months.
- Exterior pavers in high-UV exposure: reseal every 18–24 months
- Interior travertine shower tile: assess every 12 months — soap scum and cleaning products accelerate sealer breakdown
- Pool deck travertine: test every 12–18 months — pool chemistry and wet-dry cycling stress the sealer bond more than dry applications
- Low-traffic interior floors: reseal every 3–5 years depending on cleaning product aggressiveness
Heavy cleaning products — particularly anything with alkaline pH above 10 or acidic pH below 6 — actively strip penetrating sealers from travertine. The stone’s calcium carbonate base also etches under acid exposure, which destroys both the sealer and the surface finish simultaneously. Specifying a pH-neutral stone cleaner for ongoing maintenance is not a luxury recommendation — it’s the maintenance protocol that keeps your resealing intervals on the longer end of the range.
Sealing Decisions Within Landscape and Design Contexts
Ivory travertine’s warm cream-to-gold palette integrates naturally with a wide range of landscape design styles — from modern minimalist courtyards with clean geometric lines to more organic naturalistic gardens with mixed plantings. The finish choice directly affects both visual character and sealing behavior, which means design preferences and technical requirements must align before committing to a specification.
A honed finish on ivory travertine reads as refined and contemporary — ideal for clean-line landscape designs pairing the stone with ornamental grasses, specimen plantings, or water features. Honed surfaces have lower surface porosity than tumbled finishes, which means they require less sealer per coat and achieve more consistent coverage. Tumbled ivory travertine, by contrast, carries textural authenticity that suits informal garden settings and traditional architectural styles with irregular plantings and aged-material aesthetics. Surface finish classification directly influences absorption characteristics — confirming that your design finish choice has direct technical consequences for the paver sealer system you select.
In xeriscape or drought-tolerant garden designs, ivory travertine pavers interact with fine decomposed granite, gravel mulches, and low-water plantings. Those environments introduce silica-rich dust and tannin from nearby drought-tolerant shrubs — both of which can stain unsealed or under-sealed travertine over time. Choosing a sealer with enhanced oil and tannin resistance adds meaningful protection in those landscape contexts without altering the stone’s natural appearance.
How to Strip and Restart After Sealer Failure
Discovering a cloudy, peeling, or sticky sealer on installed ivory travertine is disheartening, but the stone itself is typically undamaged. Stripping a failed sealer requires a dedicated stone sealer stripper — not a general tile cleaner — applied in sections, allowed to dwell for 10 to 15 minutes, then agitated with a stiff nylon brush and extracted with a wet vacuum. Avoid metal scrapers, which scratch the travertine surface and create micro-abrasions that will trap new sealer unevenly.
After stripping, the surface needs a neutralizing rinse with clean water and a pH-neutral cleaner to remove any residual stripper chemistry. Allow the stone and substrate to dry fully — at minimum 48 hours in normal conditions, longer in humid environments — before moisture-testing and starting the sealing process from scratch. Citadel Stone’s technical team recommends confirming the substrate moisture content again after stripping, since the stripping process introduces water that must fully dissipate before a new paver sealer application will bond correctly.
- Use a stone-specific sealer stripper — general-purpose cleaners won’t fully break down penetrating sealers
- Apply stripper in small sections to prevent it from drying on the surface before you can agitate and extract it
- A wet vacuum removes stripper residue more effectively than mop-and-rinse, especially in grout joints and stone voids
- Allow 48–72 hours of full drying before moisture-testing and beginning re-sealing
- Inspect the surface under raking light after stripping to identify any surface etching that needs addressing before resealing
Planning Your Travertine Order and Sealing Timeline
Project timelines need to account for the gap between material delivery and sealer application. Ivory travertine pavers delivered from a warehouse and installed the same week still carry residual moisture from the quarrying, cutting, and transit process. A standard holding period of 7 to 10 days after installation — assuming a mortar or adhesive bed has also cured — gives the system time to reach equilibrium before sealing begins. Compressing that window to meet a project deadline is one of the most common sources of ivory travertine sealing problems in new installations.
Citadel Stone maintains national warehouse inventory for ivory travertine, which typically allows project managers to confirm material availability 4 to 6 weeks ahead of install rather than relying on 10 to 12 week import lead times. That scheduling flexibility matters — it lets you plan the sealing phase properly rather than rushing the post-installation window because materials arrived late. For large paver fields, also confirm that your sealer supplier can match the volume requirement in a single batch; sealer chemistry can vary slightly between production runs, and visible sheen inconsistency across a large installation is difficult to correct after the fact.
Avoiding Ivory Travertine Sealing Problems: What Every Specification Must Address
Ivory travertine sealing problems are almost entirely preventable when preparation, product selection, and application technique align with the material’s actual porosity and installation context. The stone’s performance over 20-plus years depends on getting those decisions right at the start — not on choosing the most expensive sealer or reapplying product reactively after staining has already occurred. Your sealing specification should treat the paver sealer as an integral part of the installation system, not a finishing afterthought. As you develop your project specification, reviewing travertine pool deck planning considerations provides additional context on how similar sealing and surface treatment principles apply across different travertine applications. Understanding the sealing intervals specific to ivory travertine helps owners avoid the staining and surface degradation that Citadel Stone specialists frequently see in neglected installations.
Related reading: Porcelain Pool Tile vs Travertine: How to Choose · Ivory Travertine vs Porcelain Tile: Which Wins?.