

Shade consistency is the specification variable that catches most grey basalt tile projects off guard when choosing grey basalt tile for a project. The stone’s iron and olivine mineral distribution means two tiles from the same block can read two tones apart under diffuse overcast light, then converge under direct sun — and that shift is perfectly normal, not a defect. Understanding that dynamic before you finalize your selection changes how you sample, how you sequence cuts, and how you approach finish pairing decisions.
Shade Range and Mineral Behavior in Grey Basalt
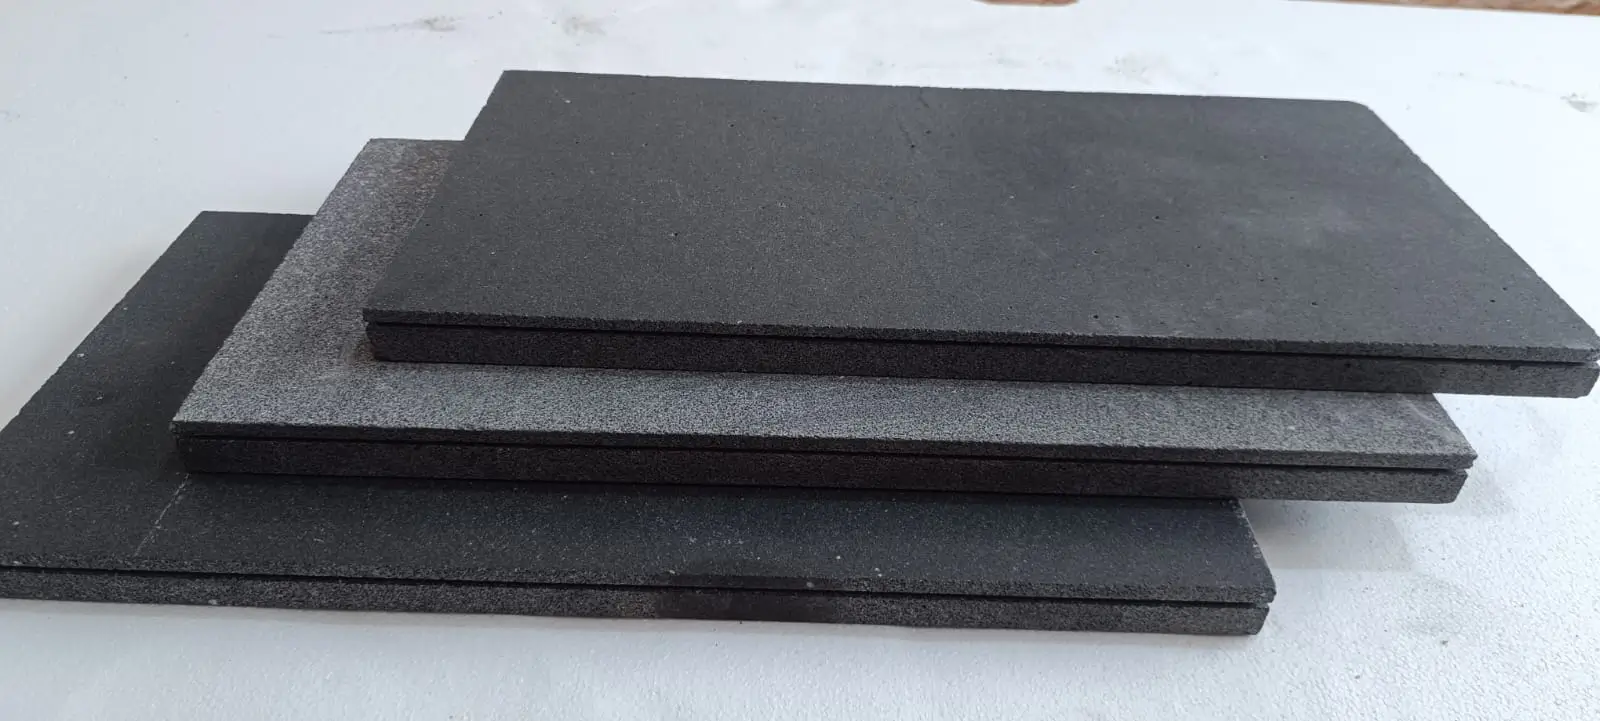
Basalt gets its grey palette from a specific combination of minerals: plagioclase feldspar, pyroxene, and iron-rich olivine. The ratio of those minerals shifts across a single quarry face, which is why grey basalt tile doesn’t come in one fixed tone — it comes in a spectrum. You’ll typically see three broad tone bands: a blue-grey with cool undertones, a mid-grey that reads neutral in most lighting, and a warm charcoal that pulls toward brown in low light. Recognizing which band your tiles fall into matters for pairing decisions later.
The surface finish you choose amplifies or suppresses those undertones dramatically. A honed finish opens the mineral structure enough to saturate the color — cool tones deepen, warm tones enrich. A flamed or bush-hammered finish fractures the surface micro-texture, scattering light and lightening the apparent tone by one to two shades. That’s not a defect; it’s a physical consequence of surface disruption and one of the reasons finish selection deserves as much attention as shade selection itself.
According to USGS volcanic rock composition data, basalt’s dense, fine-grained structure results from rapid volcanic cooling, which locks minerals in a tight crystalline matrix. That matrix is what makes the stone exceptionally durable and gives it its characteristic weight and color depth — both properties that respond directly to how the surface is processed.
Finish Options and What They Actually Do to the Surface
Your finish choice does three things simultaneously: it changes the visual tone, it changes the surface texture, and it changes the stone’s interaction with water and soiling. Getting all three right for your specific application requires thinking through each outcome rather than choosing by appearance alone.
- Honed finish leaves a smooth, matte surface with no reflective sheen — stone gray color reads deepest here, and the flat texture shows tool marks and fine scratches over time in high-traffic areas
- Polished finish produces a mirror-like surface that intensifies grey undertones and makes veining pop — primarily suited to interior floors and wall cladding where foot traffic is controlled and maintenance is consistent
- Flamed finish uses intense heat to spall the surface, creating an open, rough micro-texture — the heat lightens the tone noticeably and leaves an irregular, tactile surface that reads lighter than honed material from the same slab
- Bush-hammered finish mechanically fractures the surface to create a heavily textured, dimpled face — tone lightens further than flamed, and the open texture retains moisture longer after rain
- Sandblasted finish sits between honed and bush-hammered — a controlled matte texture with moderate tone lightening and an even, consistent surface appearance
- Tumbled finish rounds edges and corners, creating an aged, irregular look — the surface is rough and matte, tone varies piece to piece, and the format reads more informal than calibrated tile
The detail that matters most for outdoor applications is how each finish interacts with standing water. A honed surface holds a thin water film that alters its appearance when wet, while a flamed or bush-hammered surface’s open texture lets water disperse rather than pool visually. That’s an aesthetic consideration as much as a practical one — your terrace will look different wet than dry, and the finish controls how different. For any installation where wet-surface behavior is a concern, the current test standard is ANSI A326.3, measured wet; the finish is the primary variable, and a test report is available on request.
Color Pairing Principles for Grey Basalt Tile
Grey basalt tile works as both a primary field material and a neutral foil for stronger colors, but the pairing logic shifts depending on which tone band your stone sits in. Cool blue-grey basalt pairs naturally with white mortar joints, white limestone coping, and pale concrete surrounds — the contrast is clean and the palette reads monochromatic. Warm charcoal basalt, by contrast, wants earthier partners: buff limestone, aged timber decking, weathered copper fittings, or dark bronze hardware.
Neutral mid-grey is the most flexible band and the easiest to pair, but it’s also the most susceptible to unwanted color casts from adjacent materials. Lay mid-grey basalt next to warm sandstone and the basalt will pull cool by contrast. Lay it next to white marble and the same tile suddenly reads warm. Testing your field tile alongside every adjacent material in the actual site lighting is the only way to confirm the pairing works before you commit.
- White and cream tones create high-contrast borders that frame the grey field clearly
- Pale limestone and travertine soften the visual weight of dense charcoal basalt in large-format installations
- Dark bronze or matte black metal accents reinforce the stone’s natural coolness without fighting it
- Timber decking in grey-brown tones bridges cool basalt to warmer garden elements without a jarring shift
- Light pink floor tile can work as an accent material against blue-grey basalt — the contrast is significant, so use it in pattern bands or threshold strips rather than as a competing field material
- Grout color is an underrated pairing variable — a grey grout that closely matches the tile tone makes joints disappear, while a contrasting grout color creates a visible grid pattern that changes the room’s perceived scale
Format and Thickness Decisions
Grey basalt tile is produced in a wide range of formats, from small mosaic pieces through to large-format slabs, and the format you choose shapes the room’s proportions more than any other single decision. Large formats reduce the number of joints visible, making a floor read as a continuous plane — this works best when the stone’s natural tone variation is subtle and the shade consistency within your order is tight. Smaller formats accept more variation between pieces without the joins becoming distracting.
Thickness selection is driven by application and substrate, not by personal preference. Interior floor tiles typically run thinner than outdoor pavers, and the substrate’s structural capacity and likely point loads determine the lower bound of acceptable thickness. For any commercial or high-traffic project, specify the ASTM C170 compressive strength test method and request the test report from your supplier — that report confirms the stone’s actual performance rather than a generic material description.
At Citadel Stone, we cut grey basalt tile to order at our selected quarries, which means format and thickness can be matched to your project’s specific drawings rather than pulled from a fixed product range. That cut-to-order approach is particularly useful when you need a non-standard format for a large-format interior project or a custom dimension for stair treads.
- 600 x 600 mm and 600 x 300 mm are the most common residential floor tile formats — they stack efficiently and minimize cut waste at room perimeters
- Large-format tiles above 900 mm on the short edge require a substrate with tighter flatness tolerances and a full-bed adhesive system with no voids
- Thicker material is specified for outdoor use where thermal cycling and base movement demand greater section strength
- Calibrated tiles are gauged to a precise thickness tolerance — uncalibrated tiles require thicker adhesive beds to compensate for natural variation
Drainage, Water Management, and Base Preparation
For outdoor grey basalt tile installations, drainage geometry is the base specification that determines everything else. Basalt’s dense structure means the tile itself absorbs very little water — per Britannica’s geological reference on basalt formation, its low porosity is a direct result of the rapid volcanic cooling process — but that characteristic pushes all surface water management responsibility onto the installation design. The tile won’t absorb the moisture away; the base and falls have to move it.
Your surface fall specification needs to account for the full range of precipitation patterns your site will experience. In regions with intense wet seasons, monsoon-style rainfall, or high-rainfall climates, a surface fall that performs adequately under moderate rain may not shed water fast enough under extreme events. The practical implication is that you design falls for your worst-case rainfall intensity, not your average one — and you confirm that the drainage outlets at the perimeter or within the field have sufficient capacity to receive that flow.
- A minimum 1:80 surface fall is widely specified for covered outdoor areas; exposed areas in high-rainfall climates typically warrant steeper falls — consult your civil or structural engineer for the site-specific requirement
- Sub-base drainage layers prevent hydrostatic pressure from building beneath the tile bed during heavy rain events or in areas with high water tables
- Expansion joints at perimeter and field intervals prevent tile cracking caused by the combined movement of thermal cycling and moisture-driven base expansion
- In areas with strong drought-rain cycles, sub-base materials with good dimensional stability prevent differential settlement during extended dry periods followed by sudden saturation
- Channel drains set into the field tile area are more effective than perimeter-only drainage in very large outdoor installations where surface fall alone cannot move water fast enough
Delivery scheduling for large outdoor projects also intersects with water management — specifically, your site needs to be in a condition where offloaded material can be stored without ground saturation compromising the pallet stability. Offloading arrangements and lead times are confirmed with the order, so building those conversations into your project programme early avoids delays at critical installation windows.
Sealing and Ongoing Surface Care
Grey basalt tile’s dense structure means it sits at the lower end of the absorption scale for natural stone, but it is not fully water-resistant across all conditions. Trace porosity at the mineral grain boundaries means moisture can work its way in over time, particularly on unfinished cut edges and in areas with standing water. Sealing controls that ingress and makes the surface significantly easier to clean.
The finish you’ve chosen directly affects sealer selection and application rate. A honed surface accepts impregnating sealers readily because the fine pores are open to the treatment. A polished surface has those pores compacted by the polishing process, so sealer penetration is shallower and may need a product specifically formulated for dense, low-absorption stone. A flamed or bush-hammered surface has such an open texture that sealer application rates increase noticeably — budget for more product per square metre than the manufacturer’s standard coverage rate suggests.
- Apply sealer to clean, dry stone — residual moisture or setting adhesive contamination prevents proper penetration
- Test sealer compatibility on an offcut from your order before treating the installed surface — some sealers alter the apparent color or sheen level of grey basalt more than expected
- Re-sealing intervals depend on the sealer manufacturer’s stated performance period and your site’s foot traffic level — follow the sealer manufacturer’s stated interval rather than a generic rule
- Acidic cleaners damage the mineral surface of basalt — use pH-neutral products for routine maintenance
- Efflorescence can appear in the early weeks after installation as soluble salts migrate to the surface — this is a substrate phenomenon, not a stone defect, and resolves with appropriate treatment and time
Specifying Grey Basalt Tile: What to Request and What to Check
A strong specification for grey basalt tile starts with the test report, not the product description. The Natural Stone Institute maintains technical standards for natural stone paving that inform which physical properties matter for your application — compressive strength, flexural strength, and absorption are the three that drive most specification decisions, and all three should come from a real test report rather than a catalogue claim. Request the report from your supplier before you sign off on the material.
Shade and finish consistency within an order is a separate specification question from physical performance. You’ll want to confirm with your supplier how the stone is sorted — whether tiles are grouped by shade band before packing, or whether you’re receiving the full natural range of the quarry face in a single delivery. For large residential projects where consistency matters visually, specifying a tighter shade sort is worth the conversation early.
- Request physical property test reports (compressive strength, flexural strength, water absorption) — ASTM C170 and C880 are the relevant test methods for strength; ASTM C97 covers absorption
- Confirm calibration tolerance — the acceptable thickness deviation across your batch affects adhesive bed depth and finished floor flatness
- Specify finish consistency — particularly for honed and polished tiles where sheen variation across a batch is visible in raking light
- Confirm edge treatment — rectified tiles with machine-cut edges allow tighter joint widths than unrectified tiles
- Clarify quarry origin and shade batch — if you’re ordering in multiple stages for a large project, confirm that subsequent deliveries come from the same shade-matched batch
- Ask about access requirements and any restrictions at the delivery address — large-format tile is heavy, and planning the offloading sequence before the delivery date saves time on site
Your sample review process matters as much as your written specification. Reviewing samples in the actual site conditions — the real lighting, alongside the real adjacent materials — tells you things a catalogue image simply can’t. Our technical team can advise on sample selection and match tile specifications to project requirements. Explore the full range of Basalt Tiles available to order, and use the samples to test finish and shade combinations before committing to a full quantity.
Floor Tile Color and the Lighting Variable
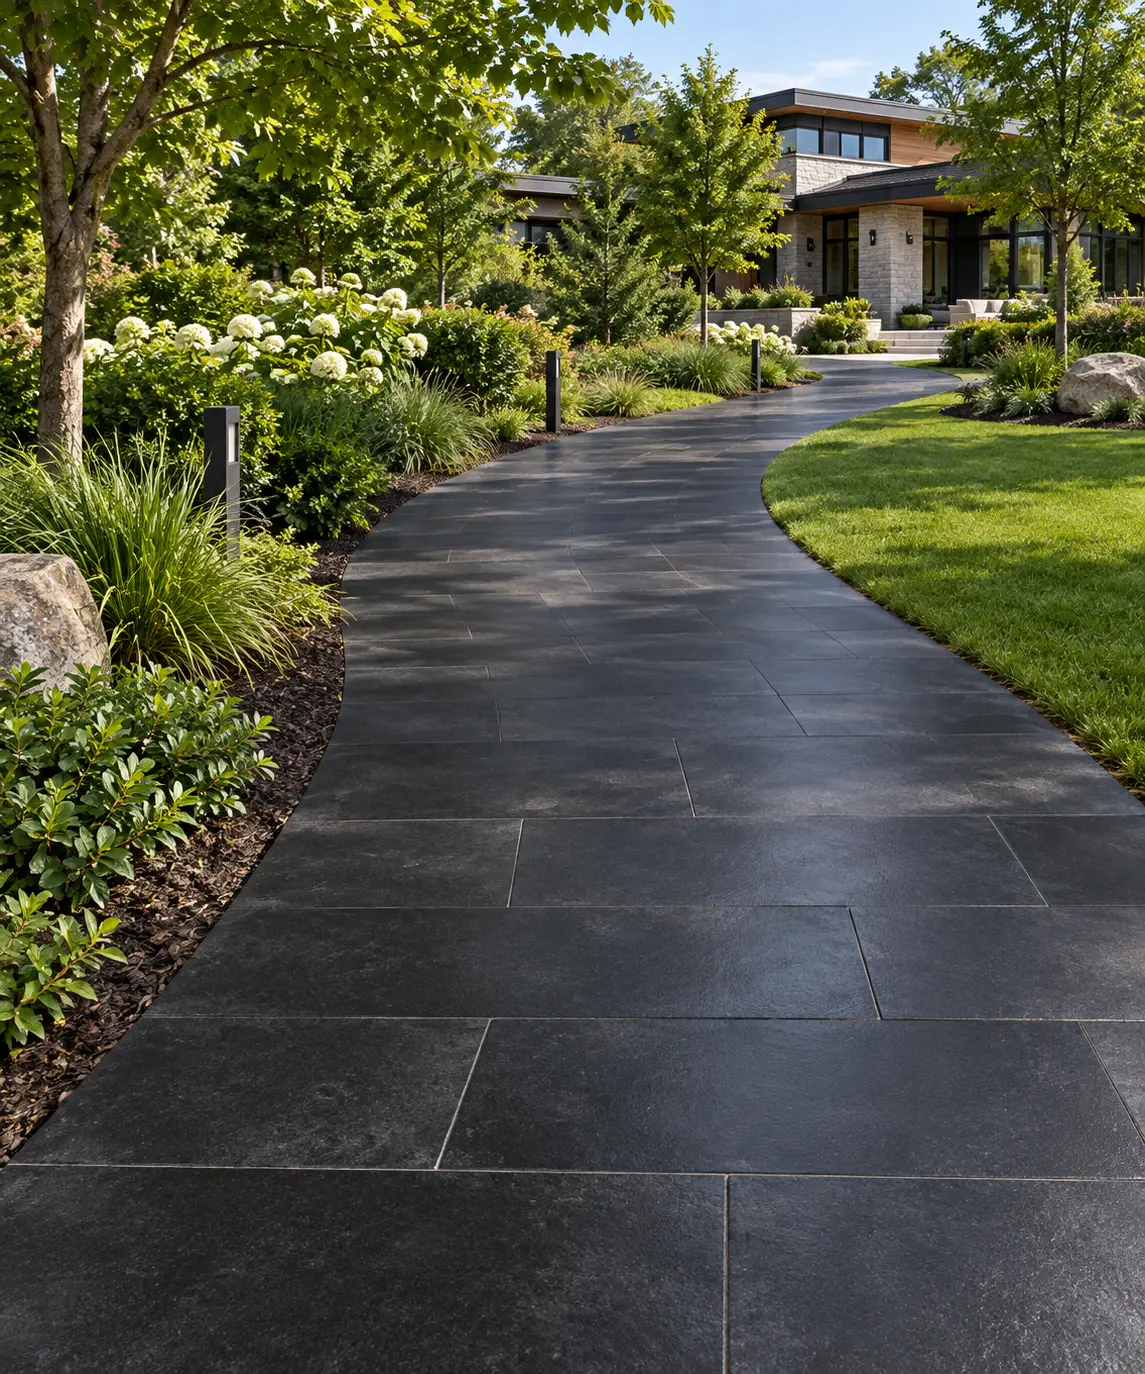
The relationship between stone gray color and artificial lighting is where more specification decisions go wrong than almost anywhere else in the selection process. Warm white incandescent or halogen lighting pulls grey basalt tile toward a warmer, slightly brown tone. Cool LED lighting — particularly in the 5000–6500K daylight range — sharpens the stone’s blue-grey undertones and makes cool-toned tiles read even cooler. If your project mixes lighting types across different zones, the same tile can appear to be two different materials depending on where you’re standing.
Here’s what most specifiers miss: the grout color and joint width amplify that lighting effect. Wide joints in a grout color that contrasts with the tile create a visible grid that changes apparent warmth depending on whether the grout reads warm or cool under the installed fixtures. Narrow joints in a matching tone make the floor read as a continuous plane whose stone gray color shifts uniformly with the light. Deciding your grout specification before you finalize your tile shade is not over-specifying — it’s the correct sequence.
- Review physical finish samples under both daylight and the actual installed artificial lighting type — not just under the lighting in a showroom or on a computer screen
- Take samples to the site and hold them in the positions they’ll occupy — floor level, wall height, horizontal versus vertical orientation all change perceived floor tile color
- Assess samples at different times of day if the space receives direct natural light — morning and afternoon sun angles alter the apparent tone significantly
- Photograph samples in situ to compare options objectively — the eye adapts and compensates in ways a camera doesn’t, which makes side-by-side photo comparison a more reliable decision tool than memory
Decision Points for Choosing Grey Basalt Tile
Choosing grey basalt tile well comes down to a sequence of decisions that each depend on the one before it. Shade band comes first — identify whether your application calls for cool blue-grey, neutral mid-grey, or warm charcoal, then select from within that band. Finish follows shade, because the finish you choose will shift the apparent tone and must be compatible with the application’s practical demands. Format and thickness follow finish, because the substrate specification changes depending on tile size and outdoor versus indoor use. And sealing and maintenance close the specification loop.
What separates projects that hold up over decades of service from those that need early intervention is usually not the stone — it’s the installation detail. Expansion joints at the right intervals, drainage geometry designed for worst-case rainfall, adhesive systems matched to the tile format, and sealer products tested on the actual stone before full application. These are the decisions that pay back over the life of the project. For a related dimension of natural basalt specification, understanding how cast and natural material differ can sharpen your material selection — cast versus natural basalt differences is worth reviewing before you finalize your order.
The full selection process — shade, finish, pairing, and drainage specification — works best when you’re reviewing real material rather than digital images. Citadel Stone stocks grey basalt at our selected quarries and cuts to your project dimensions, so the samples you review reflect the actual material in your order. Because stone gray color reads differently under warm and cool lighting, Citadel Stone recommends reviewing finish samples before committing to a floor tile color scheme.