

Base preparation is the variable that separates paver stone walkway installations that hold their grade for two decades from ones that start rocking and heaving within three years. You can source the most precisely cut natural stone on the market, but if your compacted aggregate base is sitting on poorly understood subgrade, you’re fighting the ground every season. The steps below lay out exactly what experienced specifiers and installers do — from the first grade stake to the final joint sand sweep — with the kind of detail that doesn’t show up in manufacturer literature.
Planning Your Paver Stone Walkway
Your planning phase determines everything that comes after it, so treat it as seriously as the installation itself. Start by establishing your walkway’s finished elevation relative to adjacent structures, lawn grades, and drainage outlets. A cross-slope of 1–2% away from the house foundation isn’t optional — it’s the drainage geometry that keeps hydrostatic pressure from working under your base over time.
Material selection at this stage matters beyond aesthetics. Natural stone paver thickness should match your anticipated foot traffic and point-load conditions. A 1.5-inch nominal piece works fine for light residential walkways; bump to 2-inch or 2.25-inch thickness for paths that see heavy garden equipment or frequent loaded cart traffic. Thicker pieces also give you more tolerance if subgrade proves softer than anticipated during excavation.
- Determine finished walkway elevation first, then work backwards to calculate total excavation depth
- Identify all drainage control points — where does water exit the walkway system at each end?
- Measure twice for material quantities and add 10–12% for cuts, breakage, and pattern alignment
- Confirm truck access to your delivery point before finalizing your order — a pallet of natural stone weighs 2,000–3,500 lbs and needs clearance for the delivery vehicle
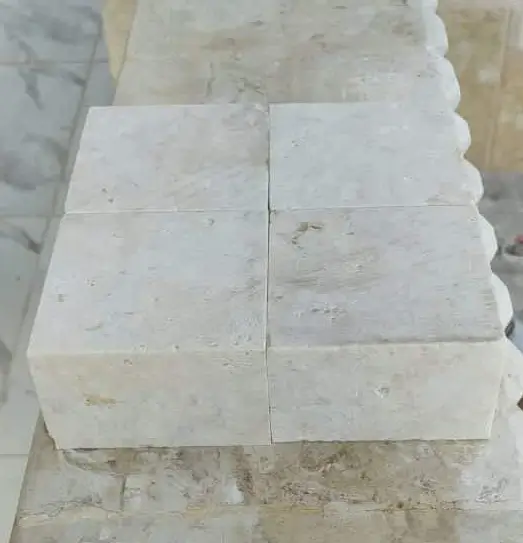
Excavation and Subgrade Assessment
Excavation depth for a natural stone paver walkway is typically 8–10 inches below finished grade for residential applications — that accounts for 4–6 inches of compacted aggregate base, a 1-inch setting bed, and your paver thickness. But that number shifts the moment you understand what’s underneath your topsoil.
Soil composition is one of the most consequential factors in any paver stone walkway installation, and it’s the variable that gets the least attention in generic step-by-step guides. Expansive clay soils — common across wide regions of the country — can exert lateral pressure against your base material during wet cycles, causing horizontal displacement even in well-compacted installations. Sandy soils drain freely but lack cohesion, which means your compacted base layer needs to be thicker and denser to prevent settlement migration. Caliche layers in arid-region soils can prevent drainage entirely if they sit just below your excavation depth, creating a hidden perched water table that pushes upward under freeze-thaw pressure.
- Probe your subgrade with a steel rod after excavation — easy penetration signals soft or unstable material that needs addressing
- Clay-heavy subgrade should be treated with a layer of geotextile fabric before aggregate placement to prevent base migration
- Rocky subgrade may require additional excavation to reach uniform bearing — an uneven bearing surface creates differential settlement
- Sandy subgrade benefits from mechanical compaction in multiple thin lifts rather than one thick pass
- Any organic material, roots, or soft pockets must be removed and backfilled with crushed aggregate before proceeding
According to ASLA natural stone walkway and stepping stone design guidance, subgrade stability and drainage management are the primary determinants of long-term paving performance in residential landscape applications. That aligns with what field experience shows every time a walkway fails prematurely — it’s almost never the stone, it’s what’s under it.
Building the Aggregate Base
Crushed stone aggregate — specifically angular, well-graded material like ASTM No. 21A or equivalent — is the right base material for a paver stone walkway. Avoid pea gravel or rounded aggregate; they don’t compact into a stable matrix the way angular crushed stone does, and you’ll see settling within the first frost cycle.
Place your aggregate in two lifts if your total base depth exceeds 4 inches. Compact each lift with a plate compactor until the surface doesn’t visibly deflect under the machine’s weight — that’s your field check for adequate compaction. Running the compactor in two perpendicular directions on each lift catches voids that a single-direction pass misses. Your finished base should be firm enough that a boot heel leaves no visible impression.
- Use angular crushed limestone or granite aggregate, not rounded gravel
- Compact in maximum 4-inch lifts — thicker lifts don’t compact uniformly through their depth
- Check cross-slope of compacted base with a level and measuring tape — it should mirror your finished grade target
- Allow 48 hours after heavy rain before final compaction if the ground was disturbed during wet conditions
Setting Bed Preparation
Your setting bed is the 1-inch layer of coarse concrete sand (ASTM C33 gradation) that sits between your compacted aggregate base and the bottom face of each paver. It’s not a second base layer — it’s a screeding medium that allows precise final elevation adjustment for each stone.
Screed the sand to a consistent 1-inch depth using parallel screed rails set to your target finished elevation minus your paver thickness. Pull a straight screed board across the rails, then remove the rails and fill the channels carefully. Avoid walking on the screeded sand after this point — any foot traffic before paver placement creates voids that cause rocking stones. Many installers complete the screeding and paver placement on the same day for exactly this reason.
The setting bed is also where you make your final drainage correction. If your base slope isn’t perfectly consistent, this is your last chance to add a millimeter or two of correction before the stone goes down. Don’t count on it for large corrections — if your base is significantly off, go back and recompact before screeding.
Paver Stone Pattern Layout
Before placing a single stone, snap chalk lines across your screeded setting bed to establish your working grid. A no cut paver pattern — like a simple running bond or jack-on-jack — requires precise alignment from the first row because any drift accumulates across the full walkway length. The chalk line is your reference, not the edge of the last stone placed.
A stone wall pattern logic actually transfers well to walkway layout planning — think of each row as a course, and the offset between courses as the structural logic that distributes load across joints rather than concentrating it. Running bond (each stone offset by half the unit length) is the most forgiving for slight dimensional variation in natural stone. Herringbone at 45 degrees looks outstanding but generates more edge cuts; if you’re working with a no cut paver pattern requirement, stick to 90-degree orientations.
- Snap perpendicular chalk lines from your starting reference point and verify square with the 3-4-5 triangle method
- Dry-lay the first 3–4 rows before setting to check joint alignment and pattern rhythm
- Natural stone pieces have slight dimensional variation — sort pieces by size before laying to keep joint widths consistent
- Work from the center of the walkway outward when using diagonal or herringbone patterns to keep cuts symmetric at both edges
- A paver stone wall along the walkway edge, if planned, should be laid concurrently so coping and field stone courses align visually
At Citadel Stone, we recommend reviewing our natural stone walkway pieces before finalizing your pattern, since unit dimensions vary by material and influence which layout orientations are most practical for your project width.
Placing and Seating the Stone
Place each paver directly onto the screeded setting bed without sliding it — sliding displaces sand and creates voids under the stone’s leading edge. Set the stone in position, then press or tap it into the sand with a rubber mallet. Your goal is full contact between the stone’s bottom face and the sand, with no rocking movement when you apply hand pressure to each corner.
Use a straightedge or level across every 3–4 stones placed to check for flush alignment and to catch high or low stones before the pattern is too advanced to adjust easily. A stone that’s 3mm high will catch feet and become a tripping hazard; a stone that’s 3mm low will flex slightly under traffic and eventually work the joint sand loose. Pull any problem stone, adjust the sand beneath it, and reset. This is faster than ignoring it and addressing it later.
The ADA walkway surface firmness and accessibility standards establish clear thresholds for surface change-in-level tolerances — vertical lips greater than ½ inch are a documented tripping hazard, which underscores why flush stone placement isn’t just an aesthetic preference but a safety specification that protects you and your project’s end users.
- Never slide pavers horizontally across the screeded sand — always place from above
- Maintain consistent joint spacing using plastic spacers or by eye if natural stone has sufficient dimensional variation to guide spacing naturally
- Check for rocking on every stone before moving to the next — a rocking stone has a void underneath it
- Keep foot traffic off completed sections by using a plywood kneeling board that distributes your weight across multiple stones
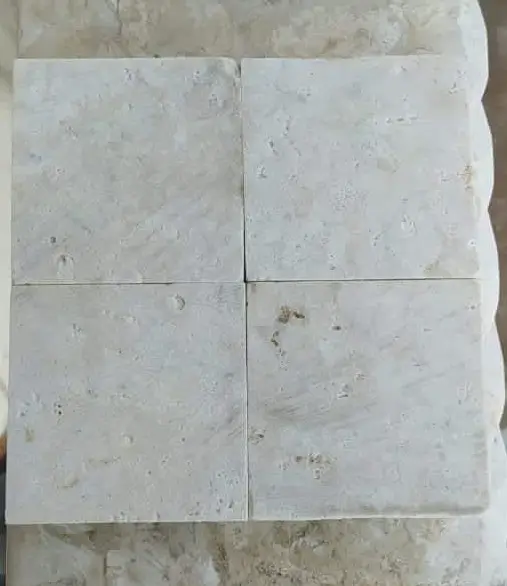
Edge Restraint Installation
Your paver stone walkway will migrate outward over time without mechanical edge restraint — it’s not a matter of if, it’s a matter of when. The lateral force from foot traffic and thermal expansion cycles pushes the outermost stones incrementally outward, and once the edge moves, the joint sand in the adjacent field stones follows.
Plastic or aluminum edge restraint spiked into the compacted aggregate base at 12-inch intervals is the standard solution. Spike length matters: 10-inch spikes into compacted aggregate are secure; 6-inch spikes in soft subgrade are not. If you’re installing a paver stone wall or raised border as part of the design, that masonry element can serve as your edge restraint on that side — but it needs to be built before field stone placement, not after.
- Install edge restraint before final joint sand application — the restraint needs to be in place before vibration compaction
- Curve the edge restraint gradually using scored sections — forcing tight bends creates stress points that fail over time
- On sloped walkways, install edge restraint on the downhill edge first to prevent downslope creep during construction
- In freeze-thaw regions, use galvanized or stainless spikes — standard steel corrodes and loses holding power in three to five seasons
Joint Sand and Final Compaction
Polymeric sand is the correct choice for most natural stone paver walkway projects — it activates with water to form a semi-rigid binder that resists ant and weed intrusion, and it doesn’t wash out in the first heavy rain the way plain coarse sand does. Spread it across the surface, sweep it into joints with a stiff push broom, then run a plate compactor across the entire surface with a protective rubber pad to set the stone and vibrate the sand into full joint depth.
Repeat the sand application and sweeping process two to three times — joints that look full after the first pass typically reveal voids after compaction. Activate the polymeric sand with a fine water mist according to the manufacturer’s specification; over-watering washes binder out of the joints, while under-watering leaves the surface fragile. This last step is where many otherwise excellent installations fall short. The CDC slip-and-fall prevention guidelines for outdoor walking surfaces note that surface irregularities and joint failures are leading contributors to outdoor pedestrian fall incidents — proper joint sand completion directly addresses that risk.
- Apply polymeric sand only when stone surfaces are dry — moisture on the stone face causes hazing as binder activates
- Compact with a rubber pad between the plate compactor and the stone surface — direct metal-to-metal contact chips natural stone edges
- Top up joints a second time after the initial water activation, since sand settles as binder cures
- Avoid foot traffic on activated polymeric sand for 24 hours minimum — 48 hours in humid conditions
Sealing and Long-Term Maintenance
Sealing is the maintenance step that extends the appearance and longevity of a natural stone paver walkway, but the timing matters more than most installers communicate to their clients. New installations should cure for a minimum of 30 days before sealing — applying sealer too early traps installation moisture beneath the film and causes clouding that’s difficult to reverse without stripping the sealer entirely.
Penetrating sealers (silane-siloxane chemistry) are the right specification for exterior natural stone walkways. They repel water and oil from below the surface rather than forming a film on top, which means they don’t peel, flake, or become slippery when wet. Film-forming acrylic sealers produce the glossy look some clients prefer, but they require more frequent reapplication — typically every 1–2 years outdoors — and can become dangerously slick in wet conditions if the gloss formula doesn’t include slip-resistant additives.
- Test sealer on an inconspicuous piece before full application — some stone types darken noticeably with certain sealer chemistries
- Apply sealer in two thin coats rather than one heavy coat to avoid pooling and film buildup in low spots
- Reapply penetrating sealer every 3–5 years for routine residential walkways; high-traffic applications warrant a 2-year cycle
- Clean the surface with a pH-neutral stone cleaner before resealing — acidic or alkaline cleaners etch calcium-based stones like limestone
- Check joint sand annually and top up any sections where settlement has left joints partially exposed
Citadel Stone maintains warehouse stock of natural stone walkway pavers in multiple thicknesses, which means your project doesn’t have to wait through extended import lead times when you need to match an existing installation for repairs or extensions.
Getting Your Paver Stone Walkway Right
A paver stone walkway built correctly from the subgrade up is genuinely a long-service installation — 20 to 30 years of stable, attractive performance is achievable when the base is right, the joint sand is maintained, and the sealer is refreshed on schedule. The steps that make the difference aren’t complicated, but they require discipline: understanding your soil before you excavate, compacting in proper lifts, placing stone without displacing your setting bed, and finishing your joints completely. Skip any one of those, and you’re scheduling a repair within a decade. Your hardscape budget deserves better than that.
If you’re also exploring complementary natural stone applications for your property, Belgian block paving for driveways and borders covers another dimension of stone hardscape worth considering alongside your walkway design. Stone for nationwide projects includes tight-tolerance pieces that keep a paver stone walkway even underfoot for years.
Related reading: cobblestone pavers vs natural stone · limestone cobblestone paving patterns · limestone paver base preparation.