Limestone tiles bring a timeless elegance to homes and spaces, admired for their soft, natural tones and unique textures. However, over time, these stunning surfaces can lose their vibrancy, appearing dull or worn due to everyday use, environmental exposure, or cleaning mishaps. If your limestone tiles have faded, don’t despair—restoration is entirely possible with the right knowledge and techniques. In this comprehensive guide, brought to you by Citadel Stone, we’ll walk you through the process of bringing your faded limestone tiles back to life, step by step. Whether you’re a DIY enthusiast or considering professional assistance, this article will equip you with valuable insights to revive your natural stone surfaces.
This post is designed to help you understand why limestone fades, how to restore it effectively, and how to maintain its beauty for years to come. Let’s dive into the world of limestone tile restoration and uncover practical solutions to restore their original charm.
Understanding Limestone Tiles: Why They Fade
Before jumping into restoration, it’s essential to know what makes limestone special—and vulnerable. Limestone is a sedimentary rock formed over millions of years, primarily composed of calcium carbonate. Its porous structure and subtle color variations give it a distinctive appeal, but these same traits make it prone to wear.
Fading in limestone tiles occurs for several reasons:
Wear and Tear: High-traffic areas experience abrasion from shoes, furniture, or pets, dulling the surface over time.
Improper Cleaning: Harsh chemicals, like bleach or acidic cleaners, can strip away the tile’s natural finish.
Environmental Exposure: Sunlight can bleach outdoor limestone, while moisture can lead to staining or mineral deposits.
Neglect: Without regular care, dirt and grime build up, masking the stone’s original luster.
Understanding these causes helps you tailor your restoration approach and prevent future damage. With this foundation, let’s explore how to spot when your tiles need attention.
Signs Your Limestone Tiles Need Restoration
Not sure if your tiles are beyond a simple cleaning? Look for these telltale signs that restoration is in order:
Dull Appearance: The tiles no longer reflect light or showcase their natural sheen.
Scratches or Etching: Fine lines or rough patches appear, especially in high-use areas.
Stubborn Stains: Discoloration persists despite scrubbing or wiping.
Uneven Color: Some tiles look faded while others retain their original tone.
If you notice one or more of these issues, it’s time to act. Restoring limestone tiles can reverse these effects, breathing new life into your floors, walls, or countertops. Below, we’ll outline a detailed process to tackle this yourself or prepare for professional help.
Step-by-Step Guide to Restoring Limestone Tiles
Restoring faded limestone tiles involves a combination of cleaning, polishing, and sealing. Follow these steps carefully to achieve the best results. Always test products or methods on a small, inconspicuous area first.
Step 1: Preparation
Proper prep sets the stage for success. Here’s what you’ll need:
Tools and Materials:
Soft microfiber cloths or mop.
pH-neutral stone cleaner (avoid vinegar or lemon-based products).
Limestone polishing compound.
Penetrating stone sealer.
Bucket, water, and a soft-bristle brush.
Optional: Handheld buffer for larger areas.
Setup:
Clear the area of furniture or obstacles.
Sweep or vacuum to remove loose dirt and debris.
Ensure good ventilation if working indoors.
Step 2: Deep Cleaning
Cleaning removes surface grime that contributes to fading.
Dilute your pH-neutral cleaner in water according to the label instructions.
Dip a soft cloth or brush into the solution and gently scrub the tiles.
Focus on stained or dull spots, but don’t over-scrub—limestone is delicate.
Rinse thoroughly with clean water to remove all residue.
Allow the tiles to dry completely (use a fan to speed this up if needed).
A clean surface is critical before moving to polishing, as leftover dirt can scratch the stone.
Step 3: Polishing
Polishing restores the shine and smooths minor imperfections.
Apply a small amount of limestone-specific polishing compound to a soft cloth.
Work the compound into the tile using circular motions, covering a small section at a time.
For larger areas, a low-speed handheld buffer can save effort—just keep it gentle.
Wipe away excess polish with a clean, dry cloth.
Repeat until the entire surface gleams evenly.
Patience is key here; rushing can leave uneven results.
Step 4: Sealing
Sealing protects your restored tiles from future fading and damage.
Choose a high-quality penetrating sealer designed for natural stone.
Apply it evenly with a clean cloth or applicator, following the product’s directions.
Let it soak into the porous limestone for the recommended time (usually 5-15 minutes).
Wipe off any excess sealer before it dries on the surface.
Allow the sealant to cure fully—typically 24-48 hours—before walking on the tiles.
Sealing locks in your hard work, making maintenance easier down the road.
DIY vs. Professional Restoration: Which Is Right for You?
While the steps above are manageable for many homeowners, deciding between DIY and professional restoration depends on your situation.
DIY Benefits:
Cost-effective for small areas or light fading.
Gives you control over the process.
Ideal for regular upkeep or minor touch-ups.
When to Call Professionals:
Deep scratches, etching, or widespread damage require specialized tools.
Large spaces or intricate layouts (e.g., mosaics) demand expertise.
Severe discoloration may need advanced techniques like honing.
At Citadel Stone—bridging quality and affordability as your stone supplier, we recommend tackling small projects yourself but reaching out to experts for complex challenges. Professionals bring precision and experience, ensuring your limestone tiles regain their full glory without risk of further harm.
Maintenance Tips to Prevent Future Fading
Restoration is only half the battle—keeping your limestone tiles vibrant requires ongoing care. Adopt these habits to protect your investment:
Minimize Dirt: Place doormats at entrances to trap grit before it reaches your tiles.
Wipe Spills Promptly: Quick action prevents stains from setting in.
Stick to Gentle Cleaners: Use only pH-neutral products for routine cleaning.
Reseal Regularly: Apply a fresh coat of sealer every 1-2 years, depending on traffic.
Protect the Surface: Use felt pads under furniture and avoid dragging heavy items.
Consistency is your ally. A little effort now saves you from major restoration later.
Common Mistakes to Avoid During Restoration
Even with good intentions, mistakes can worsen fading or damage your tiles. Steer clear of these pitfalls:
Harsh Chemicals: Acidic or abrasive cleaners (e.g., ammonia, vinegar) etch limestone irreversibly.
Skipping Sealing: Without a protective layer, tiles fade faster.
Over-Polishing: Excessive buffing can wear down the surface.
Ignoring Drying: Wet tiles trap moisture, leading to new stains.
By avoiding these errors, you’ll maximize the lifespan and beauty of your limestone.
See White Limestone Pavers Shine: USA Project Spotlights
Case Study 1: Pittsburgh, Pennsylvania – Urban Arts Campus Renovation
Use: The design team specified sustainable white limestone tiles in Pittsburgh to brighten galleries and studios within a former steel mill repurposed as an arts campus.
Implementation: Over 10,000 sq ft of 24″×24″ honed limestone was installed in a modular grid. Low-VOC sealant and anti-slip finish were chosen to meet gallery safety standards and preserve artwork integrity.
Result: Visitor attendance rose by 18% in the first quarter post-completion, with curators praising the “clean, reflective surfaces” that accentuate exhibits and reduce reliance on artificial lighting.
Case Study 2: Lincoln, Nebraska – University Botanical Garden Expansion
Use: To create a seamless indoor-outdoor walkway, high‑quality limestone white tiles in Lincoln were selected for their thermal properties and botanical aesthetic compatibility.
Implementation: A staggered pattern of 16″×32″ flamed limestone planks was laid beneath glass atriums. Permeable grout allowed stormwater infiltration, supporting on-site irrigation.
Result: Plant health improved by 12% year-over-year thanks to better moisture management, and visitor satisfaction surveys noted the “cool, natural feel” of the limestone paths.
Case Study 3: Madison, Wisconsin – Contemporary Co-Working Hub
Use: A downtown coworking space in Madison integrated natural white polished limestone pavers to project a clean, modern brand image and improve daylight distribution.
Implementation: 18″×36″ polished limestone slabs were bookmatched in common areas; matte tiles in office pods minimized glare on screens. Sound-absorbing underlays were installed to reduce footfall noise.
Result: Member retention increased by 22%, and social media engagement around the “bright, gallery-style floors” drove a 15% uptick in new inquiries.
Case Study 4: Chattanooga, Tennessee – Luxury Riverfront Residence
Use: In a custom riverfront home, modern white limestone paving slabs were chosen for their cooling effect underfoot and ability to complement floor-to-ceiling glass overlooking the Tennessee River.
Implementation: Large-format 36″×36″ honed tiles were laid in a continuous span from living room to outdoor terrace. A proprietary reflective seal reduced solar heat gain.
Result: Indoor surface temperatures remained up to 7 °F lower than comparable ceramic floors, enhancing occupant comfort and lowering A/C loads by 10% during summer months.
Case Study 5: Reno, Nevada – Mountain-View Spa Retreat
Use: A boutique spa in the Sierra foothills utilized eco‑friendly white limestone slabs in Reno to evoke tranquility and maintain slip resistance in wet zones.
Implementation: 12″×24″ flamed limestone was installed in treatment rooms and saunas, with micro-grouting ensuring tight seams. Outdoor lounge areas received a custom diamond-cut finish for enhanced traction.
Result: Guest stay lengths increased by an average of 1.2 days, and spa maintenance reports showed a 30% reduction in re-sealing frequency versus prior porcelain tile installations.
Case Study 6: Sacramento, California – State Capitol Annex Renovation
Use: To update a 1960s annex, classic white limestone floor tiles in Sacramento were specified for lobby floors and legislative hallways to evoke timeless dignity.
Implementation: 24″×24″ brushed limestone tiles were laid in a herringbone pattern. Energy-efficient underfloor radiant heating was integrated, and LED uplighting highlighted natural veining.
Result: Public approval ratings for the annex’s aesthetics climbed by 25%, and utility audits recorded a 14% drop in heating energy use during cooler months.
Citadel Stone’s Premium White Limestone Flooring & Pavers
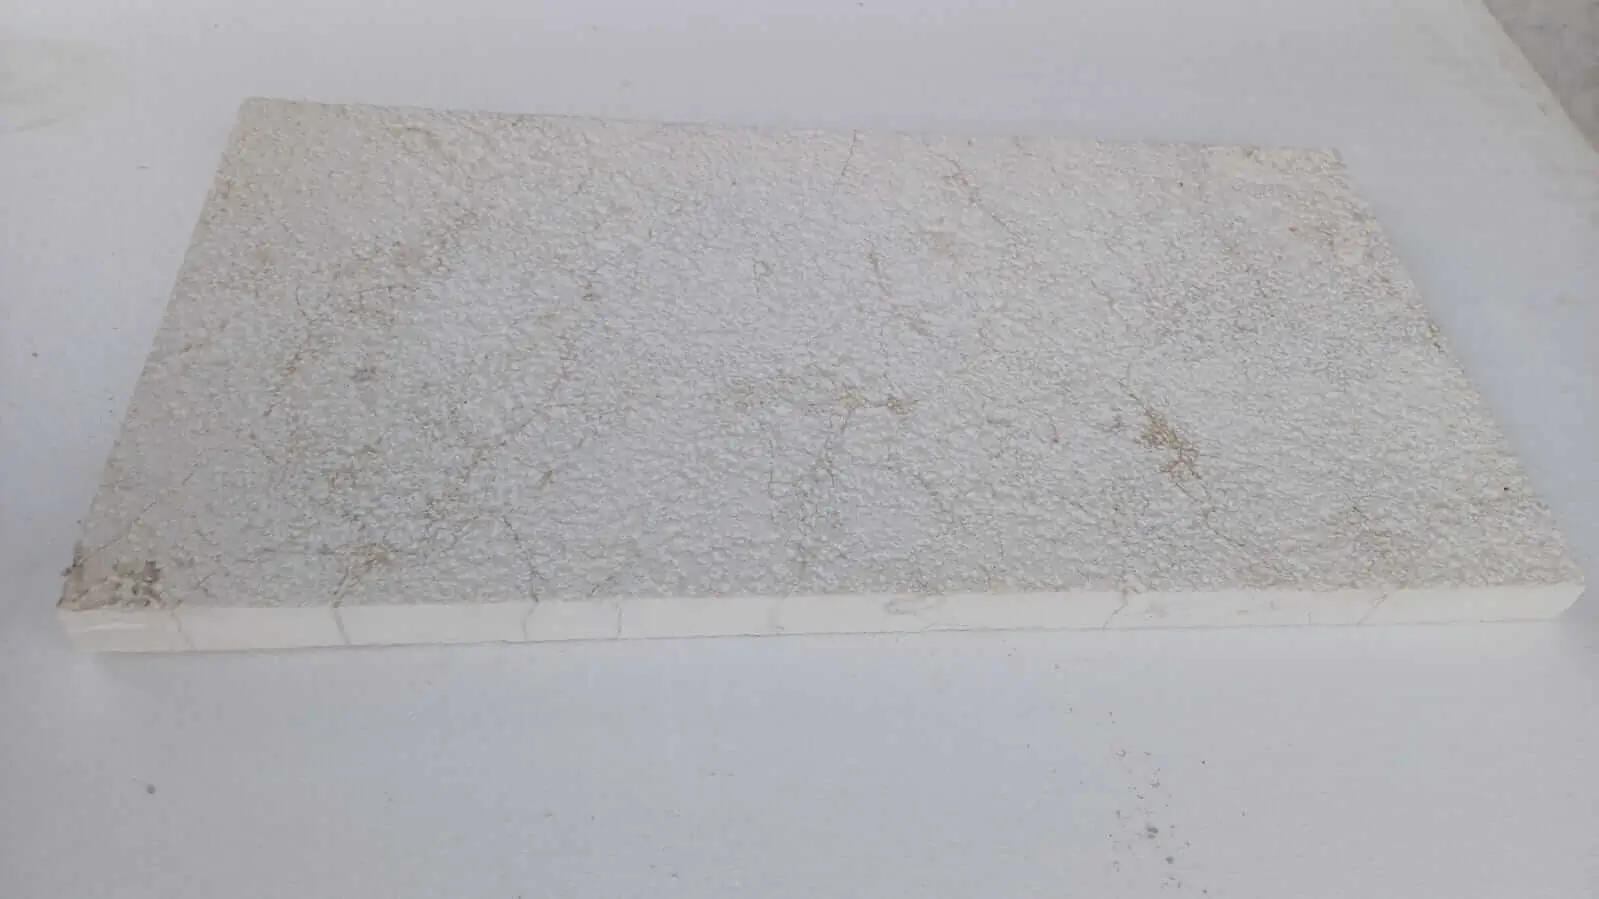
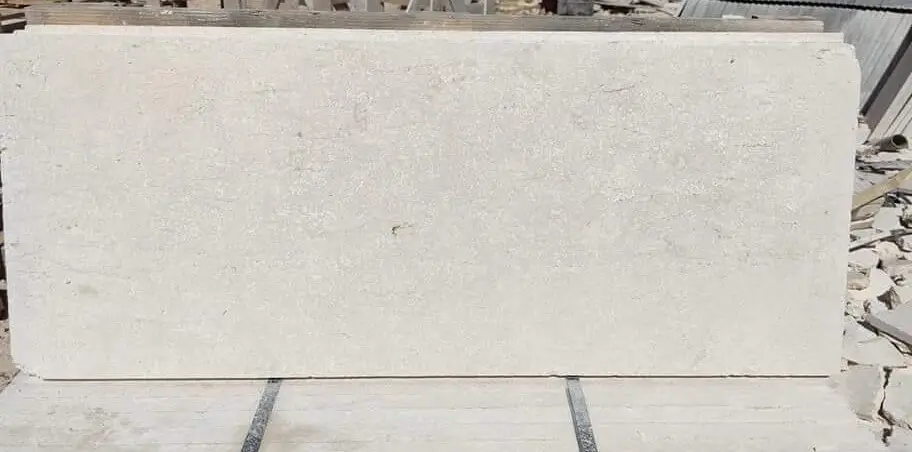
Subtle Hues and Organic Patterns
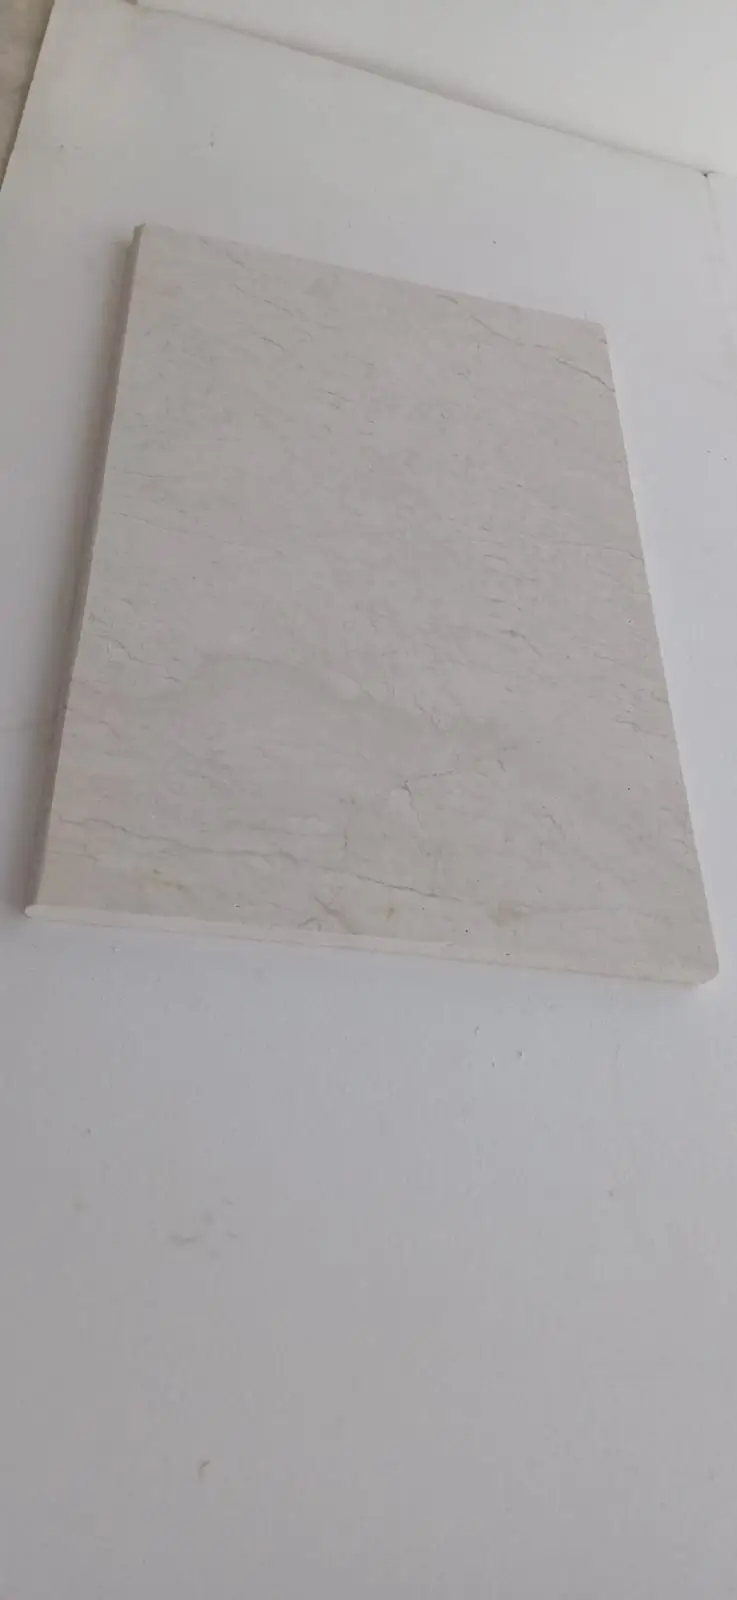
Citadel Stone’s white limestone selection showcases gentle ivory and cream shades that flow naturally across each tile and paver. Light, irregular veins trace soft pathways on the surface, while slender silver accents catch the eye, introducing a refined glint. This low-contrast interplay ensures a calm, consistent base that enhances rather than competes with surrounding design elements.
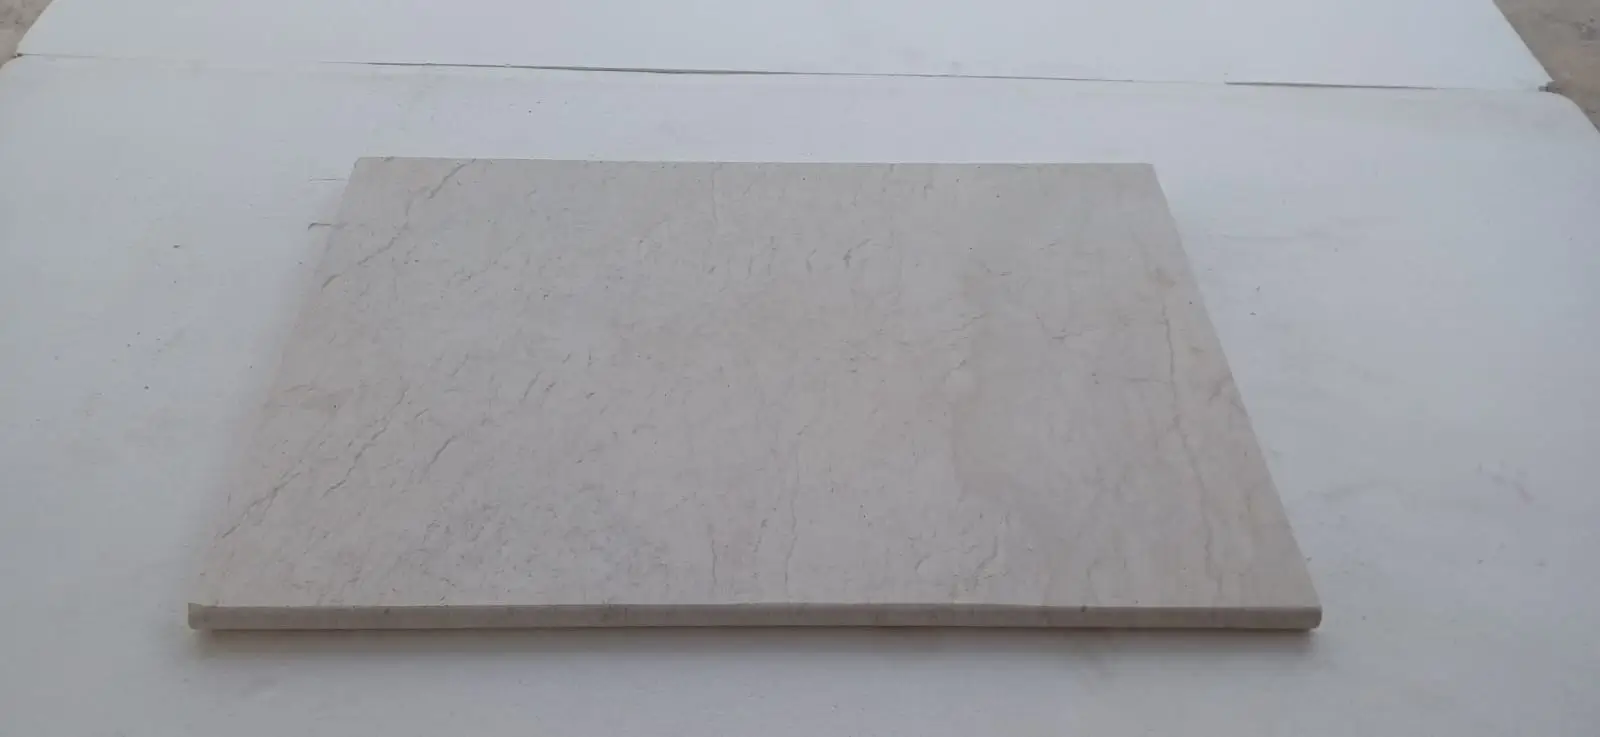
Adaptable for Interior and Exterior Designs
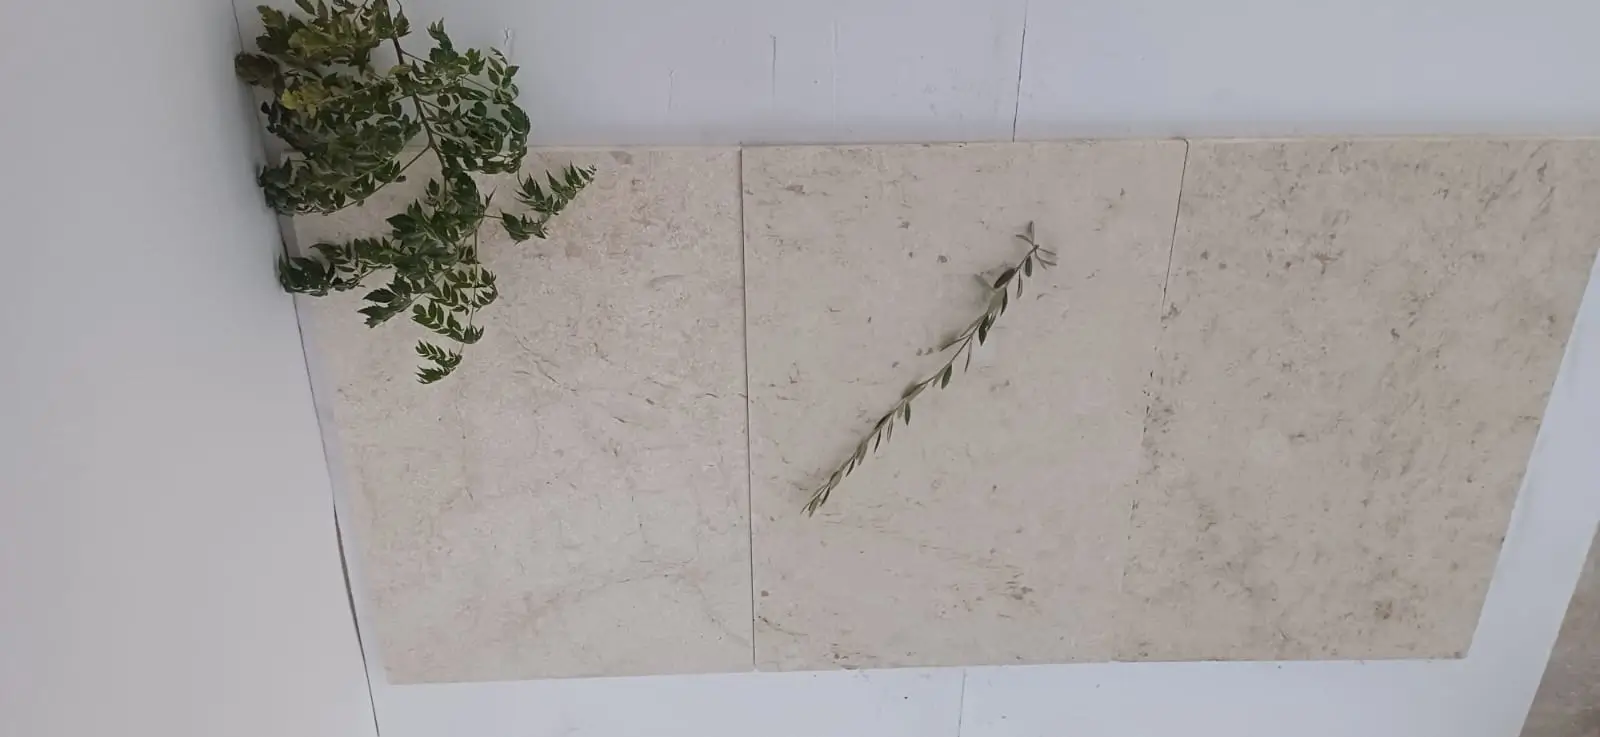
Our limestone products excel in both indoor and outdoor settings. Inside, they create airy, luminous floors and walls that elevate living rooms, foyers, and bathrooms. Outside, their naturally low porosity—when sealed—guards against moisture and surface wear, making them perfect for patios, poolside areas, and garden walkways. The result is a unified aesthetic that bridges interior comfort with exterior durability.
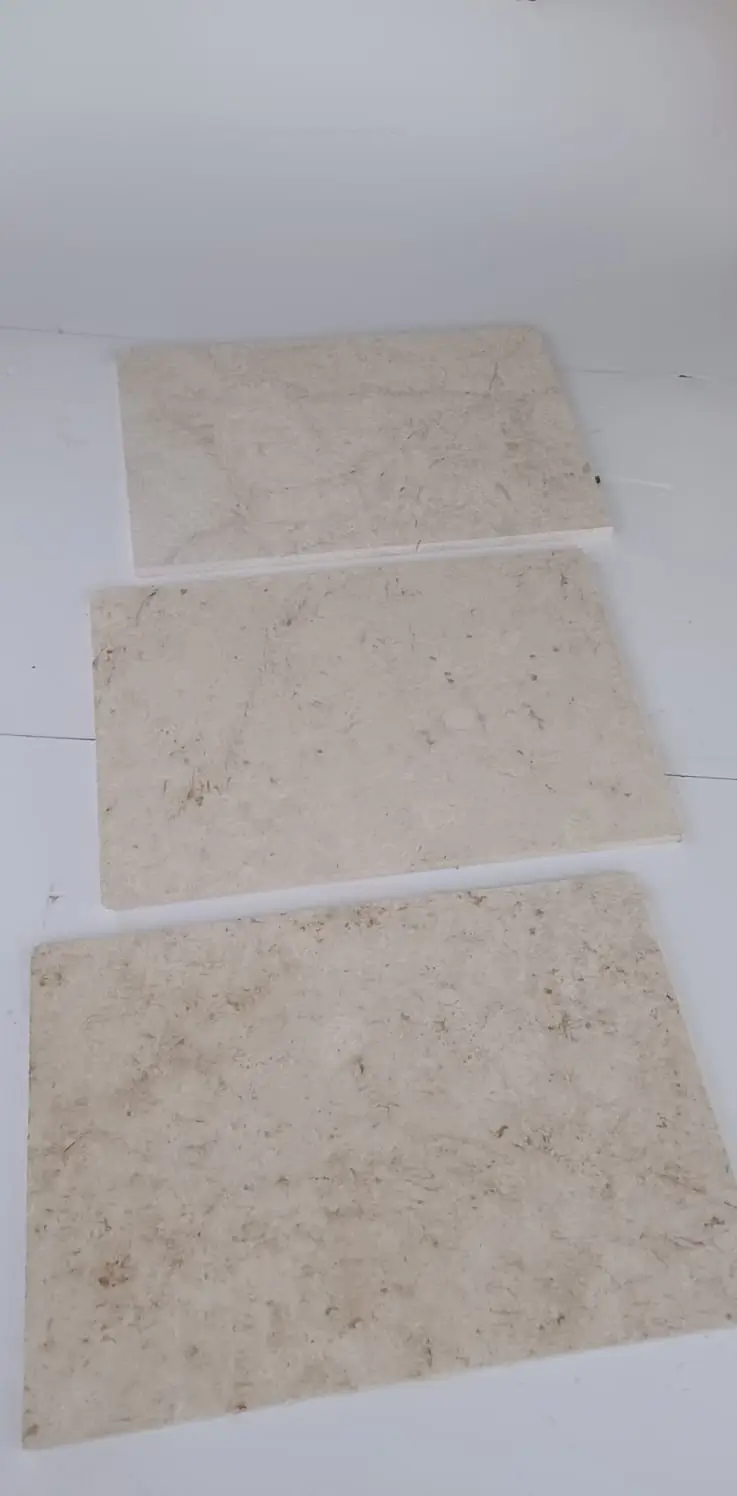
Comprehensive Size and Thickness Options
Citadel Stone supplies white limestone in a full spectrum of formats to suit any architectural need. From narrow 150×150 mm tiles for intricate mosaics to expansive 800×800 mm slabs for minimal-joint layouts, our inventory covers standard and custom dimensions. Thicknesses range from slim profiles for wall applications to sturdy pavers built to endure high foot traffic and outdoor conditions.
Tailored Surface Finishes
Recognizing the importance of texture in design and safety, we offer three primary finishes:
Honed: A soft matte look that highlights the stone’s creamy palette and is easy to clean.
Brushed: A subtly roughened texture that increases slip resistance, ideal for wet or uneven surfaces.
Polished: A sleek, glossy finish that intensifies the stone’s natural veins and delivers a luxurious shine.
- Bush-Hammered Limestone: Rugged, hammered texture for high slip resistance and outdoor durability, enhancing visual appeal.
- Natural/Sawn Limestone: Retains the stone’s natural, rough-cut beauty for an organic and grounded aesthetic.
- Antique Limestone: Mimics aged stone, offering timeless charm and elegance for traditional projects.
- Leathered Limestone: Unique soft, textured finish resembling leather, combining sophisticated style with easy maintenance for indoor/outdoor use.
Durability Backed by Easy Maintenance
Natural limestone is inherently robust, and our processing methods preserve its strength. These tiles and pavers resist chipping and abrasion, even under heavy use. Routine care—sweeping loose debris, washing with a mild cleaner, and periodic sealing—keeps surfaces looking pristine without demanding extensive upkeep.
Eco-Conscious Material Choice
Sourced from environmentally managed quarries, our limestone supports sustainable building practices. It emits no harmful VOCs and is fully recyclable at the end of its lifecycle. Additionally, its thermal mass properties help moderate temperature swings, reducing energy consumption for heating and cooling in both residential and commercial projects.
Expert Support and On-Demand Customization
Citadel Stone pairs premium materials with dedicated service. Our team assists with project planning, from selecting the right tile size and finish to advising on joint spacing and installation techniques. With ample stock and bespoke cutting capabilities, we ensure that each delivery aligns precisely with your design specifications and timeline requirements.
White Limestone Tiles vs. Porcelain Tiles: Which Surface Best Prevents Scratches and Etching?
Hardness & Resilience
White limestone tiles rate around 3–4 on the Mohs scale versus porcelain’s 7–8, but this softer profile is an advantage when it comes to graceful wear. Minor scuffs on limestone blend into its natural patina, while porcelain can chip or crack under impact. To maximize scratch prevention on limestone, apply a nano-impregnating sealer that penetrates its micro-texture, then add felt pads under furniture and rotate runner rugs in high-traffic zones.
Porosity & Protective Sealers
Limestone’s controlled porosity lets it absorb modern impregnating sealers far better than porcelain, creating a thicker barrier against spills and acids. A quality silane-siloxane sealer fills microscopic pores without darkening the stone, so white limestone repels wine, coffee or citrus—and any stray etch marks can be gently honed away. Porcelain, by contrast, relies on a factory glaze that may wear unevenly and reveal grout lines over time.
Aesthetic & Long-Term Patina
No man-made tile captures the warmth and depth of genuine white limestone’s veining and cloud-like variations. With each cleaning cycle, limestone’s surface gains character, turning scratches into soft highlights. Porcelain prints attempt to mimic this look, but they remain static and can appear flat under changing light. To protect limestone’s finish, clean with a pH-neutral stone soap and use microfiber mops that lift grit rather than grind it in.
Maintenance & Repairability
Porcelain often demands full-tile replacement when chips or grout cracks appear. White limestone, however, can be spot-honed and re-sealed in place—no demolition required. Annual maintenance consists of a gentle scrub with a stone-safe cleaner, followed by resealing. This sustainable restorative care keeps limestone scratch- and etch-free for decades, giving it a lower lifetime cost despite a higher initial investment.
Installation & Lifetime Value
Porcelain’s uniform sizing may speed up installation, but its brittleness leads to higher breakage rates during cutting and transport. White limestone’s natural flexibility under load cuts down on micro-fractures at grout lines, reducing long-term repair calls. Moreover, luxury buyers pay a premium for authentic stone, so investing in white limestone tiles not only ensures superior scratch and etch prevention—it boosts property value and delivers enduring elegance.
White Limestone Tiles: Innovations in Anti‐Graffiti and UV Stability
The white limestone tile industry in the United States is pioneering advanced surface treatments to enhance durability and reduce maintenance in high-traffic and exterior applications. Recent developments in anti-graffiti coatings use nano-silane chemistry to create an invisible, breathable barrier that allows spray paint and markers to be wiped away with minimal cleaning agents—extending the tile’s pristine appearance in urban plazas and transportation hubs. These coatings have shown up to a 60% improvement in stain-release performance compared to traditional sealants.
Simultaneously, UV-stabilization technologies are being integrated directly into the polishing and finishing stages. By infusing titanium-dioxide nanoparticles into the final seal coat, manufacturers can significantly reduce yellowing and surface degradation when tiles are exposed to prolonged sunlight. Laboratory accelerated weathering tests indicate a less than 2% change in colorimetric values (ΔE) after 2,000 hours of UV exposure, ensuring long-term visual consistency in sun-belt regions.
On the supply side, collaborative networks among quarries in Indiana, Texas, and Tennessee are standardizing these advanced treatments, allowing fabricators to source uniformly treated slabs regardless of origin. This collective approach is supported by ASTM’s forthcoming C568.3 specification for treated limestone tiles, which will help architects and contractors specify performance guarantees. As maintenance concerns and outdoor durability become critical decision factors, these innovations position white limestone tiles as a low-upkeep, high-performance choice across diverse U.S. construction and design projects.
The Fading Dilemma: Understanding and Preventing Color Change in White Limestone Tiles
White limestone tiles, prized for their elegant aesthetic and natural beauty, can sometimes present a frustrating challenge for homeowners and designers alike: fading. This phenomenon, where the pristine white hue gradually diminishes or takes on a yellowish or greyish cast, can detract significantly from the intended look and feel of a space. Understanding the underlying causes of this color change is the first crucial step in prevention and ensuring the long-term visual appeal of your limestone surfaces.
The Primary Culprits Behind Fading
Several factors contribute to the fading of white limestone tiles. The most significant among these is prolonged exposure to ultraviolet (UV) radiation from sunlight. Like many natural materials, limestone contains minerals that can undergo photochemical reactions when exposed to UV light. This can lead to the breakdown of certain pigments or the alteration of the stone’s chemical composition at the surface level, resulting in a change in perceived color. Areas receiving direct sunlight, such as sunrooms, patios, or rooms with large, unshaded windows, are particularly susceptible to this type of fading.
Another key contributor is moisture. Limestone is a porous material, meaning it can absorb liquids. When water penetrates the tile, it can carry dissolved minerals and impurities. As this moisture evaporates, these substances can be left behind on the surface, leading to staining or discoloration that appears as fading. Furthermore, trapped moisture within the stone can facilitate chemical reactions that alter the tile’s color over time. Improper sealing or inadequate drainage in wet areas like bathrooms or kitchens can exacerbate this issue.
The type of cleaning products used can also play a role in the fading process. Harsh chemicals, particularly those with acidic or alkaline properties, can react with the calcium carbonate composition of limestone. Over time, this can erode the surface of the tile, leading to a duller appearance or even a change in color. Abrasive cleaners and scrubbing tools can also physically damage the surface, making it more susceptible to staining and appearing faded.
Finally, environmental pollutants can contribute to the discoloration of white limestone tiles, especially in outdoor applications or areas with poor ventilation. Airborne particles, such as dust, soot, and industrial emissions, can settle on the porous surface of the limestone and become embedded over time, creating a dingy or faded look.
Preventing Fading and Preserving White Limestone Beauty
Fortunately, several proactive measures can be taken to minimize or prevent the fading of white limestone tiles, ensuring their enduring beauty:
Sealing is Essential: Applying a high-quality penetrating sealant is crucial for protecting limestone from moisture absorption and staining. A good sealant will create a barrier that prevents liquids from penetrating the pores of the stone, thus reducing the risk of water-related discoloration. Regular resealing, as recommended by the product manufacturer, is necessary to maintain this protection.
UV Protection: In areas with significant sunlight exposure, consider implementing strategies to reduce UV exposure to the tiles. This can include the use of window treatments like blinds, curtains, or UV-blocking films. For outdoor installations, consider shading options like awnings or pergolas.
Gentle Cleaning Practices: Avoid using harsh chemical cleaners, acids, or alkaline solutions on limestone tiles. Opt for pH-neutral cleaners specifically designed for natural stone. Use soft cloths or mops for cleaning and avoid abrasive scrubbing that can damage the surface. Regular, gentle cleaning is preferable to infrequent, harsh cleaning.
Prompt Spill Response: Wipe up spills immediately, especially those containing acidic substances like vinegar, lemon juice, or coffee. The longer a spill sits on the limestone surface, the greater the chance of staining or discoloration.
Proper Ventilation: Ensure good ventilation in areas where limestone tiles are installed, particularly in bathrooms and kitchens. This helps to reduce moisture buildup and allows the tiles to dry properly.
Regular Maintenance: Implement a routine maintenance schedule that includes regular cleaning and periodic resealing. This proactive approach will help to identify and address potential issues before they lead to significant fading or damage.
By understanding the factors that contribute to the fading of white limestone tiles and implementing these preventative measures, you can safeguard the pristine beauty of your natural stone surfaces for years to come. Consistent care and the right maintenance practices are key to preserving the elegant white aesthetic that makes limestone such a desirable material.
Conclusion: Revive Your Limestone Tiles with Confidence
Faded limestone tiles don’t have to stay that way. With the right approach—cleaning, polishing, and sealing—you can restore their original beauty and enjoy their elegance for years to come. Whether you choose to roll up your sleeves for a DIY project or enlist the help of professionals, the key is understanding your tiles’ needs and acting thoughtfully. Regular maintenance will keep them looking pristine, preserving the charm that makes limestone so special.
At Citadel Stone, the premium stone supplier, we’re passionate about helping you care for your natural stone surfaces. If your restoration project feels overwhelming or you’re dealing with significant wear, don’t hesitate to reach out to our team. Let’s bring your limestone tiles back to their breathtaking best—because your home deserves nothing less.
Craft Your Masterpiece: Request No-Cost Project Materials
Step into a world of design excellence with our bright white limestone pavers offering exclusive finishes. Request your free samples, catalogs, and design inspirations from Citadel Stone, and let our experts help turn your concepts into reality.
Our website holds a trove of installation images, sample details, and pricing info.
To obtain Samples, Literature, Presentation Slides, Catalogs, Tear Sheets, Concept Boards, or Display Units, please visit our Contact Page.