The primary benefits of sealing include enhanced stain resistance, easier daily maintenance, and slower soiling from foot traffic. However, sealing doesn’t make limestone stain-proof or acid-proof—understanding these limitations helps set realistic expectations for your investment.
Why Seal White Limestone? The Practical & Performance Reasons
Protecting Against Staining and Soiling
White limestone’s natural porosity makes it vulnerable to staining from oils, wine, coffee, and other household substances. When you’re sealing white limestone floors, you’re creating a barrier that slows liquid penetration, giving you precious time to clean up spills before they become permanent stains.
Unsealed limestone can absorb cooking oils in kitchens or mud from entryways within minutes. A quality sealer extends this absorption time from minutes to hours or even days, dramatically reducing maintenance stress.
Ease of Maintenance and Appearance Preservation
Sealed white limestone requires less frequent deep cleaning and maintains its color consistency longer. The sealer prevents dirt and grime from penetrating deep into the stone’s pores, allowing surface cleaning to be more effective.
Some sealers subtly enhance the stone’s natural color depth without creating an artificial appearance. This enhancement can make white limestone appear more vibrant and uniform across large installations.
Beware the Limits — What Sealers Do Not Do
Sealers do not prevent acid etching from lemon juice, vinegar, or wine. Limestone is calcium carbonate, which reacts chemically with acids regardless of sealing. Etching creates dull spots that require professional restoration.
Sealers also don’t prevent structural issues like cracking from foundation settlement or impact damage. They’re surface protection, not structural reinforcement. Understanding these limitations prevents disappointment and helps you maintain realistic expectations about sealer performance.
Sealer Types Explained — Pros, Cons & When to Use Each
Penetrating Sealers (Silane/Siloxane, Silicone, Silicate Blends)
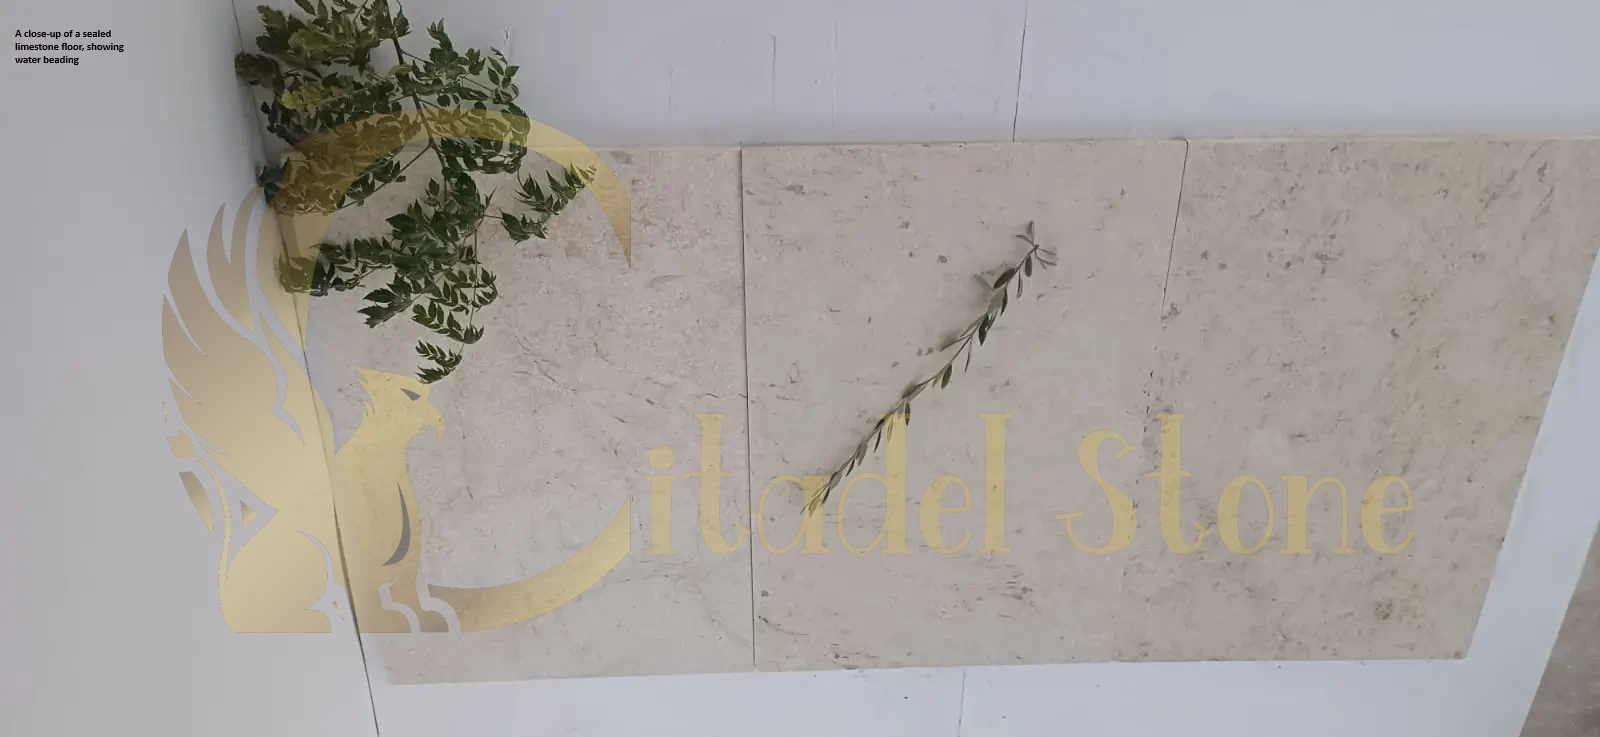
Penetrating sealers work by chemically bonding within the limestone’s pore structure. They create water repellency while maintaining the stone’s natural breathability and appearance. These sealers are nearly invisible once applied, preserving the limestone’s original texture and color.
Pros: Excellent breathability, natural appearance, long-lasting protection, no slip hazard creation
Cons: Limited protection against oil-based stains, requires more frequent reapplication than topical options
Best for: Interior residential applications, areas where natural appearance is critical
Topical/Film-Forming Sealers
Topical sealers create a protective film on the limestone surface. They typically enhance the stone’s color depth and can add subtle sheen. Water-based versions maintain more natural appearance, while solvent-based options provide stronger protection but may darken the stone slightly.
Pros: Excellent stain protection, easier to apply evenly, renewable surface
Cons: Can create slip hazards, may trap moisture, changes appearance
Best for: High-stain-risk areas like kitchens, commercial spaces with controlled environments
Hybrid & Impregnating + Surface-Active Hybrids
Hybrid sealers combine penetrating technology with mild surface activity. They provide deeper penetration than purely topical sealers while offering better stain protection than purely penetrating options.
These products work well for homeowners wanting maximum protection without significant appearance changes. The slight surface activity helps with oil stain resistance while maintaining reasonable breathability.
Epoxy/Urethane Coatings
High-performance coatings create extremely durable, chemical-resistant surfaces. However, they dramatically change the limestone’s appearance and completely eliminate breathability. These products are generally inappropriate for fine white limestone floors in residential or elegant commercial settings.
Best for: Industrial applications, laboratory floors, areas with extreme chemical exposure requirements
How Often Should You Reseal? Factors that Determine Frequency
Use-Case Matrix
Low-traffic areas (bedrooms, studies): Illustrative reseal interval of 3-5 years
Moderate-traffic areas (living rooms, hallways): Illustrative reseal interval of 2-3 years
High-traffic areas (kitchens, entryways): Illustrative reseal interval of 1-2 years
Commercial spaces (lobbies, retail): Illustrative reseal interval of 6-18 months
These intervals assume proper cleaning and maintenance. Heavy use, aggressive cleaning products, or frequent spills can necessitate more frequent resealing.
Influencing Variables
Foot traffic intensity directly correlates with sealer wear. Areas with sand and grit exposure wear sealers faster through abrasion. UV exposure from large windows can degrade some sealer formulations over time.
Your cleaning regimen significantly impacts sealer longevity. pH-neutral cleaners preserve sealers, while acidic or highly alkaline products can strip protection prematurely. The original limestone porosity also affects how well sealers penetrate and perform.
Practical Rule-of-Thumb
Monitor high-use areas quarterly using simple water tests. Establish a baseline testing schedule immediately after sealing, then compare results every illustrative 6-12 months. This approach prevents over-sealing while catching protection loss before staining occurs.
How to Test When Reseal Is Needed — Simple Home Tests & Professional Checks
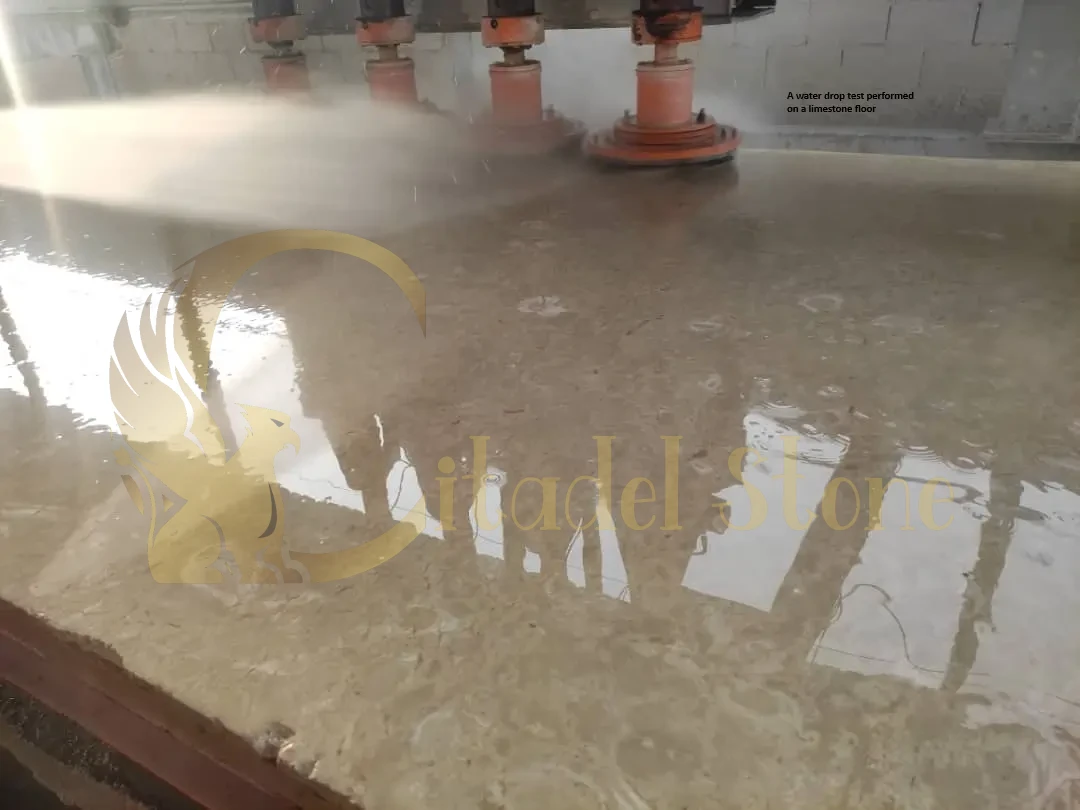
Water Drop Test
Place several drops of water on clean, dry limestone in different areas. On properly sealed stone, water should bead up and remain on the surface for at least illustrative 10-15 minutes. If water absorbs within illustrative 2-3 minutes, resealing is needed.
Test multiple locations, as wear patterns vary across floors. Focus on high-traffic areas, spots near sinks, and zones where spills commonly occur.
Olive Oil Spot Test
For testing oil resistance, place a small drop of olive oil on an inconspicuous area. On well-sealed limestone, oil should remain on the surface for illustrative 30+ minutes. Rapid absorption indicates compromised protection, particularly important for kitchen areas.
Clean test spots immediately after observation to prevent staining. This test is more revealing than water tests for penetrating sealer effectiveness.
Professional Options
Professional testing uses calibrated absorption meters or lab analysis of small samples. These services cost more but provide precise protection measurements. Consider professional testing for valuable installations or when visual inspection results are unclear.
Choosing the Right Product — Features to Look For (Checklist)
Essential Product Features:
- Breathability rating (water vapor transmission)
- Water repellency percentage (illustrative 85%+ reduction in absorption)
- Stain resistance classification
- UV stability data
- Slip rating impact assessment
- VOC content and regulatory compliance
- Recoat window specifications
- Coverage rates per square meter
- Manufacturer technical data sheet (TDS) and safety data sheet (SDS)
- Warranty terms and application support
Compatibility Requirements:
- Explicitly rated for calcium carbonate stones
- Compatible with your limestone finish (honed, filled, or polished)
- Appropriate for your climate and use conditions
- Matches your maintenance preferences and capabilities
Always request product samples and conduct test patches before committing to large quantities.
DIY Step-by-Step: How to Seal White Limestone Floors Safely
1. Pre-Application Testing
Conduct water and oil absorption tests in multiple locations. Select an inconspicuous illustrative 2ft × 2ft area for sealer testing. Verify adequate ventilation and confirm ambient temperature is between illustrative 60-80°F.
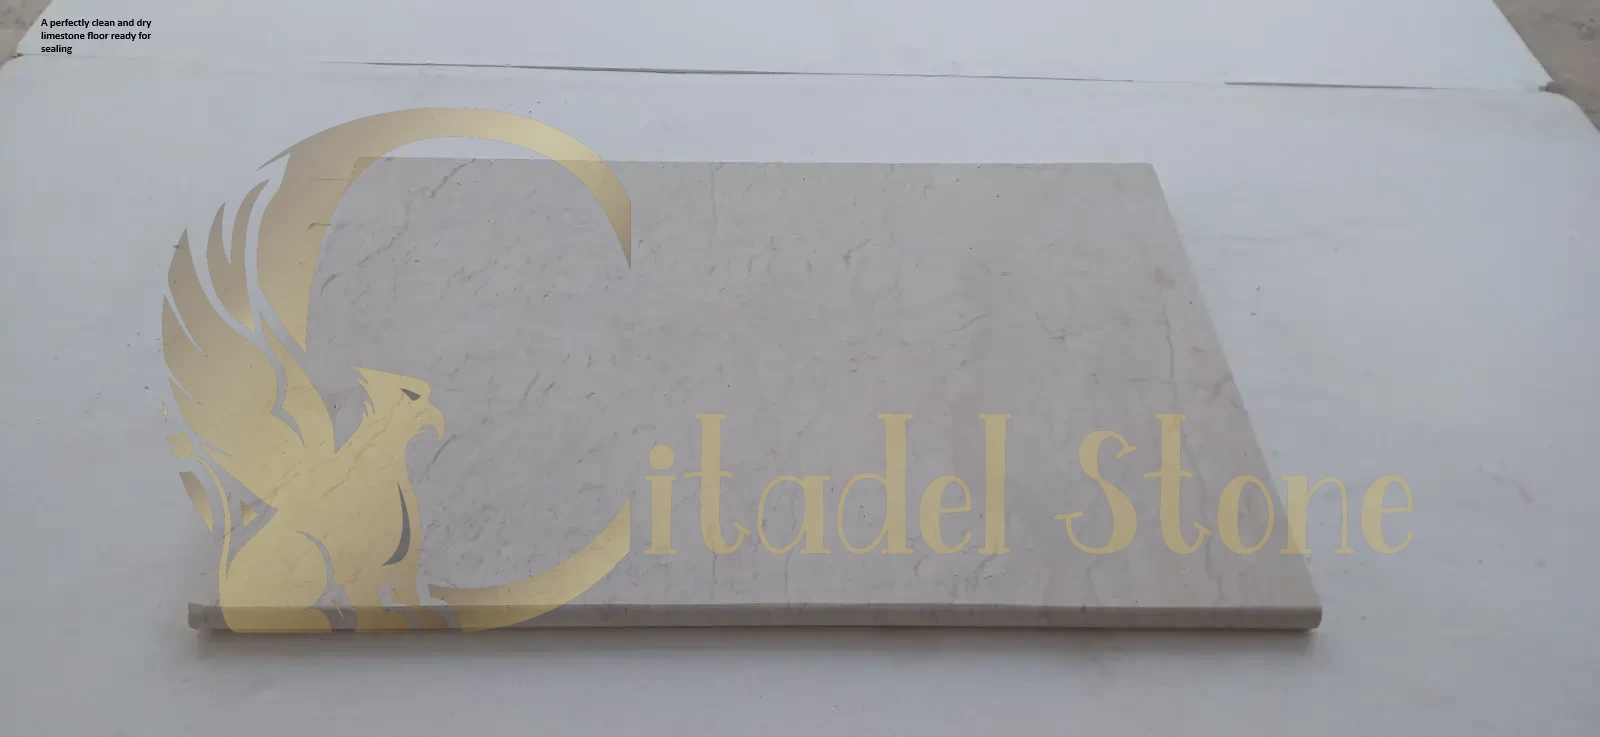
2. Surface Preparation
Vacuum thoroughly and clean with pH-neutral stone cleaner. Remove all soap residue, wax, or existing topical treatments. Apply poultice to any visible stains and allow illustrative 24-48 hours for complete drying.
3. Area Protection
Mask adjacent surfaces including baseboards, cabinets, and metal fixtures. Cover furniture and ensure pets and children cannot access the work area during application and curing.
4. Product Mixing
Follow manufacturer dilution instructions precisely. Mix only the quantity you can apply within the specified working time, typically illustrative 30-45 minutes for most products.
5. Application Method Selection
Use low-nap rollers for large areas, microfiber applicators for detailed work, or pump sprayers for extensive commercial applications. Maintain consistent coverage rates as specified in the TDS.
6. Coverage Verification
Apply sealer to your test area first, observing appearance changes and absorption rates. Calculate total product needed based on manufacturer coverage rates, typically illustrative 100-300 square feet per gallon.
7. First Coat Application
Work in illustrative 4ft × 4ft sections to maintain wet edges. Apply thin, even coats rather than heavy single applications. Monitor for proper coverage without pooling or missed spots.
8. Recoat Timing
Apply second coat within the manufacturer’s recoat window, typically illustrative 2-6 hours. Some penetrating sealers require only one coat, while topical products often need two for optimal protection.
9. Curing Period Management
Restrict foot traffic for illustrative 24-48 hours and avoid wet cleaning for illustrative 72 hours minimum. Ensure continued ventilation throughout the curing period.
10. Final Quality Check
Repeat water drop tests in several locations to verify proper protection. Document the sealer used, application date, and coverage rates for future maintenance planning.
Tools, PPE & Materials List for a DIY Job
Application Tools:
- Low-nap rollers (3/16″ to 1/4″ nap)
- Microfiber applicators or lambswool pads
- Lint-free cloths for cleanup
- Disposable paint trays
- Pump sprayer (for large areas)
Safety Equipment:
- Nitrile gloves
- Safety goggles
- Respirator (for solvent-based products)
- Non-slip shoe covers
Preparation Materials:
- pH-neutral stone cleaner
- Masking tape (low-residue)
- Plastic sheeting
- Test patch materials
- Poultice ingredients (if needed)
Safety, Environmental & Building Considerations
Ventilation and VOCs
Solvent-based sealers require mechanical ventilation during application and curing. Water-based products produce minimal odor but still need air circulation. Consider occupant sensitivity and plan application timing accordingly.
Check local VOC regulations, as some areas restrict solvent-based products. Many high-performance water-based sealers now match solvent-based protection levels with better environmental profiles.
Slip Risk Management
Topical sealers can increase slip hazard, particularly when wet. Test slip resistance before and after application in areas prone to moisture. Consider anti-slip additives or microtextured application techniques for wet-prone areas.
Document slip resistance changes for liability protection, especially in commercial applications where building codes may specify minimum coefficients of friction.
Underfloor Heating Compatibility
Maintain substrate temperatures below illustrative 85°F during application and initial curing. Some sealers require gradual temperature increases over illustrative 48-72 hours to prevent thermal stress cracking.
Verify sealer thermal cycling stability if your limestone experiences significant temperature variations from heating systems or solar exposure.
Waste Disposal Requirements
Dispose of solvent-based sealer waste according to local hazardous waste regulations. Water-based products typically qualify for standard disposal, but check local requirements. Never pour sealers down drains or into storm systems.
Store unused sealers in original containers with proper labeling for future touch-up work.
Professional vs DIY — When To Hire a Pro
Consider professional application for areas exceeding illustrative 1,000 square feet, historic or irreplaceable stone installations, or complex patterns requiring precise masking. Professionals have specialized equipment and insurance coverage for potential damage.
Hire professionals when your limestone shows existing damage, deep staining, or previous sealer failures. These situations require diagnostic expertise and potentially corrective treatments before new sealer application.
If manufacturer warranties require professional installation, factor this requirement into your cost-benefit analysis. Some high-end sealers offer extended warranties only with certified applicator installation.
Uncover the unique features of our limestone pavers.
Troubleshooting Common Problems After Sealing
Blotchy Appearance: Usually caused by uneven application or substrate moisture variations. Strip affected areas and reapply with better surface preparation.
Cloudy Film: Indicates sealer incompatibility or over-application. Test small areas with appropriate stripper before proceeding with full remediation.
Excessive Darkening: Some darkening is normal, but excessive changes suggest wrong sealer type or over-penetration. Future applications should use lighter, more breathable formulations.
Reduced Breathability Signs: Watch for efflorescence or moisture entrapment patterns. These indicate sealer incompatibility requiring professional removal and substrate remediation.
Peeling or Flaking: Topical sealer failure often results from poor surface preparation or moisture issues. Remove failed coating completely before resealing.
Maintenance After Sealing — Cleaning Products & Schedule
Weekly Maintenance: Vacuum or sweep debris. Damp mop with pH-neutral stone cleaner diluted according to manufacturer instructions.
Monthly Deep Cleaning: Use specialized limestone cleaners to remove accumulated soiling. Rinse thoroughly to prevent cleaning residue buildup that can interfere with sealer performance.
Annual Assessment: Conduct comprehensive water drop testing and visual inspection. Document results and plan maintenance or resealing based on protection levels.
Resealing Triggers (illustrative): Water absorption within illustrative 5 minutes, visible staining increase, or traffic pattern wear visible to naked eye.
Products to Avoid: Never use vinegar, lemon-based cleaners, or generic bathroom cleaners. Avoid wax-based products that can interfere with future sealer adhesion.
Ask about our custom sizes for limestone tiles.
Product Selection Examples — What to Ask Stone Suppliers
Supplier Questions:
“Please provide complete technical data sheet (TDS) and safety data sheet (SDS) for this sealer.”
“What percentage water absorption reduction should I expect after proper application?”
“What is the recommended coverage rate per square meter for first and second coats?”
“Is this product compatible with calcium carbonate stones and specifically tested on limestone?”
“What is the VOC content and do you have regional regulatory compliance documentation?”
“What are the exact dilution ratios and recoat timing windows?”
“Do you provide technical support during application and warranty coverage terms?”
Case Example — Small Kitchen Reseal Walkthrough (Illustrative)
Illustrative Case Study: A homeowner with illustrative 200 square feet of honed white limestone kitchen flooring noticed water absorption within illustrative 3 minutes during testing. The original sealing was performed illustrative 18 months earlier with a penetrating sealer.
After thorough cleaning and illustrative 48-hour drying, a water-based penetrating sealer was applied using microfiber applicators in illustrative 4ft sections. The homeowner mixed illustrative one quart at a time to maintain working time management.
Application required illustrative 6 hours total including preparation. Water drop tests 72 hours post-application showed proper beading for illustrative 15+ minutes. The homeowner reported easier cleaning and no new staining after illustrative 6 months of normal kitchen use.
This illustrative example demonstrates typical residential resealing success with proper preparation and product selection.
FAQs — Short Practical Answers
Q: Will sealing prevent etching from acidic spills?
A: No. Sealers provide stain resistance but cannot prevent chemical etching from acids. Clean acidic spills immediately regardless of sealing status.
Q: Can I use any sealer on white limestone?
A: No. Choose sealers specifically rated for calcium carbonate stones. Generic masonry sealers may cause discoloration or adhesion problems.
Q: How long before I can walk on sealed floors?
A: Light foot traffic typically after illustrative 24-48 hours, normal use after illustrative 72 hours. Follow your specific product’s curing schedule.
Q: Will sealing change my limestone’s appearance?
A: Penetrating sealers cause minimal change. Topical sealers may enhance color depth or add slight sheen. Always test patches first.
Q: Can I seal over existing sealer?
A: Sometimes, if the existing sealer is compatible and in good condition. Test adhesion in small areas before proceeding with full application.
Q: What happens if I don’t maintain the sealer?
A: Protection gradually diminishes, leading to increased staining risk and more difficult cleaning. Regular testing prevents protection loss.
Conclusion — Quick Actionable Takeaways
- Test first: Always conduct absorption tests and sealer compatibility patches before full application.
- Choose breathability: For interior limestone, prioritize breathable penetrating sealers over topical options unless specific protection needs require film formation.
- Schedule maintenance: Establish testing schedules based on traffic patterns rather than arbitrary time intervals. High-use areas need more frequent attention.
- Document everything: Record sealer types, application dates, and coverage rates for future maintenance planning and warranty purposes.
- Professional guidance: When in doubt about product selection or application techniques, consult with stone care professionals rather than risk expensive mistakes.
DIY Step-by-Step Sealing Procedure
- Test current protection levels with water drop test
- Clean surface with pH-neutral stone cleaner
- Allow illustrative 24-48 hours complete drying time
- Mask adjacent surfaces and ensure proper ventilation
- Mix sealer according to manufacturer dilution instructions
- Apply test patch in inconspicuous area
- Apply first coat using appropriate applicator in illustrative 4ft sections
- Apply second coat within recoat window if required
- Maintain illustrative 24-48 hour cure time before foot traffic
- Verify protection with follow-up water drop testing
Product Feature Checklist for Buyers
- Breathability rating and water vapor permeability
- Water absorption reduction percentage
- Stain resistance classification and test data
- UV stability and fade resistance
- Slip coefficient impact measurements
- VOC content and regulatory compliance
- Coverage rate specifications per coat
- Recoat timing windows and compatibility
- Manufacturer technical support availability
- Warranty terms and coverage limitations
- Calcium carbonate stone compatibility verification
Tools & PPE List for DIYers and Installers
Application Equipment:
- Low-nap rollers (3/16″ nap recommended)
- Microfiber applicators
- Lint-free cleaning cloths
- Disposable mixing containers
- Measuring cups for dilution
Safety Protection:
- Nitrile chemical-resistant gloves
- Safety goggles with side protection
- Respirator for solvent-based products
- Non-slip protective shoe covers
- Work clothing covering arms and legs
Maintenance Schedule
Weekly: Vacuum debris, damp mop with pH-neutral cleaner
Monthly: Deep clean with specialized stone cleaner, rinse thoroughly
Quarterly: Water drop testing in high-traffic areas
Annually: Comprehensive protection assessment and documentation
Reseal triggers (illustrative): Water absorption under illustrative 10 minutes, increased staining, visible wear patterns.
Versatile White Limestone Pavers by Citadel Stone
Case Study 1: Wichita, KS — Contemporary Family Home Entry & Kitchen (residential limestone paver)
Project overview
A modern family home in Wichita replaced aging vinyl with white limestone outdoor tiles through the entry, kitchen, and open living area to create a bright, durable surface that ties the plan together.
Paver selection rationale
Designers chose honed white limestone, 18″×36″, for minimal grout lines and easy maintenance—ideal for a residential limestone paver application where pets and kids increase wear and cleaning needs.
Installation challenges
Subfloor flattening was required over an older slab with localized depressions. Installers used a high-flow self-leveling screed and a decoupling membrane to protect against future micro-movement.
Outcomes & key metrics
Budget adherence: 2% over the $14,500 estimate due to extra leveling.
Completion time: 3 weeks, including membrane cure.
Performance results: No grout failures and homeowner reports faster daily cleaning routines.
How Citadel Stone helped
Citadel Stone provided field-tested leveling specs, recommended the exact decoupling membrane, and supplied on-site training to the tile contractor to ensure consistent grout joints and finish.
Case Study 2: Little Rock, AR — Municipal Gallery Renovation (commercial limestone paving)
Project overview
A city gallery in Little Rock reopened with a refreshed entrance hall and main gallery floor using white limestone paving tiles to neutralize gallery sightlines and improve cleaning cycles between exhibits.
Paver selection rationale
Matte honed large-format limestone was specified for low glare under gallery lighting and for durability under rolling pedestals and high foot traffic—typical needs for commercial limestone paving.
Installation challenges
The gallery required a phased install around exhibit days, and strict dust containment to protect art. Movement joints needed alignment with existing structural seams.
Outcomes & key metrics
Budget adherence: On budget at $48,000.
Completion time: 5 weeks, staged between shows.
Performance results: 12 months with zero grout loss; cleaning time per exhibit turnover reduced by 30%.
How Citadel Stone helped
Citadel Stone created a phased installation sequence, supplied dust-control cut stations, and modeled movement-joint layout to align with existing structural joints—minimizing later cracking risk.
Case Study 3: Sarasota, FL — Coastal Townhouse Pool Terrace (limestone paver installations)
Project overview
A Sarasota townhouse upgraded its pool terrace and adjacent outdoor kitchen with white limestone tiles, seeking a cool, slip-resistant surface for barefoot areas.
Paver selection rationale
Textured cleft finish limestone, 2-cm exterior grade, was chosen for superior traction, low heat absorption, and a light palette that blends with coastal landscaping—key for residential limestone paver outdoor use.
Installation challenges
Salt spray and chlorinated water exposure required a robust waterproofing and sealer regimen. The team also needed a fine-tuned slope (1–2%) for rapid drainage without impeding threshold transitions.
Outcomes & key metrics
Budget adherence: 3% under the $22,000 budget.
Completion time: 3 weeks, with added waterproofing cure time.
Performance results: Zero slip incidents and no visible salt staining after 14 months.
How Citadel Stone helped
Citadel Stone supplied a salt-tested sealer spec, provided slope and drainage details for contractor bidding, and conducted a post-install inspection to verify joint sand and sealant coverage.
Case Study 4: Des Moines, IA — Boutique Office Fit-Out Reception (limestone paver case studies for commercial interiors)
Project overview
A boutique professional-services firm in Des Moines sought a premium reception area using white polished limestone pavers to communicate stability and refinement to clients.
Paver selection rationale
Semi-polished, dense limestone was selected to withstand wheeled luggage and meet daily polishing cycles while offering a warm white tone suitable for brand photography and digital marketing collateral.
Installation challenges
The reception required embedded floor boxes and recessed thresholds that needed precise cutting and bullnose fabrication. Work occurred during office hours with strict protection zones.
Outcomes & key metrics
Budget adherence: On budget at $26,500.
Completion time: 4 weeks, with phased access control.
Performance results: 20% reduction in scuff marks vs. prior terrazzo; client satisfaction score 9.4/10.
How Citadel Stone helped
Citadel Stone produced CAD shop drawings for cutouts, supplied custom bullnose pieces, and coordinated pre-install mockups so the client could approve the threshold details before fabrication.
Case Study 5: Lexington, KY — Vineyard Tasting Room & Breezeway (residential limestone paver applied to hospitality)
Project overview
A small vineyard outside Lexington renovated its tasting room and breezeway using white limestone pavers that flow from the indoor bar to the shaded outdoor breezeway.
Paver selection rationale
Chosen were honed interior tiles for the tasting room and tumbled exterior pavers for the breezeway to provide visual continuity with appropriate traction for outdoor use—an effective limestone paver installation strategy for hospitality.
Installation challenges
Transition details required flush thresholds and expansion joints that concealed drainage collectors. The site also required protection from vineyard equipment during harvest.
Outcomes & key metrics
Budget adherence: 2% under the $31,000 budget.
Completion time: 4 weeks, scheduled outside harvest weeks.
Performance results: No trip incidents and increased dwell time by 18% during tastings.
How Citadel Stone helped
Citadel Stone supplied matched indoor/outdoor production lots, specified concealed drainage joint profiles, and advised on harvest-season protection to prevent machinery damage during install.
Case Study 6: Wichita Falls, TX — Medical Imaging Center Corridor Upgrade (commercial limestone paving for healthcare)
Project overview
A medical imaging center in Wichita Falls replaced vinyl corridors with white limestone flooring to reduce long-term maintenance and create a calmer patient experience.
Paver selection rationale
Low-absorption, honed limestone with a hospital-grade sealer was specified for chemical resistance and ease of sterilization—important for commercial limestone paving in healthcare settings.
Installation challenges
Work had to maintain sterile paths to operating rooms. Installers used negative-pressure containment and staged closures to keep critical routes open during working hours.
Outcomes & key metrics
Budget adherence: On budget at $34,000.
Completion time: 3.5 weeks, phased with strict containment.
Performance results: 35% reduction in corridor cleaning time and improved patient comfort scores.
How Citadel Stone helped
Citadel Stone prepared a contamination mitigation plan, recommended hospital-grade grout and sealer pairings, and provided training for custodial staff on approved disinfectants and sealer maintenance.
On-Site QA Checklist to Verify Successful Sealing
- Water beads on surface for illustrative 15+ minutes minimum
- No visible streaking, clouding, or uneven coverage
- Original stone texture remains unchanged
- No pooling or excessive product buildup
- Adjacent surfaces properly protected from overspray
- Adequate ventilation maintained throughout curing
- All waste materials properly contained and labeled
- Documentation completed with product details and coverage rates
Six FAQs with Concise Answers
Q: How do I know when my limestone needs resealing?
A: Perform water drop tests. If water absorbs within illustrative 5-10 minutes, resealing is needed.
Q: What’s the difference between penetrating and topical sealers?
A: Penetrating sealers absorb into stone pores with minimal appearance change. Topical sealers form surface films that may enhance appearance but can create slip hazards.
Q: Can I apply sealer over old sealer?
A: Only if the existing sealer is compatible and in good condition. Test adhesion first in small areas.
Q: Why is my sealed limestone still showing stains?
A: Sealers provide time to clean spills, not permanent stain-proofing. Clean spills immediately and check if resealing is needed.
Q: Will sealing make my floors slippery?
A: Penetrating sealers typically don’t affect slip resistance. Topical sealers may increase slip hazard, especially when wet.
Q: How long does sealing last?
A: Depends on traffic, cleaning, and sealer type. Typical ranges: illustrative 1-5 years with proper maintenance.