How to Schedule a Productive Limestone Yard Visit
Effective showroom appointments begin with strategic scheduling and clear communication about what you need to see.
Best times to visit: Early morning appointments—7:30 to 9:30 AM—provide optimal natural lighting before Arizona’s intense overhead sun creates glare and washes out subtle color variations. Morning hours also allow you to view slabs outdoors in direct sunlight to assess how the stone appears under installation conditions. Summer visits should occur as early as possible; by 10 AM, yard surfaces often exceed 100°F, making extended inspections uncomfortable and potentially unsafe.
Appointment etiquette and preparation: Call 24–48 hours in advance rather than showing up unannounced. Ask the receptionist: “Can you stage slabs [provide slab IDs if you have them] outdoors or in natural light for inspection tomorrow morning? I’ll need approximately 60–90 minutes to inspect faces, backs, and edges.” This advance notice allows yard staff to locate specific slabs and position them accessibly, saving you hours of searching through inventory.
What to request when booking: Specify whether you need remnant-rack access, in-shop cutting consultation, or multiple slab comparisons for color matching. If you’ve already shortlisted pieces based on online photos or previous visits, reference specific slab IDs: “I’d like to inspect slabs #4427, #4429, and #4433 that we discussed yesterday.” Confirming IDs prevents confusion when yards stock dozens of visually similar pieces.
Using a supplier showroom visit guide approach: Frame your visit around specific decision points—not casual browsing. Tell the representative: “I’m selecting limestone for [exterior cladding / pool coping / architectural veneer] and need to verify porosity, finish consistency, and batch color matching across three slabs.” Focused visits with clear objectives yield better staff support and more productive inspections than open-ended “just looking” approaches.
Coordination with contractors or fabricators: Bringing your installer or fabricator to showroom visits provides technical perspective you may lack. They can assess cutting requirements, identify potential installation challenges, and confirm whether your selections fit within project budgets and timelines. Schedule their attendance when booking: “I’ll have my fabricator with me—can you have someone available to discuss in-shop cutting capabilities and lead times?”
Before You Go — Quick Prep Checklist
Preparation transforms casual showroom browsing into efficient, decision-driven inspections.
Pre-Visit Essentials to Bring
- Project dimensions and layout drawings: Accurate measurements prevent ordering insufficient material or oversized pieces that don’t fit installation spaces. Bring sketches showing slab placement, seam locations, and edge details.
- Cabinet, paint, or material swatches: Coordinate limestone undertones with surrounding finishes. Arizona sunlight dramatically shifts color perception—what appears neutral gray indoors may read blue-green in outdoor light.
- Measuring tape and notepad: Verify actual slab dimensions match listed specs. Note thickness variations, edge conditions, and any discrepancies for follow-up questions.
- Contractor or fabricator representative: Their technical expertise identifies issues you might overlook—excessive resin fills, structural concerns, or fabrication challenges that affect project feasibility.
- Smartphone or camera: Document every slab face, back, edge, and ID tag. Photos create reference libraries for team discussions and prevent “I thought it was lighter” disputes later.
- List of slab IDs or remnant dimensions: If you’ve pre-qualified pieces remotely, bring written documentation showing which slabs you want to inspect in person.
Copy-ready advance email to yard: “I have an appointment [date/time] to inspect slabs for [project type]. Please stage slabs #[IDs] in natural light with both faces accessible. I’ll need approximately 90 minutes and would like to view your remnant inventory as well. Confirm this is feasible or suggest an alternative arrangement. Thank you.”
This email sets clear expectations and allows the yard to prepare, ensuring your allocated time focuses on inspection rather than locating buried inventory.
On Arrival: First Things to Confirm at the Showroom or Yard
Initial arrival protocols establish safe, productive visits and clarify what services and inventory you can access.
Safety compliance: Yards are working industrial environments with heavy equipment, moving machinery, and overhead hazards. Wear closed-toe shoes, safety glasses if touring fabrication areas, and stay within designated customer zones unless escorted by staff. Ask about restricted areas before wandering—forklift paths, cutting stations, and loading docks pose serious injury risks.
Request slab tags and run numbers immediately: Every professional yard uses identification systems—numbered tags, engraved codes, or digital inventory tracking. Ask your guide: “Can you show me the slab tags so I can reference specific pieces during inspection and in my order?” Document these IDs photographically so you can cross-reference later.
Confirm inventory access: Clarify what you’re allowed to inspect: “Can I view both slab faces, or are backs inaccessible due to stacking?” and “Is your remnant rack available for browsing, or do I need staff assistance?” Some yards restrict remnant access to prevent cherry-picking; others encourage self-service browsing.
Ask about in-shop capabilities upfront: Before investing time in slab inspection, verify the yard can fulfill your requirements: “Do you provide in-house cutting, or will I need to arrange separate fabrication?” and “What’s your current lead time from selection to delivery for simple edge work?” Discovering two-week fabrication delays after selecting slabs wastes inspection time if your timeline demands faster service.
Verify staging and storage conditions: Inspect how the yard protects inventory from Arizona’s climate. Are slabs stored indoors or under cover? Do outdoor pieces show dust infiltration or sun damage? Professional operations maintain climate-controlled storage or covered outdoor staging with regular rotation to prevent deterioration.
Establish communication protocol: Exchange contact information with your guide: “If I have follow-up questions after today’s visit, who should I call or email?” Direct contacts streamline subsequent conversations about holds, pricing, and delivery coordination.
What to Inspect on Display Samples and Slabs — Field Checklist
Systematic slab inspection reveals quality issues photos cannot capture and validates that material meets project requirements.
Face Color & Undertones in Variable Lighting
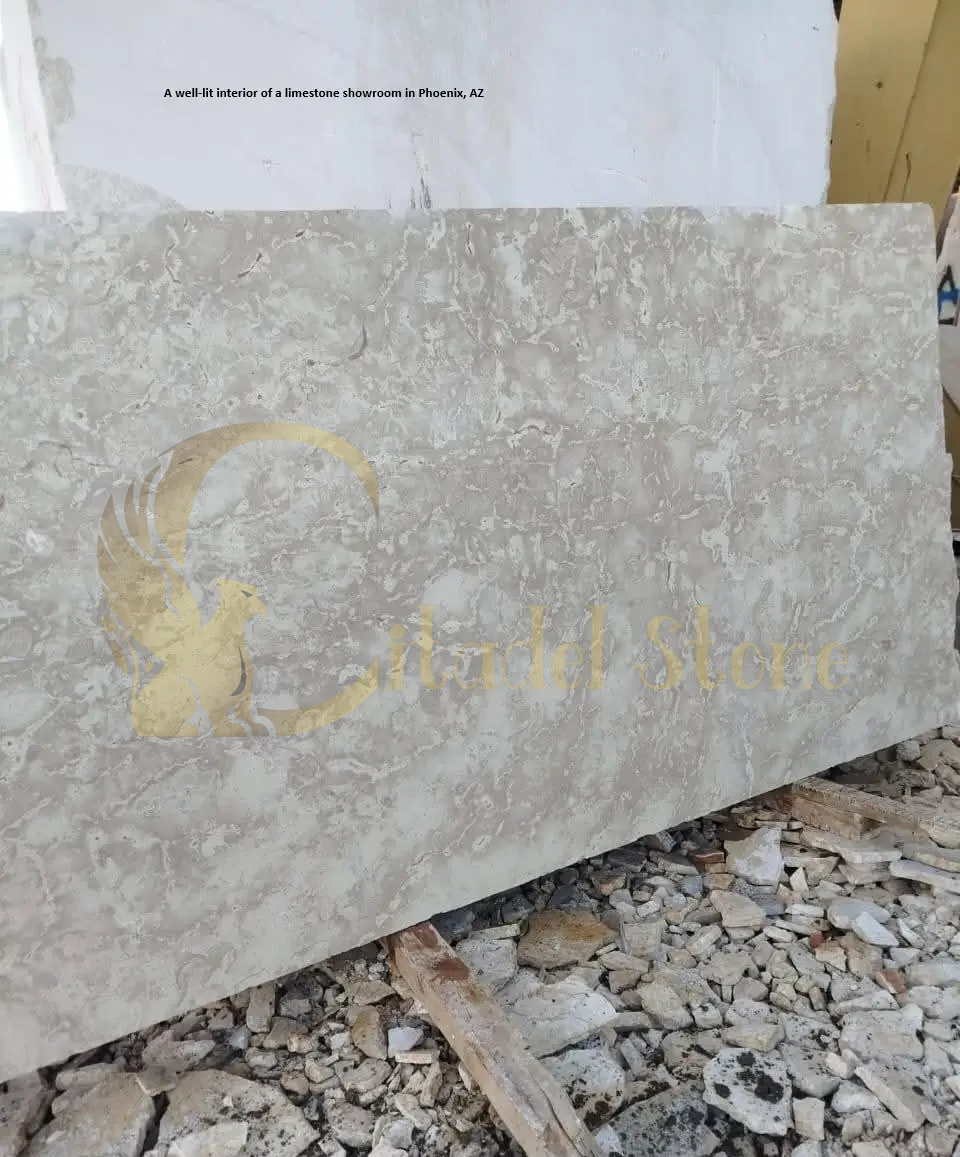
View each slab under multiple lighting conditions—direct sunlight, open shade, and artificial warehouse lighting. Arizona’s intense sun amplifies undertones invisible indoors. Beige limestone may read yellow-gold outdoors; gray varieties often shift blue-green. Rotate slabs or walk around them to assess how angle changes affect appearance. Note whether color remains consistent or varies dramatically with viewing position.
Texture & Finish Quality
Run your hand across polished surfaces to detect inconsistencies—rough patches, uneven sheen, or areas where polishing failed to achieve uniform gloss. Honed finishes should feel smooth and consistent without glossy or dull spots. Brushed or textured finishes should show even, regular patterns rather than random tool marks. Irregular finish quality signals poor fabrication or material defects that will appear more pronounced after installation.
Back-Side Structural Inspection
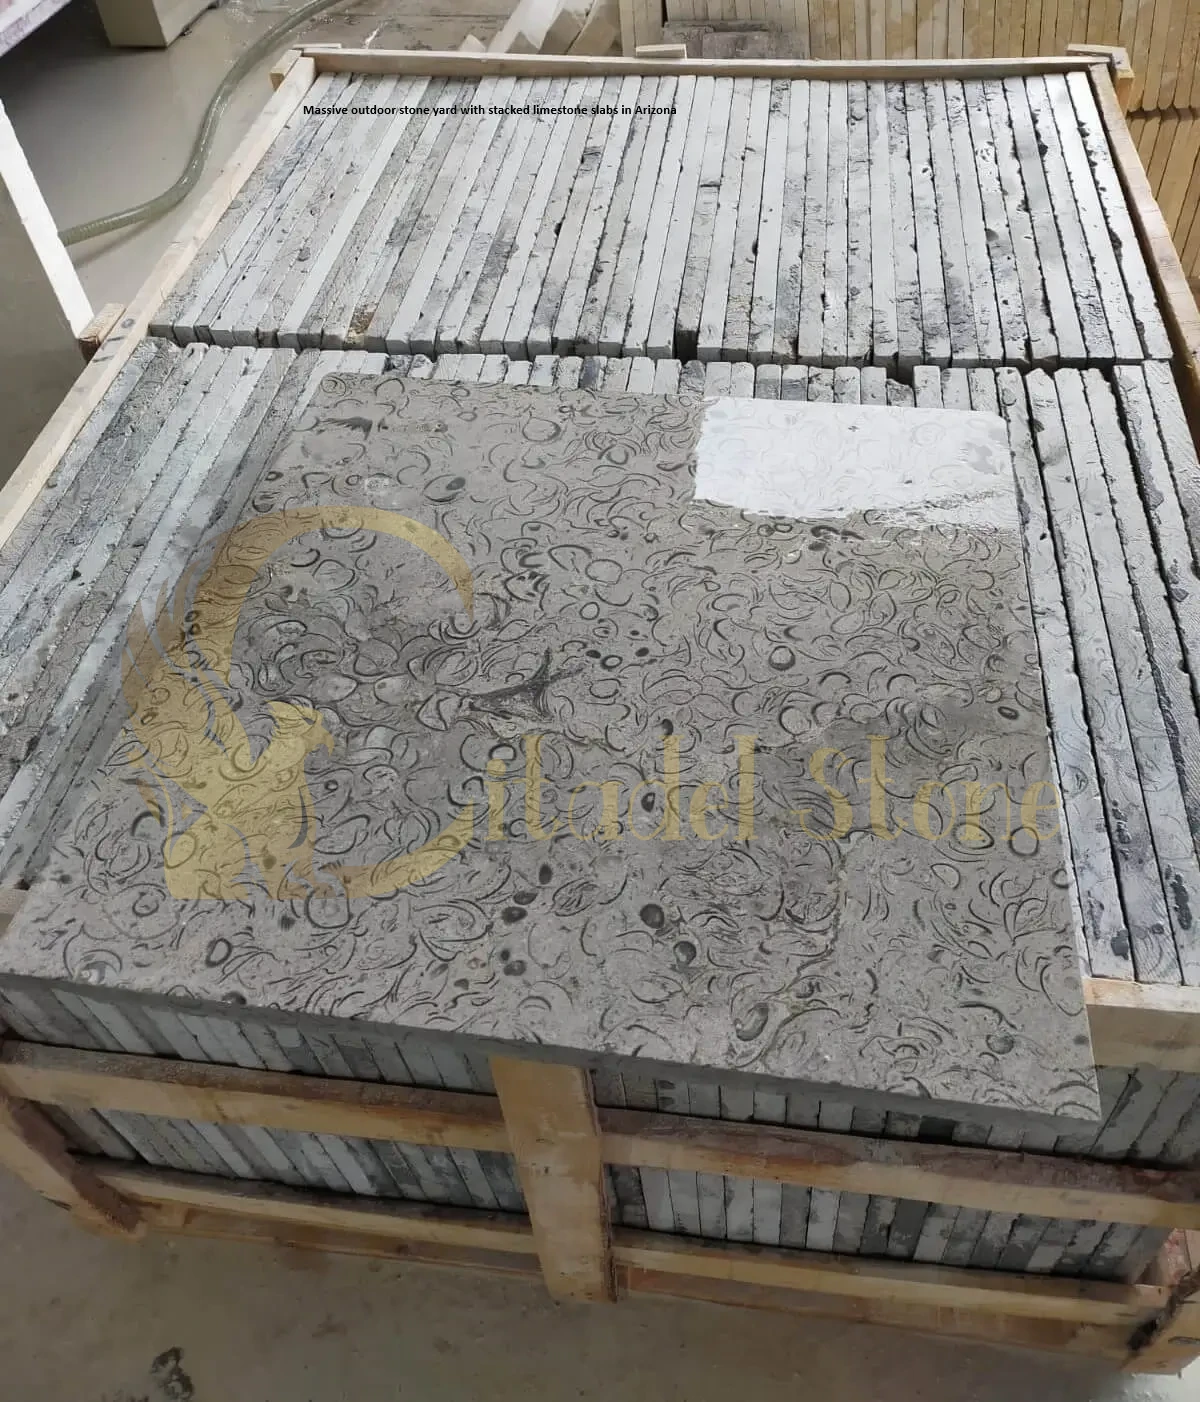
Flip slabs or request staff assistance to view unpolished backs. Check for hairline fissures, excessive mesh reinforcement (indicates weak stone), or heavy resin application (fills structural voids). Minor resin fills are acceptable industry practice; widespread application covering 10–15% of back surface suggests significant porosity or integrity issues. Micro-cracks visible on backs often propagate through the slab, creating failure risk under stress.
Edge Condition & Thickness Verification
Inspect all four edges for chips, cracks, or delamination. Measure thickness at multiple points—nominal 2cm slabs should measure 18–22mm consistently. Variations exceeding 2–3mm complicate installation and may indicate poor quarrying or cutting practices. Pristine edges suggest careful handling; damaged edges reveal rough inventory management that may extend to delivery and placement.
Porosity & Water Absorption Test
Place several water drops on unpolished edges or the slab back. High-quality limestone absorbs slowly—water should bead for 30–60 seconds before soaking in. Immediate absorption indicates high porosity, which accelerates staining in Arizona’s dust and mineral-rich irrigation environments. Conduct this test discreetly; some yards discourage it, but absorption rate critically affects outdoor performance.
Tap & Light-Back Tests for Delamination
Gently tap the slab face with your knuckle while listening for sound variations. Solid, consistent tone indicates structural integrity. Dull or hollow sounds in specific areas suggest delamination or internal voids. For thinner slabs (2cm or less), hold a flashlight against the back and view the face—light bleeding through reveals thin spots or structural weaknesses that affect durability.
Batch Color Consistency Across Multiple Slabs
If ordering multiple pieces, view them side by side under identical lighting. Limestone from the same quarry run should exhibit minimal color variation. Dramatic shifts—one slab warm beige, another cool gray—indicate mixed batches that produce visible seams in installations. Document any concerns photographically and ask whether the yard can source better-matched alternatives.
Acceptance cues: Consistent color in variable light, smooth uniform finish, minimal back-side resin (under 5% surface area), pristine edges, slow water absorption, solid tap tone, and tight batch matching across multiple slabs.
Rejection cues: Dramatic color shifts with lighting angle, irregular finish texture, heavy back-side mesh or resin, chipped edges, instant water absorption, hollow tap sounds, or mismatched batch colors that won’t produce seamless installations.
What Services to Verify During the Tour
Understanding in-house capabilities determines whether the yard can fulfill complete project requirements or if you’ll need to coordinate separate fabricators.
In-yard cutting and CNC capability: Ask: “Can you complete straight cuts, edge profiles, or cutouts in-house, and what’s the lead time?” Yards with CNC equipment offer faster turnarounds—often 3–7 days versus 10–14 days when outsourcing to separate fabricators. Clarify whether cutting fees are itemized or included in quoted pricing.
Remnant cutting and small-piece fabrication: Verify whether the yard will cut remnants to custom dimensions or sells them as-is only. For architectural details, fireplace surrounds, or small accent panels, custom remnant cutting saves 30–50% versus purchasing full slabs. Ask: “Can you cut this 18×36 remnant to 14×28, and what’s the charge?”
Mock-ups and edge-profile samples: For complex installations—exterior veneer, masonry cladding, architectural facades—request mock-up capability: “Can you create a 12×12 sample showing the proposed edge profile and finish so we can approve before full fabrication?” Professional yards serving design-focused clients maintain sample-cutting services; budget operations may lack this capability.
Protective finishing and sealing: Confirm whether the yard applies factory sealing or provides unsealed material: “Do your slabs come pre-sealed, or should I arrange separate sealing after installation?” For Arizona outdoor applications, factory sealing before delivery protects limestone during construction and simplifies contractor coordination.
Stock of architectural and specialty sizes: Beyond standard slab dimensions, ask about tile inventory, threshold pieces, stair treads, and pool coping. Yards stocking pre-cut architectural sizes enable faster project completion when standard slabs don’t fit design requirements.
Scheduling, staging, and delivery services: Verify: “Can you hold selected slabs for 14–21 days while we finalize other project elements?” and “What delivery services do you offer—curbside drop, crane placement, or white-glove installation support?” Comprehensive service offerings simplify logistics; limited services require you to coordinate multiple vendors.
Why in-house capability matters: Single-source suppliers reduce communication gaps, accelerate timelines, and clarify accountability. When selection, cutting, finishing, and delivery occur through one vendor, resolving issues takes hours instead of days spent coordinating between disconnected parties.
Questions to Ask On-Site or By Phone
Strategic questioning reveals operational standards and service quality that casual observation misses.
Copy-Ready Question List
- “Can you email photographs of both slab faces showing the full piece with ID tags visible?”
- “What’s your hold and reserve policy—deposit percentage, hold duration, and refund terms if I need to cancel?”
- “Do you have remnant panels in [specific dimensions], and can I browse the remnant rack today?”
- “Can you complete a 12×12 sample cut today or within 24 hours so I can verify the finish and color match expectations?”
- “What’s included in your quoted price—material only, or material plus cutting, delivery, and rigging?”
- “Do you provide photographic delivery documentation showing slab condition at loading and upon arrival?”
- “What insurance do you carry—general liability and cargo coverage—and can you email current certificates?”
- “If delivered material arrives damaged or doesn’t match the reserved slab, what’s your replacement process and timeline?”
- “Can you coordinate crane or hoist placement for multi-story installations, or do I need to arrange rigging separately?”
- “What lead time should I expect from today’s selection to delivery for [describe your cutting/finishing requirements]?”
Phoenix-specific phrasing example: When planning to visit limestone supplier Phoenix locations, add: “Given Phoenix summer heat, can you guarantee covered delivery and early-morning placement to avoid thermal stress on the limestone?”
Frame questions matter-of-factly without apology. Professional yards expect detailed inquiries; evasive or defensive responses signal operational weaknesses worth noting.
Documenting the Visit: Photos and Records to Collect
Comprehensive documentation protects purchase decisions and provides evidence if disputes arise during delivery or installation.
Photo Checklist — What to Capture
- Slab face under natural light: Full slab showing color, veining, and finish. Take at least two shots—direct sun and open shade—to document how lighting affects appearance.
- Back side showing structural condition: Capture any resin fills, mesh reinforcement, or fissures. These images become critical if hidden defects appear during fabrication.
- All four edges and corners: Close-ups showing edge condition, thickness consistency, and any chips or damage present before purchase.
- Slab ID tags: Photograph tags from multiple angles ensuring numbers/codes are legible. These images prove which specific slab you selected if the wrong piece arrives.
- Entire slab in context: Wide shot showing the slab’s position in the yard, surrounded by reference objects (measuring tape, color samples) that document scale and appearance.
- Remnant rack overview: Document available remnant inventory with dimensions visible if you’re considering smaller pieces for future projects.
Labeling protocol: Rename photo files immediately: “Slab-4427-face-sun.jpg” and “Slab-4427-back-detail.jpg” prevent confusion when reviewing dozens of images later. Cloud-backup ensures photos survive if your phone is lost or damaged.
Video documentation advantage: Record a 30–60 second video walking around the slab under direct sunlight, narrating observations: “Slab 4427, viewing in full sun at 8:45 AM, color appears warm beige with minimal veining, no visible defects on face.” Video captures subtleties still photos miss and provides time-stamped context if disputes emerge.
Why photographic records protect buyers: When delivered slabs don’t match showroom appearance, your photos provide evidence of what you expected versus what arrived. Without documentation, disputes devolve into “your word against ours” arguments that rarely favor buyers.
Safety, Staging & Delivery Logistics to Confirm While Onsite
Addressing logistics during showroom visits prevents delivery-day surprises that delay installations and increase costs.
Covered crating and transport protection: Ask: “Do you provide covered delivery as standard, or is that an upcharge?” Arizona’s monsoons and dust storms require protective crating—open-flatbed transport risks water staining and contamination. Confirm crating materials (wood crates versus plastic wrap) and whether additional weather protection is available for extreme conditions.
Truck types and site access: Clarify delivery-vehicle dimensions: “What size trucks do you operate, and can they navigate narrow residential streets or gated communities?” Large 10-wheeler semi-trucks cannot access many older Arizona neighborhoods; smaller trucks or trailers may be necessary. Discuss your site’s access constraints and confirm the yard can accommodate them.
Crane and hoist availability: For multi-story placements or locations without ground-level access, verify: “Can you coordinate crane or hoist service, including operator and insurance, or should I hire rigging separately?” Get operator names, contact numbers, and written confirmation of availability—verbal assurances evaporate when delivery day arrives without equipment.
Staging protection for Arizona climate: Confirm: “How will slabs be stored between selection and delivery, especially if my timeline extends through monsoon season or peak summer?” Indoor climate-controlled storage is ideal; covered outdoor staging with regular rotation is acceptable. Unprotected outdoor storage risks heat damage and dust infiltration.
Photographic delivery protocols: Require: “Will drivers photograph slab condition at loading and upon job-site arrival, providing time-stamped images as delivery documentation?” Professional yards maintain these protocols standard; operations lacking photographic accountability create dispute risks.
Insurance and damage-claim process: Request: “If material arrives damaged, what’s your process—immediate replacement, repair credit, or refund—and what’s the typical resolution timeline?” Understanding claims procedures before problems occur streamlines resolution when issues arise.
Delivery confirmation checklist to obtain in writing:
- Delivery date and two-hour window
- Driver contact number for day-of coordination
- Crane/hoist operator name if applicable
- Protective crating specifications
- Photographic documentation commitment
- Damage claim and replacement process
Obtain these confirmations via email before scheduling delivery—verbal commitments alone won’t resolve disputes.
What the Showroom Can — and Cannot — Tell You
Realistic expectations about showroom limitations prevent over-reliance on visual inspection while recognizing when additional testing is warranted.
What visual inspection reveals: Surface finish quality, color and veining patterns, edge condition, obvious structural defects (cracks, chips, delamination), approximate porosity through water-drop tests, batch color consistency across multiple slabs, and general handling/storage practices.
What requires laboratory or technical testing: Precise absorption rates (ASTM C97 testing), compressive strength for structural applications, freeze-thaw cycle performance, long-term weathering predictions, chemical resistance to specific cleaners or pool chemicals, and dimensional stability under temperature cycling.
When to request technical data: For exterior applications in Arizona’s extreme climate, request absorption and density data. For pool coping or areas exposed to chlorine, ask for chemical-resistance documentation. For structural installations—load-bearing cladding or heavy-use flooring—demand compressive strength specifications.
Limits of photographic representation: Even high-resolution photos cannot capture how limestone reacts to Arizona’s UV intensity, monsoon moisture, or irrigation minerals. Physical samples installed on-site for 30–60 days provide better long-term performance predictions than showroom inspections.
Professional yards acknowledge these limits and recommend appropriate testing when applications demand it. Operations dismissing technical data requests or claiming “visual inspection is enough” for demanding applications lack the technical sophistication your project deserves.
Regional Showroom Walkthrough — Phoenix to Tempe
Phoenix
Phoenix’s intense summer heat and sprawling metro layout require strategic showroom-visit planning. Ask the yard to stage your shortlisted slabs outdoors between 8 and 9 AM when natural light is strong but temperatures remain below 95°F—this window allows you to assess true color undertones and surface glare under conditions matching your installation environment. Many Phoenix yards cluster near I-17 and I-10 corridors; plan routes to visit two or three suppliers in a single morning trip, minimizing windshield time during peak heat. Request that staff photograph slabs in afternoon lighting as well if morning appointments aren’t possible, then compare those images to morning photos you take yourself during cooler months. Confirm whether the yard maintains multiple metro locations with distributed inventory—split operations can reduce delivery times by 1–2 hours compared to single-location suppliers. For summer visits, bring water and limit outdoor inspections to 45–60 minutes to avoid heat exhaustion while examining slabs.
Scottsdale
Scottsdale’s design-focused market means showrooms often feature curated displays with premium lighting and staged vignettes. While attractive, these presentations can misrepresent how limestone appears in actual installations. Ask to view your shortlisted slabs outside the showroom in natural light: “Can we move this piece outdoors for a few minutes so I can assess it under real-world conditions?” Professional Scottsdale yards serving architects and designers expect this request. For high-visibility projects, request seam mock-ups during your visit—have staff position adjacent slab edges together so you can evaluate vein continuity and color transitions before committing. Obtain written finish tolerances (honed to 800-grit, polished to 3000-grit) and confirm replacement policies if delivered material arrives outside specified parameters. Scottsdale suppliers often maintain relationships with high-end fabricators; ask whether they can coordinate templating and installation as bundled services, simplifying project logistics for luxury residential and commercial applications.
Tucson
Tucson’s desert dust and fine particulate infiltration require special attention during showroom visits. Inspect how the yard protects inventory—are slabs stored indoors with dust barriers, or do outdoor pieces show contamination? Run your hand across polished surfaces to feel for embedded dust particles that indicate inadequate storage practices. Ask: “How frequently do you rotate outdoor inventory, and do you apply protective film to polished slabs during storage?” When viewing remnant racks, examine pieces carefully for dust-related surface degradation that might not be immediately visible. Tucson yards serving both residential remodels and hospitality projects often maintain diverse inventory; confirm whether they stock outdoor-rated limestone factory-sealed for Arizona’s UV exposure and irrigation environments. For projects near University of Arizona campus, verify delivery logistics account for campus traffic restrictions and narrow street access common in older neighborhoods surrounding the university.
Mesa
Mesa’s active residential construction market means showroom inventory turns over rapidly during spring and fall seasons. Schedule visits early in the week—Tuesday or Wednesday mornings—when fresh shipments arrive and staff have time for detailed consultations. Ask about new arrivals: “What came in this week that matches [your requirements]?” Early access to incoming inventory provides first selection before popular pieces sell. Confirm the yard’s hold policies explicitly during your visit: “If I reserve this slab today, how long will you hold it, and what deposit is required?” Mesa’s high-volume market means holds may be shorter (7–10 days) than yards serving slower markets. Request written confirmation including slab IDs to prevent inventory mix-ups when multiple buyers compete for similar pieces. For projects in east Mesa gated communities, discuss HOA delivery protocols during your visit—yards familiar with specific subdivisions can expedite access coordination that otherwise takes days to arrange.
Chandler
Chandler’s master-planned communities create unique delivery constraints worth discussing during showroom visits. Before selecting slabs, confirm: “Can you handle deliveries to gated subdivisions with restricted commercial-vehicle hours and HOA notification requirements?” Professional Chandler-area suppliers maintain HOA contact lists and understand neighborhood-specific protocols. Ask them to document delivery-window commitments in writing during your visit, including crane-operator contact information if multi-story placement is needed. For outdoor limestone near pool decks or irrigation systems, request sealing-product recommendations on-site and ask staff to demonstrate water-repellency by applying droplets to sealed versus unsealed samples. Chandler’s high-mineral water content accelerates limestone staining; verifying recommended sealers during showroom visits prevents future maintenance problems. Request technical data sheets for sealing products before leaving so you can review absorption rates and re-seal intervals.
Glendale
Glendale’s mix of older homes and newer developments means delivery-access planning becomes critical during showroom visits. Discuss your specific site constraints with yard staff: “I have a 1970s home with 32-inch doorways and a narrow driveway—can you recommend slab sizes that will fit, or should we plan split-slab installations?” Bring site photos or measurements showing access paths, and ask whether the yard offers pre-installation site consultations to assess feasibility before you commit to purchases. Many Glendale yards serving retrofit contractors stock thinner limestone options (3/4-inch or 1cm) that reduce weight and simplify handling in confined spaces—ask to see these alternatives during your visit if standard 2cm slabs won’t navigate your access routes. For properties near Luke Air Force Base, confirm delivery timing avoids flight-pattern noise restrictions that some western Glendale neighborhoods enforce during military operations.
Gilbert
Gilbert’s rapid growth and outdoor limestone applications make sealing and maintenance discussions essential during showroom visits. Ask to see sealed versus unsealed limestone samples side by side, then test water repellency: “Can you apply water drops to both samples so I can see the difference?” This demonstration clarifies why proper sealing matters for Gilbert’s irrigation-heavy environments. Request remnant pieces suitable for test installations—12×12 samples you can place outdoors for 2–4 weeks to observe real-world weathering before committing to full orders. For poolside or patio applications, confirm the yard stocks outdoor-rated limestone varieties with low absorption rates (under 3–5%) that resist chlorine and mineral staining. Gilbert’s production-builder market means some yards cater primarily to volume contractors; verify they offer individual-homeowner pricing and services rather than bulk-order minimums inappropriate for single-family projects.
Discover Which Local Arizona Suppliers Offer Same-Day Limestone Delivery!
Tempe
Tempe’s fast-paced urban environment and university-area projects demand showroom visits focused on quick decision-making and inventory availability. Ask immediately upon arrival: “What’s in stock today that meets [your requirements], and what’s your lead time from selection to delivery?” Avoid showrooms requiring special orders unless your timeline accommodates 2–3 week waits. For student-housing or multi-family projects, discuss phased delivery capability during your visit: “Can you stage inventory for monthly releases as units complete, rather than single all-at-once shipments?” Tempe yards serving commercial contractors often maintain this flexibility. Confirm whether quoted prices include delivery to ASU-adjacent locations with parking restrictions and narrow access—some suppliers charge premiums for campus-area navigation. For quick-turnover rental properties, ask about remnant inventory that can ship same-day or next-day, enabling emergency repairs without waiting for full-slab fabrication and delivery.
Showroom Visit Checklist — Copy-Ready
Print this checklist and bring it to every yard visit:
Safety & Arrival:
- Wear closed-toe shoes and safety glasses if touring fabrication areas
- Confirm customer-accessible zones and restricted areas
- Request slab ID tags for pieces you want to inspect
Inspection Items:
- View slabs in direct sunlight, open shade, and indoor lighting
- Inspect polished face for finish consistency and color uniformity
- Examine back side for fissures, excessive resin, or mesh reinforcement
- Check all edges for chips, cracks, or delamination
- Measure thickness at multiple points to verify consistency
- Conduct water-drop porosity test on unpolished areas
- Tap slab face listening for hollow sounds indicating voids
- Compare multiple slabs side-by-side for batch color matching
Documentation:
- Photograph slab face (sun and shade), back, edges, and ID tags
- Label photos with slab IDs immediately
- Record short video walking around slab under natural light
- Note any defects or concerns in writing with slab ID reference
Questions to Ask:
- Hold/reserve policy and required deposit
- In-house cutting capability and lead times
- Delivery services (curbside, crane, white-glove)
- Photographic delivery documentation standard or extra
- Insurance certificates available for review
- Damage/replacement process and timeline
Pre-Delivery Confirmation:
- Delivery date and two-hour window in writing
- Driver contact number
- Crane/hoist details if applicable
- Covered crating confirmed
- Slab IDs matching your selections
Phone / Email Script — Request Staged Slabs & Appointment
Phone Script — Copy-Ready
“I’d like to schedule a showroom visit to inspect limestone slabs for [project type—exterior cladding / pool coping / architectural veneer]. I’m available [date/time]. Can you stage [slab IDs if known, or ‘slabs matching X specifications’] outdoors or in natural light so I can assess color and finish? I’ll need approximately 90 minutes and would also like to view your remnant inventory. Please confirm this appointment and staging arrangement.”
Email Template — Copy-Ready
Subject: Showroom Appointment Request – Limestone Slab Inspection
Hello [Yard Contact Name],
I’m planning to visit limestone supplier Phoenix [or your city] showroom to select limestone for [project description]. I’d like to schedule an appointment for [date/time].
Please stage the following for my inspection:
- Slabs #[IDs] if available
- Alternative slabs matching [dimensions, color family, finish type]
- Access to remnant inventory for [specific dimensions if applicable]
I’ll need both slab faces accessible for inspection and approximately 90 minutes total visit time.
Please confirm:
- Appointment date/time
- Slabs will be staged in natural light
- Staff available to discuss cutting capabilities and lead times
- Remnant rack accessible for browsing
Additionally, can you email photographs of both faces of slabs #[IDs] with ID tags visible so I can begin preliminary selection before my visit?
Thank you,
[Your Name, Contact Info]
After the Visit — Next Steps & How to Lock a Slab
Converting showroom inspections into secured purchases requires clear hold agreements and written documentation.
How to place a hold: Immediately upon deciding, tell the yard representative: “I want to reserve slab #4427. What deposit is required, how long will you hold it, and what are the refund terms if I need to cancel?” Standard deposits range 10–25% of material cost; hold periods typically run 7–21 days depending on yard policies and seasonal demand.
Required deposit language: Obtain written confirmation—email or signed agreement—stating: slab ID, deposit amount, hold expiration date, refund policy (full refund, partial refund, or non-refundable), and whether deposit applies toward final invoice or represents separate administrative fee. Verbal hold agreements evaporate when inventory confusion arises or other buyers claim the same piece.
Confirming hold expiry: Before leaving the showroom, clarify: “If my fabrication schedule extends beyond the hold period, can I extend for an additional fee, or must I re-select?” Some yards offer extensions for nominal daily/weekly charges; others require full re-deposit and availability restart.
Requesting inspection on delivery: Include in your hold agreement: “Delivery acceptance is contingent on slab condition matching showroom inspection. I will photograph delivered material immediately upon arrival, and reserve the right to reject pieces showing damage, incorrect slab ID, or condition inconsistent with reserved slab.” This language protects against bait-and-switch scenarios where yards substitute inferior pieces claiming “the one you selected sold.”
Scheduling fabrication or further testing: If your selections require cutting, edge profiles, or technical testing, coordinate those services before finalizing delivery dates. Confirm lead times in writing: “You stated 10–14 days from today to complete cutting and schedule delivery. Please email confirmation of that timeline and the date by which I must approve final specifications.”
Treat holds as binding contracts requiring written documentation on both sides. Casual verbal agreements create disputes; written confirmations with slab IDs, dates, and terms protect everyone’s interests.
Find nearby Arizona material experts
How you book a yard visit shapes what you see and how quickly you can decide. This how-to section gives a streamlined, practical approach to scheduling efficient limestone showroom appointments so each visit produces usable evidence for design decisions — not just more options to fret over. The advice below is written for specifiers, contractors and architects working in Peoria, Surprise, San Tan Valley and Yuma.
Before you call — clarify the decision you need to make
Define the use-case: exterior coping, pool surround, interior floor, countertop, veneer, etc.
Note the sample size you need (small tile, 300×300 mm panel, or 1 ft² / larger panel).
Decide whether you require performance data with the sample (absorption, abrasion, recommended sealer).
Those three items let the yard prepare the right pieces and documentation ahead of your visit.
Timing matters — pick the smart window
Aim for early-morning slots (generally between 8:00–10:00 AM) so natural light is favourable and yard temperatures are lower for comfortable inspection.
Book appointments at least 48 hours ahead when possible so staff can stage slabs and free up time with a fabricator if you want a quick mock-up.
For summer visits in Yuma or San Tan Valley, try the earliest available slot; for Surprise plan around imminent weather if monsoon risk exists.
What to ask for when you book (short script to adapt)
“Hello — I’m [name] with [firm]. I’ll be selecting limestone for [project type] and would like a 60–90 minute appointment on [date]. Please stage slabs [list slab IDs or describe color/finish/thickness] in natural light and provide photos of both faces in advance. I’ll bring my fabricator and need access to remnant racks and in-shop capability confirmation. Can you confirm?”
Tell them exactly what you want staged (slab IDs, finishes, remnant sizes), whether you’ll compare multiple lots, and that you expect both-face photos before the visit. Clear expectations save time on arrival.
Who to bring & why
Fabricator or installer: they assess cutting, seams and access constraints.
Project designer or client rep: keeps aesthetic approvals on the same visit.
Contractor/site contact: confirms logistics (delivery access, crane needs).
Bringing the right people turns a good visit into a procurement-ready decision.
What to bring with you
Project drawings or scale sketches (show seam locations and edge details).
Adjacent material samples (paint, tile, cabinetry) to check undertones.
Measurement tape, a flashlight for back-side checks, and a camera or phone for timestamped photos.
A short checklist of must-answer questions (hold terms, lead times, insurance proof).
On arrival — a compact inspection sequence (30–60 minutes)
Confirm staged pieces and slab IDs against pre-visit photos.
View each slab in both shade and direct sun for a minute to note undertone shifts.
Inspect the back side for fissures, mesh, or large resin fills; ask staff to flip a slab if needed.
Check edge condition and measure thickness at a couple of points.
Perform a discreet water-drop test on an unpolished edge or back to gauge absorption.
Ask to see remnant racks if you need small pieces.
Document everything with labeled photos immediately (use filenames with slab IDs).
Key things to confirm with staff while on-site
Hold terms (deposit %, hold duration, extension policy).
Pre-shipment photo practice and whether they will send timestamped loading and delivery images.
In-house cutting capacity and typical turnarounds for your required edge/profile.
Delivery options (curbside, crane placement) and any HOA or gated-community experience for your target delivery area.
Get these confirmations in writing before you leave.
City-specific scheduling tips
Peoria: ask about abrasion data and kept spare panels — suburban sites often track grit that affects maintenance.
Surprise: request covered staging and a post-storm inspection clause if selection happens near monsoon season.
San Tan Valley: expect longer yard-to-site runs; prioritize slabs already in inland staging to reduce delivery time.
Yuma: insist on early-morning inspection and covered storage confirmations because extreme heat accelerates finish issues.
Turning a visit into a hold — do this on the spot
If you decide to reserve a slab, immediately request an emailed hold confirmation that includes: slab ID, deposit amount, exact hold expiry date, refund terms, and the agreed storage condition (indoor/covered). Don’t rely on verbal holds — get it in writing before you leave the yard.
Follow-up within 24 hours
Save the staged photos and your visit notes to your project folder with clear filenames.
Email any clarifying questions and ask the yard to attach the insurance certificate and technical data for the selected lot.
If you plan a mock-up, confirm timing and who will perform it (yard, fabricator, or installer).
Efficiency checklist (use when booking and signing off)
Purpose & sample size specified in booking
Pre-visit photos of both slab faces received
Morning appointment confirmed (8–10 AM recommended)
Fabricator or contractor attending (yes/no)
Hold terms emailed and signed (slab ID, deposit %, expiry)
Delivery options and HOA/crane coordination discussed
A well-planned visit converts time on-site into a contractual decision, not just another inspiration run. Keep communication tight, bring the technical eyes you need, and insist on written confirmations — the result is fewer surprises and a smoother path from selection to installation for projects in Peoria, Surprise, San Tan Valley and Yuma.
Conclusion & Immediate Actions
Visiting a limestone showroom Arizona near you transforms abstract online photos into confident material selections backed by in-person inspection and professional consultation. Showroom visits reveal quality details, confirm color accuracy under Arizona lighting, and establish relationships with local suppliers who understand desert climate challenges.
Three immediate actions:
- Schedule staged slab viewing appointments. Call 2–3 local yards, request morning appointments, and use the provided phone script to ensure slabs are staged in natural light for inspection.
- Print and bring the visit checklist. Systematic inspection following the checklist ensures you don’t overlook critical quality indicators or forget essential questions.
- Demand slab ID photos and written hold terms. Before leaving the showroom, obtain written confirmation showing specific slab IDs, hold duration, deposit requirements, and delivery timelines. Photographic documentation protects your purchase decisions and streamlines any necessary dispute resolution.
Transform showroom visits from overwhelming browsing sessions into efficient, decision-driven inspections that yield confident material selections for your Arizona limestone project. Citadel Stone is a leading choice among limestone suppliers near you in Arizona for climate-appropriate stone recommendations.