What ‘Temporary Paver’ Means for Renters
Temporary pavers are removable flooring systems designed to enhance outdoor rental spaces without permanent alterations. Unlike traditional mortared pavers or poured concrete, these systems rely on interlocking mechanisms, weight distribution, or friction—not adhesives or excavation—to stay in place.
Renter constraints shape product selection. Lease agreements typically prohibit drilling, digging, or applying adhesives that damage underlying surfaces. You must preserve the original substrate for move-out inspections. Temporary paver systems address these limits through modular design: interlocking polypropylene or plastic tiles snap together via edge pins; rubber pavers use friction and weight; pedestal porcelain tiles elevate on adjustable supports; resin-bound removable mats roll out and conform to substrates; modular composite decking clicks together; turf-paver hybrid mats combine artificial grass with drainage grids; and roll-out tiles unroll like outdoor carpets.
Each family offers trade-offs. Lightweight plastic tiles install quickly and remove easily but may shift in high wind. Rubber pavers provide slip resistance and comfort but can retain heat and emit odor when new. Pedestal systems deliver premium aesthetics and excellent drainage but add weight that may require landlord approval for balconies. Resin mats install fastest but offer limited design choices. Turf hybrids suit pet owners yet can trap heat in Phoenix summers. Consider weight per square foot, breathability for substrate health, slip resistance for safety, and heat retention for barefoot comfort when selecting your system.
Top Temporary Paver Options — Pros, Cons & Best Uses
Interlocking Plastic/Polypropylene Tiles
- Lightweight (typically 0.5–1.5 lbs per square foot), easy snap-together installation via edge loops or pins
- Quick removal—disconnect tiles in reverse order, stack, and store
- Best for balconies, small patios, and renters prioritizing easy DIY install
- Available in wood-look, stone-look, and perforated drainage designs
- Breathable open-grid versions allow substrate airflow and rainwater drainage
- Light colors reflect heat better in Phoenix; darker tones absorb more solar gain
- Budget-friendly option for first-time patio upgrades
Rubber Pavers / Recycled Rubber Tiles
- Resilient, slip-resistant surface comfortable for barefoot walking and pet play
- Typical weight 1–3 lbs per square foot; heavier than plastic but still removable by one person
- Good for rooftops and high-traffic rental areas due to durability
- Recycled rubber products support sustainability goals
- Watch for initial rubber odor (usually dissipates within days to weeks outdoors)
- Dark rubber retains significant heat in direct Arizona sun—consider shaded placements or lighter colors
- Non-marking backing protects concrete or wood substrates during removal
Pedestal Porcelain Tiles / Floating Deck Systems
- Premium aesthetic—mimics natural stone, wood, or contemporary concrete finishes
- Elevates tiles 0.5–4 inches on adjustable pedestals, creating air gap for superior drainage and ventilation
- Heavier (3–6 lbs per tile depending on thickness and size); may require landlord sign-off for load-bearing capacity on balconies
- Pedestals distribute weight evenly, reducing point-load stress
- Excellent for modern apartment complexes where aesthetics matter for resale or HOA compliance
- Higher material cost but delivers high-end look without permanent installation
- Adjustable pedestals accommodate sloped surfaces and level out uneven substrates
Resin-Bound Mats and Roll-Out Decking
- Fastest installation—unroll, trim to fit, and secure edges with minimal tools
- Conforms to substrate contours, ideal for irregular shapes or temporary event staging
- Limited aesthetic variety (typically neutral tones or basic textures)
- Lightweight and portable; easy to remove for cleaning substrate or relocating
- Great for short-term rental situations or seasonal patio use
- Some products feature non-slip textured surfaces suitable for wet conditions
- Check product specs for UV stability; cheaper mats may degrade quickly under Arizona sun
Artificial-Turf-Infill Paver Mats
- Soft play surface ideal for families with children or pets
- Combines synthetic turf with integrated drainage grid or rubber backing
- Pet-friendly, easy to hose clean, and reduces mud tracking indoors
- Watch for heat retention—artificial turf can reach 160°F+ in Phoenix midday sun; consider shade structures
- Infill materials (sand, rubber crumb) may migrate and require occasional redistribution
- Heavier than plastic tiles but lighter than solid rubber pavers (1.5–2.5 lbs per square foot)
- Requires periodic brushing to maintain turf blade orientation and appearance
Rubber-Backed Outdoor Rugs / Snap Grid + Paver Combo
- Low-cost entry point for small patios or balconies (under 100 square feet)
- Rubber-backed outdoor rugs provide immediate visual upgrade with minimal prep
- Snap-grid systems combine plastic grids with loose-fill pavers or gravel for custom looks
- Easy to remove for substrate inspection or relocation
- Best for renters on tight budgets or testing temporary solutions before larger investments
- Limited durability compared to solid tile systems; outdoor rugs may fade or fray within 1–2 seasons
- Loose-fill grids require edge containment to prevent material migration
Landlord & Lease Considerations — Get Permission First
Securing landlord approval protects your security deposit and maintains a positive tenant-landlord relationship. Even fully removable systems can raise concerns about weight, drainage alterations, or aesthetic impacts visible from neighboring units. Property managers worry about liability if temporary installations cause water intrusion, structural stress, or trip hazards. Building codes in some Arizona municipalities impose load limits on balconies and patios—exceeding these limits could void insurance coverage or violate lease terms.
Before purchasing materials, review your lease for clauses addressing outdoor modifications, common-area aesthetics, and restoration requirements. Contact your property manager or landlord with a detailed proposal including product specifications, installation method, drainage plan, and removal timeline. Offer to provide photos or mockups, demonstrating the professional appearance and reversible nature of your chosen system.
Landlords typically require assurance that your installation avoids adhesives, drilling, or penetration of waterproof membranes; respects weight limits for elevated surfaces; maintains existing drainage patterns; can be fully removed without residue or damage; and includes a plan to restore the original substrate condition. Providing this documentation upfront signals responsibility and increases approval likelihood.
HOA & City Rules — Quick Arizona Metro Notes
Arizona municipalities and homeowners associations vary in their approach to temporary patio improvements for rental properties. Some cities require permits for structures exceeding certain square footage or height thresholds, while others exempt non-permanent, non-attached installations. Always verify current rules with your city’s development services department or HOA architectural review board before proceeding.
Phoenix
Phoenix renters benefit from the city’s relatively permissive approach to temporary outdoor improvements, though HOA rules in master-planned communities can be strict. (Unverified as of November 2025—confirm with Phoenix Development Services and your specific HOA): Non-permanent, ground-level patio installations under 200 square feet typically do not require city permits, but HOA architectural review may still apply.
Best product choices for Phoenix’s intense heat include light-tone plastic tiles (beige, sand, light gray) that reflect solar radiation, or pedestal porcelain systems that create air gaps for heat dissipation. Avoid solid dark rubber pavers in full-sun exposures—surface temperatures can exceed 150°F midday May through September, creating burn risks.
Actionable tip for Phoenix renters: Install temporary pavers in late afternoon or evening when substrate temperatures drop. Pre-soak the concrete or existing patio surface with a hose to cool it before laying tiles, improving comfort during installation and revealing drainage patterns.
Tucson
Tucson’s rental market includes many historic neighborhoods with Territorial and Mission Revival architecture where HOA aesthetic guidelines emphasize earth tones and desert-appropriate materials. (Unverified as of November 2025—confirm with Tucson Planning & Development Services and your HOA): Temporary installations that don’t alter drainage or penetrate surfaces generally don’t require city permits, but verify if your property lies within a historic preservation district.
Rental property hardscaping Tucson works well with terracotta-tone rubber pavers or natural stone-look porcelain tiles that complement Southwestern aesthetics. The slightly cooler Tucson climate (versus Phoenix) allows broader color choices, though light tones remain advisable for summer comfort.
Actionable tip for Tucson renters: Monsoon drainage is critical. Ensure your temporary paver system maintains at least 1/4-inch perimeter gaps along walls and 1/8-inch gaps between tiles to allow rapid water runoff during July–September storms. Test drainage by hosing the area and observing flow patterns before finalizing installation.
Scottsdale
Scottsdale’s upscale rental properties often feature strict HOA covenants governing outdoor aesthetics. Some communities require architectural review board approval even for temporary installations visible from streets or common areas. (Unverified as of November 2025—confirm with Scottsdale Planning & Development and your HOA ARB): Non-permanent installations may still need ARB review if they alter the exterior appearance of the dwelling unit.
Apartment patio pavers Phoenix-Scottsdale area should prioritize premium aesthetics—pedestal porcelain or high-end composite decking—to satisfy HOA design standards. Neutral contemporary tones (grays, taupes, warm whites) align with Scottsdale’s modern desert architecture.
Actionable tip for Scottsdale renters: Submit mockup photos or product samples to your HOA ARB before purchasing materials. Include a letter from your landlord confirming approval and emphasizing the temporary, removable nature of the installation. ARB approval can take 30–60 days, so plan ahead.
Mesa
Mesa’s diverse rental housing stock ranges from mid-century homes to modern apartment complexes. The city’s development services department generally focuses on permanent structures, but large temporary installations may trigger review. (Unverified as of November 2025—confirm with Mesa Development Services): Ground-level, non-attached patio improvements under 200 square feet typically don’t require permits, but always verify.
Mesa’s slightly lower elevation and less intense heat island effect (versus central Phoenix) make mid-tone pavers viable. Interlocking plastic tiles in gray or taupe balance heat reflection and aesthetic appeal.
Actionable tip for Mesa renters: If your rental home has an existing concrete patio with minor cracks or settling, use a pedestal system to create a level surface without repairing the substrate—a renter-friendly solution that avoids permanent fixes while improving usability.
Chandler
Chandler’s master-planned communities and HOAs are known for detailed design guidelines. Many rental properties fall within HOA jurisdictions requiring approval for any exterior changes. (Unverified as of November 2025—confirm with Chandler Development Services and your HOA): Temporary installations may need HOA architectural approval if visible from public streets or neighboring properties.
Non-permanent patio solutions AZ Chandler area should emphasize quick-install, quick-remove systems like interlocking plastic tiles or roll-out mats that minimize installation visibility and can be rapidly removed if HOA issues arise.
Actionable tip for Chandler renters: If your HOA requires approval, include in your application a detailed removal timeline (e.g., “All materials will be removed within 7 days of lease termination”) and offer to provide a refundable deposit or additional security to guarantee restoration.
Gilbert
Gilbert’s growing rental market includes many newer apartment complexes with modern amenities and relatively flexible management policies. The town’s development services typically focus on permanent structures. (Unverified as of November 2025—confirm with Gilbert Development Services): Non-permanent, ground-level patio installations generally don’t require town permits, but HOA rules apply in most rental communities.
Gilbert’s family-friendly rental demographic favors pet- and child-safe options. Rubber pavers or turf-infill mats provide comfortable, slip-resistant surfaces for active households.
Actionable tip for Gilbert renters: If you have pets, choose rubber pavers with antimicrobial treatments or open-grid plastic tiles that allow easy hosing and drainage. Establish a weekly cleaning routine (hose rinse, squeegee) to prevent odor buildup and maintain deposit-refund readiness.
Prescott
Prescott’s higher elevation (5,400 feet) and cooler climate create different considerations than Valley locations. Freeze-thaw cycles in winter can affect some temporary paver materials. (Unverified as of November 2025—confirm with Prescott Community Development): Temporary installations typically don’t require city permits, but verify if your rental property falls within a historic district.
Choose freeze-thaw-rated materials for Prescott rentals. Rubber pavers and high-quality polypropylene tiles with UV stabilizers withstand temperature swings better than cheaper alternatives. Avoid water-trapping designs that could freeze and crack in winter.
Actionable tip for Prescott renters: Install pavers in late spring (April–May) after final frost risk passes, and plan for seasonal removal in late fall (October–November) if your lease allows. Store tiles indoors during winter to extend product lifespan and prevent ice-related damage.
Flagstaff
Flagstaff’s high elevation (7,000 feet) and significant snowfall (average 100+ inches annually) make year-round temporary paver installations challenging. Most renters install pavers seasonally for summer use only. (Unverified as of November 2025—confirm with Flagstaff Community Development): Temporary, non-permanent installations generally don’t require city permits, but verify rental property rules.
Select cold-weather-rated materials designed for freeze-thaw cycles. Pedestal systems work well in Flagstaff because they elevate tiles above snowmelt, preventing ice dams and allowing drainage. Avoid solid rubber pavers that can trap moisture underneath and freeze.
Actionable tip for Flagstaff renters: Plan for seasonal installation (May–June) and removal (September–October). Store tiles indoors during winter. If your lease extends through winter, discuss with your landlord whether you can leave pedestals in place (removing only tiles) to simplify spring reinstallation.
Installation & Removal: Step-by-Step (Tenant-Friendly)
Pre-Installation Checks (30–60 minutes)
Verify door swing clearances—tiles should not interfere with door operation or create trip hazards at thresholds. Measure threshold heights and select tiles with compatible thickness. Inspect existing drainage patterns by hosing the area; note where water flows and pools. Identify substrate defects (cracks, oil stains, mildew) that need cleaning but not repair.
Surface Preparation (1–2 hours for 100 sq ft)
Sweep thoroughly, removing dirt, leaves, and debris. Power-wash or hose-scrub concrete surfaces to remove organic growth. Allow substrate to dry completely (24–48 hours in Arizona heat, longer in winter or shaded areas). For oil-stained areas, apply biodegradable degreaser, scrub, rinse, and dry.
Test Layout (Dry Layout) (1–2 hours)
Arrange tiles without locking them together to visualize final appearance and identify cuts needed for edges. Start from a fixed reference point (wall or door threshold) and work outward. Maintain 1/4-inch perimeter gaps along walls, doors, and railings for drainage and expansion. Mark tiles requiring cuts with chalk or tape.
Locking/Interlock Sequence (2–4 hours for 100 sq ft)
Begin at your reference point and interlock tiles row by row. For snap-together systems, align edge pins and press firmly until tabs click. Use a rubber mallet for stubborn connections—tap gently to avoid cracking tiles. Maintain consistent gap spacing. For pedestal systems, position pedestals per manufacturer grid spacing, level each pedestal, and set tiles on top.
Edge Treatment (30–60 minutes)
Install perimeter trim or rubber edging to finish exposed tile edges and prevent lifting. Trim pieces typically snap into tile perimeter slots or adhere with minimal removable adhesive. Leave 1/8-inch expansion gap between trim and walls.
Drainage Verification (15 minutes)
Hose the installed area thoroughly. Observe water flow—it should drain freely through tile gaps and perimeter openings. If water pools, adjust tile elevation or add drainage shims under low spots (for pedestal systems).
Removal Process (2–3 hours for 100 sq ft)
Reverse the installation sequence. Begin at the last tile installed and work backward. Disconnect interlock tabs carefully to avoid breaking. Stack tiles as you remove them for efficient storage or transport. Remove pedestals and clean threads to prevent rust. Inspect substrate for any damage or discoloration.
Restoration (1–2 hours)
Vacuum or sweep substrate thoroughly. Wipe concrete with damp mop to remove residue. Inspect for scuffs or marks—most can be removed with mild detergent and scrubbing. Touch up minor concrete scuffs with concrete patching compound if necessary (consult landlord first). Photograph restored area for move-out documentation.
Time Estimates
- 50 sq ft balcony: 3–5 hours install, 1–2 hours removal
- 100 sq ft patio: 5–8 hours install, 2–3 hours removal
- 150 sq ft backyard area: 8–12 hours install, 3–4 hours removal
Tool List
Rubber mallet, push broom, measuring tape, chalk line or string, level, utility knife (for cutting tiles), garden hose, bucket, cleaning supplies, gloves, knee pads.
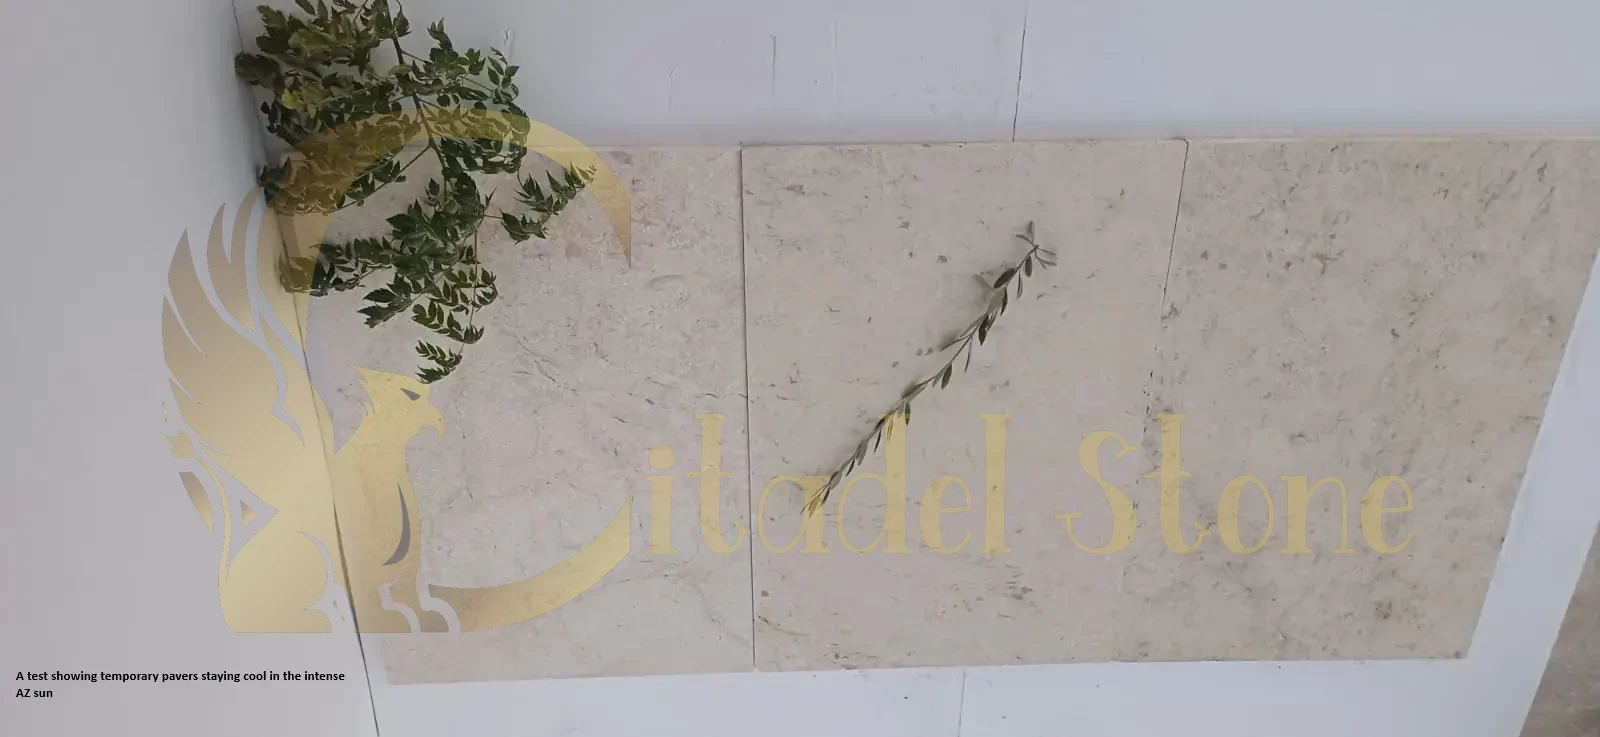
Heat, Drainage & Safety in Arizona
Arizona’s intense solar radiation creates surface temperatures far exceeding air temperature. Dark pavers in full Phoenix sun can reach 160–180°F midday in summer—hot enough to cause burns within seconds. Light-tone tiles (beige, tan, light gray) reflect more solar energy, typically running 20–30°F cooler than dark colors. Pedestal systems with air gaps beneath tiles provide additional cooling through convection.
For barefoot comfort, consider shade structures (pergolas, umbrellas, shade sails) to reduce direct solar exposure. Install pavers in areas with partial shade during peak afternoon hours (2–5 PM). Artificial turf pavers, despite appearing “grass-like,” retain significant heat; wet them down before use during summer months.
Monsoon season (July–September) brings sudden, intense rainfall. Proper drainage prevents water pooling that can damage substrates, promote mildew, and create slip hazards. Maintain minimum 1/8-inch gaps between tiles and 1/4-inch perimeter gaps along walls. Open-grid tile designs allow water to pass through to substrate drainage. Pedestal systems excel in monsoon conditions because elevated tiles allow free water flow underneath.
Slip resistance varies by product. Textured tile surfaces provide better traction when wet. Rubber pavers offer excellent slip resistance. Smooth porcelain tiles may become slippery when wet—choose textured finishes for Arizona applications. Test slip resistance by wetting tiles and walking on them before full installation.
Anti-trip thresholds matter at doors and transitions. Ensure tile elevation doesn’t exceed 1/4 inch above existing thresholds. Use tapered edge trim to create smooth transitions. Inspect regularly for tiles that have shifted or lifted, creating trip hazards—especially after high winds.
After monsoon storms, inspect paver installations for water intrusion signs: standing water underneath tiles (visible by lifting a corner tile), mildew odor, or substrate discoloration. If water is trapped, temporarily remove affected tiles, allow substrate to dry, and reinstall after verifying drainage improvements.
Where to Buy or Rent: Local Options & Logistics
Big-Box Retailers
Home Depot, Lowe’s, and Costco in Phoenix, Tucson, Mesa, and other Arizona cities stock interlocking plastic tiles, rubber pavers, and composite decking seasonally (peak availability March–June). Advantages include immediate availability, easy returns, and sample tiles for testing. Disadvantages include limited high-end options and minimal staff expertise.
Specialty Outdoor Tile Shops
Arizona Tile (locations in Phoenix, Tucson, Tempe) and Floor & Decor stores carry pedestal porcelain systems, premium interlocking tiles, and commercial-grade rubber pavers. Staff can provide technical advice on load-bearing, drainage, and Arizona-specific climate considerations. Expect higher prices but superior product quality and selection.
Landscape Supply Yards
Local landscape suppliers in Phoenix (Southwest Boulder & Stone) and Tucson (Civano Nursery) offer paver rentals for temporary events and may stock or order removable patio systems. Some suppliers rent pallet quantities of temporary decking for large projects, with delivery and pickup included.
Rental Outfitters
Event rental companies (e.g., Arizona Party Rental) provide temporary flooring for weddings and events—portable dance floors, interlocking event tiles. While designed for short-term use (days, not months), these systems demonstrate installation principles and may suit renters hosting seasonal gatherings.
Online Direct Suppliers
Manufacturers like Greatmats, SwissTrax, and Rubber Flooring Inc. ship directly to Arizona addresses. Advantages include wider selection, customer reviews, and technical specifications. Disadvantages include shipping costs (pavers are heavy), inability to inspect before purchase, and return shipping complexity. Order sample boards ($10–30 each) before committing to full orders.
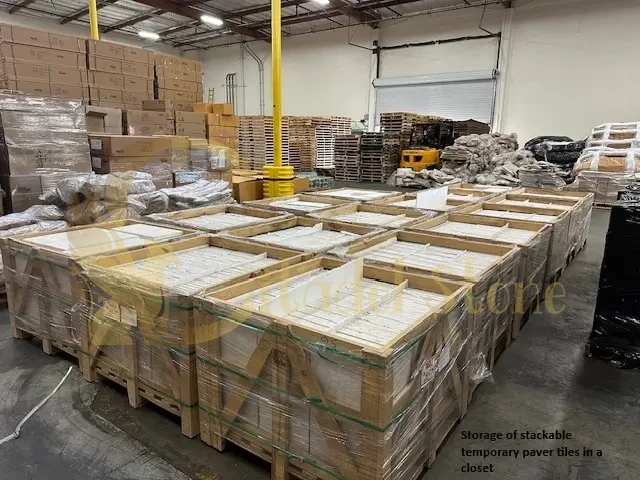
Logistics Considerations
Pavers ship on pallets via freight carriers. Residential deliveries may require curbside drop-off; coordinate labor to move pallets to your patio (ask friends or hire TaskRabbit helpers). Some suppliers offer lift-gate service for $50–100 extra. Estimate 40–60 lbs per square foot for pallet weight including packaging. Store tiles flat in covered areas to prevent warping before installation.
DIY vs Professional Install for Rentals
DIY-Friendly Scenarios
Small balconies (under 100 sq ft), interlocking plastic tile systems, and lightweight rubber pavers suit DIY installation. If you’re comfortable with measuring, cutting (utility knife or circular saw), and basic leveling, most temporary systems install in one weekend. Benefits include cost savings (labor typically equals or exceeds material costs), schedule flexibility, and firsthand knowledge of your system for future adjustments.
Professional Install Scenarios
Large patios (200+ sq ft), pedestal porcelain systems on rooftops or elevated balconies, and installations requiring weight-distribution calculations should involve professionals. Structural concerns—especially for balconies and rooftops—demand verification that added weight doesn’t exceed building load limits. Professionals carry liability insurance covering installation errors. Hire licensed landscape contractors or tile installers experienced with temporary systems; request references from other rental properties.
Cost Ballpark Estimates (2025, Arizona)
- DIY material only, plastic tiles: $3–8 per sq ft
- DIY material only, rubber pavers: $6–12 per sq ft
- DIY material only, pedestal porcelain: $15–30 per sq ft
- Professional install, plastic tiles: $8–15 per sq ft installed
- Professional install, rubber pavers: $12–20 per sq ft installed
- Professional install, pedestal porcelain: $25–50 per sq ft installed
- Professional removal & restoration: $2–5 per sq ft
Label these as sample estimates; actual costs vary by project complexity, access challenges, and seasonal demand.
Maintenance & Care for Temporary Pavers
Weekly Sweep (5–10 minutes)
Remove leaves, dirt, and debris with a push broom. Prevents organic buildup and staining. Pay attention to gaps where debris accumulates.
Monthly Hose Rinse (15–20 minutes)
Spray tiles with garden hose to remove dust and surface grime. Use a light stream to avoid dislodging interlocked tiles. For rubber pavers, a stronger spray helps remove embedded dirt.
Spot-Clean Grease & Stains (as needed)
Address spills immediately. Use mild dish soap and scrub brush for oil or food stains. Avoid harsh chemicals that can damage tile surfaces or underlying substrates. Rinse thoroughly after cleaning.
Seasonal UV Degradation Checks (quarterly)
Inspect tiles for fading, brittleness, or cracking—especially cheaper plastic tiles under intense Arizona sun. UV degradation typically appears within 1–2 years for lower-quality products. Replace damaged tiles to maintain aesthetics and safety.
Substrate Cleaning (annually or as needed)
Temporarily remove tiles to clean underlying concrete or wood. Sweep, hose, and inspect for mildew or damage. This step is critical before move-out inspections. Allow substrate to dry completely before reinstalling tiles.
Pet-Specific Care
For pet owners, hose tiles weekly to remove urine and prevent odor buildup. Rubber pavers can retain pet odors—consider antimicrobial treatments or enzyme cleaners designed for outdoor use. Open-grid tiles allow pet waste to reach substrate for easier cleaning; solid tiles require more frequent surface washing.
Anti-Odor Suggestions for Rubber Tiles
New rubber pavers often emit a strong rubber smell that dissipates within days to weeks. Accelerate off-gassing by hosing tiles before installation and allowing them to air-dry in full sun. For persistent odors, apply baking soda paste, let sit for an hour, then rinse. Ensure adequate ventilation—avoid enclosed balconies without airflow.
Landlord-Approved Pavers for Backyard & Small Patios
Landlords favor systems demonstrating minimal risk to property condition and ease of restoration. No-adhesive interlock systems top the list because they require zero substrate alteration and remove without residue. Pedestal systems with proven load distribution appeal to landlords managing multi-unit properties because they protect waterproof membranes on rooftop or balcony surfaces while providing excellent drainage.
Rubber pavers with non-marking backing reassure landlords concerned about scuff marks or staining on concrete patios. Some rubber products specifically advertise “rental-friendly” or “temporary installation” features—highlight these when seeking approval.
When approaching your landlord, emphasize reversibility, substrate protection, and professional appearance. Offer to sign an addendum specifying your responsibilities: maintaining the installation, removing it upon lease termination, restoring the original surface condition, and indemnifying the landlord against damage claims related to the installation.
Sample Landlord Approval Clause
“Tenant may install temporary, removable patio pavers on the [balcony/patio/backyard area] subject to the following conditions: (1) No adhesives, drilling, or permanent fasteners shall be used; (2) Installation shall not exceed [X] pounds per square foot and shall comply with building load limits; (3) Tenant shall maintain existing drainage patterns and shall not block drains or alter water flow; (4) Tenant shall remove all materials and restore the surface to original condition within [7] days of lease termination; (5) Tenant shall be responsible for any damage resulting from installation or removal; (6) Landlord reserves the right to inspect installation and require modifications or removal if issues arise. Tenant shall provide product specifications and installation plan to Landlord for approval prior to purchase.”
Cost Comparison: Temporary Systems
Plain-Text Cost Matrix (Per Square Foot, 2025 Arizona Estimates)
System Type                  Material Cost    Install Time (DIY)    Removal/Restore
------------------------------------------------------------------------------------------
Plastic Interlock Tiles      $3–8            3–5 hrs (100 sq ft)   1–2 hrs, minimal cost
Rubber Pavers                $6–12           4–6 hrs (100 sq ft)   2–3 hrs, minimal cost
Pedestal Porcelain           $15–30          8–12 hrs (100 sq ft)  3–4 hrs, $50–150
Roll-Out Resin Mats          $4–9            1–2 hrs (100 sq ft)   30 min, minimal cost
Turf-Infill Hybrid Mats      $8–15           3–4 hrs (100 sq ft)   1–2 hrs, minimal cost
Composite Decking Tiles      $10–18          5–7 hrs (100 sq ft)   2–3 hrs, $25–75
Example Cost Breakdown: 120 sq ft Apartment Balcony
- Mid-range interlocking plastic tiles: 120 sq ft × $5.50 = $660 materials
- Edge trim and accessories: $40
- Cleaning supplies and tools: $30
- Total DIY cost: $730
- Professional install (optional): add $1,200–1,800
- Expected lifespan: 3–5 years (Arizona sun exposure)
- Cost per month over 3-year lease: $20.28 DIY, $53.61 with professional install
All figures are sample estimates. Actual costs vary by product quality, supplier, project complexity, and seasonal discounts. Request quotes from multiple suppliers and installers.
Damage Prevention & Restore Checklist
Pre-Installation
☐ Photograph entire patio/balcony area (wide shots + close-ups of substrate condition) with timestamps
☐ Document existing cracks, stains, or defects in writing with measurements
☐ Clean substrate thoroughly; allow to dry 24–48 hours
☐ Obtain written landlord approval with installation specifications
☐ Purchase appropriate tile system and verify all components arrived undamaged
☐ Review installation instructions; watch manufacturer tutorial videos if available
☐ Test-lay tiles without interlocking to verify fit and appearance
During Installation
☐ Maintain 1/4-inch perimeter gaps along walls and doors
☐ Avoid adhesives unless explicitly landlord-approved and easily removable
☐ Use protective padding when moving heavy equipment or pallets across existing surfaces
☐ Verify drainage by hosing area and observing water flow
☐ Photograph completed installation (wide shots + detail shots) with timestamps
Monthly Maintenance
☐ Sweep weekly to remove debris
☐ Hose rinse monthly
☐ Inspect for lifted, cracked, or shifted tiles; adjust as needed
☐ Check drainage after rain events; ensure no standing water
Pre-Removal
☐ Schedule removal to allow 2–3 full days for work and substrate drying
☐ Gather tools: rubber mallet, broom, mop, bucket, cleaning supplies
☐ Purchase any needed substrate repair materials (concrete cleaner, touch-up paint)
Post-Removal
☐ Remove all tiles, trim, and accessories; stack for donation or disposal
☐ Sweep and vacuum substrate thoroughly
☐ Scrub substrate with mild detergent and rinse
☐ Allow to dry 24 hours
☐ Inspect for scuffs, stains, or minor damage
☐ Repair minor concrete scuffs with concrete cleaner or light sandpaper (consult landlord)
☐ Photograph restored area (wide shots + close-ups) with timestamps matching pre-installation photos
☐ Compile installation receipts, product specifications, landlord approvals, and before/after photos for move-out documentation
☐ Submit documentation to landlord with move-out walkthrough request
Solve Arizona’s Hidden Paver Hazard: Learn How to Manage Soil Expansion in Gilbert & Chandler Clay Soils!
Sample Email & Permission Template for Landlords
Tenant Email Request
Subject: Request for Approval – Temporary Patio Pavers at [Your Address]

Dear [Landlord/Property Manager Name],

I am writing to request approval to install temporary, removable patio pavers on the [balcony/patio/backyard] at [your rental address]. I want to enhance the outdoor space while ensuring full compliance with my lease and protecting the property.

System Details:
- Product: [Interlocking plastic tiles / rubber pavers / pedestal porcelain system]
- Manufacturer: [Brand name]
- Installation area: Approximately [X] square feet
- Installation method: No adhesives, drilling, or permanent fasteners; interlocking/pedestal system only
- Weight: Approximately [X] lbs per square foot (within building load limits)
- Drainage: Maintains existing drainage patterns; includes perimeter gaps for water flow

I will:
- Obtain all necessary products and verify specifications before installation
- Install according to manufacturer guidelines
- Maintain the installation throughout my tenancy
- Remove all materials and restore the surface to original condition within 7 days of lease termination
- Provide proof of purchase and product specifications upon request
- Assume full responsibility for any installation-related damage

Attached are product specifications, installation diagrams, and photos of similar installations. I'm happy to discuss this proposal at your convenience or provide additional information.

Thank you for considering this request. I look forward to your response.

Sincerely,
[Your Name]
[Your Phone]
[Your Email]
[Date]
Landlord Approval Template
ADDENDUM TO LEASE AGREEMENT – TEMPORARY PATIO IMPROVEMENT

Property Address: [Address]
Tenant Name: [Tenant Name]
Lease Date: [Original Lease Date]

Landlord grants Tenant permission to install temporary, removable patio pavers on the [balcony/patio/backyard area] subject to the following conditions:

1. Installation shall use no adhesives, drilling, or permanent fasteners
2. Total weight shall not exceed [X] lbs per square foot and shall comply with building load limits
3. Tenant shall maintain existing drainage patterns and shall not block drains or alter water flow
4
Tenant shall remove all materials and restore the surface to original condition within 7 days of lease termination
5. Tenant shall be responsible for any damage to the property resulting from installation, use, or removal
6. Landlord reserves the right to inspect the installation at any time and require modifications or removal if safety, structural, or aesthetic concerns arise
7. Tenant shall maintain the installation in good condition and repair throughout tenancy
8. Tenant shall provide product specifications, weight calculations, and installation plan prior to commencing work
This approval is granted for the current lease term only and does not transfer to future tenancies. Tenant acknowledges that failure to comply with these conditions may result in forfeiture of security deposit and/or additional charges.
Landlord Signature: _________________________ Date: _____________
Tenant Signature: _________________________ Date: _____________Case Examples: Balcony Refresh, Ground-Floor Patio & Rooftop Rental
Case 1: 80 sq ft Apartment Balcony, Phoenix
(Hypothetical example for illustration)
A Phoenix renter transformed a bare concrete balcony using interlocking plastic tiles in light gray. Total cost: $420 materials ($5.25/sq ft average) plus $35 for edge trim and cleaning supplies. Installation took one Saturday afternoon (4 hours solo). The renter secured landlord approval via email, emphasizing the no-adhesive installation and including product spec sheets.
Key decisions: Light gray color to minimize heat retention; open-grid design for drainage during monsoons; starting layout from the sliding door threshold to ensure level transition. Outcome: The balcony became a usable outdoor living space for the 18-month lease term. Removal took 2 hours; substrate showed no damage. Full security deposit refunded.
Lessons learned: Pre-installation photos proved invaluable during move-out inspection. The renter wished they had tested heat retention more thoroughly—even light-colored tiles became uncomfortably hot in full afternoon sun. Adding a shade sail (removable, approved by landlord) resolved the issue mid-lease.
Case 2: 150 sq ft Ground-Floor Patio, Tucson
(Hypothetical example for illustration)
A Tucson renter with two large dogs installed rubber pavers on a ground-floor patio to create a comfortable, pet-friendly surface. Total cost: $1,380 materials ($9.20/sq ft average) plus $120 for professional consultation (2 hours). The property manager required written approval from the HOA; the renter submitted mockup photos and product specs to the architectural review board, receiving approval in 45 days.
Key decisions: Rubber pavers for durability and comfort; dark brown color to match existing landscaping (HOA requirement); professional consultation to verify proper drainage slope. Installation took two weekends (16 hours total with partner assistance). The renter established a weekly hose-rinse routine to manage pet odors and dirt.
Outcome: The patio remained functional and attractive for a 2-year lease. Removal took 5 hours (two people). Minor substrate discoloration from rubber contact cleaned completely with pressure washer. Security deposit refunded in full.
Lessons learned: HOA approval took longer than expected—start the process immediately upon deciding to install. Weekly maintenance prevented odor buildup. The renter regretted choosing dark brown for heat retention; lighter colors would have been more comfortable for barefoot dogs.
Case 3: 200 sq ft Rooftop Rental Deck, Scottsdale
(Hypothetical example for illustration)
A Scottsdale renter in a luxury apartment complex installed a pedestal porcelain system on a rooftop common-area deck (with exclusive-use rights per lease). Total cost: $5,200 materials ($26/sq ft average) plus $2,800 professional installation. The landlord required structural engineer verification that the system wouldn’t exceed the rooftop’s 100 lbs/sq ft load limit; the professional installer provided stamped load calculations.
Key decisions: Pedestal system for superior drainage and aesthetics; warm gray porcelain tiles to complement modern architecture; professional installation to ensure code compliance and protect the waterproof membrane. Installation took 2 days (professional crew). The renter committed to quarterly professional inspections ($150 each) to maintain landlord confidence.
Outcome: The deck became a high-value amenity, justifying the investment for a planned 3-year lease. At 18 months (current), the system remains pristine. Removal cost negotiated at $1,200, to be performed by the same installer.
Lessons learned: Professional installation and engineer verification, though expensive, secured landlord approval for a high-stakes rooftop installation. The renter negotiated that removal costs would be split 50/50 with the landlord if the next tenant wanted to keep the deck (landlord benefits from increased property value).
Find your perfect Arizona pavers — quick local selection guide
Citadel Stone – top pavers are offered here as conditional selection notes to help specifiers and designers choose appropriate materials across Arizona microclimates. This short guide would outline popular stone types, suitable finishes and practical advice for each city; all recommendations are hypothetical and framed as what we would suggest for comparable sites.
Phoenix
Phoenix’s prolonged high temperatures and very strong UV exposure make thermal performance and colour stability primary concerns for Phoenix. Light-coloured travertine — preferrably filled and honed — can be recommended to reduce surface heat while preserving a Mediterranean aesthetic; a brushed finish could balance grip and appearance around shaded pool decks. Prioritise low-porosity grades and UV-stable sealants; typical thickness guidance is 20–30 mm for patios and 30–40 mm for light vehicle areas. For Phoenix, our pavers could be previewed via sample tiles, full technical datasheets and specification support, and palletised delivery could be proposed to simplify logistics.
Tucson
Tucson’s basin setting, frequent dust and episodic monsoon runoff would influence stone choice for Tucson. Dense, compact limestones or cream-coloured sandstones with a sawn or lightly textured face often suit the softer desert palette; choose varieties with low water absorption to reduce staining during storms. Finishes such as honed or brushed can keep glare and slip risk under control. Use 20–30 mm for pedestrian terraces and 30–40 mm for light vehicle crossings as general guidance. For Tucson projects, Citadel Stone – top pavers could be supplied with sample slabs, performance datasheets and specification notes on request.
Mesa
Mesa’s suburban character and high solar load make reflective, low-heat materials attractive for Mesa. Hard quartzite or calibrated flagstone with a flamed or riven surface may be suggested to manage heat gain and provide durable abrasion resistance. Opt for tightly grained, low-porosity stone and finishes that reduce surface temperature while retaining texture. Thickness guidance of 20–30 mm for footpaths and 30–40 mm for drive-over areas would be a practical baseline. In Mesa scenarios, our pavers could be made available as sample boards, technical datasheets and specification guidance, and palletised delivery could be coordinated if helpful.
Chandler
Chandler’s irrigated landscapes and shaded residential corridors would shape material choices for Chandler. Feldspathic sandstones (arkose types) or compact limestones with a brushed or lightly cleft finish can offer warmth while resisting surface marking where sprinklers operate. Choose stones with good pigment stability and low absorption; finishes such as honed edges or fine-texture faces can improve maintenance outcomes. Typical thickness recommendations would be 20–30 mm for patios and 30–40 mm for light vehicle areas. For Chandler, our pavers could be reviewed with sample strips, specification templates and datasheets to inform tender documents.
Scottsdale
Scottsdale’s premium outdoor-living trends often favour visually striking yet durable materials for Scottsdale. Premium quartzites or dense, compact limestones with subtle veining can be selected where a refined look is desired; finishes ranging from honed to saw-cut are useful depending on glare and slip concerns. Focus on UV resistance and abrasion ratings when evaluating options. Use 20–30 mm for walking zones and 30–40 mm where light vehicles may pass as a starting point. For Scottsdale designs, Citadel Stone – top pavers could be previewed with sample panels, CAD details and specification assistance, and palletised delivery could be proposed.
Gilbert
Gilbert’s family-oriented yards and irrigated streetscapes recommend low-maintenance, robust choices for Gilbert. Medium-grain granites or weathered-look sandstones with a textured or brushed finish often offer long-term colour stability and easy upkeep; select low-porosity grades to reduce biological growth in irrigated areas. Thickness guidance of 20–30 mm for pedestrian terraces and 30–40 mm for light vehicle routes is a sensible baseline. For Gilbert, our pavers could be supplied with sample boards, full technical datasheets and practical specification notes, with palletised delivery options available where required.
Design pointers and city-specific advice (conditional)
When selecting Citadel Stone – top pavers for any Arizona location, a few tailored tips could help refine choices: favour lighter tones or filled travertine in intensely sunny areas to lower surface temperatures; prefer tight-grain quartzites or granites where abrasion resistance and low water uptake are essential; and choose honed, brushed or textured finishes over high-polish finishes for exterior use to reduce glare and slipperiness. Jointing strategy matters too — consider permeable joint systems where runoff management or heat mitigation is a priority, and sealed or polymeric joints where dust ingress or staining are primary concerns. Always request water absorption, abrasion resistance and slip-rating figures from technical datasheets to compare alternatives objectively.
Supply, samples and specification support (what could be provided)
Specifiers commonly request physical samples, mock-up panels and written performance data before finalising palettes. To assist evaluation, our pavers could be provided as colour boards, individual sample tiles and lab-tested technical datasheets showing water absorption, abrasion and UV stability metrics. Specification support — including CAD details, jointing recommendations and suggested installation tolerances — could be offered to help integrate choices into construction documents. Where site access or staging is a consideration, palletised delivery proposals and packaging options could be discussed to help coordinate procurement and on-site handling. All such offerings would be available as conditional support during the selection process.
Conclusion & 6-Step Renter Action Plan
Temporary paver solutions Arizona rentals offer practical, reversible upgrades that transform bare rental outdoor spaces into comfortable living areas without risking security deposits or violating lease terms. By selecting appropriate products for Arizona’s climate, securing landlord approval with professional documentation, and following installation best practices, renters can enjoy enhanced patios and balconies throughout their tenancy and remove everything cleanly at move-out.
6-Step Renter Action Plan
Step 1: Review Lease & Contact Landlord (Week 1)
Read your lease for outdoor modification clauses. Draft an approval request email using the template provided. Include product specs, installation method, and restoration plan. Submit to landlord/property manager.
Step 2: Research Products & Climate Fit (Week 1–2)
Identify products suitable for your location (Phoenix heat vs Prescott freeze-thaw). Consider apartment patio pavers Phoenix options for Valley locations, rental property hardscaping Tucson considerations for southern Arizona. Request sample boards from 2–3 suppliers ($10–30 each).
Step 3: Verify HOA & City Rules (Week 2)
Check if your rental property has HOA design guidelines requiring architectural review. Contact your city’s development services department to confirm permit requirements for non-permanent patio solutions AZ installations. Document all approvals in writing.
Step 4: Order Materials & Schedule Installation (Week 3–4)
Purchase approved materials. Arrange delivery logistics (curbside drop-off, freight handling). Gather tools (rubber mallet, broom, measuring tape, level, hose). Schedule installation for cooler morning hours or cloudy days to avoid heat exhaustion.
Step 5: Install & Document (Week 4–5)
Photograph substrate before installation (timestamped). Follow installation steps: surface prep, test layout, interlock/pedestal installation, edge treatment, drainage verification. Photograph completed installation. Share photos with landlord to confirm compliance.
Step 6: Maintain & Prepare for Move-Out (Ongoing + Final Week)
Establish weekly sweeping and monthly hosing routine. Inspect quarterly for damage or shifting. Before lease termination, remove all materials, restore substrate, photograph restored area, and compile documentation (receipts, approvals, before/after photos) for move-out walkthrough.
Call to Action:
Request temporary paver samples & landlord permission kit from local Arizona suppliers or online retailers. Start your rental patio transformation today with confidence and deposit protection.
Download The Ultimate Arizona Paver Profile: Technical Datasheet for Architects & Contractors!