Use Cases: Where Pavers Add Value on Equestrian Properties
Trailer Aprons and Turnout Pads: Horse trailers—whether two-horse bumper-pull units (4,000-6,000 lbs loaded) or four-horse gooseneck trailers (12,000-16,000 lbs loaded)—concentrate weight on dual axles with relatively narrow tire contact patches. Trailer aprons at barn entrances and loading areas receive repeated turning loads and backing maneuvers that generate high lateral forces. Pavers provide a stable, level surface that resists rutting, distributes loads through proper subbase, and eliminates the dust and mud issues common with decomposed granite or dirt turnouts.
Service Vehicle Lanes: Hay delivery trucks, manure removal services, veterinary rigs, and maintenance tractors require all-weather access. Paved service lanes prevent soil compaction that kills tree roots near barns, eliminate track-in mud during monsoon season, and provide defined circulation that protects arena footing from vehicle incursion. Typical service vehicle loads range from 8,000 lbs (light trucks) to 26,000 lbs (tandem-axle delivery trucks).
Barn Aisles & Stable Walkways: Interior and covered barn aisles benefit from pavers that drain quickly, clean easily with pressure washers, remain cooler than asphalt or sealed concrete, and provide slip resistance under wet conditions. Pavers handle the continuous hoof traffic, dropped feed buckets, and occasional equipment carts while maintaining level surfaces critical for horse safety. Loading scenarios include horse + handler (1,200-1,800 lbs concentrated on four hooves) and golf carts or feed carts (600-1,200 lbs).
Mounting Blocks and Spectator Areas: Fixed mounting block perimeters and spectator viewing zones adjacent to arenas require stable, dust-free surfaces that don’t migrate into arena footing. These lower-traffic zones can use thinner pavers (60mm vs 80mm for trailer aprons) with less aggressive subbase preparation while still providing years of maintenance-free service.
Tiedown Pads: Grooming and tacking areas where horses stand tied require firm, level footing that drains quickly and resists pawing damage. A 10×12 foot paver pad at each tiedown location prevents the hollows and mud pits that develop in dirt or decomposed granite surfaces, improving safety and reducing bedding consumption.
Wash Racks: Dedicated horse wash areas demand sloped paver surfaces (2-3% grade) that direct water to drains or vegetated swales, prevent standing water that breeds insects, and provide slip-resistant footing for wet horses. Pavers withstand daily hosing, occasional pressure washing, and the chemical exposure from shampoos and fly sprays that degrade unsealed concrete.
Arena Edging: The perimeter where arena footing meets exterior circulation paths requires durable edging that prevents footing migration, provides a stable surface for tractors performing arena maintenance, and maintains a clean visual boundary. Properly installed paver edging eliminates the ongoing maintenance of repairing eroded arena edges and retrieving scattered footing material.
Load Requirements & Paver Selection
Understanding wheel loads and axle configurations determines appropriate paver specifications. Horse trailers present unique loading scenarios compared to standard vehicular traffic due to concentrated rear axle weights and frequent sharp turning maneuvers.
Typical Horse Trailer Loading:
- Two-horse bumper-pull trailer: 2,000-3,000 lbs per rear wheel, single axle or tandem with 4-foot spacing
- Four-horse gooseneck trailer: 3,500-5,000 lbs per wheel on rear tandem axles
- Six-horse commercial trailer: 4,000-6,000 lbs per wheel, triple axle configuration
Paver Thickness and Class Recommendations:
For trailer aprons and heavy-service zones where loaded trailers execute turning maneuvers, specify 80mm (3.1-inch) minimum thickness interlocking concrete pavers meeting ASTM C936 with compressive strength 8,000 PSI minimum and absorption under 5%. These load bearing pavers for horse trailers distribute concentrated wheel loads through the paver thickness into a properly prepared subbase without cracking or corner spalling.
For stable walkways and barn aisles with horse + handler traffic only, 60mm (2.4-inch) pavers suffice when installed over a competent subbase. Light service vehicle access (golf carts, ATVs under 1,000 lbs) can use 60mm pavers; heavier utility vehicles require 80mm thickness.
For mounting blocks and spectator areas with foot traffic only, 50mm (2-inch) pavers provide adequate strength when properly bedded, though 60mm offers a stronger safety margin and simplified procurement (single thickness for multiple applications).
Converting Vehicle Specifications to Paver Design:
Example calculation for four-horse gooseneck trailer (14,000 lbs loaded, 60% rear weight distribution, tandem rear axle):
- Rear axle load: 14,000 × 0.60 = 8,400 lbs
- Per-wheel load (dual wheels): 8,400 ÷ 4 = 2,100 lbs per wheel
- Tire contact patch: approximately 25-35 square inches depending on inflation
- Contact pressure: 2,100 lbs ÷ 30 sq in = 70 PSI at tire/paver interface
This loading scenario requires 80mm pavers over minimum 6-inch aggregate base (8 inches preferred) compacted to 95% Standard Proctor to safely distribute loads into subgrade without exceeding bearing capacity or causing settlement.
Pavers vs Structural Concrete Wheel Paths:
Full-depth reinforced concrete (6-inch minimum, 3,000 PSI, WWF 6×6-W1.4×W1.4) provides the ultimate load-bearing solution for areas with extreme repeated loading—commercial boarding facilities with multiple daily trailer movements or properties that host frequent hauling events. However, concrete requires expansion joints every 10-12 feet, cracks inevitably develop, and repairs involve saw-cutting and costly concrete replacement.
Hybrid Solutions: Concrete wheel paths (24-30 inches wide) positioned for trailer tire tracks combined with paver fields between and adjacent to wheel paths optimize cost and performance. The concrete handles concentrated repeated loading along predictable paths while pavers provide flexibility, easier repair, and better aesthetics in surrounding areas. This approach commonly appears in commercial boarding facilities where 10-20 trailers per day traverse the same routes.
Subbase, Compaction & Drainage — The Real Work Under the Pavers
Paver performance depends entirely on subbase quality—the pavers themselves merely transfer loads to the base, which must distribute forces into the subgrade without exceeding bearing capacity. Inadequate base preparation causes the settlement, rutting, and joint loss that plague failed installations.
Recommended Subgrade Preparation:
Begin with native soil evaluation. Arizona soils range from expansive clays (common in Phoenix and Tucson valleys) to sandy loams (higher elevations) to rocky desert hardpan. Expansive clays require removal to 12-18 inches depth and replacement with non-expansive fill, or installation of geotextile separation barriers that prevent soil migration into aggregate base. Rocky subgrades may require minimal preparation beyond grading and proof-rolling.
Proof-roll the exposed subgrade with a loaded tandem-axle truck (minimum 10,000 lbs) or vibratory roller. Any areas showing deflection, pumping, or rutting require remediation—either remove and replace soft spots or stabilize with lime or cement treatment before proceeding.
Subbase Type and Depth:
For stable walkways and barn aisles (horse + handler traffic, light carts): 4-inch minimum aggregate base of AASHTO #57 or #67 crushed angular stone. Compacted to 95% Standard Proctor Density per ASTM D698. In stable soils with good drainage, this minimal base suffices for light loading.
For trailer aprons and service vehicle lanes (axle loads 2,000-5,000 lbs per wheel): 6-inch minimum aggregate base, 8 inches preferred, using AASHTO #57 stone for the lower lift and #8 or #9 stone for the upper 2-inch bedding layer. Compact each lift separately to 95% Standard Proctor before placing the next layer. This deeper base distributes concentrated trailer loads across a wider subgrade area, preventing bearing capacity failures.
For commercial facilities with heavy daily trailer traffic or large gooseneck/commercial trailers exceeding 16,000 lbs loaded: 8-10 inch aggregate base with geogrid reinforcement at mid-depth provides additional tensile strength that resists lateral spreading under repeated loading.
Compaction Targets:
Specify 95% Standard Proctor Density (ASTM D698) as the minimum—this is an example target commonly used in commercial paving specifications. However, critical loading areas may warrant 98% compaction or use of Modified Proctor (ASTM D1557) for higher-strength applications. Always require a licensed civil or geotechnical engineer to review and approve compaction specifications based on site-specific soil conditions and loading requirements.
Verify compaction with nuclear density gauge testing or plate load testing per ASTM D1196. Random test locations: minimum one per 500 square feet for trailer aprons, one per 1,000 square feet for walkways.
Geotextile Separation:
Install woven or non-woven geotextile fabric (minimum 4 oz/sq yd for separation applications, 8 oz/sq yd for stabilization under heavy loads) between native subgrade and aggregate base. Geotextile prevents subgrade soil migration into base voids—a process that undermines base integrity and causes settlement. Overlap geotextile seams 18 inches minimum and avoid wrinkles or folds that create weak zones.
Frost and Moisture Considerations at Elevation:
Prescott (5,400 feet elevation) and Flagstaff (7,000 feet) experience freeze-thaw cycles. Frost depth in Flagstaff can reach 36 inches, though most equestrian paving occurs in areas without frost-susceptible soils or where base depth already exceeds frost depth. For critical installations in cold climates, consult AASHTO frost penetration maps and consider base depths that extend below seasonal frost line or use of non-frost-susceptible base materials (clean crushed stone with fines content under 10%).
Moisture management: In all Arizona locations, design positive drainage. Standing water in base materials reduces bearing capacity and, at elevation, contributes to frost heave potential.
Crown and Slope for Drainage:
Grade paved surfaces with minimum 2% slope (1/4 inch per foot) away from barn structures and toward acceptable drainage paths—vegetated swales, French drains, or designated stormwater collection areas. Avoid directing runoff toward arenas (prevents footing contamination with silt), septic drain fields (may exceed field capacity), or neighboring properties.
For trailer aprons and service lanes, consider crowning the surface (high point at centerline, 2-3% cross-slope toward edges) to shed water bilaterally. This prevents water accumulation in wheel paths that can cause soft spots and accelerated deterioration.
Dust Control Paving Strategies for Stables & Arenas
Arizona’s arid climate and frequent winds make dust control critical for equine respiratory health and facility usability. Fine silicate dust from arena footing, decomposed granite pathways, and exposed soil infiltrates stables, coats equipment, and contributes to chronic respiratory conditions in horses and humans.
Permeable Pavers with Aggregate Joints:
Standard interlocking concrete pavers with open joints (5-8mm width) filled with coarse sand or fine crushed rock allow water infiltration while providing a firm, dust-free walking surface. This approach works well for stable walkways and perimeter paths where you want drainage without creating impervious runoff. However, fine dust can still migrate through wider joints—for maximum dust control, specify polymeric sand joint fill that binds particles while retaining some permeability.
Resin-Bound Surfaces:
Resin-bound aggregate systems mix decorative stone (3-6mm size) with UV-stable polyurethane resin to create a smooth, porous, dust-free surface. These systems excel in high-visibility areas—barn entrances, mounting blocks, spectator zones—where aesthetics matter and dust control is paramount. Resin-bound surfaces handle light vehicle traffic (golf carts, ATVs) but are not suitable for heavy trailer loads. Expect installed costs of $18-35 per square foot depending on aggregate choice and site preparation requirements.
Maintenance: Occasional pressure washing (low pressure, wide fan nozzle) removes organic matter. UV degradation occurs over 8-12 years in intense Arizona sun; budget for reapplication or overlay at that interval.
Stabilized Crushed Stone:
Polymer-stabilized crushed stone systems (such as those using acrylic or modified polyurethane binders) create a semi-rigid surface from 1/4-inch minus angular aggregate. Applied at 2-3 inch depth over prepared base, stabilized stone provides a natural appearance, excellent permeability, and resistance to erosion that plagues untreated decomposed granite. These systems suit service roads, overflow parking, and transitional areas between paved and unpaved zones. Cost: $8-15 per square foot installed.
Polymer-Stabilized Arena Sands:
For arena footing itself (outside the scope of structural paving but relevant to perimeter dust control), polymer-coated sands reduce dust generation within the arena while maintaining cushioning and traction properties horses require. Dust control paving for stables works synergistically with stabilized arena footing—controlling dust at the source (arena) and in surrounding circulation (paved perimeters) creates the healthiest environment.
Sealed Compacted Surfaces:
Compacted aggregate base treated with penetrating sealers or dust-control agents (lignosulfonates, petroleum resins, magnesium chloride solutions) offers a low-cost dust suppression option for service roads and low-traffic areas. However, these treatments require frequent reapplication (quarterly to annually depending on traffic and weather), may not be horse-safe if ingested (especially magnesium chloride), and degrade rapidly under vehicle traffic.
Best Practice: Maintain Loose Arena Footing While Controlling Perimeter Dust:
Never extend impermeable paving into arena footing—horses require cushioned, slip-resistant footing materials (sand, fiber blends, rubber additives) that paving cannot replicate. Instead, create clear boundaries: arena footing contained within proper edging (railroad ties, concrete curbs, or paver edges) and firm, dust-free paved surfaces for all circulation, service access, and spectator areas surrounding the arena. This horse arena footing and paving strategy maintains optimal riding surfaces while eliminating dust from adjacent hardscaped zones.
See Citadel Stone’s Full Paver Products and Request Your Sample Kit!
Arena Edging & Transition Details
The interface between arena footing and perimeter paving demands careful detailing to prevent footing migration, maintain edge stability, and accommodate maintenance equipment.
Preventing Arena Footing Migration:
Install rigid edging—pressure-treated 6×6 timbers, steel or aluminum arena rail systems, or poured concrete curbs (4-6 inches high)—to physically contain footing. The edging must be anchored deeply enough (24-30 inches below finished grade for timbers, concrete footings for steel rail systems) to resist lateral pressure from footing pushed by horses and maintenance equipment.
For paver-to-footing transitions, position pavers flush with or slightly below (1-2 inches) the top of arena edging. This allows footing to overlap the edge without spilling onto pavers and provides a stable surface for tractors performing arena dragging without wheels dropping into soft footing.
Edge Restraint Types:
Concrete edge beam: 4-inch thick, 12-inch deep minimum, reinforced with #3 rebar, provides permanent, immovable edge restraint for high-traffic perimeter paving. This approach is common in commercial facilities where durability justifies the higher installation cost ($12-20 per linear foot).
Steel or aluminum edge restraint: Commercial paver edging systems anchor with 10-inch spikes driven every 12-18 inches. Less expensive than concrete ($4-8 per linear foot) and faster to install, but may shift slightly under heavy equipment loads.
Transition Joint Design:
Create a flexible joint between rigid edge restraint (concrete curb or timber edging) and paver field using compressible joint filler or leaving a 1/2-inch gap filled with polymeric sand. This accommodation joint prevents stress transfer from the rigid edging into the paver field, reducing crack risk at the interface.
Geogrid at Interface:
In high-traffic perimeter zones where tractors repeatedly traverse the paver-to-arena transition, consider installing geogrid reinforcement in the upper base layer (2-3 inches below paver bedding). Biaxial geogrid (aperture size 1-1.5 inches, tensile strength 2,000+ lbs/ft) provides additional tensile resistance that prevents base spreading and settlement under repeated turning loads.
Maintenance Tips:
Inspect arena edges quarterly for footing spillover onto pavers—sweep or blow footing back into arena before it becomes compacted and difficult to remove. Check edge restraint anchoring annually; re-anchor any loose sections immediately. Prevent organic matter accumulation (manure, hay) at the paver-footing interface—organic decomposition creates voids that undermine paver support. Power wash the perimeter pavers seasonally to remove accumulated dust and organic film that can support weed growth in joints.
Material Options: Natural Stone, Concrete Pavers, Porcelain & Resin Systems
Interlocking Concrete Pavers (Heavy-Duty):
The workhorse of equestrian paving. Specify 80mm thickness for trailer aprons, 60mm for walkways. Compressive strength 8,000+ PSI per ASTM C936, absorption under 5% per ASTM C140. Available in multiple colors, textures, and laying patterns. Interlocking geometry (typically I-shape, bone, or herringbone patterns) distributes loads laterally across multiple units.
Pros: Proven load-bearing, readily available from multiple suppliers, competitive installed cost ($12-22/SF), individual unit replacement when damaged, permeable with proper jointing.
Cons: Surface texture can show manure stains if not sealed or regularly cleaned, requires joint maintenance (sand replenishment), color fade over 15-20 years under intense UV.
Slip resistance: Textured surfaces provide adequate hoof traction when wet. Avoid smooth-faced architectural pavers in horse traffic areas.
Hoof-friendliness: Concrete pavers with properly filled joints (sand or polymeric sand) are safe for shod and barefoot horses. Avoid wide joint gaps (>10mm) where hooves could catch.
Heat in Arizona: Light colors (tan, gray, buff) remain 20-30°F cooler than dark charcoal or red pavers. Critical for Phoenix/Scottsdale installations where summer surface temps reach 140°F+.
Freeze-thaw (elevation): Specify absorption under 5% for Prescott, under 3% for Flagstaff to ensure freeze-thaw durability per ASTM C1026.
Cost bracket: $12-22/SF installed depending on thickness, pattern complexity, and site preparation requirements.
Porcelain Pavers (Low Absorption):
Through-body porcelain pavers offer the lowest absorption rates (under 0.5% per ISO 10545-3), superior stain resistance, and consistent manufacturing tolerances. Minimum 20mm (3/4 inch) thickness suitable for pedestrian + light vehicle traffic; 30mm available for heavier loads though still not recommended for direct trailer wheel paths.
Pros: Virtually stain-proof (manure, urine, hay tea wash off easily), consistent color throughout thickness (chips less visible), excellent slip resistance in textured finishes.
Cons: Higher cost ($20-35/SF installed), requires specialized cutting tools, can chip under severe impact (dropped steel tools), not suitable for heavy trailer axle loads without substantial base preparation.
Best applications: High-visibility barn aisles, mounting block surrounds, spectator areas, luxury estate hardscaping where aesthetics justify premium cost.
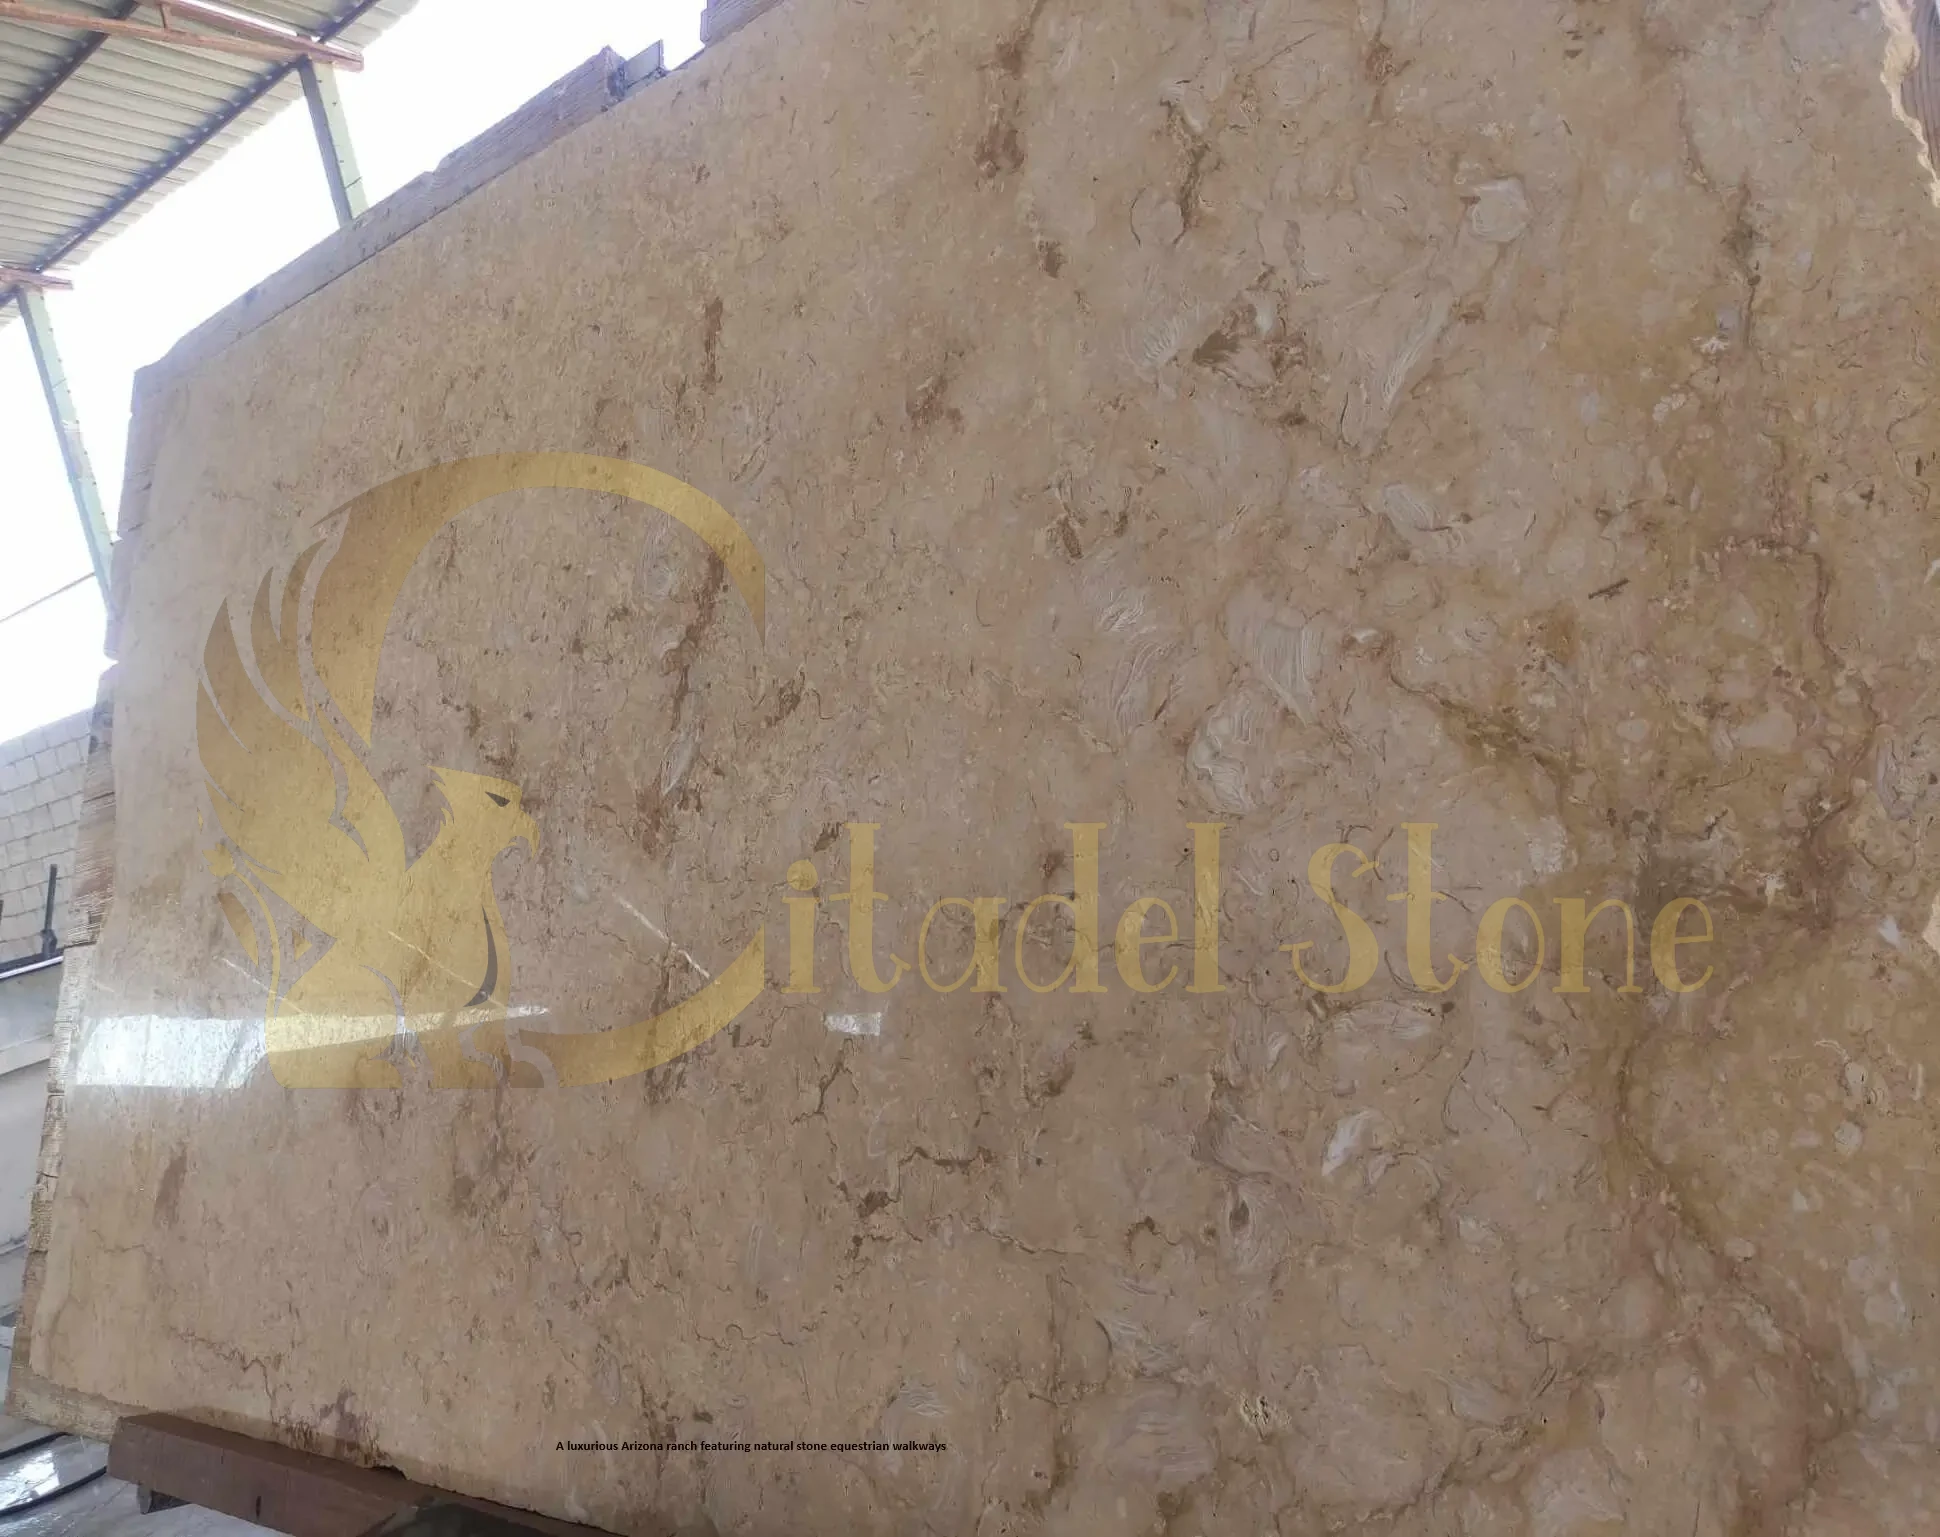
Dense Natural Stone (Granite/Basalt):
Sawn or thermally finished granite and basalt provide natural aesthetics with excellent durability. Minimum 2-inch thickness for equestrian applications. Select granite with absorption under 0.4% per ASTM C97 and Mohs hardness 6-7.
Pros: Unmatched natural beauty, cooler surface temps than concrete (better thermal mass and reflectivity), extremely long lifespan (30+ years), can be resurfaced if worn.
Cons: High cost ($25-50/SF installed), heavy weight complicates handling and shipping, requires experienced installers, variable slip resistance requires testing each batch.
Applications: Entry features, high-visibility barn frontage, luxury estate properties where natural materials match architectural character.
Resin-Bound Aggregate:
UV-stable polyurethane resin mixed with 3-6mm decorative aggregate creates a smooth, porous, dust-free surface. Applied at 15-20mm thickness over prepared base.
Pros: Low dust, smooth appearance, extensive color options, porous (reduces runoff), comfortable for barefoot horses in grooming areas.
Cons: Not suitable for heavy loads (golf carts OK, trailers no), UV degrades binder over 8-12 years requiring reapplication, higher cost ($18-35/SF), limited local installer availability.
Applications: Mounting block surrounds, grooming stalls, covered barn aisles, spectator paths.
Turf Pavers for Overflow Parking:
Plastic grid systems filled with soil and grass provide overflow parking and trailer staging areas that maintain a natural appearance while preventing rutting. Load ratings vary; commercial-grade turf pavers handle occasional trailer traffic when properly installed over engineered base.
Pros: Maintains green space, reduces heat island effect, manages stormwater on-site, cost-effective for seasonal/occasional use areas.
Cons: Requires irrigation and mowing, grass struggles in heavy shade or high traffic, mud forms in winter unless drainage is excellent.
This horse arena footing and paving material comparison shows interlocking concrete pavers as the most versatile choice for equestrian load-bearing applications, with porcelain and stone serving specialized high-visibility zones and resin systems providing dust-free solutions in protected areas.
Animal Welfare: Slip Resistance, Hoof Safety & Surface Temperatures
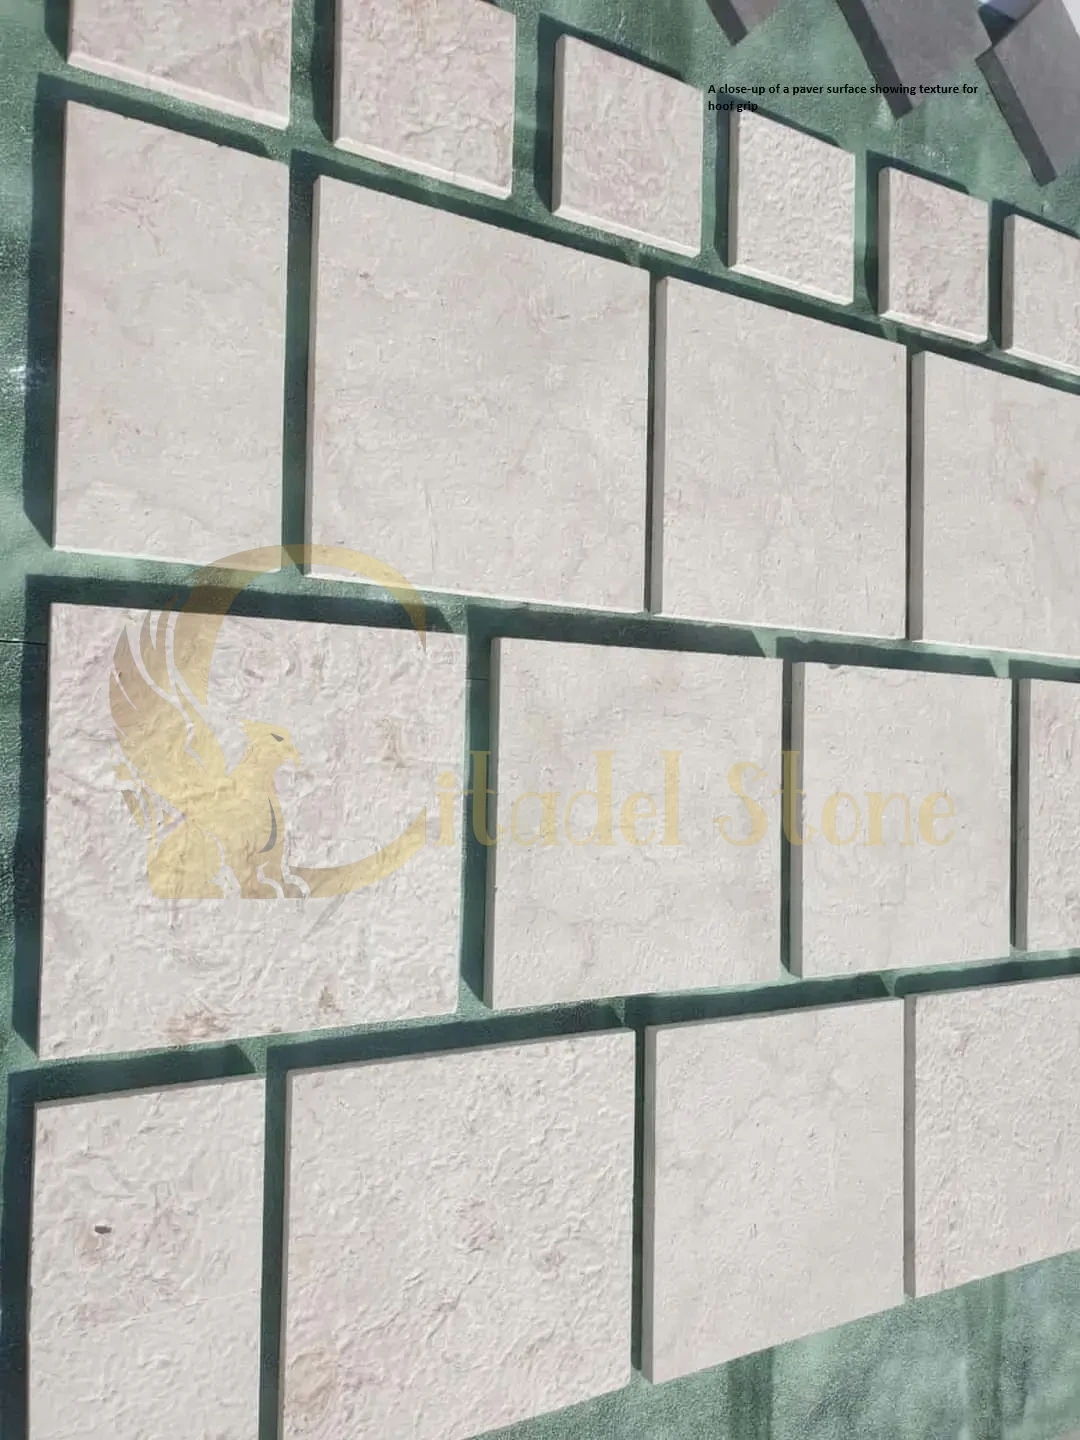
Surface Texture for Slip Prevention:
Horses require textured surfaces that provide traction for shod hooves (steel shoes on wet pavers can slip like ice skates on glass) and barefoot horses whose hoof walls benefit from slight roughness. Specify pavers with matte, textured, or thermally finished surfaces—avoid smooth, polished, or glazed finishes in horse traffic areas.
Test: Pour water on sample pavers and walk across in smooth-soled boots. If you feel uncertain footing, horses will too. Acceptable textures provide grip without being so coarse that hooves catch or shoes accumulate packed material in deep grooves.
Avoiding Sharp Edges:
Chamfered (beveled) paver edges create small gaps where hoof walls or shoes can catch during turning maneuvers. Specify square-edged or minimal-chamfer (under 2mm) pavers for horse traffic areas. Inspect edges during installation—reject units with chips or sharp projections that could cause hoof wall cracks or shoe pulls.
Joint width should be minimal (3-6mm) and completely filled with sand or polymeric sand. Wide joints (8mm+) or joints that lose fill material create hazards where hooves can wedge or trip.
Drainage to Avoid Frozen/Icy Conditions:
At Prescott and Flagstaff elevations, standing water creates ice hazards during winter months. Design 2-3% surface slopes that shed water quickly to eliminate puddling. Consider installing barn aisle and stable walkway pavers with permeable joints that allow meltwater to drain vertically rather than sheet-flowing across surfaces where it refreezes overnight.
In wash rack areas, install below-grade drainage (trench drains or gravel sumps) that captures all water before it can flow onto adjacent circulation paths and freeze.
Surface Temperature Considerations:
Phoenix and Scottsdale summer surface temperatures regularly exceed 140°F on dark pavers—hot enough to cause hoof discomfort and potential soft-tissue damage to frogs and heels during prolonged standing. Mitigation strategies include:
- Light-colored pavers: Tan, buff, light gray reflect more solar radiation and remain 20-30°F cooler than dark colors.
- Shaded zones: Construct loafing sheds, shade structures, or large shade trees over high-traffic standing areas (tiedown pads, mounting blocks).
- Spray cooling: Install misting systems or provide hose access for pre-cooling paved areas before use during peak heat (noon-4pm).
- Timing: Schedule horse activities for early morning or evening hours when surface temps moderate.
Recommended Surface Textures:
For barn aisles and stable walkways: Medium texture (Ra 15-25 microns), similar to broom-finished concrete. Provides traction without being abrasive to bare hooves.
For trailer aprons and loading areas: Medium to coarse texture (Ra 20-35 microns) suitable for shod horses and handlers in work boots, accommodates the grit and debris that accumulates in high-traffic areas.
Joint Profiles:
Maintain consistent joint width (5-6mm typical) completely filled with joint sand. Check joints monthly and top up any low areas immediately—exposed base material or partially filled joints create trip hazards and accelerate edge spalling as pavers rock under load.
Installation Best Practices & Quality Control
Step-by-Step Installation Protocol:
1. Site Grading: Establish final grades with 2% minimum slope away from structures. Remove topsoil and organic material to expose competent subgrade. Proof-roll with loaded truck; remediate soft spots.
2. Subgrade Testing: Verify bearing capacity meets design assumptions. For trailer aprons with high loads, consider plate load testing per ASTM D1196 to confirm subgrade can support design loads without excessive deflection.
3. Geotextile Placement: Roll out woven or non-woven geotextile over subgrade with 18-inch overlaps and no wrinkles. Pin edges to prevent movement during aggregate placement.
4. Base Lifts & Compaction: Place aggregate base in maximum 4-inch lifts (loose measurement). Compact each lift to 95% Standard Proctor before placing next lift. Verify compaction with nuclear density gauge or Proctor testing at random locations—minimum one test per 500 SF in critical areas, one per 1,000 SF in lower-traffic zones.
5. Bedding Layer: Final 2-inch layer of AASHTO #8 or #9 stone (1/8-inch minus) provides smooth bedding for pavers. Screed to consistent thickness; check grade with laser level or string lines.
6. Paver Placement: Install pavers in designated pattern (herringbone, running bond, I-shape as specified) working from straight edge (building foundation, existing paving) toward open areas. Maintain consistent joint width with spacers or tabs on modular pavers. Cut edge pavers with masonry saw—no half-units or pieces smaller than one-third full paver.
7. Edge Restraint: Install edge restraint (concrete beam, steel edging, or buried soldier course) before final compaction to prevent lateral creep. Anchor per manufacturer specs (typically 10-inch spikes every 12-18 inches for steel edging).
8. Jointing: Sweep dry joint sand (coarse concrete sand or polymeric sand) across surface to fill joints. Vibrate or compact pavers with plate compactor (minimum 5,000 lbs centrifugal force) to settle sand and seat pavers into bedding. Repeat sand application and compaction until joints remain full after final pass.
9. Initial Acceptance Tests: Conduct the following before accepting completed installation:
- Plate compaction: Random density tests confirm 95%+ compaction
- Straightness: 10-foot straightedge reveals no gaps exceeding 1/8 inch
- Lippage: Adjacent pavers within 1/8 inch elevation difference
- Joint retention: Probe joints—sand should resist displacement; refill any low joints
- Slope verification: Digital level or laser confirms 2% minimum drainage slopes
- Load test: Drive loaded truck across trailer apron—no visible deflection or shifting
Recommended Acceptance Tolerances:
- Surface elevation: ±3/4 inch from specified grades over 10-foot spans
- Lippage between adjacent pavers: maximum 1/8 inch (1/16 inch preferred)
- Joint width: ±2mm from specified width, consistent across field
- Base compaction: 95% minimum Standard Proctor (98% for heavy commercial applications)
- Drainage: No standing water remaining 30 minutes after saturation test
Mockup Requirements:
For projects exceeding 2,000 SF or involving critical loading (commercial facilities, high-traffic trailer aprons), require a 10×10 foot mockup area demonstrating paver appearance, laying pattern, joint width, edge detail, and subbase cross-section. Conduct load testing on mockup (drive loaded truck across, verify no deflection or settlement). Approve mockup in writing before proceeding with full installation—approved mockup becomes quality standard for project.
Hybrid Solutions: When to Use Concrete Wheel Paths & Paver Fields
Hybrid designs optimize cost, performance, and aesthetics by combining materials suited to specific loading conditions. This approach is common in commercial equestrian facilities where budget constraints meet demanding service requirements.
When Hybrids Make Sense:
Properties with high-frequency trailer traffic (boarding barns loading/unloading 10-20 trailers daily, training facilities hosting clinics) benefit from concrete wheel paths positioned along predictable trailer routes. The concrete handles repeated concentrated loading while surrounding paver fields accommodate overflow parking, pedestrian circulation, and aesthetic requirements.
Design Guidelines:
- Wheel path width: 24-30 inches per wheel path (48-60 inches total for dual paths accommodating typical trailer wheelbase)
- Concrete specification: Minimum 6-inch thickness, 3,000 PSI compressive strength, reinforced with welded wire fabric (WWF 6×6-W1.4×W1.4) or #3 rebar on 18-inch centers each direction
- Path spacing: Position paths to align with typical trailer wheelbases (60-68 inches for tag-alongs, 80-88 inches for goosenecks measured outside tire to outside tire)
- Expansion joints: Every 10-12 feet in concrete paths with 1/2-inch backer rod and polyurethane sealant
Transition Details:
The junction between concrete wheel paths and paver fields requires careful detailing. Set pavers within 1/4 inch of concrete surface elevation (slightly below preferred to prevent trip hazard). Install edge restraint along concrete edges to prevent paver creep. Use polymeric sand in joints adjacent to concrete to resist washout from water sheeting off concrete during rain.
Cost Comparison:
Hybrid system: Concrete wheel paths approximately $8-12/SF, paver fields $12-18/SF depending on specifications. Overall project cost typically 15-25% less than full-coverage high-spec pavers while delivering 90%+ of the durability for heavy-load applications.
Maintenance Advantages:
Concrete wheel paths require minimal maintenance beyond occasional crack sealing. Surrounding paver fields accommodate minor settling or shifting without visible distress—simply remove affected pavers, add bedding sand, and reinstall. If a concrete path fails (significant cracking or settlement), repairs involve saw-cutting, removal, and replacement of entire sections—a disruptive and costly process.
Maintenance & Seasonal Care for Arizona Equestrian Sites
Structured maintenance preserves paver performance and appearance while catching small issues before they require costly repairs.
Daily/Weekly Routine Tasks:
- Sweep or blow off manure, hay, and debris—don’t allow organic matter to accumulate and decompose in joints
- Hose down high-traffic areas (barn aisles, wash racks) to remove urine and prevent salt crystallization
- Inspect for sunken or tilted pavers after heavy equipment use; flag areas for repair
- Check drainage function after rain events—identify any ponding or slow-draining zones
Monthly Maintenance:
- Joint inspection: Walk entire paved area checking for low or missing joint sand. Top up joints immediately—exposed edges accelerate spalling and allow pavers to rock under load, creating trip hazards and accelerating deterioration.
- Weed control: Apply pre-emergent herbicide in spring (safe for livestock) or hand-pull weeds before root systems establish. Polymeric sand joints resist weed growth better than standard sand.
- Stain treatment: Pressure wash (1,500 PSI maximum, 25-degree nozzle, 12-inch standoff) areas showing manure staining or organic buildup. Use pH-neutral cleaner; avoid acids that etch concrete pavers.
- Edge restraint check: Verify edge restraint remains anchored and tight. Re-stake any loose sections before pavers begin shifting.
Quarterly Deep Maintenance:
- Comprehensive pressure wash: Clean entire surface removing accumulated dust, organic film, and mineral deposits. Follow with joint sand top-up where wash pressure displaced sand.
- Settlement monitoring: Use string lines or laser level to check for localized settling in high-traffic zones (trailer turning areas, service vehicle lanes). Mark any depressions exceeding 1/2 inch for repair.
- Drainage system inspection: Clear debris from trench drains, check gravel sumps for sediment accumulation, verify downspouts and gutters aren’t dumping water directly onto paved surfaces (causes erosion and undermining).
Annual Comprehensive Inspection:
- Structural assessment: Remove sample pavers from high-load areas (trailer apron corners where turning occurs, center of service lanes) and inspect bedding layer and base. Base should be dry, compacted, and free of intrusion by subgrade soil. If base shows contamination or loss of compaction, plan for remediation.
- Joint material evaluation: Polymeric sand typically lasts 3-5 years before UV degradation and traffic wear require replacement. Budget for complete joint removal (pressure washing or mechanical extraction) and reapplication.
- Paver condition inventory: Document cracked, chipped, or significantly worn pavers. Order replacements to maintain inventory for repairs.
- Sealer consideration: If using sealed pavers (rare in equestrian applications due to maintenance complexity), evaluate sealer condition and reapply per manufacturer schedule.
Handling Manure and Hay Spills:
Remove solids immediately—don’t allow manure to sit and dry onto pavers where it becomes difficult to clean. Hosing within hours of deposition prevents staining. For dried manure, presoak with water, allow 10-minute dwell time, then scrub with stiff brush and rinse. Enzymatic cleaners designed for stable use accelerate breakdown of organic stains without harsh chemicals that harm plants in drainage areas.
Hay leaves behind tannins and organic acids that can stain light-colored pavers. Sweep up loose hay immediately and hose areas where horses pull hay from feeders or drop flakes during feeding. Consider placing rubber mats under hay feeders in high-spill zones—mats capture debris and can be hosed or shaken out away from paved areas.
Periodic Pressure Wash Guidance:
Pressure washing effectively removes accumulated grime but must be controlled to avoid joint damage. Maximum 1,500-2,000 PSI, use 25-40 degree fan nozzles (never zero-degree pencil jets that blast out joint sand), maintain 12-18 inch standoff distance, and angle spray away from joint lines when possible. After pressure washing, always inspect joints and replenish sand as needed—budget 30-50 pounds of joint sand per 100 SF for post-wash top-up.
Re-leveling Near Arena Edges:
Arena edges where tractors repeatedly turn during maintenance develop localized settlement over time. Annual or biannual re-leveling prevents trip hazards and maintains clean edge appearance. Remove affected pavers, add and compact bedding sand to restore grade, reinstall pavers, verify levelness with straightedge, and refill joints.
Winter Preparation for Higher-Elevation Properties:
Prescott and Flagstaff facilities require winter-specific protocols:
- Pre-winter drainage check: Verify all drainage systems flow freely before freeze onset—frozen standing water creates ice hazards and freeze-thaw damage.
- Snow removal equipment: Use plastic or rubber-edged snow shovels and blades—metal scrapers gouge paver surfaces and damage joints. Rubberized snow blower augers protect pavers better than steel augers.
- Ice melt selection: Use calcium magnesium acetate or sand for traction—avoid sodium chloride (rock salt) and magnesium chloride which damage concrete pavers, kill vegetation, and are harmful to horses if ingested.
- Gutter management: Prevent roof runoff from dumping onto paved areas where it refreezes—extend downspouts to discharge beyond paved surfaces or into underground drainage.
Maintenance Schedule Summary:
- Daily: Sweep debris, hose high-traffic zones, visual inspection
- Weekly: Thorough cleaning, check for immediate repairs needed
- Monthly: Joint top-up, weed control, stain treatment, edge check
- Quarterly: Pressure wash, settlement monitoring, drainage inspection
- Annually: Structural assessment, joint material evaluation, sealer review, comprehensive repairs
Document all maintenance in a log noting dates, tasks performed, materials used, and any issues identified. This record helps establish patterns (areas requiring frequent joint replenishment may indicate base problems) and supports warranty claims if premature failures occur.
Costs, Value & Lifecycle Comparison
Installed Cost Ranges (estimates—obtain local quotes):
Interlocking Concrete Pavers:
- Light-duty (60mm, stable walkways): $12-18/SF installed
- Heavy-duty (80mm, trailer aprons): $16-24/SF installed
- Premium patterns/colors: add $2-4/SF
Porcelain Pavers:
- Pedestrian-rated (20mm): $22-32/SF installed
- Heavy-duty (30mm): $28-38/SF installed
Natural Stone (Granite/Basalt):
- Standard thickness (2-inch): $25-40/SF installed
- Premium selections/finishes: $35-60/SF installed
Resin-Bound Aggregate:
- Standard residential-grade: $18-28/SF installed
- Commercial-grade for light vehicles: $24-35/SF installed
Poured Concrete (for comparison):
- Standard 4-inch slab: $6-10/SF
- 6-inch reinforced (trailer loads): $10-16/SF
- Decorative finishes: add $3-8/SF
Stabilized Crushed Stone:
- Polymer-stabilized systems: $8-15/SF installed
Cost factors affecting final pricing: site accessibility (equipment access, distance from staging), quantity (economies of scale above 1,000 SF), subgrade conditions (poor soils requiring remediation add significantly), edge complexity, pattern intricacy, and local labor rates (Phoenix/Tucson typically lower than Scottsdale/Flagstaff).
Lifecycle Cost Analysis:
Evaluate total cost of ownership over 20-year service life rather than initial installation cost alone.
Concrete Pavers (20-year lifecycle):
- Initial install: $18/SF × 1,000 SF = $18,000
- Joint sand replacement (years 5, 10, 15): $500 each = $1,500
- Spot repairs/paver replacement (5% of area over 20 years): $1,000
- Pressure washing (quarterly, DIY): minimal cost
- Total 20-year cost: ~$20,500 or $1.03/SF/year
Poured Concrete (20-year lifecycle):
- Initial install: $12/SF × 1,000 SF = $12,000
- Crack sealing (years 3, 7, 12, 17): $300 each = $1,200
- Surface degradation repair (years 10, 15): $1,500 each = $3,000
- Replacement sections (10% of area fails, requires saw-cutting and repour): $2,000
- Total 20-year cost: ~$18,200 or $0.91/SF/year
Decomposed Granite (requires frequent maintenance):
- Initial install: $4/SF × 1,000 SF = $4,000
- Annual replenishment/grading (material + labor): $800/year × 20 = $16,000
- Dust control treatments (quarterly): $200/year × 20 = $4,000
- Erosion repairs after monsoons: $500/year × 20 = $10,000
- Total 20-year cost: ~$34,000 or $1.70/SF/year
The analysis shows properly installed pavers deliver lower lifecycle costs than decomposed granite despite higher initial investment, and competitive lifecycle costs with concrete while offering superior repairability and flexibility.
Downtime Costs for Arenas:
Commercial boarding facilities and training operations lose revenue during facility repairs. Pavers enable spot repairs without disrupting adjacent areas—remove and re-level 50 SF in a trailer apron without closing the entire facility. Concrete repairs require saw-cutting, demo, form construction, pouring, and 7-day cure time before use—during which the affected area remains unusable. For operations generating $500-1,500 per day in boarding and training revenue, minimizing downtime justifies paver premiums over concrete.
Replacement and Repair Strategies:
Maintain a 5% inventory of spare pavers matching original installation. When individual units crack or chip (dropped tools, trailer accidents), remove and replace in minutes without specialized equipment. Joint sand replenishment costs $0.30-0.50/SF every 3-5 years and requires only a broom, sand, and plate compactor.
For larger repairs (settled areas, base failures), remove affected pavers, excavate to base layer, add and compact material to restore grade, reinstall pavers. A 100 SF repair typically costs $800-1,500 depending on depth of excavation required—compare to $2,000-3,500 for equivalent concrete saw-cutting, removal, and replacement.
Permits, Water Runoff & County Considerations in Arizona
Likely Permit Triggers:
Most Arizona counties require building permits for adding impervious surface area exceeding specific thresholds (commonly 200-500 SF depending on jurisdiction). Equestrian paving projects often trigger permits through:
- Total impervious area: Trailer aprons, service lanes, and barn walkways combined may exceed thresholds
- Stormwater management: Projects adding runoff may require detention/retention facilities or demonstrate low-impact development strategies
- Septic system proximity: Paving within 50-100 feet of septic drain fields may require health department review
- Grading and drainage: Cuts or fills exceeding 12 inches often trigger grading permits
Maricopa County (Phoenix, Scottsdale, Mesa, Chandler, Gilbert areas):
Maricopa County Planning & Development regulates unincorporated areas. Most incorporated cities (Phoenix, Scottsdale, etc.) maintain their own permitting—verify jurisdiction before applying.
For rural/unincorporated areas, consult Maricopa County Planning & Development regarding impervious surface additions. County websites provide guidance on when permits are required. (Verify current requirements at maricopa.gov/planning — site reviewed November 2024.) Projects in floodplains or near washes face additional restrictions.
Pima County (Tucson area):
Pima County Development Services oversees building permits in unincorporated areas. Similar thresholds apply—significant impervious surface additions typically require permits demonstrating adequate drainage. Properties with on-site septic systems must maintain setbacks from drain fields. (Verify requirements at pima.gov/development — site reviewed November 2024.)
Coconino County (Flagstaff, northern Arizona):
Higher-elevation properties face additional considerations: frost depth requirements, snow load considerations for covered structures, and drainage design accounting for spring snowmelt. Coconino County Community Development provides guidance. (Verify at coconino.az.gov/development — unverified as of November 2024; confirm with county planning before proceeding.)
Yavapai County (Prescott area):
Rural equestrian properties in Yavapai County typically operate under less restrictive permitting than urban counties, but significant improvements still require building permits. Contact Yavapai County Development Services for thresholds and requirements. (Unverified as of November 2024—confirm with county planning.)
Water Runoff Management:
Arizona’s intense but infrequent monsoon rainfall creates management challenges. A 2-inch rain in 30 minutes (common July-September) generates substantial runoff from hardscaped areas. Design considerations:
- Low-Impact Development (LID): Where feasible, use permeable pavers that infiltrate runoff on-site, reducing need for retention basins
- Vegetated swales: Direct runoff from impervious paving into vegetated swales (depression planted with native grasses) that slow, filter, and infiltrate water
- Retention basins: Larger projects may require on-site retention facilities sized per county stormwater ordinances
- Off-site discharge: If directing runoff off-property, verify neighbor agreements and county regulations on concentrated discharge
Septic System Considerations:
Properties on septic systems must avoid paving over or near drain fields. Concentrated runoff directed toward drain fields can exceed soil absorption capacity, causing system failure. Maintain minimum setbacks (typically 50-100 feet, verify with county health department) and design drainage away from septic components.
Professional Engineering Recommendation:
This guide provides general technical information but does not constitute professional engineering advice. For projects involving significant loading (trailer aprons for commercial operations, heavy service vehicles), structural failures with liability implications (areas where accidents could cause injury), or sites with challenging soils or drainage, retain a licensed civil or geotechnical engineer to review and stamp design drawings. Engineer involvement typically adds $1,500-4,000 to project costs but provides critical validation that designs meet site-specific conditions and applicable codes.
County planning departments often require engineer-stamped drawings for commercial equestrian facilities, projects exceeding certain square footages, or installations near sensitive areas (floodplains, septic systems, property boundaries with drainage implications).
City-by-City & Regional Notes
Arizona’s geographic and climatic diversity creates location-specific considerations for equestrian paving projects.
Phoenix
Phoenix’s extreme summer heat (110°F+ air temperature, 140-150°F surface temperature) drives material selection and timing strategies. Specify light-colored pavers (tan, buff, light gray) that remain 25-30°F cooler than dark options—critical for horse comfort on trailer aprons and tiedown pads where animals stand during loading. Surface temperatures above 130°F can cause hoof discomfort and potential soft-tissue damage during prolonged exposure.
Dust control becomes critical during spring winds (March-May) when prevailing westerlies carry fine dust from surrounding desert. Estate property hardscaping AZ designs in Phoenix benefit from windbreak plantings (mesquite, palo verde) upwind of arenas combined with perimeter paving that prevents loose soil from migrating into riding areas.
Contractor tip: Schedule installations October through April. Summer concrete and sand reaches 110-120°F by mid-morning, making installation physically demanding and accelerating setting material cure times that complicate proper installation. Early morning starts (5-6 AM) allow several hours of work before extreme heat.
Phoenix permitting through Planning & Development Department typically processes straightforward residential equestrian improvements within 2-3 weeks. Commercial boarding facilities face more extensive review. (City of Phoenix Planning & Development, phoenix.gov/pdd, accessed November 2024.)
Tucson
Tucson’s combination of fine dust and intense monsoon rains (July-September) creates erosion and washout challenges for equestrian infrastructure. Dust control paving for stables using polymeric sand joints or resin-bound perimeter paths significantly improves air quality around barns where desert dust would otherwise infiltrate feed rooms and living quarters.
Monsoon downpours (1-2 inches in 30 minutes possible) demand robust drainage design. Trailer aprons and service lanes require well-engineered slopes (minimum 2%, consider 3% in heavy-rain zones) directing water to vegetated swales or retention basins. Undersized drainage causes washout that undermines paver edges and erodes base material—common failure mode in Tucson equestrian properties.
Resilient joint systems: Specify polymeric sand or polymer-modified grout in joints rather than standard mason sand, which washes out during monsoons requiring frequent replacement. The premium for polymeric sand ($2-3/SF additional) pays back quickly in reduced maintenance.
Client tip: Tucson Horse Property Owners face unique wind patterns—afternoon winds from the southeast carry dust from undeveloped desert areas. Position arenas and high-traffic zones upwind of prevailing dust sources where possible, using buildings and vegetation as barriers.
Pima County Development Services regulates unincorporated areas; City of Tucson Development Services handles within city limits. (tucsonaz.gov/departments/planning-development-services, accessed November 2024.)
Prescott
Prescott’s mile-high elevation (5,400 feet) introduces freeze-thaw cycles absent in valley locations. Winter temperatures drop to 20°F at night, rise to 50°F during daytime—perfect conditions for freeze-thaw damage in materials with high absorption rates. Specify pavers with absorption under 3% per ASTM C140 (concrete pavers) or ISO 10545-3 (porcelain). Natural stone must demonstrate freeze-thaw durability per ASTM C1026 with zero deterioration after 300 cycles.
Frost protection: While Prescott rarely experiences deep frost penetration in most soil types, north-facing areas and shaded locations can develop frost lenses in fine-grained soils. Use open-graded crushed stone base materials (AASHTO #57 stone with fines content under 10%) that drain freely and resist frost heave. Proper base drainage more effectively prevents frost damage than simply increasing base depth.
Paver class for elevation: Specify heavy-duty 80mm pavers even for areas that might accept 60mm in Phoenix—the additional thickness provides insurance against freeze-thaw stresses that can crack thinner units.
Contractor tip: Schedule installations May through October before winter onset. Spring installations (March-April) risk working in frozen or saturated subgrades that don’t compact properly. Fall installations (September-October) must be completed with adequate time for settling before winter freeze cycles.
Yavapai County Development Services: (yavapaiaz.gov/development — unverified as of November 2024; confirm permit requirements with county planning.)
Flagstaff
Flagstaff’s high-elevation environment (7,000 feet) combines intense UV exposure with severe winter conditions—100+ inches annual snowfall, prolonged sub-freezing temperatures (December-February), and deep freeze-thaw cycling. These conditions demand the most robust specifications in Arizona.
Winter-proofing requirements:
- Pavers: Absorption under 2% mandatory (concrete pavers with integral waterproofing or porcelain). Standard 5% absorption concrete fails within 5-10 years under Flagstaff freeze-thaw.
- Base: Minimum 8-inch depth of clean crushed stone (fines under 10%) to ensure drainage and resist frost heave. Consider deeper base (10-12 inches) in fine-grained subgrades prone to frost action.
- Grout: Polymer-modified flexible grout rated for freeze-thaw environments—standard polymeric sand may crack under thermal cycling from 10°F to 90°F.
Snow and ice drainage: Design 3% minimum slopes (steeper than typical 2%) to shed snowmelt quickly before overnight refreezing creates ice sheets. Install trench drains at low points to capture meltwater. Avoid areas where roof snow-shedding dumps loads onto paved surfaces—either design for snow loads or position paving away from eave lines.
Snow removal: Use plastic or rubberized snow removal equipment—metal blades and steel augers damage frozen pavers and joints. Apply calcium magnesium acetate ice melt (not rock salt or magnesium chloride which damage pavers and harm horses).
Contractor tip: Installation window is brief—late May through early September only. Earlier attempts encounter frozen subgrades; later installations risk winter onset before proper settling and consolidation. Budget for possible weather delays that extend schedules.
Coconino County Community Development: (coconino.az.gov/development — unverified as of November 2024; confirm freeze-thaw specifications and permit requirements with county engineering.)
Scottsdale
Scottsdale’s luxury estate market demands aesthetics equal to functionality. Estate property hardscaping AZ in Scottsdale equestrian properties often incorporates natural stone pavers, custom patterns, integrated lighting, and landscape architecture that complements high-end residential design—while still meeting load-bearing requirements for trailer aprons and service vehicles.
Aesthetic choices with heavy-load capacity:
- Natural stone (granite, basalt) in earth tones matches Scottsdale’s desert contemporary architecture while providing load-bearing capacity when installed over proper subbase
- Porcelain pavers in large-format sizes (24×24, 24×48) deliver sleek modern appearance with superior stain resistance for high-visibility barn entrances
- Custom laying patterns (circular, radial, inset borders) add visual interest without compromising structural performance
Design review and HOAs: Many Scottsdale equestrian properties lie within master-planned communities, luxury subdivisions, or county islands with architectural controls. Submit material samples, site plans, and elevation drawings to architectural review committees early in design process—approval timelines range 30-90 days. Some communities restrict certain paver colors or require landscape screening of utilitarian areas (manure storage, equipment yards).
Contractor tip: Scottsdale clients expect premium workmanship—budget for experienced installers with portfolios demonstrating luxury equestrian projects. Shortcuts that might pass in rural installations will be rejected during final inspections. Plan for mockup approval process and owner walk-throughs at multiple milestones.
City of Scottsdale Development Services (scottsdaleaz.gov/codes, accessed November 2024) requires permits for most equestrian hardscape projects. Luxury properties often work with design-build firms that handle permitting as package services.
Mesa
Mesa’s suburban equestrian market focuses on cost-effective, functional solutions for family horse properties and small boarding operations. Quick-install options serve clients with budget constraints who need reliable performance without luxury finishes.
Suburban equestrian optimization:
- Standard interlocking concrete pavers in neutral colors (gray, tan) provide proven durability at $14-18/SF installed—25-35% less than Scottsdale custom work
- Simplified patterns (90-degree herringbone, running bond) reduce installation time and labor costs without sacrificing performance
- Focus investment on high-load areas (trailer apron gets 80mm pavers with 8-inch base) while using 60mm pavers with 6-inch base for walkways and secondary zones
Timeline tips: Mesa’s competitive contractor market means shorter lead times than Scottsdale. Standard residential equestrian projects (500-1,000 SF trailer apron plus walkways) typically install in 3-5 days with experienced crews. Schedule installations during cooler months (October-March) for installer comfort and optimal material performance.
Contractor tip: Mesa has numerous contractors serving the equestrian market—request multiple bids and check references specific to horse properties. Some residential paving contractors lack experience with trailer load requirements; verify bidder understands 80mm thickness and subbase specifications for heavy-load areas.
City of Mesa Development Services (mesaaz.gov/business/development-services, accessed November 2024) processes residential equestrian permits efficiently—typically 10-15 business days for straightforward projects.
Chandler
Chandler’s suburban stable layouts in planned communities require attention to HOA requirements, neighbor considerations, and integrated design that balances equestrian function with residential aesthetics.
HOA considerations in equestrian neighborhoods:
Many Chandler horse properties lie within equestrian-zoned subdivisions with specific covenants governing barn placement, arena size/location, manure management, and hardscape materials. Review CCRs (Covenants, Conditions & Restrictions) before designing paving projects—some HOAs pre-approve certain paver styles/colors while prohibiting others. Common restrictions include:
- Visible areas must use “earth-tone” pavers (typically tan, brown, gray—no bright colors)
- Trailer parking may be restricted to specific locations or require screening landscaping
- Drainage must remain on-property or route to approved common drainage systems
- Arena lighting restrictions protect neighbors from light pollution
Stable layout tips: Efficient barn layouts in Chandler’s 1-2 acre horse properties position trailer aprons near property frontage for easy access, service lanes along side-yard property lines (maintaining required setbacks), and arenas in rear yards. Paved circulation connecting these zones reduces dirt track-through to residential living spaces—important in homes where equestrian and family living areas integrate closely.
Contractor tip: Choose installers familiar with Chandler’s HOA approval processes who can provide material samples and site plans in format HOAs expect. Some contractors maintain pre-existing relationships with common Chandler equestrian HOAs that accelerate approval.
City of Chandler Development Services (chandleraz.gov/government/departments/development-services, accessed November 2024) coordinates with HOAs on permit review. Expect 15-25 business days for permitting when HOA approval required.
Gilbert
Gilbert’s family-estate horse properties balance equestrian function with suburban lifestyle—properties host horses for family recreation while maintaining low-maintenance landscapes that don’t consume every weekend.
Family-estate design priorities:
- Low-maintenance corridors: Paved service lanes and stable walkways reduce the constant grading, dust control, and weed management that dirt/DG paths require—critical for families managing properties without full-time staff
- Safety for young handlers: Even, well-drained paving eliminates trip hazards, mud hazards, and slick spots that endanger children learning horsemanship
- Visual integration: Pavers in colors/styles matching residential hardscape (pool decks, patios, driveways) create cohesive estate appearance rather than utilitarian barnyard aesthetic
Multi-use space optimization: Gilbert families often design equestrian areas that adapt for non-horse events—birthday parties, family gatherings. Trailer aprons with decorative paver patterns and quality drainage double as event parking; arena perimeter viewing areas serve as outdoor entertaining spaces. This dual-function thinking justifies investment in higher-quality materials and integrated landscape design.
Contractor tip: Gilbert clients appreciate contractors who understand family-lifestyle priorities—finish quality matters as much as load-bearing specs, timelines accommodate family schedules rather than disrupting daily routines, and work areas remain safe when children are present.
Town of Gilbert Development Services provides efficient permit processing. Heritage District (downtown Gilbert) has enhanced standards; verify if property falls within special planning areas. (gilbertaz.gov/departments/development-services, accessed November 2024.)
Procurement & Spec Language (Copy-Paste Ready)
Use these specification clauses in Requests for Proposal (RFPs), purchase orders, or contractor agreements. Modify with engineer input for site-specific requirements.
SECTION: EQUESTRIAN PAVER INSTALLATION SPECIFICATIONS
1. Minimum Paver Class & Thickness:
For trailer aprons and service vehicle lanes: 80mm (3.1-inch) minimum thickness interlocking concrete pavers conforming to ASTM C936 with minimum 8,000 PSI compressive strength and maximum 5% absorption per ASTM C140. Pavers shall be manufactured with integral color (not surface-applied dye) to minimize appearance of chips or wear.
For stable walkways, barn aisles, and pedestrian paths: 60mm (2.4-inch) minimum thickness conforming to same standards.
For freeze-thaw environments (Prescott, Flagstaff): Maximum 3% absorption for concrete pavers; porcelain pavers meeting ISO 10545-3 absorption requirements accepted.
2. Base Compaction & Testing:
Aggregate base shall be placed in maximum 4-inch loose lifts of AASHTO #57 crushed angular stone for lower layers, AASHTO #8 or #9 stone for upper bedding layer. Compact each lift to 95% Standard Proctor Density per ASTM D698 (this is an example target—licensed civil or geotechnical engineer shall verify and approve final compaction specifications for project-specific conditions).
Base depth: Minimum 6 inches compacted depth for trailer aprons (8 inches preferred for commercial facilities or heavy trailers exceeding 14,000 lbs loaded weight); minimum 4 inches for walkways and light-duty areas.
Verification: Nuclear density gauge testing or plate load testing per ASTM D1196 at minimum one location per 500 square feet in trailer aprons, one per 1,000 square feet in walkways. Test results shall document achieved density and be submitted to owner before paver installation proceeds.
3. Geotextile Requirement:
Install woven or non-woven geotextile fabric (minimum 4 oz/sq yd for separation, 8 oz/sq yd for stabilization under heavy loads) between prepared subgrade and aggregate base. Overlap seams minimum 18 inches. Geotextile shall be pinned or stapled to prevent displacement during base placement.
4. Jointing System Specification:
Joint width: 5-6mm (3/16 to 1/4 inch) consistent throughout field. Joint fill material:
- Standard duty (walkways, barn aisles): Coarse concrete sand or polymeric sand suitable for equestrian applications
- Heavy duty (trailer aprons, high-traffic): Polymeric sand minimum; polymer-modified cementitious grout for commercial facilities with daily heavy traffic
- Freeze-thaw environments: Flexible polymer-modified grout rated for temperature cycling -20°F to +110°F
Joints shall be filled completely and compacted. Any joints showing loss of material within 30 days of installation shall be refilled at contractor expense.
5. Edge Restraint:
Install rigid edge restraint (concrete edge beam minimum 4×12 inches, or commercial aluminum/steel paver edging system) along all perimeter edges and adjacent to soft materials (lawn, planting beds, arena footing). Anchor per manufacturer specifications—typically 10-inch galvanized spikes every 12-18 inches for metal edging; reinforced concrete edge beams with #3 rebar.
6. Mockup Panel Requirement:
Prior to full installation, contractor shall construct minimum 10×10 foot mockup area demonstrating specified paver product, laying pattern, joint width, edge detail, and complete subbase cross-section (excavate viewing window showing geotextile, base layers, and bedding). Owner reserves right to conduct load testing on mockup (drive loaded vehicle across, verify no deflection or settlement) before approving full installation. Approved mockup becomes quality standard for project; contractor shall match or exceed mockup quality throughout.
Why choose our Arizona pavers — Citadel Stone guidance for local specifications
Citadel Stone – top pavers are presented here as hypothetical options to consider when specifying natural stone in Arizona’s varied urban and desert settings. The short notes below would serve as conditional guidance only — intended to help specifiers and designers match material selection, finishes and supply options to local climate and site demands across six Arizona cities.
Glendale
Glendale’s desert heat, strong solar irradiance and occasional winter cool snaps (freeze is rare) would shape stone choice for Glendale. Travertine is a popular aesthetic here for its warm tones, but for desert use we would suggest dense, low-porosity travertine or filled/treated variants and a honed or lightly brushed finish to reduce slipperiness and surface heat. Typical thickness guidance might be 20–30 mm for pedestrian terraces and 30–40 mm for light vehicle areas. For Glendale schemes, our pavers could be evaluated with sample tiles, technical datasheets and specification assistance; palletised delivery could be offered where helpful.
Tempe
Tempe’s urban core, irrigation-rich landscapes and strong UV exposure would inform a conservative approach to stone selection for Tempe. Sandstone or certain dense limestones are often considered for a tactile, natural look; choose durable, low-water-absorption faces and a textured or brushed surface to aid traction around pools and shaded plazas. As a general guideline, specify 20–30 mm for patios and pedestrian zones and 30–40 mm where occasional vehicular access is likely. Citadel Stone – top pavers could be supplied with sample boards, CAD details and specification support to assist tender documentation.
Peoria
Peoria’s suburban mix and proximity to reservoir environments suggest attention to wind-blown dust, irrigation salts and intense sun when specifying for Peoria. Quartzite or denser flagstones are sometimes favoured for their abrasion resistance; select low-porosity material and a honed or finely textured finish to balance slip performance and maintenance. Typical thicknesses to consider would be 20–30 mm for footpaths and 30–40 mm for light vehicle use. For Peoria projects, our pavers could be supported by product datasheets, sample packs and logistics options such as palletised delivery on request.
Surprise
Surprise’s rapidly developing neighbourhoods and the local diurnal temperature range would be relevant for Surprise specifications. A popular choice can be calibrated limestone with stable mineralogy, specified with a textured or sandblasted finish to limit glare and improve grip; because freeze is rare but occasional, low-porosity choices are recommended. Thickness guidance of 20–30 mm for entertaining and lounging areas, and 30–40 mm for occasional vehicle passages, would be typical. We could provide Citadel Stone – top pavers sample sets, technical performance data and specification-writing assistance where required.
San Tan Valley
San Tan Valley’s open-desert context, high summer temperatures and dust loading would influence material selection for San Tan Valley. Native-look sandstones or heavily textured limestones can be appealing, but the priority would be low water absorption and UV-stable pigmentation; a textured or cleft finish could be recommended to reduce surface heating and improve underfoot friction. As general guidance, use 20–30 mm for patios and 30–40 mm where light vehicle traffic is anticipated. For San Tan Valley, our pavers could be offered with specification notes, sample swatches and palletised supply options to assist site planning.
Yuma
Yuma’s extreme summer heat, intense insolation and arid conditions would be the dominant factors when specifying for Yuma. Granite or dense basaltic options are sometimes selected where thermal stability and low-porosity performance are priorities; choose finishes such as honed or textured rather than highly polished to reduce glare and surface temperature. Standard thickness guidance would remain 20–30 mm for pedestrian zones and 30–40 mm where light vehicle loads apply. For Yuma, our pavers could be previewed with sample boards, full technical datasheets and specification support; palletised delivery could be proposed for logistical efficiency.
Material selection tips (conditional guidance)
When specifying Citadel Stone – top pavers across the Phoenix metropolitan area and outlying deserts, consider three practical conservative choices. First, prioritise low-porosity materials where occasional irrigation, dust and rare freeze-thaw cycles could affect long-term appearance; second, pick finishes — honed, textured or brushed — that reduce glare and enhance slip resistance in poolside or shaded locations; third, size thickness to anticipated loads with 20–30 mm for pedestrian use and 30–40 mm for light vehicular access as a starting point. In all cases, request abrasion ratings, water absorption figures and UV stability data from technical datasheets to compare options objectively.
Specification support and supply options (what could be provided)
Specifiers commonly benefit from seeing physical samples, colour-matched boards and datasheets before final selection. Citadel Stone – top pavers could be supplied alongside sample packs, CAD details, specification templates and recommendations for jointing and bedding materials tailored to local rainfall intensity and maintenance regimes. We could also propose palletised delivery, packing variations and on-request lead-time guidance to fit site access and program constraints. Specification assistance — including suggested fixings, tolerances and construction notes — could be offered to help integrate material choices into tender documents.
Upgrade Your Restaurant Patio: Find Non-Slip, Easy-Clean Pavers for Commercial Hospitality!