Why Limestone Works for Arizona Living Spaces
Limestone is a sedimentary stone with moderate density that provides excellent durability for residential living and family rooms when properly installed and maintained. The stone’s natural thermal mass absorbs heat slowly during the day and releases it gradually as temperatures drop—a valuable property in Arizona where indoor-outdoor temperature differentials can exceed 40°F between midday and evening. This thermal stability helps moderate indoor climates and creates comfortable barefoot surfaces that stay cooler than carpet or wood during summer months.
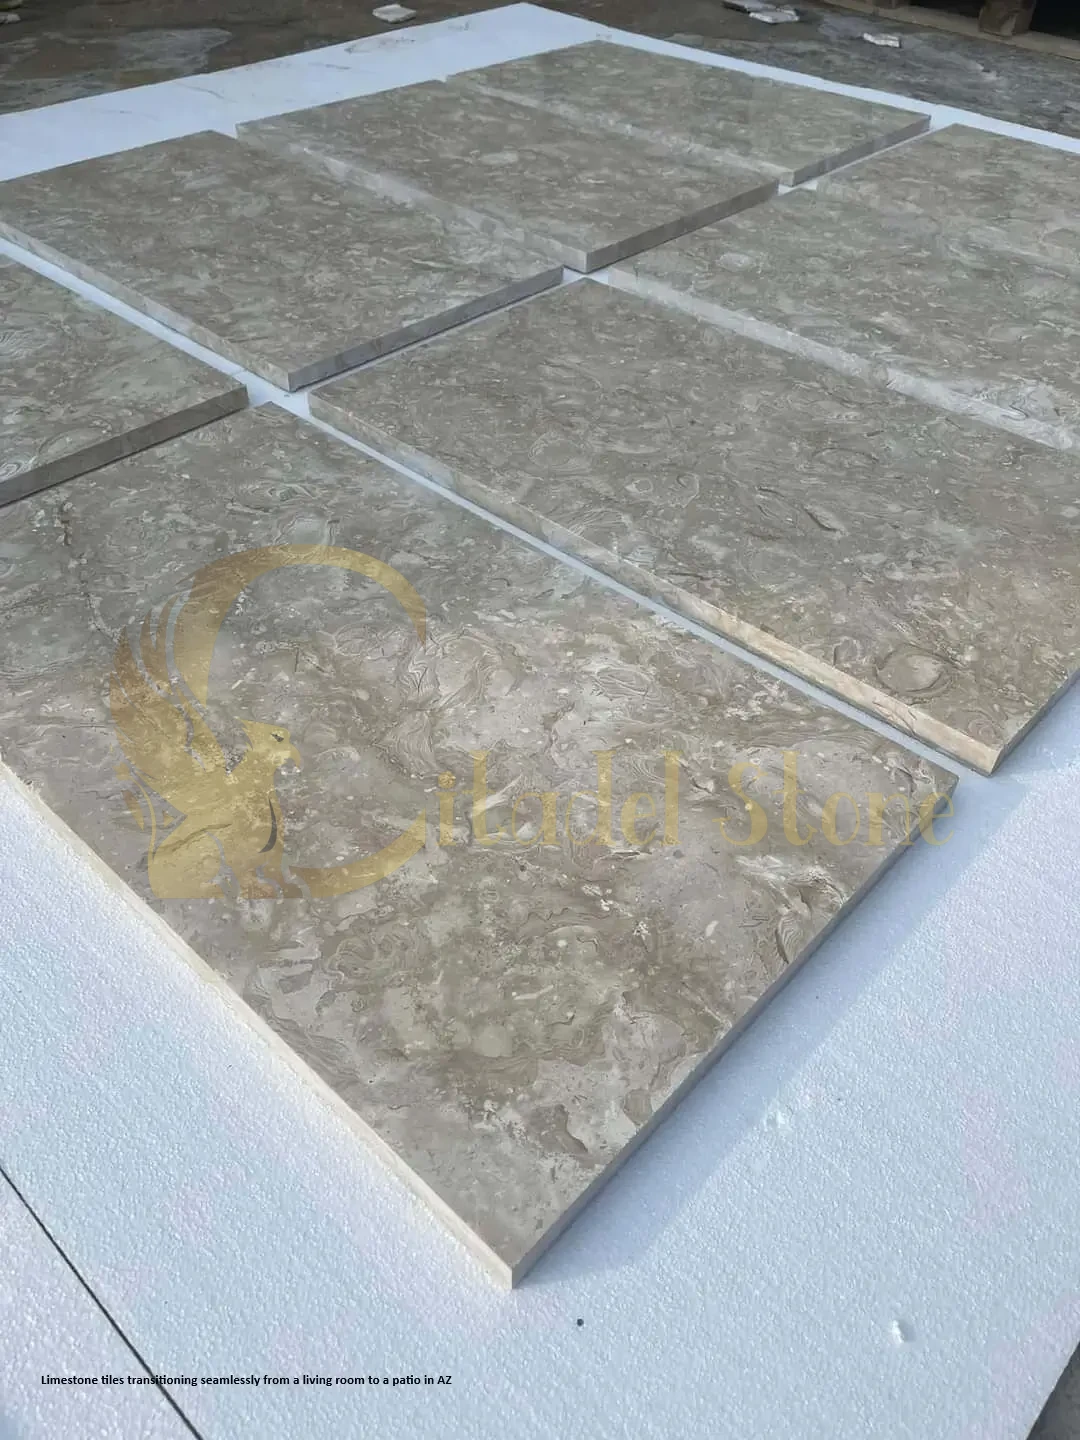
Available finishes significantly affect both appearance and function. Honed limestone delivers smooth, matte surfaces ideal for contemporary interiors, showing minimal glare even in sun-filled Arizona rooms with large windows and sliding glass doors. Brushed finishes add subtle texture that hides minor scratches and provides slight slip resistance without the rough feel of heavily tumbled stone. Filled and honed treatments smooth natural voids while preserving limestone’s organic character, creating refined surfaces suitable for upscale installations.
Limestone’s natural color palette—ranging from warm beiges and tans to cool grays and blue-tones—coordinates effortlessly with Arizona architecture. Lighter shades reflect natural light, making spaces feel larger and reducing heat absorption in south and west-facing rooms. Mid-tone grays suit modern desert aesthetics and hide dust between cleanings better than very light or very dark stones.
Compared to other flooring options, limestone offers distinct advantages for Arizona living spaces. Unlike wood that contracts during dry seasons and expands during monsoons, limestone remains dimensionally stable. Unlike carpet that traps dust, allergens, and pet dander—significant concerns in Arizona’s arid, dusty environment—limestone wipes clean easily and doesn’t harbor irritants. Compared to porcelain tile, limestone provides authentic natural variation and warmth, though it requires more maintenance and sealing. The stone’s moderate hardness allows for professional refinishing if surfaces become worn or etched over decades, extending functional life beyond most synthetic alternatives.
Design Ideas & Layout Strategies
Large-format honed limestone tiles create sleek, contemporary living rooms with minimal grout lines and expansive visual flow. Tiles measuring 24×24 inches or 18×36 inches suit modern open-concept spaces, creating clean horizontal planes that emphasize architectural volumes. For living room limestone tile design Phoenix homes favor, pair large-format light gray or warm beige limestone with white oak furniture, floor-to-ceiling windows, and minimalist décor for sophisticated desert modern aesthetics that maximize natural light.
Warm buff and cream limestone tiles in medium formats (12×12 or 16×16 inches) deliver traditional comfort perfect for family rooms. These inviting tones coordinate with leather furniture, wood entertainment centers, and earth-tone textiles common in Southwestern and transitional Arizona homes. The slightly smaller scale creates subtle visual interest through grout line patterns without overwhelming relaxed gathering spaces.
Mixed-format modular patterns combine multiple tile sizes (typically three to four dimensions like 8×8, 8×16, 16×16, and 16×24 inches) in repeating layouts that add visual complexity to large living spaces. These patterns work particularly well in great rooms and open-plan areas where uniform tile fields might feel monotonous. The varied scale creates rhythm and movement while maintaining the clean, natural aesthetic limestone provides.
Consider border and feature insets to define zones within open living areas. A 12-inch border in contrasting limestone shade or complementary stone delineates seating areas from circulation paths. Decorative medallions or compass roses in foyer-adjacent living rooms create focal points and architectural interest. For homes with formal living and family rooms, use consistent limestone throughout but vary patterns—straight-lay in the formal space and diagonal or modular in the casual room—to differentiate functions while maintaining material continuity.
Pair limestone floors with appropriate furnishings and textiles for balanced interiors. Area rugs in wool or natural fibers add warmth, define conversation areas, and protect high-traffic paths from wear. Choose rug sizes that allow 12–24 inches of exposed limestone border around perimeters—this frames rugs attractively while showcasing your flooring investment. Upholstered furniture with felt or soft plastic glides prevents scratching when pieces are moved. Wood and metal furniture complements limestone’s natural character better than heavily contemporary acrylic or glass pieces that may appear cold against stone floors.
For transitions between limestone living areas and adjacent spaces, use coordinating materials that maintain visual flow. Metal or stone transition strips between limestone and wood hallways provide clean delineation and protect tile edges from chipping. Transitions to carpeted bedrooms work best with low-profile reducers that create gentle slopes rather than abrupt steps. Match baseboard materials and heights throughout connected spaces—painted wood baseboards in 4–6 inch heights or limestone base tiles create finished edges that protect walls from furniture contact.
Choose limestone undertones that harmonize with Arizona interior palettes. Warm beige and tan limestone coordinate with traditional stucco walls, terra-cotta accents, and exposed wood beams common in territorial and Spanish Colonial homes. Cool gray limestone suits contemporary interiors with concrete or smooth plaster walls, stainless appliances, and minimalist color schemes. For adobe-style homes, select limestone with subtle pink or gold undertones that echo traditional earthen walls without literal matching.
Tile Size, Finish & Thickness Recommendations
Tile size selection balances aesthetics, installation complexity, and practical performance. For living rooms and family rooms, popular sizes include:
12×24-inch planks create contemporary linear patterns with directional flow that can make rooms appear longer or wider depending on orientation. These install efficiently with 1/8-inch to 3/16-inch grout joints and suit both modern and transitional interiors.
24×24-inch squares provide expansive, clean surfaces with minimal grout lines, ideal for large living spaces and open-concept great rooms. The substantial scale emphasizes limestone’s natural variation and reduces visual busyness.
18×36-inch large-format planks deliver dramatic contemporary impact, best suited to spacious rooms with minimal furniture where the flooring becomes a design feature. These require skilled installation to maintain proper alignment and lippage control.
16×16-inch tiles offer versatile middle-ground sizing that works in various room scales, installing relatively quickly while providing enough grout line definition to hide minor substrate imperfections.
For residential living spaces, standard tile thickness ranges from 3/8 inch to 1/2 inch. This provides adequate strength for foot traffic and furniture loads when installed over properly prepared substrates. Thicker tiles (5/8 inch to 3/4 inch) are unnecessary for interior residential applications and increase material costs and installation complexity without meaningful performance benefits.
Finish selection significantly impacts both appearance and maintenance. Honed limestone provides smooth, matte surfaces that feel comfortable underfoot, show minimal glare from windows and lighting, and clean easily with dry dust-mopping and damp mopping. Honed finishes suit modern, transitional, and formal living spaces where refined aesthetics matter. However, honed surfaces show scratches more readily than textured finishes and can become slippery when wet.
Brushed limestone adds subtle surface texture through mechanical abrasion that creates light, organic variation. This finish hides minor scratches and wear better than honed surfaces while maintaining relatively smooth feel. Brushed finishes work well for casual family rooms and homes with children or pets where pristine appearance is less critical than durability.
Lightly tumbled or antiqued finishes provide more pronounced texture and aged character suitable for rustic, Mediterranean, or Old World interiors. While these finishes excel at hiding wear and damage, their textured surfaces trap dust and require more cleaning effort—less ideal for Arizona’s dusty environment unless you’re committed to frequent maintenance.
Trim and transition pieces complete professional installations. Coordinate bullnose edge tiles for stairs, steps, and raised platforms. Select or custom-cut thresholds that bridge elevation changes between limestone and adjacent flooring materials. For open-plan spaces, use transition strips in complementary metal finishes (brushed nickel, oil-rubbed bronze, or matte black depending on interior style) to create clean breaks between flooring types without awkward grout-to-grout junctions.
Acid-Resistant Limestone Tiles for Arizona Homes: Preventing Etching, Stains & Hard Water Damage
Durability Considerations for High-Traffic Areas
Living rooms and family rooms rank among the most heavily trafficked residential spaces, requiring flooring that withstands constant foot traffic, furniture movement, dropped items, and pet activity. Understanding durable limestone tile high traffic Arizona performance characteristics helps you select appropriate materials and protect your investment.
Abrasion resistance determines how well limestone surfaces withstand wear from foot traffic and dirt particles. While formal abrasion testing classifications apply primarily to ceramic and porcelain tiles, similar principles guide limestone selection. Dense limestone varieties with tight crystalline structures resist surface wear better than highly porous, soft limestone. Request hardness information from suppliers—limestone measuring 3–4 on the Mohs scale (typical range) provides adequate durability for residential living spaces when properly sealed and maintained.
Limestone’s moderate hardness makes it somewhat susceptible to scratching from dragged furniture, pet claws, and grit tracked from outdoors. However, this characteristic also allows scratches to be repaired through professional honing and polishing—an advantage over harder stones where damage is permanent or synthetic materials that can’t be refinished. For homes with large dogs whose nails contact floors frequently, choose brushed or lightly textured finishes that camouflage minor scratches rather than smooth honed surfaces that show every mark.
Edge chipping risk increases at doorways, furniture legs, and areas where hard objects drop frequently. Limestone edges are more vulnerable than granite or porcelain but less fragile than marble. Protect edges by using furniture coasters under heavy pieces, area rugs in high-traffic circulation paths, and careful handling when moving furniture. For living rooms adjacent to kitchens or dining areas where dropped objects are common, consider extending limestone only to the seating and conversation areas while using more impact-resistant materials in work zones.
Finish impact on durability: Honed limestone shows surface wear gradually as microscopic scratches accumulate and sealer degrades, creating slowly dulling appearance. Textured finishes hide this wear longer, maintaining acceptable appearance for more years between professional restoration. However, textured surfaces trap dust and require more aggressive cleaning that can accelerate wear—balance aesthetic preferences against maintenance commitment.
The concept of traffic ratings (similar to PEI ratings for ceramic tile) suggests choosing materials tested and verified for “heavy residential” or “moderate commercial” use for busy family rooms. While limestone doesn’t follow the same classification system, select varieties described as “high-density,” “low-absorption,” or “grade-one” quality that indicate superior durability compared to budget-grade limestone with high porosity and softer composition.
Protective practices extend tile life significantly:
- Use area rugs in primary circulation paths and beneath furniture groupings, rotating them annually to distribute wear evenly
- Install felt or soft plastic glides under all furniture legs and replace them annually as they wear thin
- Place doormats at all entry points to trap dirt and grit before it reaches limestone floors
- Trim pet nails regularly to minimize scratching from claws
- Use furniture sliders when moving heavy pieces rather than dragging them across limestone
- Avoid walking on limestone with high heels, cleats, or shoes with damaged hard-sole edges that concentrate force
For Arizona family room limestone flooring installations in homes with children, designate play areas with cushioned rugs over limestone to protect both the floor and provide safer surfaces for activities. Establish “no wheels indoors” rules for toy vehicles, scooters, and wheeled office chairs that create concentrated wear patterns and scratching.
Installation Essentials for Long-Term Performance
Professional installation determines long-term performance more than any other factor. Follow these contractor-grade protocols for quality results:
Substrate preparation: Concrete slabs must be flat within 1/8 inch over 10 feet and free of curing compounds, sealers, paint, or contaminants that interfere with thinset adhesion. Shot-blast or grind surfaces if necessary. Perform moisture testing using calcium chloride or relative humidity probes—moisture vapor emission should not exceed 3 pounds per 1,000 square feet per 24 hours for residential installations. Arizona’s arid climate rarely creates moisture issues, but newer construction and monsoon season installations require verification.
For existing tile or vinyl floors, remove old materials down to concrete or install cement backerboard overlay (minimum 1/2 inch thick) to create proper substrate. Installing limestone over existing flooring without adequate preparation risks adhesion failure and tile cracking.
Wood subfloors require reinforcement since limestone’s weight and rigidity demand minimal deflection. Install two layers of 1/2-inch cement backerboard over plywood subfloors with deflection not exceeding L/360 under load. Offset backerboard seams from plywood joints and fasten every 8 inches along edges and in the field using corrosion-resistant screws.
Uncoupling or crack isolation membranes: Install sheet membranes or liquid-applied elastomeric products over concrete slabs to isolate minor substrate cracks and prevent them from telegraphing through limestone. These membranes absorb substrate movement from thermal expansion, settling, or minor structural shifts. Follow manufacturer specifications for adhesive types, cure times, and compatible thinsets.
Thinset selection and application: Use polymer-modified thinset mortar formulated for natural stone in light colors (white or light gray) to prevent shadowing through light-colored limestone. Avoid thinsets with excessive water or additives that may stain. Select medium-bed or large-and-heavy-tile mortars for tiles exceeding 15 inches in any dimension—these provide extended open time and superior bonding.
Match trowel notch size to tile dimensions: 1/4×1/4×1/4-inch square notch for tiles up to 8×8 inches; 1/4×3/8×1/4-inch for 12×12 to 16×16 inches; 1/2×1/2×1/2-inch for larger formats. Back-butter all tiles exceeding 15 inches to ensure 95% minimum thinset coverage. Beat tiles into mortar beds using rubber mallets and check periodically by lifting tiles to verify full bedding without voids.
Grout joint widths and types: For rectified limestone with machined edges, joints as narrow as 1/16 inch to 1/8 inch create sleek contemporary appearance. Natural-edge or calibrated limestone requires 1/8-inch to 1/4-inch joints to accommodate size variation. Living room installations typically use unsanded grout for joints 1/8 inch or narrower and sanded grout for wider joints.
Standard cement grout suffices for interior living spaces. Choose grout colors that either match limestone closely for seamless appearance or contrast subtly (one shade darker) for gentle definition. Avoid high-contrast grout—white grout with dark limestone or charcoal grout with light limestone—as these show dirt quickly and can appear dated.
Transitions and expansion joints: Install metal transition strips, reducer moldings, or stone thresholds at doorways between limestone and other flooring materials. These protect limestone edges from chipping and provide clean visual breaks. For large living spaces exceeding 20 feet in any direction, include expansion joints filled with flexible sealant rather than grout to accommodate thermal movement. Place expansion joints at perimeter walls, leaving 1/4-inch to 3/8-inch gaps filled with compressible foam backer rod and color-matched polyurethane sealant.
Radiant heating considerations: Limestone works excellently with electric or hydronic radiant floor heating systems. Use flexible thinset and grout formulated for heated applications. Install heating systems per manufacturer specifications with proper load calculations and controls. Ramp temperatures gradually during initial startup (maximum 5°F increase per day) to prevent thermal shock. Radiant heat enhances limestone’s natural thermal comfort, creating luxuriously warm floors during Arizona’s mild winters.
Quality control during installation: Check lippage (difference in height between adjacent tile edges) continuously—maximum 1/16 inch for tiles with edges shorter than 15 inches, maximum 1/8 inch for larger formats. Use leveling clips or wedge systems if needed. Verify grout joints maintain consistent width throughout. Clean thinset from tile faces and grout lines immediately before it hardens. Protect newly installed limestone from foot traffic for 72 hours after thinset application and 72 hours after grouting.
Explore Our Tile Technology in Arizona and See the Innovation!
Maintenance & Cleaning for Busy Arizona Homes
Proper maintenance preserves limestone’s beauty and extends its functional life. Establish these practical protocols for Arizona family room limestone flooring:
Daily maintenance: Sweep or vacuum using soft brush attachments to remove dust and grit—Arizona’s fine desert dust acts as abrasive when tracked across floors, gradually wearing sealers and dulling stone surfaces. Dust-mop with microfiber pads for efficient daily cleaning that traps particles rather than redistributing them.
Weekly cleaning: Damp-mop using pH-neutral stone cleaner diluted per manufacturer instructions. Never use vinegar, lemon juice, ammonia, or acidic all-purpose cleaners that etch limestone. Use clean water and fresh mop heads—dirty water spreads grime and defeats cleaning purpose. For stubborn spots, apply cleaner directly, let dwell briefly, then wipe with microfiber cloths.
Immediate spill response: Blot (don’t wipe) spills immediately to prevent staining, especially wine, coffee, juice, and any acidic substances. Flood area with clean water if acids contact limestone, then apply pH-neutral cleaner. Prompt action prevents permanent damage.
Preventative measures: Place substantial doormats at all exterior entry points—coir mats outside to scrape dirt and microfiber mats inside to capture finer particles. Install felt furniture pads under all chair, table, and sofa legs and replace annually as they compress and thin. Rotate area rugs quarterly to distribute traffic wear evenly and prevent uneven fading from sunlight.
Pet considerations: Trim dog and cat nails every 2–4 weeks to minimize scratching. Place waterproof mats under pet water bowls to catch spills before they contact limestone. Clean pet accidents immediately using enzymatic cleaners specifically labeled safe for natural stone—test in inconspicuous areas first.
During Arizona’s spring and early summer dust storm season, increase cleaning frequency to prevent dust accumulation. After monsoon season when tracking mud becomes common, place additional barrier rugs near entrances and clean them frequently. For homes with swimming pools, establish family rules about wet feet—require pool towels as stepping mats to prevent water trails and chlorine deposits on living room limestone floors.
Sealing, Repair & Long-Term Care
Sealer selection: Penetrating (impregnating) sealers absorb into limestone’s porous structure, providing invisible protection against staining without changing appearance or creating surface films. These work best for living and family room applications where natural matte finishes suit interior design. Apply penetrating sealers immediately after installation and grout cure (typically 72 hours after grouting), then reapply based on traffic and performance.
Topical sealers create surface coatings that enhance color and add sheen, but they wear through in traffic patterns, may trap moisture causing haziness, and require stripping before reapplication. Reserve topical sealers for low-traffic decorative applications only—never on floors.
When sealing is required: All limestone installations require initial sealing to resist staining and reduce maintenance. Unsealed limestone absorbs spills rapidly, making stain removal difficult or impossible. While some very dense limestone varieties can function unsealed in low-risk areas, sealing provides inexpensive insurance against permanent damage.
Sealing protocol: Clean limestone thoroughly with pH-neutral cleaner and allow to dry completely (24–48 hours). Apply penetrating sealer liberally using paint pads or microfiber applicators, working in 3×3-foot to 4×4-foot sections. Allow 5–15 minutes dwell time for absorption, then buff away excess with clean, dry microfiber cloths before sealer dries on the surface. Apply second coat if stone continues absorbing sealer readily—initial applications on porous limestone may require 2–3 coats for adequate protection.
Resealing intervals: High-traffic family rooms require annual resealing. Moderate-traffic formal living rooms can extend to 2–3 years. Test sealer performance every 6–12 months by sprinkling water drops on limestone—if water beads, sealer is functioning; if water absorbs darkening the stone, reseal immediately.
Stain removal: For oil-based stains (grease, cosmetics), apply poultice made from baking soda and water, cover with plastic wrap, and allow to dry 24 hours before removing. For organic stains (coffee, wine), use hydrogen peroxide-based poultice. Always test treatments in inconspicuous areas first. Professional stone restoration companies offer specialized poultice products for stubborn stains.
Minor repair: Small chips at tile edges can be filled with tinted epoxy putty matched to limestone color—these repairs are visible upon close inspection but prevent further damage. Cracked grout should be scraped out and replaced promptly to prevent moisture infiltration. Loose tiles indicate thinset failure and require professional re-installation.
When to hire professionals: Contact stone restoration specialists for widespread staining, etching affecting more than 10% of visible surfaces, lippage correction, or if you want to change finishes (polish honed limestone or hone polished surfaces). Professional technicians have diamond abrasives and specialized equipment that achieve results impossible with consumer products.
Download the Limestone Tile Guide for Cool Basement Flooring in Arizona Now!
Comfort, Acoustics & Radiant Heat Integration
Limestone’s thermal mass creates comfortable living spaces year-round. During Arizona summers, limestone floors remain cooler underfoot than carpet or wood, providing natural comfort. During winter, the stone absorbs heat from sunlight streaming through windows or radiant heating systems, moderating indoor temperatures and reducing heating demands.
Pair limestone floors with area rugs for enhanced comfort and warmth. Large rugs (8×10 feet or 9×12 feet) anchor seating groups and provide soft surfaces for bare feet. Natural fiber rugs (wool, jute, sisal) complement limestone’s organic character better than synthetic materials. Use quality rug pads beneath all area rugs—these prevent slipping, cushion footfalls, and protect both rugs and limestone from wear.
Radiant heating integration transforms limestone into luxuriously warm surfaces. Electric mat systems or hydronic tubing installed during floor construction heat limestone evenly, eliminating cold spots. Radiant heat operates efficiently with limestone due to the stone’s thermal conductivity and mass. Set systems to warm floors to 75–80°F—hot enough for comfort but not so hot as to damage stone or grout. Programmable thermostats allow scheduling that warms floors before family wakes while reducing heat during unoccupied hours.
Acoustic management: Hard stone floors reflect sound, potentially creating echo or excessive noise in large living spaces with minimal furnishings. Implement these strategies for comfortable acoustics: Install substantial area rugs that absorb sound—thicker rugs with dense pads perform best. Upholster furniture generously—fabric sofas and chairs absorb more sound than leather or hard surfaces. Add soft window treatments like draperies or fabric shades rather than hard blinds. Consider acoustic wall panels or fabric-wrapped artwork in open-plan great rooms where limestone floors, high ceilings, and minimal furnishings create excessive reverberation.
Cost Considerations & Project Planning
Limestone material costs range from $5–$18 per square foot depending on size, finish, grade, and origin. Standard honed tiles in 12×12 or 16×16-inch formats cost $5–$10 per square foot. Large-format tiles (24×24 inches or 18×36 inches) and premium finishes (brushed, antiqued) range $10–$18 per square foot. Budget varieties with significant color variation or lower density cost less but may require more frequent maintenance or earlier replacement.
Professional installation adds $8–$18 per square foot depending on tile size, pattern complexity, and substrate condition. Simple grid layouts with medium-format tiles install efficiently at the lower end. Large-format tiles requiring precise alignment and lippage control, or complex modular patterns with multiple sizes, increase labor toward the higher end. Substrate preparation (concrete grinding, backerboard installation, crack isolation membranes) adds $2–$6 per square foot depending on scope.
Radiant heating integration adds $10–$20 per square foot for electric mat systems including controls, or $15–$30 per square foot for hydronic systems including manifolds and circulation equipment. Edge trim (baseboards, transition strips, stair nosing) costs $5–$15 per linear foot depending on material and profile complexity.
Total installed cost for limestone living room floors typically ranges $20–$40 per square foot for standard projects, or $35–$60 per square foot for premium installations with radiant heat, complex patterns, and extensive substrate work.
Project scheduling for Arizona: Plan major installations during mild seasons (October through April) when comfortable temperatures allow proper material acclimation and thinset curing. Avoid scheduling deliveries during extreme summer heat when materials stored in hot trucks or garages require extended acclimation periods. If installing during monsoon season (July–September), protect job sites from moisture and plan buffer days for weather delays. For renovations involving exterior door replacement or wall openings, complete exterior work before interior limestone installation to prevent weather exposure to unfinished substrates.
City-by-City Recommendations — 8 Arizona Cities
Phoenix
Phoenix’s abundant sunshine creates intense natural light in living rooms, particularly in south and west-facing rooms with large windows. Emphasize light limestone undertones—pale beige, soft gray, or cream—to reduce glare and create comfortable brightness without harsh reflections that cause eye strain. Schedule major installations during October through April when temperatures remain moderate and thinset cures optimally without excessive heat stress.
Action: Test a 24×24-inch sample tile in your living room’s direct midday light for 48–72 hours before purchasing full quantities. Observe how the limestone appears in bright sun, shade, and artificial evening lighting to ensure the color and finish meet expectations in actual conditions.
Tucson
Tucson’s desert environment produces substantial dust year-round, with particularly heavy dust during spring wind season. Recommend brushed or lightly textured limestone finishes that hide dust accumulation between cleanings better than smooth honed surfaces that show every particle. Implement more frequent light cleaning schedules—dust-mop or vacuum high-traffic areas daily rather than every few days to prevent abrasive dust from scratching sealers.
Action: Schedule quarterly deep dusting that includes moving furniture to clean underneath and behind pieces where dust accumulates. Use microfiber tools that trap rather than redistribute particles, protecting your limestone investment from unnecessary wear.
Mesa
Mesa’s family-oriented neighborhoods feature busy households with children, pets, and frequent gatherings that stress living room floors. Recommend durable polymer-modified or epoxy grout that resists staining and cracking better than standard cement grout. Implement strategic rug placement—runners along primary circulation paths between entryways and family rooms, and area rugs beneath furniture groupings—to distribute wear and protect limestone from concentrated traffic.
Action: Use non-slip rug pads under all area runners and rugs. Quality pads prevent rugs from bunching or sliding, reducing trip hazards while protecting limestone from abrasion caused by rug movement. Replace pads every 2–3 years as they compress and lose effectiveness.
Chandler
Chandler’s suburban layouts often feature open-plan designs where living spaces flow directly from entry foyers without transition barriers. Advise integrated entry mat systems—either recessed mat wells or substantial layered mats (outdoor scraper mat plus indoor microfiber mat)—to capture dirt before it reaches living room limestone. Install low-profile transition thresholds between entryways and living spaces to delineate zones while maintaining accessible, trip-free passages.
Action: Place heavy-duty runners in 3-foot to 4-foot widths along the natural path from front entries through to main living areas. These protect limestone during the critical first 10–15 feet where most tracked debris concentrates, extending the time between deep cleanings needed.
Scottsdale
Scottsdale’s upscale interior design market favors refined aesthetics with large-format honed limestone slabs or tiles (24×24 inches, 24×36 inches, or larger) and tight grout joints (1/16 inch to 1/8 inch) that create seamless contemporary appearance. For limestone floor living spaces Scottsdale properties feature, specify tight installation tolerances—maximum 1/32-inch lippage—that demand experienced installers with proper leveling systems. These premium specifications justify higher installation costs but deliver showroom-quality results.
Action: Require installers to provide a mock-up section (minimum 4×4 feet) laid to your exact specifications for approval before proceeding with full installation. This allows you to verify joint width, lippage control, and overall appearance meet expectations, preventing costly disappointments.
Glendale
Glendale’s housing stock includes many retrofit and renovation projects where limestone replaces worn carpet or outdated tile. Before selecting limestone, inspect subfloor and slab flatness—older homes may have settlement, cracks, or uneven surfaces that require extensive preparation. Consider smaller-format tiles (12×12 or 12×24 inches) that accommodate minor substrate irregularities better than large-format tiles that telegraph every imperfection as lippage.
Action: Perform a comprehensive flatness survey using a 10-foot straightedge before bidding or ordering materials. Document areas exceeding 1/8-inch deviation over 10 feet that require grinding or leveling. This pre-planning prevents surprises and ensures realistic budgets and schedules.
Gilbert
Gilbert’s newer suburban homes often feature extensively irrigated landscapes where moisture tracking becomes common, particularly during morning hours when residents walk across dew-wet patios into living spaces. Suggest applying penetrating sealers more frequently in zones within 10 feet of exterior entries—annual resealing rather than standard 2–3 year intervals. Implement quick-dry cleaning routines using minimal water and microfiber tools that remove tracked moisture before it sits on limestone long enough to deposit minerals or cause water spotting.
Action: Establish a dedicated wipe station near patio door transitions—a small storage basket with microfiber cloths and shoe tray creates a convenient spot for family members to dry wet feet and deposit dirty shoes before walking on living room limestone.
Tempe
Tempe’s compact urban residences, condos, and rental properties favor low-maintenance limestone finishes that tolerate diverse user patterns without showing excessive wear. Specify honed or lightly brushed finishes with penetrating sealers applied annually. For rental properties, include one-page limestone care instructions for tenants: “Use pH-neutral cleaners only,” “Wipe spills immediately,” “Never use vinegar or citrus cleaners,” and “Place felt pads under all furniture.”
Action: Create and laminate a simple care guide with photo examples of acceptable cleaners and proper maintenance techniques. Provide copies at tenant move-in and post a copy inside a kitchen or utility cabinet for reference. This small investment prevents damage from improper care and expensive repairs between tenancies.
Conclusion
Limestone tile delivers elegant, durable flooring for Arizona living rooms and family rooms when you select appropriate finishes matched to traffic levels, follow professional installation protocols that ensure long-term structural integrity, and maintain proper sealing and cleaning schedules suited to our desert climate. The stone’s natural thermal comfort, authentic beauty, and compatibility with both traditional Southwestern and contemporary desert modern aesthetics make it an excellent choice for Arizona’s most-used living spaces. Test samples in your actual home environment to evaluate color response to natural light, work with experienced installers who understand natural stone requirements and maintain strict tolerances, and implement the practical maintenance strategies and city-specific recommendations outlined here. With proper care, your limestone living room floor will provide decades of beauty and performance while enhancing your home’s value and comfort.