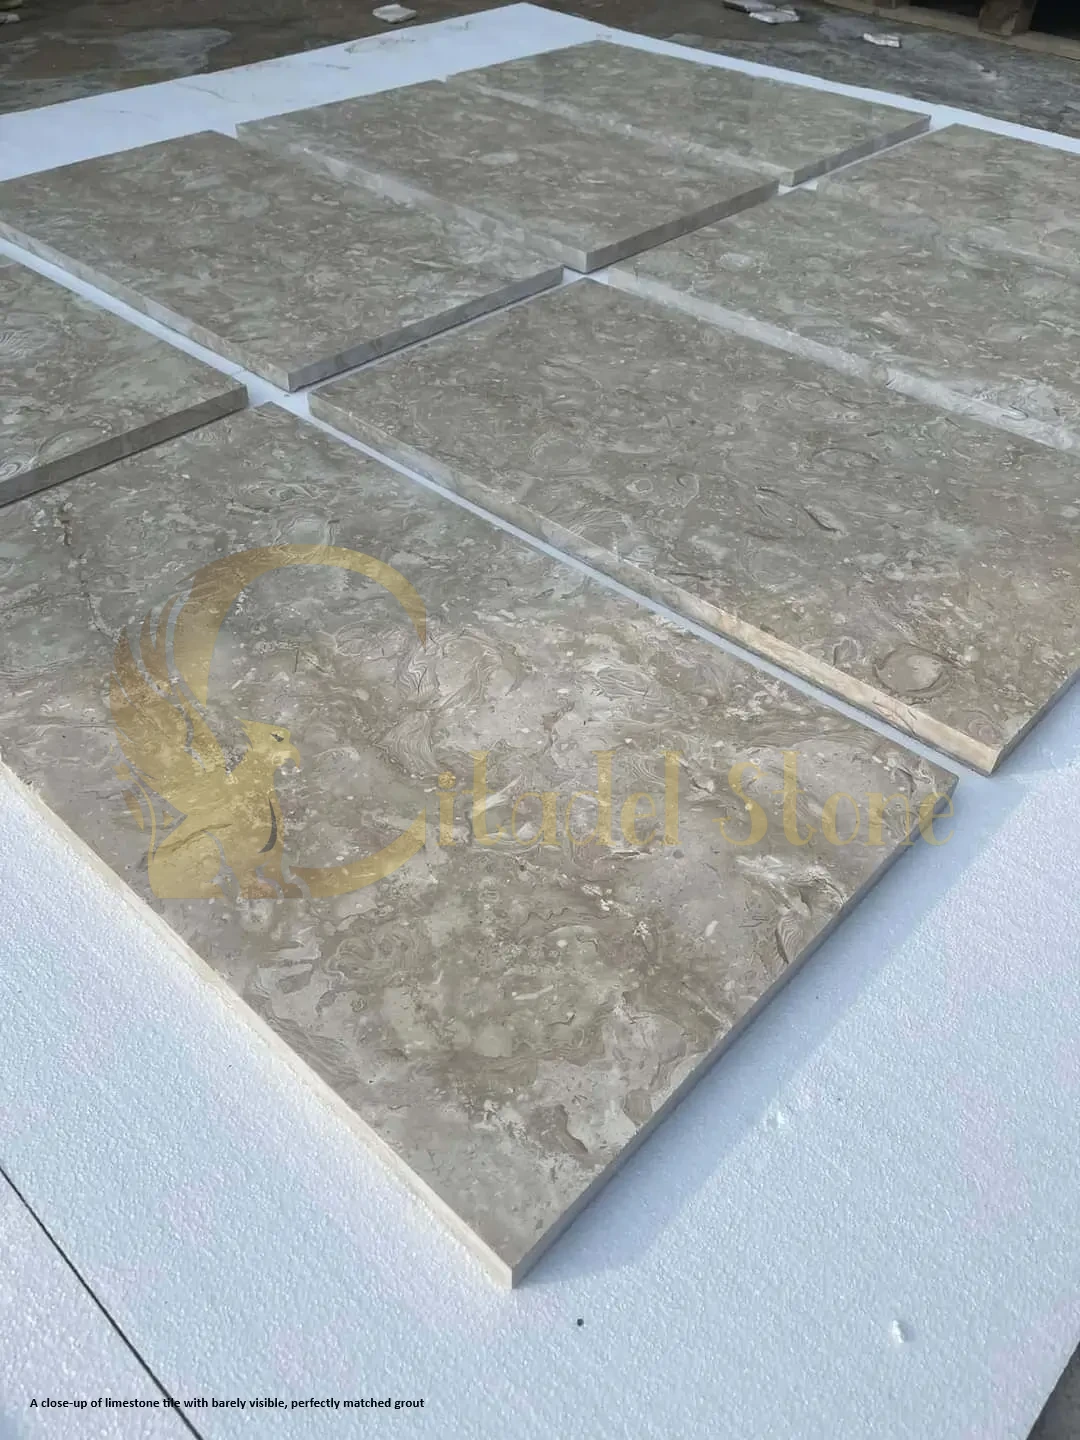
Why Grout Choice Matters with Limestone
Limestone is a naturally porous sedimentary stone, and the grout you select becomes an integral part of the floor or wall system—not merely a filler between tiles. Grout interacts with limestone through capillary action, where moisture, minerals, and cleaning solutions travel between the grout and stone. When grout porosity exceeds the stone’s absorption rate (example values: limestone absorption ~2–8%; standard cementitious grout ~10–15%), water and dissolved minerals migrate preferentially through the grout, leading to efflorescence, staining, and differential wear patterns visible across the floor.
Arizona’s climate intensifies these interactions. Hard water—common in Phoenix, Scottsdale, and Mesa—deposits calcium, magnesium, and iron in grout joints, creating white halos or rust-colored streaks. UV exposure degrades unsealed grout surfaces, causing color fade and surface chalking. Thermal expansion during summer heat and monsoon-driven moisture swings cause grout joints to crack if movement accommodation is inadequate. At elevation cities like Prescott and Flagstaff, freeze-thaw cycles drive water into grout pores; when it freezes, expansion forces can fracture both grout and adjacent stone edges.
Technical Sidebar: Capillary Action & Grout Porosity
Capillary action occurs when liquid moves through porous materials due to surface tension and adhesive forces. In a limestone-and-grout system, if grout porosity is significantly higher than stone porosity, water preferentially wicks through grout joints. Example threshold: if limestone has 5% absorption and unsealed cementitious grout has 12% absorption, the grout acts as a “highway” for moisture and dissolved salts. Sealing reduces grout porosity to ~2–4% (example values), reversing this imbalance and protecting both materials.
Choosing the wrong grout—such as a highly permeable cementitious grout left unsealed in a Phoenix bathroom, or a rigid epoxy grout on an exterior Flagstaff patio without adequate movement joints—leads to early maintenance burdens: frequent re-grouting, persistent staining, grout crumbling, or even stone edge spalling. Proper grout selection, matched to use-case and local conditions, dramatically extends the life and beauty of Arizona limestone installations.
Grout Types Explained: Cementitious, Polymer-Modified, Epoxy, Urethane
Understanding the four main grout families helps you match performance to your project’s demands.
Cementitious Grout (Standard & Sanded)
Composition: Portland cement, fine aggregates (sand in sanded versions), and pigments. Sanded grout is used for joints wider than 1/8 inch; unsanded for narrower joints.
Pros: economical, easy to work, widely available, traditional aesthetic blends well with limestone’s natural texture.
Cons: highly porous without sealing (example absorption ~10–15%), susceptible to staining from hard water and organic spills, requires periodic re-sealing.
Arizona Behavior: performs acceptably in dry living areas when properly sealed; struggles in wet areas (showers, pool decks) without rigorous maintenance; UV exposure can cause color fade over 3–5 years (example estimate).
Joint Width: sanded grout for 1/8″–1/2″ joints (example range); unsanded for <1/8″.
Applications: interior floors in bedrooms, living rooms, hallways; not recommended for showers or exterior high-moisture zones without premium sealing.
Maintenance: re-seal every 12–24 months in Phoenix-area homes (example interval); more frequent near pools or in hard-water areas.
Polymer-Modified Cementitious Grout
Composition: Portland cement with added acrylic or latex polymers for improved flexibility and adhesion.
Pros: better crack resistance than standard cementitious, improved water resistance, slightly lower porosity (example ~7–10% absorption), enhanced bond strength.
Cons: still requires sealing, moderate cost increase (~20–30% over standard; example estimate), limited color stability under intense UV without topical sealer.
Arizona Behavior: preferred for most residential limestone floors; handles thermal movement better than standard grout, making it suitable for sun-exposed entryways and covered patios in Mesa and Chandler.
Joint Width: similar to cementitious; sanded for 1/8″–1/2″.
Applications: interior floors, lightly trafficked covered outdoor areas, accent walls.
Maintenance: re-seal every 18–36 months (example interval); spot-clean mineral deposits monthly.
Epoxy Grout
Composition: epoxy resin and hardener with silica filler; no Portland cement.
Pros: virtually non-porous (absorption <0.5%; example), highly stain-resistant, chemical-resistant, does not require sealing, maintains color stability under UV, strong bond, ideal for wet environments.
Cons: higher cost (2–3× cementitious grout; example estimate), requires skilled installation (short working time, sticky consistency), can appear glossy or plastic-like (aesthetic mismatch for some limestone styles), difficult to remove from porous limestone if not cleaned immediately during install.
Arizona Behavior: excels in Tucson and Scottsdale wet rooms, pool surrounds, outdoor kitchens; withstands Phoenix hard water without staining; no re-sealing burden.
Joint Width: suitable for 1/16″–1/2″ (example range); consult manufacturer TDS.
Applications: showers, steam rooms, pool waterline tile, high-stain-risk kitchen backsplashes, commercial food-prep areas.
Maintenance: routine pH-neutral cleaning only; no sealing required; occasional deep-clean to remove soap scum.
Urethane Grout
Composition: water-based urethane resin; no cement, no epoxy.
Pros: flexible, stain-resistant, no sealing required, easier to install than epoxy (longer working time), low VOC.
Cons: moderate cost (between polymer-modified and epoxy), limited color range, newer technology with less long-term field history in extreme Arizona climates.
Arizona Behavior: emerging choice for interior limestone floors and walls; performs well in Prescott’s moderate climate; field reports from Phoenix suggest good thermal stability, but verify with manufacturer for specific products.
Joint Width: typically 1/16″–1/2″ (example; verify TDS).
Applications: interior residential floors, walls, light commercial.
Maintenance: routine cleaning; manufacturer-specific guidance on topical treatments.
Recommendation Summary:
For Arizona limestone flooring, polymer-modified cementitious grout with a high-quality penetrating sealer is the cost-effective standard for living areas. Upgrade to epoxy grout for wet rooms, pool decks, and high-stain-risk zones. Reserve standard cementitious grout for budget projects where rigorous sealing and maintenance are committed. Urethane grout offers a middle path for homeowners seeking low-maintenance performance without epoxy’s installation challenges.
Grout Color for Limestone Tiles: A Practical Decision Matrix
Grout color for limestone tiles is both an aesthetic and a practical choice. Arizona’s dust, hard water, and intense sunlight influence how grout color performs over time.
Blend vs. Contrast:
Matching grout closely to limestone tone creates a seamless, expansive visual field—ideal for open-plan living areas and small bathrooms where you want the floor to feel continuous. Contrasting grout (dark grout with light limestone, or light grout with dark stone) emphasizes the tile grid, adding geometric interest but also highlighting grout joints and making dirt, mineral deposits, and grout wear more visible.
Dust & Dirt Considerations:
Arizona desert dust is fine, alkaline, and persistent. Very light grout (white, ivory) shows dust less than mid-tone grays, which can appear dingy between cleanings. Very dark grout (charcoal, espresso) hides organic dirt but shows hard-water mineral scale as white streaks—a significant concern in Phoenix and Scottsdale where tap water exceeds 300 ppm hardness (example value).
Hard-Water Strategy:
If your home has hard water, choose grout in the mid-to-light range (taupe, sand, light gray) that camouflages both dust and mineral residue. Avoid stark white or black unless you’re committed to weekly spot-cleaning of mineral deposits.
Design Element vs. Camouflage:
High-end projects often use grout as a design accent—think honed Carrara-look limestone with dark charcoal grout for a modern grid effect. For busy households or rentals, camouflage is king: grout that blends with the stone hides imperfections and defers visible maintenance.
Decision Matrix (Grout Color for Limestone Tiles):
| Limestone Tone | Recommended Grout Color | Strategy | Grout Type | Joint Width (example) |
|---|---|---|---|---|
| Light (cream, beige) | Matching beige or light taupe | Blend; hides dust & minerals | Polymer-modified or epoxy | 1/8″–3/16″ |
| Mid-tone (tan, gray) | Mid-gray or warm taupe | Slight contrast; practical | Polymer-modified | 1/8″–1/4″ |
| Dark (charcoal, mocha) | Dark gray or matching mocha | Blend; shows mineral scale | Epoxy (wet areas) | 3/16″–1/4″ |
| Patterned/Veined | Neutral gray matching vein color | Camouflage; follows stone logic | Polymer-modified or urethane | 1/8″–3/16″ |
Always request a grout color sample mockup installed on actual limestone tiles, viewed under natural Arizona light (morning and late afternoon) and under artificial lighting. Grout color shifts dramatically between showroom fluorescent light and the intense direct sun in a Tucson living room.
Limestone Grout Sealing Arizona: Sealer Types & When to Apply
Sealing is non-negotiable for cementitious and polymer-modified grouts in Arizona. Limestone grout sealing Arizona installations require an understanding of sealer chemistry and application timing.
Sealing the Grout vs. Sealing Both Grout and Stone:
If your limestone is pre-sealed by the fabricator or you prefer to manage stone and grout maintenance separately, apply a grout-specific sealer carefully to avoid residue on the stone surface. For unseasoned installations, many installers prefer a combination sealer that penetrates both limestone and grout, simplifying the process and ensuring uniform protection.
Penetrating vs. Film-Forming Sealers:
Penetrating (impregnating) sealers soak into the grout, chemically bonding within pores to repel water and oils without altering surface appearance or texture—ideal for natural limestone aesthetics. Film-forming (topical) sealers create a surface coating that adds sheen and surface hardness but can yellow under UV, require stripping before recoat, and may alter the limestone’s honed or tumbled finish. For Arizona, penetrating sealers are the standard; reserve topical sealers for commercial high-traffic areas or where enhanced gloss is specified.
Recoat Intervals (Example Values):
Interior living areas (Phoenix, Chandler): 18–24 months.
Wet areas (showers, pool surrounds): 12–18 months.
Exterior covered patios (Tucson, Gilbert): 12–24 months.
High-elevation exteriors (Prescott, Flagstaff): 12 months due to freeze-thaw and moisture cycling.
These intervals are example estimates; always verify with sealer manufacturer TDS and perform a water-drop test (water beads and rolls off when sealer is effective; water darkens the grout when recoat is needed).
VOC Considerations:
Arizona has no statewide VOC limits as strict as California’s SCAQMD rules, but for indoor air quality—especially in tight, energy-efficient homes in Scottsdale and Mesa—select low-VOC or water-based penetrating sealers. Solvent-based sealers offer deeper penetration but require ventilation during application (cross-ventilation with fans; example airflow ~100 CFM per 500 sq ft).
Pool-Adjacent & Sun-Exposed Joints:
Pool coping and deck grout face chlorinated water splash, calcium scaling, and relentless UV. Use a premium fluoropolymer-based penetrating sealer rated for pool environments (verify TDS: chlorine resistance, UV stability). Recoat every 12 months (example). For sun-exposed exterior joints, choose sealers with UV inhibitors to prevent grout color fade and chalking.
Specification Line (Publish-Ready):
“Grout sealer shall be a penetrating, water-based or low-VOC solvent-based impregnator rated for natural stone and cementitious grout, providing water and oil repellency without altering surface appearance. Contractor shall provide manufacturer’s Technical Data Sheet (TDS) listing active ingredients, coverage rate (example: 100–200 sq ft per liter), VOC content, cure time, and recommended recoat interval. Recoat interval shall not exceed [specify months, e.g., 24 months] under normal residential use.”
Follow the Journey: Sourcing Arizona’s Premium Limestone Tiles from Quarry to Your Home!
Best Grout for Limestone Flooring: Installer Recommendations
Installers in Arizona prioritize performance, workability, and client satisfaction when recommending best grout for limestone flooring.
Joint Width Tolerance for Large-Format Limestone:
Large-format tiles (18″×18″, 24″×24″, or plank formats) require precise lippage control and joint width consistency. Recommended grout joint width for rectified large-format limestone: 3/16″ minimum (example); for non-rectified or natural-cleft tiles: 1/4″–3/8″ (example). Tighter joints (<1/8″) concentrate stress and increase crack risk under thermal movement; wider joints (>1/2″) can slump during installation and collect debris.
Substrate & Setting-Bed Considerations:
Limestone flooring over radiant heat, concrete slabs with moisture vapor transmission, or wood-framed second floors requires a setting system compatible with grout flexibility. Polymer-modified thin-set mortars bond well with polymer-modified grouts, creating a cohesive system. For epoxy grout, verify that the tile adhesive provides adequate bond without chemical incompatibility (consult adhesive and grout manufacturer compatibility charts in TDS).
Recommended Tile Adhesives for Different Grout Types:
- Polymer-modified cementitious grout: use polymer-modified thin-set mortar (ANSI A118.4 or A118.15).
- Epoxy grout: compatible with most thin-sets; verify with epoxy grout TDS.
- Urethane grout: polymer-modified thin-set recommended; verify TDS.
Avoid mastic adhesives with natural stone or in wet areas.
Mockup Acceptance Tests:
Before full installation, the installer should create a mockup panel (example size: 4 ft × 4 ft) using actual limestone tiles, specified grout color and type, and real site lighting. Evaluate grout color match, joint width consistency, grout finish (flush vs. slightly recessed), lippage, and overall aesthetic. Approve the mockup in writing before proceeding; this becomes the quality benchmark for the entire project.
Arizona Residential Scenarios:
- Living room, dining room, hallway (Phoenix, Chandler, Mesa): polymer-modified cementitious grout, sanded, 3/16″ joints, sealed with penetrating sealer.
- Master bathroom floor (Scottsdale, Tucson): polymer-modified or epoxy grout; epoxy preferred near shower threshold and around tub.
- Shower walls and floor (statewide): epoxy grout, 1/8″–3/16″ joints, no sealer required.
- Covered patio, outdoor kitchen (Gilbert, Mesa): epoxy grout for high-moisture zones; polymer-modified with premium sealer for low-traffic areas.
- Exterior pool deck (Phoenix, Tucson): epoxy grout with pool-rated sealer if cementitious grout is used (not recommended); prefer porcelain pavers or epoxy-grouted limestone.
Grout Joint Width & Movement Joints: Desert & Elevation Considerations
Grout joint width is not arbitrary; it’s engineered to accommodate tile size, substrate movement, and environmental stress.
Recommended Joint Widths for Typical Limestone Sizes (Example Values):
- 12″×12″ tiles: 3/16″–1/4″
- 16″×16″ tiles: 3/16″–1/4″
- 18″×18″ or 24″×24″ tiles: 3/16″–3/8″
- Plank formats (6″×24″, 8″×48″): 1/4″–3/8″
- Irregular or tumbled tiles: 1/4″–1/2″
Verify with tile manufacturer and TCNA Handbook guidelines for your specific tile type.
Aligning Movement Joints with Building Control Joints:
Concrete slabs and structural floors have control joints designed to manage shrinkage and movement. Tile and grout installations must honor these joints to prevent floor cracking. Locate building control joints in the substrate, then install soft joints (flexible sealant, not grout) directly above them in the tile field. Typical spacing for soft joints in Arizona commercial installations: every 20–25 feet in each direction (example guideline; verify with structural engineer).
Perimeter Joint Strategies:
Where limestone floors meet walls, columns, or changes in flooring material, install a perimeter soft joint filled with color-matched flexible sealant (silicone or urethane-based). This joint accommodates thermal expansion and prevents grout from cracking as the floor expands during Phoenix’s summer heat (tile surface temperatures can exceed 140°F in sun-exposed rooms). Width: 1/4″–3/8″ (example).
Monsoon-Driven Moisture Movement:
Arizona’s monsoon season (July–September) brings humidity spikes from 10% to 40–60% (example values), causing wood substrates to swell and concrete slabs to absorb moisture. Grout joints function as stress relief; properly sized joints and movement joints prevent tile tenting (tiles lifting at corners due to expansion pressure). For Tucson and Flagstaff projects with seasonal moisture variation, movement joint spacing may tighten to 15–20 feet (example; consult structural guidelines).
Prescott/Flagstaff Freeze-Thaw Considerations:
Exterior limestone installations at elevation must use frost-rated grout and sealers. Freeze-thaw cycles drive water into grout pores; when it freezes, expansion forces fracture grout. Specify polymer-modified grout with low absorption (<5% after sealing; example) and install movement joints every 12–16 feet (example) to relieve freeze-expansion stress. For outdoor patios and walkways, slope the surface 1–2% away from structures to shed water and prevent ice-dam formation at grout lines.
Phoenix Thermal Expansion & Monsoon Runoff:
Large sun-exposed floors in Phoenix (covered patios, sunrooms) experience extreme thermal cycling: 140°F surface temperature at 3 PM, cooling to 80°F by midnight (example values). This expansion-contraction cycle stresses grout. Use polymer-modified grout and install movement joints at perimeter and field changes. Monsoon runoff can pond on poorly sloped patios; ensure positive drainage and sealed grout to prevent water infiltration under tiles.
Installation QA: Tests & Acceptance Criteria
Quality assurance during installation prevents costly callbacks and ensures long-term performance.
Installer Acceptance Checklist:
- Grout Color Approval Under Natural Light:
View the mockup panel under morning, midday, and late-afternoon Arizona sun, plus interior artificial lighting. Approve color in writing before bulk installation. - Adhesion Test for Epoxy Grout:
After 24-hour cure (example; verify TDS), attempt to scratch or pick grout from a test joint. Properly cured epoxy should resist fingernail pressure. If grout is soft or chalky, mixing ratios or cure conditions were incorrect. - Grout Cure Check:
Cementitious and polymer-modified grouts require 72 hours minimum cure before sealing (example; verify TDS). Check that grout is hard, dry, and free of surface moisture. Sealing too early traps moisture, causing efflorescence and sealer failure. - Shrinkage Observation Period:
Inspect grout joints 7–10 days post-install (example period). Excessive shrinkage (joints recessed >1/8″ below tile surface) indicates incorrect water content during mixing. Re-grout affected areas. - Grout Surface Hardness Test:
Perform a scratch test with a metal edge (non-destructive; light pressure). Grout should resist scratching. Soft grout indicates under-mixed polymer additives or premature foot traffic. - Water Absorption Check for Sealed Grout:
After sealer cure (typically 24–48 hours; verify TDS), place water drops on grout. Drops should bead and not darken the grout. If water absorbs within 5 minutes (example), sealer was insufficient; apply additional coat.
Publish-Ready Acceptance Clause (Specimen Wording for Specs):
“Contractor shall install a mockup panel, minimum 16 square feet (example size), using specified limestone tiles, grout type, grout color, joint width, and setting materials. Owner/Architect shall inspect and approve mockup in writing under natural site lighting conditions before proceeding. Mockup becomes the quality standard for the project. Final installation shall match mockup in color, joint width (±1/16″), finish, and overall appearance. Work not matching approved mockup shall be removed and reinstalled at Contractor’s expense. Owner may withhold [specify percentage, e.g., 10%] of contract sum as holdback until final inspection and mockup compliance is verified.”
Maintenance & Cleaning: Daily, Weekly, Monthly, Annual
A structured maintenance plan tailored to Arizona conditions keeps limestone and grout looking new and prevents costly repairs.
Daily: Dust Management
Arizona desert dust is abrasive and alkaline. Sweep or dry-mop floors daily using a microfiber dust mop or soft-bristle broom. Do not use vacuums with beater bars on limestone; they can scratch honed finishes. For high-traffic areas (entryways, kitchens), increase to twice daily during spring dust storms (March–May in Phoenix).
Weekly: pH-Neutral Damp Mop
Mix a pH-neutral stone cleaner (pH 7–10; verify product label) with water per manufacturer’s dilution ratio (example: 1 oz per gallon). Damp-mop the floor, wringing the mop nearly dry—standing water can seep into grout joints and beneath tiles, causing efflorescence. Rinse with clean water and dry with a microfiber towel or allow air-dry. Avoid acidic cleaners (vinegar, lemon juice, tile-and-grout cleaners with phosphoric or citric acid), alkaline cleaners (ammonia, bleach at >1% concentration), and abrasive powders—all can etch limestone or degrade grout sealer.
Immediate Spot Removal: Hard-Water Deposits
White crusty deposits from sprinkler overspray or shower splash should be removed immediately. Wipe with a damp microfiber cloth; if deposits are stubborn, use a dedicated hard-water remover safe for natural stone (verify “safe for limestone” on label). Rinse thoroughly. Do not allow mineral deposits to accumulate—they etch into limestone over time.
Monthly: Joint Inspection & Spot Re-Seal
Walk the floor inspecting grout joints for hairline cracks, color fade, or areas where water no longer beads (failed sealer). Perform the water-drop test on 3–4 suspect joints: place a few drops of water on the grout; if it darkens within 5 minutes (example), that area needs re-sealing. Spot re-seal using a small brush or applicator, following sealer TDS for cure time before exposing to moisture.
Annual: Deep-Clean & Re-Seal
Once per year—or after 12–24 months depending on grout type and use (example intervals)—perform a deep-clean and full re-seal:
- Remove all furniture and rugs.
- Sweep and vacuum thoroughly.
- Clean with pH-neutral stone cleaner and a soft brush for grout joints.
- Rinse with clean water; allow floor to dry completely (24–48 hours; example).
- Apply penetrating sealer per manufacturer TDS (typically 2 thin coats, allowing appropriate dry time between coats).
- Cure per TDS (24–72 hours; example) before resuming normal use.
For Phoenix-area homes with hard water, consider a professional stone-care service every 2–3 years (example interval) to remove deep mineral buildup and restore grout color.
Cleaners to Avoid:
- Vinegar, lemon juice, or any acidic cleaner (pH <6)
- Bleach at concentrations >1% (can discolor grout)
- Abrasive powders (Comet, Ajax)
- Oil-based cleaners or soaps (leave residue that attracts dirt)
- Steam cleaners on unsealed grout (drive moisture deep into joints)
Emergency Hard-Water Descaling Procedure:
If mineral scale has built up extensively (common in Scottsdale and north Phoenix):
- Test a hidden area first (closet threshold).
- Apply a stone-safe descaler or mild phosphoric acid solution (0.5–1% concentration; example) with a soft brush.
- Let sit 2–5 minutes (do not exceed recommended dwell time).
- Scrub gently with a non-abrasive pad.
- Rinse thoroughly with clean water 2–3 times.
- Dry completely.
- Re-seal the affected area once dry.
If scale persists or limestone shows etching, call a professional stone restoration service.
Problem Solving: Stains, Efflorescence & Grout Failures
Even with proper maintenance, problems can arise. Quick diagnosis and remediation minimize damage.
Mineral Scale from Hard Water:
Symptoms: White, crusty deposits on grout and limestone, especially near shower edges or sprinkler zones.
Diagnosis: Water-drop test reveals calcium/magnesium deposits; feels rough or crystalline.
Remediation: Apply stone-safe descaler per emergency procedure above. For persistent scale, use a poultice: mix descaler with an absorbent powder (kaolin, diatomaceous earth) to paste consistency, apply 1/4″ thick, cover with plastic, let sit 24 hours (example), remove, rinse, re-seal.
Prevention: Install water softener; adjust sprinkler heads away from limestone walls; wipe shower walls after use.
Iron or Organic Stains:
Symptoms: Rust-colored, brown, or dark spots on grout or limestone; often appear after water exposure.
Diagnosis: Iron stains are orange/rust and often have a halo; organic stains (coffee, wine) are brown/black and sharply defined.
Remediation (Iron): Poultice with a stone-safe rust remover (oxalic acid-based; verify limestone-safe). Apply paste, cover, let sit 24–48 hours (example), remove, rinse, re-seal.
Remediation (Organic): Poultice with hydrogen peroxide (12% concentration; example) mixed with absorbent powder. Follow poultice procedure.
Prevention: Seal limestone and grout; wipe spills immediately.
Efflorescence:
Symptoms: White, powdery residue on grout or stone surface; often appears after new installation or water intrusion.
Diagnosis: Efflorescence is water-soluble salts migrating from the substrate (concrete, mortar bed) to the surface as water evaporates. Feels powdery, not crystalline like mineral scale.
Remediation: Allow floor to dry completely (may take 2–4 weeks; example). Brush off powder with a stiff nylon brush; do not wet—water reactivates the process. Once dry and powder stops reappearing, seal grout and stone. If efflorescence persists, identify and stop water source (leak, rising damp, vapor transmission through slab).
Prevention: Use vapor barriers under slabs; ensure proper substrate cure before tile installation; seal grout promptly.
Grout Deterioration (Cracking, Crumbling):
Symptoms: Hairline cracks, grout recession, or grout crumbling out of joints.
Diagnosis: Caused by inadequate movement joints, substrate movement, freeze-thaw (Flagstaff, Prescott), improper mixing, or grout applied over uncured adhesive.
Remediation (Minor): For hairline cracks <1/16″ wide and isolated areas, use a grout repair pen or caulk matched to grout color (temporary fix).
Remediation (Significant): Remove deteriorated grout using a grout saw or oscillating tool with grout-removal blade (take care not to chip tile edges). Vacuum debris, dampen joint slightly, apply new grout matching original type and color, cure per TDS, seal.
Prevention: Properly size grout joints; install movement joints per structural guidelines; ensure substrate is stable and adhesive is fully cured before grouting.
When to Call a Stone-Care Professional:
- Efflorescence persists after 4 weeks of drying and brushing (indicates ongoing moisture source).
- Stains do not respond to homeowner-applied poultice after two attempts.
- Grout failure affects >20% of floor area (example threshold).
- Limestone surface shows widespread etching, pitting, or spalling.
- Suspected structural movement (cracks in grout align with cracks in substrate).
Arizona has certified stone-care professionals through organizations like the Stone and Tile School or IICRC. Request proof of training, liability insurance, and references from recent Arizona projects.
Cost & Value Over Time: Grout Choices & Lifecycle
Upfront cost is only part of the equation. Lifecycle cost—initial materials and labor plus maintenance over time—reveals the true value of grout choices.
Initial Cost Comparison (Example Estimates):
- Standard cementitious grout: $1–2 per square foot installed (example).
- Polymer-modified cementitious grout: $1.50–2.50 per square foot (example).
- Epoxy grout: $3–6 per square foot (example).
- Urethane grout: $2.50–4 per square foot (example).
Labor for epoxy grout is higher due to longer installation time and skilled application requirements.
Sealing Costs (Example Estimates):
- Professional sealer application: $0.50–1.50 per square foot (example; varies by sealer type and accessibility).
- DIY sealing: $0.15–0.40 per square foot for materials (example; does not include labor).
Maintenance & Re-Seal Cycles Over 10 Years (Example Estimates):
| Grout Type | Initial Install Cost (per sq ft) | Sealing Frequency | Sealing Cost (per cycle) | Total Sealing (10 yrs) | Total 10-Yr Cost |
|---|---|---|---|---|---|
| Cementitious + sealer | $2.00 | Every 18 months | $0.75 | ~6 cycles × $0.75 = $4.50 | $6.50 |
| Polymer-modified + sealer | $2.25 | Every 24 months | $0.75 | ~5 cycles × $0.75 = $3.75 | $6.00 |
| Epoxy (no sealer required) | $4.50 | None | $0 | $0 | $4.50 |
Notes:
Figures are example estimates for planning only. Actual costs vary by region, installer, project size, and material selection. Verify costs with local suppliers and contractors.
Value Analysis:
Epoxy grout has the highest upfront cost but the lowest 10-year lifecycle cost for wet areas and high-maintenance zones. Polymer-modified grout with periodic sealing offers a balanced middle path for living
areas. Standard cementitious grout is cost-effective upfront but demands rigorous maintenance discipline—suitable for budget-conscious projects where homeowners commit to regular sealing.
Intangible Value Factors:
- Time savings: epoxy grout eliminates sealing labor and reduces cleaning frequency, freeing homeowner time.
- Aesthetic longevity: epoxy and well-sealed polymer-modified grout maintain color and appearance longer, preserving home value.
- Resale appeal: homes with low-maintenance, stain-free grout systems command higher buyer interest in competitive Arizona markets like Scottsdale and Gilbert.
For property managers overseeing multiple units or rental properties, the labor savings and reduced callback rate of epoxy grout often justify the initial premium within 2–3 years (example ROI estimate).
Product Spec Language & Procurement Checklist
Precise specification language ensures you receive the grout system your project demands.
Ready-to-Use Specification Phrases (Specimen Wording for RFPs/POs):
- Grout Technical Data Sheet (TDS) Requirement:
“Contractor shall submit manufacturer’s Technical Data Sheet (TDS) for proposed grout and sealer products prior to purchase. TDS must include: product composition, ANSI classification (A118.3, A118.6, A118.7, etc.), joint width range, absorption rate after cure, VOC content, cure time, coverage rate, recommended cleaning products, and any limitations for use with natural limestone. Substitutions require written approval.” - Color Sample Mockup Requirement:
“Contractor shall prepare a minimum 2 sq ft grout color sample board using actual limestone tiles and proposed grout color. Sample board shall be viewed under natural daylight (morning, midday, late afternoon) and artificial interior lighting. Owner shall approve grout color in writing before bulk grout purchase.” - Joint Width Tolerance:
“Grout joint width shall be [specify dimension, e.g., 3/16″] ±1/16″ unless otherwise approved. Joint width shall be consistent across the installation with no variation exceeding specified tolerance.” - Movement Joint Alignment:
“Soft joints shall be installed at building control joints, perimeter edges, and at maximum [specify spacing, e.g., 20 feet] intervals in field. Soft joints shall be filled with flexible polyurethane or silicone sealant color-matched to grout and tooled flush with tile surface. Grout shall not be installed in soft joints.” - Pre-Shipment Sample Panel Requirement:
“Prior to bulk installation, Contractor shall install an on-site mockup panel, minimum [specify size, e.g., 4 ft × 4 ft], in the actual project location using specified materials, grout color, grout type, joint width, and installation method. Mockup shall remain in place for Owner/Architect inspection and written approval. Approved mockup becomes the quality standard. Mockup area may be incorporated into the project upon approval.” - Holdback Until Mockup Acceptance:
“Owner shall retain [specify percentage, e.g., 10%] of contract value as holdback until final inspection confirms installed work matches approved mockup in color, joint width, finish quality, and overall appearance. Holdback shall be released within [specify days, e.g., 14 days] of satisfactory final inspection.”
Procurement Checklist for Homeowners & Specifiers:
☐ Request grout manufacturer TDS and sealer TDS; verify compatibility with limestone.
☐ Specify grout type (cementitious, polymer-modified, epoxy, urethane) based on use-case.
☐ Specify grout color by manufacturer name and color code (e.g., “Mapei Keracolor U #09 Natural Stone”).
☐ Require on-site color mockup approval under natural and artificial light.
☐ Specify joint width dimension and tolerance.
☐ Identify locations for soft movement joints on project drawings.
☐ Require installer to submit proof of product-specific training for epoxy or urethane grout (if applicable).
☐ Request installer references from recent Arizona limestone projects.
☐ Establish mockup acceptance procedure and holdback terms in contract.
☐ Schedule pre-installation meeting to review substrate conditions, moisture testing, and installation sequence.
☐ Confirm sealer application responsibility (installer vs. owner) and recoat interval in contract.
Legal/Contract Review Note:
All specimen specification wording provided in this guide should be reviewed by legal counsel and adapted to specific project requirements, local codes, and contract law in Arizona.
City-by-City: Local Notes for Arizona Cities
Arizona’s diverse climates and municipal environments require tailored grout strategies.
Phoenix
Phoenix’s extreme heat, intense UV, and hard water (often 250–350 ppm hardness; example values) create unique challenges. Summer tile surface temperatures in sun-exposed rooms can exceed 140°F (example), driving thermal expansion and accelerating grout degradation. Desert dust is persistent, especially during spring dust storms (March–May), when fine particulate coats grout joints and abrades sealer surfaces.
Local Tip: Plan an extra grout joint inspection and spot re-seal in early June, just before monsoon season, to ensure sealer integrity before humidity spikes and monsoon moisture arrives. Homeowners should schedule a professional deep-clean every spring to remove accumulated dust and mineral deposits before they etch into limestone.
Supplier/Installer Instruction: When sourcing materials in Phoenix, request grout and sealer products with UV inhibitors and verify TDS for performance in high-temperature environments (140°F+ surface exposure). Installers should acclimate grout and adhesive materials on-site for 24 hours before use to prevent flash-setting during summer installations.
Municipal/Code Note: Phoenix does not have limestone-specific building code requirements, but large commercial projects may require submittal to the Development Services Department. Confirm current code applicability with Phoenix Development Services before finalizing specifications.
Tucson
Tucson’s monsoon season is more pronounced than Phoenix’s, with summer humidity levels reaching 50–70% during storms (example values). Hard water is prevalent (200–300 ppm; example), and the city’s elevation (2,600 ft; example) creates moderate temperature swings. Historic districts (Barrio Histórico, Armory Park) may have additional tile and grout color approval requirements for exterior installations.
Local Tip: Monsoon runoff can pond on poorly sloped patios and courtyards. Ensure all exterior limestone installations have positive drainage (1–2% slope; example) and sealed grout to prevent water infiltration under tiles. Tucson homeowners should inspect grout joints after the first heavy monsoon rains (typically mid-July) for any gaps or failures.
Supplier/Installer Instruction: Request pool-rated sealers for any exterior grout near pool or fountain features common in Tucson landscaping. Verify that installers are familiar with historic district requirements if your project is within a designated area; color mockup approval may require submission to the Tucson-Pima County Historical Commission.
Municipal/Code Note: Tucson’s greywater reuse ordinance encourages water conservation; installers should ensure grout sealing and drainage prevent greywater contamination of adjacent landscaping. Confirm compliance with Tucson Water regulations.
Scottsdale
Scottsdale’s luxury residential market demands high-end finishes and low-maintenance solutions. Hard water (often 300+ ppm; example) is a significant concern, particularly in North Scottsdale. Homeowners expect pristine grout appearance and are receptive to premium grout systems like epoxy and urethane. Desert landscaping and pool features are ubiquitous, increasing exposure of grout to chlorinated water and mineral-laden irrigation overspray.
Local Tip: Scottsdale homeowners should invest in epoxy grout for all wet areas (showers, steam rooms, pool surrounds) to eliminate hard-water staining and reduce maintenance burden. Schedule biannual professional stone-care service (spring and fall) to remove mineral buildup and maintain sealer effectiveness.
Supplier/Installer Instruction: When specifying grout for Scottsdale projects, request samples and TDS from premium product lines with proven performance in high-end Arizona installations. Verify installer has references from recent Scottsdale luxury homes or resorts. Mockup approval should include both the homeowner and their interior designer or architect.
Municipal/Code Note: Scottsdale’s Development Review process for custom homes may require material submittals; confirm whether grout color and type require inclusion in submittals with Scottsdale Planning & Development Services.
Mesa
Mesa’s residential growth includes new construction and remodels in older neighborhoods. Water hardness varies by area (150–300 ppm; example). The city’s dry climate and dust conditions mirror Phoenix, but Mesa’s more affordable housing market often prioritizes cost-effective grout solutions.
Local Tip: For budget-conscious Mesa homeowners, polymer-modified cementitious grout with diligent sealing provides excellent value. Commit to the maintenance schedule: seal every 18–24 months and perform monthly water-drop tests to catch failing sealer early. Spring dust control is critical; daily dry-mopping during March–April prevents abrasive dust from wearing down sealer.
Supplier/Installer Instruction: Request cost-effective grout and sealer packages from Mesa suppliers that balance performance and price. Installers should provide a written maintenance guide to homeowners, including sealer recoat schedule and recommended cleaning products available at local hardware stores.
Municipal/Code Note: Mesa’s Building Safety Division oversees tile installation under IRC/IBC codes. No Mesa-specific grout requirements are known; confirm with Mesa Building Safety if your project includes unusual applications (e.g., outdoor kitchen with limestone counters).
Chandler
Chandler’s suburban neighborhoods and tech-sector workforce create demand for modern, low-maintenance homes. Water hardness (200–300 ppm; example) and summer heat (matching Phoenix’s intensity) are key concerns. New construction often features open-plan living areas with large-format limestone tile.
Local Tip: Chandler homeowners favor clean, contemporary aesthetics—consider light-to-mid-tone grout in a matching blend with limestone to create seamless, expansive floor planes. For busy families, epoxy or urethane grout in kitchens and bathrooms reduces cleaning time and eliminates re-sealing tasks. Install soft joints at large-format tile perimeters to prevent summer expansion issues.
Supplier/Installer Instruction: When sourcing for Chandler projects, request grout products suited to large-format tiles (rectified edges, minimal lippage). Installers should emphasize movement joint education for homeowners: explain where soft joints are located and why grout should never be used in those locations. Provide care instructions for families with young children (non-toxic cleaning products, immediate spill cleanup).
Municipal/Code Note: Chandler’s Development Services Department processes building permits; confirm whether your project requires inspection of tile substrates or setting systems. No Chandler-specific grout codes are documented—verify with Chandler Building Safety.
Gilbert
Gilbert’s family-oriented communities and newer housing stock mean many limestone installations are in homes less than 15 years old. Water hardness (200–300 ppm; example) and seasonal dust are moderate. Homeowners often undertake DIY maintenance, so clear maintenance education is important.
Local Tip: Gilbert’s community-oriented culture means homeowners often share recommendations. Installers who provide excellent service and clear maintenance instructions will receive strong word-of-mouth referrals. Homeowners should ask installers for a written maintenance plan specific to their grout type and sealer product, including where to purchase recoat sealer locally (many Gilbert residents prefer Home Depot or local tile shops over ordering online).
Supplier/Installer Instruction: Provide homeowners with a one-page maintenance checklist laminated for bathroom or laundry room reference. Include: daily/weekly/monthly tasks, sealer recoat reminders (use calendar stickers or smartphone reminders), emergency stain-removal contacts, and supplier phone numbers for sealer repurchase. Gilbert installers should stock DIY-friendly sealer products (small bottles with applicator brushes) for homeowner spot repairs.
Municipal/Code Note: Gilbert’s Building & Safety Division follows IBC/IRC standards for tile installations. No Gilbert-specific grout regulations are known; confirm permitting requirements with Gilbert Building & Safety for major remodels.
Prescott
Prescott’s high-elevation location (5,400 ft; example) brings freeze-thaw cycles, seasonal moisture swings, and cooler temperatures. Winter lows can drop below freezing; summer highs reach 90°F (example values). Exterior limestone installations face harsher conditions than anywhere else in Arizona.
Local Tip: Prescott homeowners must choose frost-rated grout for all exterior limestone installations—patios, walkways, exterior entries. Specify polymer-modified grout with absorption <5% after sealing (example), and ensure installers slope surfaces for drainage to prevent ice-dam formation at grout lines. Seal grout annually in Prescott (more frequently than Phoenix) due to freeze-thaw moisture cycling. Inspect grout joints each spring after snowmelt for hairline cracks; re-grout damaged areas before the next winter.
Supplier/Installer Instruction: When sourcing for Prescott projects, request grout and sealer TDS confirming freeze-thaw resistance (ASTM C1026 or equivalent testing; verify product compliance). Installers should educate homeowners on winter precautions: avoid de-icing salts on limestone (use sand or kitty litter for traction), and do not shovel snow aggressively across grout joints (use plastic shovels, not metal). Provide a list of local stone-care professionals familiar with elevation-specific limestone issues.
Municipal/Code Note: Prescott’s Development Services may have specific requirements for exterior tile installations in historic districts (downtown Courthouse Plaza area). Confirm whether your project requires design review or color approval with Prescott Community Development.
Flagstaff
Flagstaff’s high elevation (6,900 ft; example), heavy winter snowfall (average 100+ inches annually; example), and freeze-thaw cycles make it Arizona’s most demanding environment for limestone and grout. Summer temperatures are mild (70–80°F; example), but winter cold and moisture dominate maintenance planning.
Local Tip: Flagstaff is not ideal for exterior limestone installations; consider porcelain pavers or flagstone for outdoor areas. If limestone is used outdoors, it must be a dense, low-absorption variety (Class I per ASTM C568; verify stone TDS), and grout must be frost-rated epoxy or premium polymer-modified with aggressive sealing (annual recoat mandatory). Interior installations perform well, but entryways and mudrooms track snow-melt and de-icing salts—use entry mats and commit to daily cleaning during winter months. Homeowners should inspect grout joints after spring thaw for any freeze-damage and repair immediately.
Supplier/Installer Instruction: Request grout and sealer products explicitly rated for freeze-thaw environments when sourcing for Flagstaff projects. Verify installer has experience with high-elevation installations and can demonstrate knowledge of proper substrate preparation (vapor barriers, thermal breaks for radiant heat, drainage layers). Provide homeowners with winter care instructions: wipe entryways immediately after snow-melt tracking, use only limestone-safe ice-melt products (calcium magnesium acetate; avoid sodium chloride or calcium chloride), and schedule professional inspection each April after snowmelt season.
Municipal/Code Note: Flagstaff’s Community Development Department enforces IBC with local amendments for snow loads and freeze protection. Confirm whether tile installations in exterior or unheated spaces require additional frost-protection measures. Check with Flagstaff Building Safety Division before finalizing specifications.
Deliverables
Grout Selection Matrix
| Limestone Tone | Recommended Grout Color | Recommended Grout Type | Joint Width (example) | Use Case |
|---|---|---|---|---|
| Light (cream, beige) | Matching beige or light taupe | Polymer-modified or epoxy | 3/16″ | Living areas, dry zones |
| Mid-tone (tan, gray) | Mid-gray or warm taupe | Polymer-modified | 3/16″–1/4″ | Kitchens, hallways |
| Dark (charcoal, mocha) | Dark gray or matching mocha | Epoxy (wet areas) | 3/16″–1/4″ | Bathrooms, pool surrounds |
| Patterned/Veined | Neutral gray matching vein tone | Polymer-modified or urethane | 3/16″ | Feature walls, living areas |
Example values. Verify joint width with tile manufacturer and TCNA guidelines.
Installer Acceptance Checklist
- Grout Color Mockup Approval: Install 4 sq ft mockup panel using actual limestone and proposed grout. View under natural morning, midday, and afternoon light plus interior artificial lighting. Obtain written approval from owner/architect before bulk installation.
- Joint Width Verification: Measure joint width at multiple locations. Confirm consistency within specified tolerance (±1/16″ typical).
- Lippage Check: Use straightedge across tile surfaces. Lippage should not exceed 1/16″ for rectified tiles or 1/8″ for natural-cleft tiles (example thresholds; verify project specs).
- Adhesion Test (Epoxy Grout): After 24-hour cure, attempt to scratch grout with fingernail. Properly cured epoxy resists scratching.
- Cure Verification (Cementitious Grout): Wait minimum 72 hours (verify TDS) before sealing. Grout should be hard, dry, and free of surface moisture.
- Shrinkage Inspection: Inspect joints 7–10 days post-install. Excessive shrinkage (joints recessed >1/8″ below tile surface) requires re-grouting.
- Sealer Application Check: After sealer cure, perform water-drop test on grout. Water should bead and not darken grout within 5 minutes.
- Movement Joint Verification: Confirm soft joints are installed at perimeters, building control joints, and specified field intervals. Soft joints filled with flexible sealant, not grout.
- Final Cleaning: Grout haze removed; limestone surface clean and free of residue.
- Documentation: Installer provides grout product name, color code, batch numbers, sealer product name, application date, and recommended recoat interval in writing to owner.
Maintenance Schedule
DAILY:
- Sweep or dry-mop with microfiber mop to remove desert dust (increase to twice daily during spring dust storms).
- Wipe spills immediately with damp microfiber cloth.
WEEKLY:
- Damp-mop with pH-neutral stone cleaner (1 oz per gallon water; example dilution).
- Wring mop nearly dry; avoid standing water.
- Rinse with clean water; air-dry or towel-dry.
MONTHLY:
- Inspect grout joints for hairline cracks, color fade, or staining.
- Perform water-drop test on 3–4 grout joints to check sealer effectiveness.
- Spot re-seal any joints where water absorbs within 5 minutes.
- Remove hard-water deposits with stone-safe descaler; rinse thoroughly.
ANNUALLY (or per sealer TDS recoat interval):
- Deep-clean floor with pH-neutral cleaner and soft brush for grout joints.
- Rinse thoroughly; allow 24–48 hours to dry completely.
- Apply penetrating sealer per manufacturer TDS (typically 2 thin coats).
- Cure per TDS (24–72 hours) before resuming use.
AS NEEDED:
- Emergency stain removal using poultice (iron/organic stains).
- Hard-water descaling procedure for severe mineral buildup.
- Professional stone-care service every 2–3 years (Phoenix/Scottsdale hard-water areas).
Emergency Descale & Stain Removal Flow
Hard-Water Descaling:
- Test stone-safe descaler on hidden area (closet threshold).
- Apply descaler or mild phosphoric acid solution (0.5–1% concentration; example) with soft brush.
- Let sit 2–5 minutes (do not exceed recommended dwell time per product label).
- Scrub gently with non-abrasive pad.
- Rinse thoroughly with clean water 2–3 times.
- Dry completely with microfiber towels.
- Re-seal affected area once dry per sealer TDS.
Iron or Organic Stain Poultice:
- Identify stain type (rust-colored = iron; brown/black = organic).
- Mix appropriate remover with absorbent powder (kaolin, diatomaceous earth) to paste consistency.
- Iron stains: oxalic acid-based remover (verify limestone-safe).
- Organic stains: hydrogen peroxide (12% concentration; example).
- Apply paste 1/4″ thick over stain, extending 1″ beyond stain edges.
- Cover with plastic wrap; tape edges.
- Let sit 24–48 hours (example period).
- Remove paste; rinse thoroughly with clean water.
- Dry completely.
- Re-seal area per sealer TDS.
- If stain persists, repeat once. If still present after two attempts, call professional stone restorer.
Escalation Criteria:
Call professional if:
- Stain does not respond after two poultice attempts.
- Efflorescence persists after 4 weeks of drying.
- Grout failure exceeds 20% of floor area.
- Limestone shows etching, pitting, or structural cracking.
Procurement Spec Snippets
Technical Data Sheet Requirement (Specimen Wording):
“Contractor shall submit manufacturer’s Technical Data Sheet (TDS) for proposed grout and sealer products prior to purchase. TDS must include: product composition, ANSI classification (A118.3, A118.6, A118.7, etc.), joint width range, absorption rate after cure, VOC content (g/L), cure time, coverage rate (sq ft per unit), recommended cleaning products, and any limitations for use with natural limestone. Substitutions require written approval from Owner/Architect.”
Mockup Acceptance Clause (Specimen Wording):
“Contractor shall install a mockup panel, minimum 16 square feet, using specified limestone tiles, grout type, grout color, joint width, and setting materials. Owner/Architect shall inspect and approve mockup in writing under natural site lighting conditions (morning, midday, and late afternoon) and under artificial interior lighting before Contractor proceeds with bulk installation. Mockup becomes the quality standard for the project. Final installation shall match mockup in color, joint width (±1/16″), finish, and overall appearance. Work not matching approved mockup shall be removed and reinstalled at Contractor’s expense.”
Holdback Wording (Specimen Wording):
“Owner may withhold ten percent (10%) of contract sum as holdback until final inspection confirms installed work matches approved mockup in color, joint width, finish quality, and overall appearance. Holdback shall be released within fourteen (14) days of satisfactory final inspection and written acceptance by Owner/Architect.”
Note: All specimen wording should be reviewed by legal counsel and adapted to specific project requirements and Arizona contract law.
Cost-of-Ownership Table (10-Year Estimate)
| Grout System | Initial Install Cost ($/sq ft) | Sealing Frequency | Sealing Cost per Cycle ($/sq ft) | Number of Reseals (10 yrs) | Total Sealing Cost (10 yrs) | Total Cost (10 yrs) |
|---|---|---|---|---|---|---|
| Standard cementitious + sealer | $2.00 | Every 18 months | $0.75 | 6 | $4.50 | $6.50 |
| Polymer-modified + sealer | $2.25 | Every 24 months | $0.75 | 5 | $3.75 | $6.00 |
| Epoxy (no sealer required) | $4.50 | None | $0 | 0 | $0 | $4.50 |
| Urethane (minimal sealing) | $3.00 | Every 36 months | $0.50 | 3 | $1.50 | $4.50 |
Example estimates for planning purposes only. Actual costs vary by region, project size, installer rates, and material selection. Verify with local suppliers and contractors. Does not include routine cleaning or emergency repairs.
Our tile perfection — Limestone tile grout selection guide for Arizona homes
Choosing the right grout for limestone tile in Arizona requires balancing appearance, durability and maintenance under local conditions. This practical guide frames decision points—grout types, color strategies and upkeep routines—in ways you can adapt for Glendale, Tempe, Peoria, Surprise, San Tan Valley and Yuma. All recommendations below are conditional and intended to shape specification and maintenance planning rather than to document completed work.
Quick grout-selection checklist (read before you choose)
Match grout chemistry to limestone: use grout systems that are compatible with calcium-carbonate stones to avoid staining or chemical attack.
Prioritize cleanability: pick grout that resists soiling and accepts approved cleaners without leaving residues.
Consider joint width and movement: thinner joints favor a refined look but require tighter substrate tolerances; wider joints hide size variation but collect more dust.
Plan for serviceability: specify reseal intervals, approved cleaners and a spare grout sample lot for repairs.
Treat every selection as a conditional decision that should be tested on a full-size sample in site lighting and under local cleaning regimes.
Grout types — pros, cons and when you might specify them
Cement-based grout (modern formulations)
Pros: familiar to most installers, economical, available in many pigments.
Cons: higher water absorption unless treated; can require topical sealers on limestone to reduce staining.
Typical use: budget-sensitive areas where frequent maintenance is acceptable; recommend sealed grout and pre-test with your stone sample.
Polymer-modified cement grout
Pros: improved flexibility and stain resistance compared with plain cement grout; better bond with thinset systems.
Cons: still somewhat absorbent; select products rated for natural stone.
Typical use: general bathroom and living areas where moderate resistance to soiling is needed.
Epoxy grout
Pros: excellent stain resistance, near-impermeable, minimal maintenance once cured.
Cons: higher cost, more exacting installation technique, potential for color mismatch with porous stone if not tested.
Typical use: shower pans, high-wear thresholds, or where homeowners require low-maintenance seams; always trial on sample tiles to check visual effect.
Cementitious grout with integral stain inhibitors
Pros: cost-effective with improved performance; installer-friendly.
Cons: variable long-term performance; verify manufacturer claims with independent porosity testing.
Typical use: large-floor areas where epoxy is impractical but improved resistance is desired.
Color strategy — how grout color affects appearance and maintenance
Tonal match (close match to tile): creates a seamless plane and minimizes perceived joint lines; tends to show less contrast dirt but can reveal subtle color shifts between production lots.
Contrasting grout: highlights pattern, geometry and joint definition; may make light soiling more visible on high-contrast installations.
Mid-tone neutral: a pragmatic compromise for dusty Arizona interiors where tracked grit is common; it balances concealment and definition.
Recommendation: request full-size mock-ups with the shortlisted grout color and expose them to representative soiling and cleaning cycles before final selection.
City-level considerations (practical notes you can adapt)
Glendale — irrigation splash and fine dust are common. You might prefer grout that tolerates periodic wetting and accepts resealing; request a sealed grout mock-up to verify stain behavior after simulated irrigation exposure.
Tempe — higher daytime temperatures and urban dust mean grout that resists rapid soiling and chemical degradation is helpful. Consider polymer-modified or epoxy options for wet-edge showers and south-facing wet rooms.
Peoria — tracked-in grit from suburban activity suggests grout with slightly darker mid-tones to hide abrasion marks between cleanings; specify grout with clear maintenance instructions to be included in O&M documents.
Surprise — extended dry spells and occasional dust storms make cleanability key. Test grout samples for ease of dry sweeping and wet cleaning; prefer grout that won’t retain mineral residue after typical household cleaners are used.
San Tan Valley — coarse desert particles and episodic monsoon water flow require grout that tolerates both abrasion and intermittent wetting; consider grout that pairs well with approved penetrating sealers and request reseal interval guidance based on measured porosity.
Yuma — pervasive sand and intense solar loading favor grout systems that minimize thermal movement stress and resist surface abrasion; epoxy grout can be useful at thresholds and wet areas where maintenance access is limited.
Installation and detailing tips you can require in specs
Joint width tolerance: define acceptable tolerance band (for example, ±1 mm) to guide installer pricing and mock-up acceptance.
Back-buttering and bedding: require manufacturer-recommended methods to ensure full contact and reduce voiding beneath tile.
Sealer specification: if a topical or penetrating sealer is part of the regimen, specify product, application method and reseal frequency as part of the contract.
Mock-up acceptance: require an on-site or yard mock-up of at least one square meter showing chosen tile, grout and sealer applied and cured; use that result as the acceptance standard for the lot.
Spare material and grout lot hold: request a reserved grout sample and a small spare grout container from the approved batch for future repairs.
Maintenance protocol examples you could include
Daily/weekly: dry-sweep or vacuum to remove abrasive particles that accelerate joint wear.
Monthly: spot-mop with a pH-neutral cleaner approved by the grout manufacturer; avoid acidic cleaners on limestone.
Annual (or per reseal interval): perform a light extraction and apply penetrating sealer if specified; reinspect grout lines and touch up with reserve grout as required.
Acceptance testing: specify simple acceptance tests (e.g., water beading test) to confirm sealer performance on arrival of site mock-ups.
Sample procurement language (adapt to your contract)
“Supplier / installer shall produce a full-size mock-up showing tile, selected grout and sealer; mock-up must be approved prior to mass installation.”
“Grout product and color shall be from the same manufacturer for the installed area; installer to provide batch numbers and maintain a reserved grout sample for future repairs.”
“Specify reseal intervals and approved cleaners; provide a one-page maintenance schedule for inclusion in the O&M handover.”
Use procurement clauses like these to make grout performance and maintenance an explicit part of contract compliance.
Testing and verification you might request
Porosity and absorption figures for both tile and grout products.
Stain tests (coffee, oil) on the combined tile+grout mock-up.
Abrasion resistance or wear rating for grout where high foot traffic or tracked grit is expected.
Request these data early so performance expectations are aligned with local exposure.
Conclusion & Quick Action Checklist
Selecting the right limestone tile grout Arizona homeowners and professionals depend on is a multi-layered decision that balances aesthetics, performance, and long-term maintenance. Arizona’s climate—from Phoenix’s extreme heat and hard water to Flagstaff’s freeze-thaw cycles—demands grout systems engineered for resilience. By understanding grout types, matching color strategically, committing to sealing protocols, and following city-specific best practices, you ensure your limestone installation delivers decades of beauty and durability.
6-Step Quick Action Checklist:
- Define Your Desired Look: Decide blend vs. contrast grout color; request color swatches on your actual limestone.
- Request Mockup Under Real Arizona Light: Insist on a 4 sq ft mockup panel viewed under morning, midday, and afternoon natural light plus interior lighting before approval.
- Select Grout Type Suited to Use-Case: Polymer-modified for living areas; epoxy for wet rooms, pools, and high-stain zones; urethane for low-maintenance interiors.
- Specify Sealer & Recoat Interval: Choose penetrating sealer with TDS documentation; commit to recoat schedule (12–24 months typical; verify per product).
- Require Installer Acceptance Tests: Written mockup approval, joint width verification, cure checks, and sealer water-drop test before final payment.
- Schedule Maintenance Plan: Daily dust control, weekly pH-neutral cleaning, monthly inspections, annual deep-clean and re-seal.
Call to Action:
Request a grout color mockup and detailed specification from your Arizona tile supplier or installer today. Bring this guide to your consultation to ensure all climate-specific considerations are addressed in your project plan.