Quick Answer — Do Limestone Pavers Need Special Care at High Altitude?
Yes—high altitude paver care in Flagstaff and Prescott demands specific attention to freeze-thaw resistance, moisture management, and winter maintenance protocols. Unlike lower-elevation Arizona installations where weathering occurs slowly over years, high-altitude freeze-thaw cycles can cause rapid deterioration (surface spalling, edge flaking, structural cracking) in non-frost-rated limestone or improperly installed pavers within one to three winter seasons. Three critical protective actions: First, verify stone is frost-rated (water absorption <3%, documented freeze-thaw cycle testing per ASTM C666) before installation or retroactively test existing materials. Second, inspect and repair joints before winter—open joints allow water infiltration that expands when frozen, causing damage. Third, use only limestone-safe deicers (avoid sodium chloride rock salt)—choose calcium magnesium acetate, sand/grit for traction, or low-chloride formulations, and rinse residues promptly after thaw events.
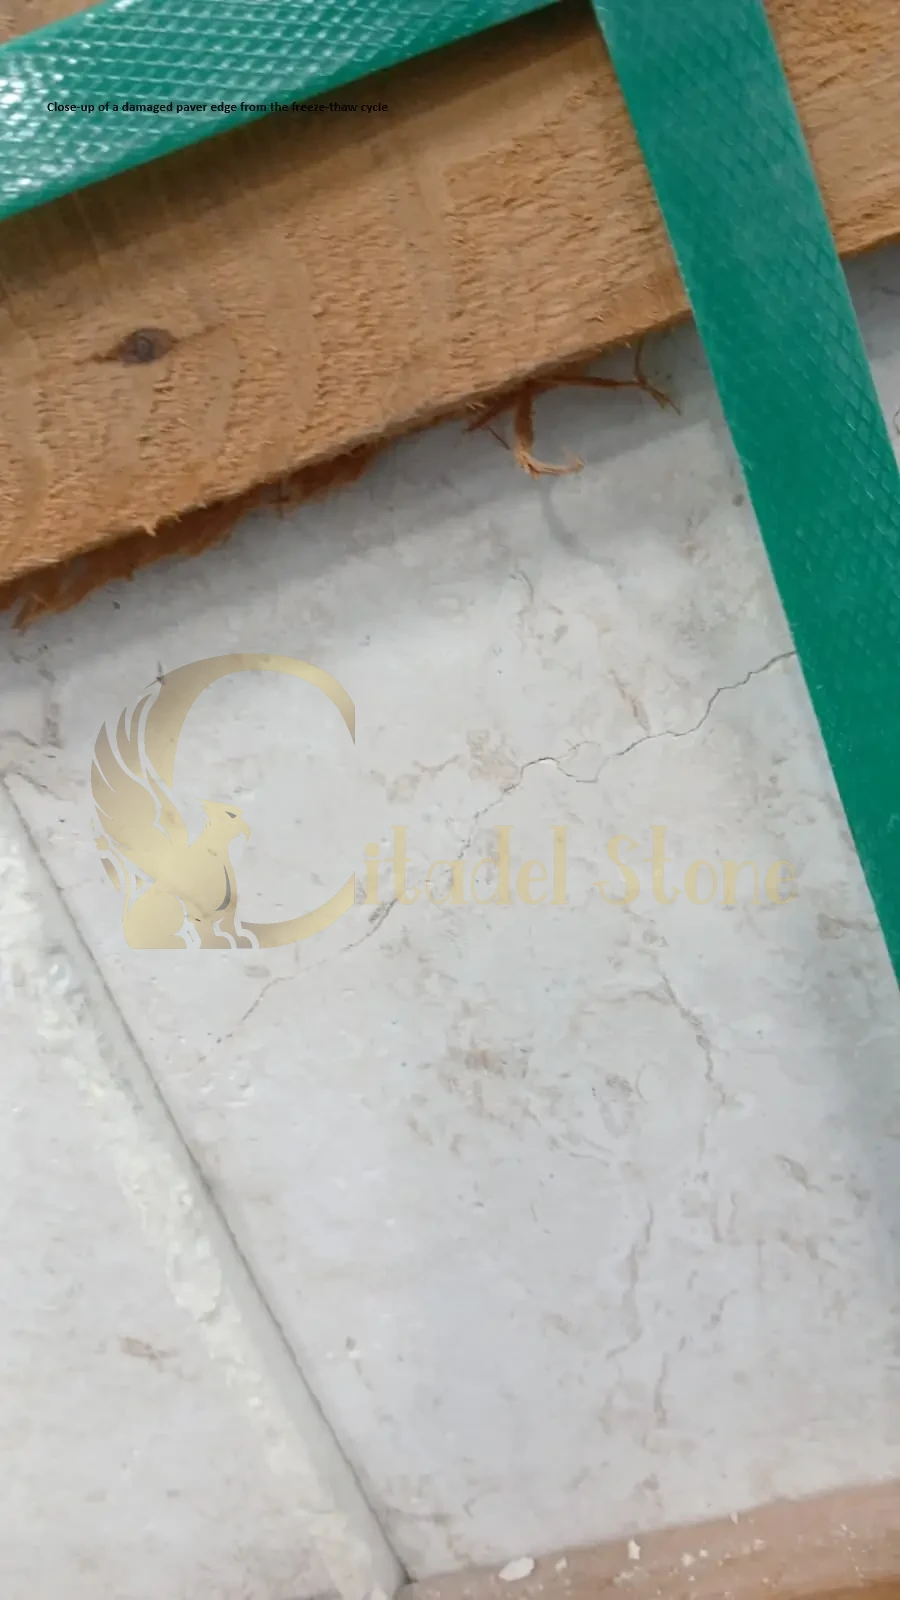
How High-Altitude Weather Stresses Stone — Freeze-Thaw, Snow & UV
Why freeze-thaw cycles matter in Flagstaff & Prescott
Freeze-thaw damage occurs through a destructive cycle: water absorbed into limestone’s porous structure (via capillary action drawing moisture into microscopic pores and fissures) expands approximately 9% when freezing, creating internal pressure that exceeds the stone’s tensile strength. In a single freeze event, this expansion can create micro-cracks invisible to casual inspection. Repeated cycles—Flagstaff averages 180–220 freeze-thaw cycles annually (estimated—based on days crossing 32°F threshold), Prescott 80–120 cycles (estimated)—propagate these micro-cracks into visible surface damage: spalling (shallow surface flaking), scaling (thin layer delamination), and eventually structural cracking.
Critical threshold: Limestone with water absorption >5% faces high risk of freeze-thaw failure in Flagstaff’s climate. Absorption 3–5% represents moderate risk requiring protective measures (sealing, proper drainage). Absorption <3% indicates dense stone with adequate frost resistance for high-altitude use. Complicating factor: High-altitude UV intensity (30–40% higher than Phoenix due to thinner atmosphere—estimated) accelerates surface degradation, making limestone more susceptible to moisture absorption over time as UV breaks down surface structure and any applied sealers.
Temperature cycling stress compounds freeze-thaw damage. Flagstaff winter days often feature below-freezing mornings (15–25°F), warming to 40–50°F by afternoon, then dropping below freezing again overnight—multiple freeze-thaw events within 24 hours. This rapid cycling prevents complete drying between freeze events, maintaining high moisture content that maximizes ice expansion stress.
Snow, ice and salt: common failure modes for pavers
Snow loading: While snow itself rarely damages limestone (light weight distributed across surface), snow accumulation creates prolonged moisture contact. Multi-day snow coverage prevents evaporation, allowing sustained water absorption into stone. When temperatures fluctuate, this trapped moisture undergoes freeze-thaw cycles while confined beneath snow cover—intensifying damage.
Ice formation in joints: Open or eroded joints become ice reservoirs. Water settles in joints, freezes, and expands laterally—pushing adjacent pavers apart, destabilizing the field, and accelerating joint material loss. This creates positive feedback: wider joints hold more water, causing more ice expansion, widening joints further. Eventually pavers become loose, susceptible to cracking under foot traffic or snow removal equipment.
Salt scaling: Sodium chloride (rock salt) deicers create chemical attack in addition to physical freeze-thaw damage. Salt solutions have lower freezing points than pure water, keeping water liquid at temperatures where it would otherwise freeze solid. This liquid brine penetrates deeper into limestone, reaching pores unaffected by pure water. When temperatures drop further (below salt’s effective range, approximately 5°F for standard rock salt), this deeply-penetrated moisture freezes, causing internal damage. Additionally, repeated salt exposure can react with limestone’s calcium carbonate structure, causing surface softening and accelerated weathering. Salt scaling symptoms: white powdery residue (salt deposits plus limestone dissolution products), rough pitted surface texture, progressive surface loss of 1/16″–1/8″ per season in severe cases.
Choosing the Right Stone — freeze thaw resistant stone arizona
Quarry specs to request (water absorption, porosity, frost rating)
freeze thaw resistant stone arizona selection begins with objective material testing data from quarries or independent laboratories:
Water absorption (ASTM C97): Measures percentage of water absorbed by weight after 48-hour immersion. Target values for high-altitude Arizona: <2% excellent (minimal freeze-thaw risk), 2–3% good (acceptable with proper installation and maintenance), 3–5% marginal (requires sealing, perfect drainage, and vigilant maintenance), >5% poor (not recommended for Flagstaff/Prescott exterior use). Request certified test results specific to the production lot you’re purchasing—absorption varies between quarry blocks.
Apparent porosity: Related to absorption but measures void volume as percentage of bulk volume. Lower porosity indicates denser, more frost-resistant stone. Target <6% porosity for high-altitude use.
Freeze-thaw cycle testing (ASTM C666 or C1026): Definitive test for frost resistance. Stone samples undergo 50–300 rapid freeze-thaw cycles (one complete cycle every few hours) in laboratory conditions. Acceptance criteria: <5% weight loss and minimal surface degradation after 50 cycles indicates adequate frost resistance. Many European limestones carry documentation showing 100+ cycles without significant deterioration. Request test certificates—verbal claims of “frost rating” without documentation are insufficient.
Compressive strength (ASTM C170): While primarily indicating structural capacity, higher strength often correlates with density and frost resistance. Target ≥8,000 psi for high-altitude installations—stronger stone typically has tighter crystalline structure limiting water absorption.
Specification language for contracts: “Supplier shall provide certified laboratory test reports (dated within 12 months) for production lot [LOT NUMBER] showing: water absorption ≤3% per ASTM C97, compressive strength ≥8,000 psi per ASTM C170, and freeze-thaw resistance documentation per ASTM C666 showing <5% weight loss after minimum 50 cycles. Test samples shall represent actual delivered materials.”
Surface finishes & their winter performance (honed vs sawn vs thermal)
Honed finish (machine-ground smooth surface): Creates uniform, relatively dense surface with sealed pores. Moderate slip resistance when dry; can be slippery when wet or ice-covered—specify coarser honing grits (80–120) for pathway and step applications. Winter performance: Good—smooth surface sheds water relatively well, resists lichen/moss colonization, and is easy to inspect for damage. Snow removal straightforward with plastic shovels. Considerations: May show salt residue staining more visibly than textured finishes.
Sawn finish (rough-cut from quarry saw): Slight texture with visible saw marks, better slip resistance than polished but less than heavily textured finishes. Economical choice. Winter performance: Good—texture provides some water drainage channels preventing sheet ice formation, adequate slip resistance for most applications. Saw marks can trap some moisture but difference is minimal. Considerations: Edges may be more vulnerable to chipping during snow removal if shovel strikes paver face.
Brushed finish (wire-brushed texture): Linear texture increasing slip resistance and creating micro-drainage channels. Winter performance: Excellent—texture breaks up surface ice formation, provides good traction even when wet, and handles freeze-thaw stress well. Slightly more moisture retention in texture than honed but minimal practical difference. Best for: Steps, ramps, pool edges, and high-traffic pathways requiring maximum slip safety.
Thermal/flamed finish (heat-fractured surface): Creates rough, highly textured surface. Less common for limestone than granite but available for some varieties. Winter performance: Excellent slip resistance but rough texture can trap moisture and salt residues. More difficult to clean thoroughly post-winter. Best for: Specialized applications requiring extreme traction; generally over-specification for residential use.
Recommendation hierarchy for high-altitude: Brushed finish for pathways and steps (slip safety + freeze-thaw performance), honed finish for main patio areas (aesthetics + adequate performance with proper maintenance), avoid polished finishes entirely (unsafe when wet/icy, shows every imperfection).
Pre-Winter Preparation Checklist — preparing patio for snow prescott
preparing patio for snow prescott and Flagstaff installations requires systematic attention before first freeze. Follow this timeline:
Late September / Early October (before first frost):
- Clean thoroughly (2–3 hours for typical 400–600 sq ft patio): Sweep away all organic debris—leaves, pine needles, seed pods—from paver surfaces and joints. Organic matter holds moisture and provides nutrients for moss/lichen growth that retains water and accelerates freeze-thaw damage. Use leaf blower or soft-bristle broom.
- Inspect joints (1–2 hours): Walk entire paver field looking for eroded, cracked, or missing joint material. Probe joints with screwdriver—properly filled joints resist penetration; degraded joints allow screwdriver to sink >1″ depth. Document problem areas with photos.
- Repair joints (3–6 hours plus cure time, or contractor service $400–$800 estimated—Prescott/Flagstaff market): Remove loose joint sand to 1–2″ depth using oscillating tool with grout blade or manual grout saw. Vacuum debris. Refill with fresh polymeric sand (for joints 3/16″–3/8″) or repoint with polymer-modified mortar (for wider joints or exposed edges). Compact thoroughly and allow full cure per manufacturer guidelines (typically 24–72 hours) before next step.
- Water absorption test (30 minutes): Place quarter-sized water drops on 6–8 representative pavers across installation. Time how long water beads vs. absorbs. If absorption occurs within 2–3 minutes, sealer has degraded or was never applied—consider resealing (see sealing section below). If water beads for 10+ minutes, sealer remains effective.
- Drainage verification (1 hour): Simulate heavy rain with garden hose, observing water flow patterns. Water should drain away from house foundation and off paver field within 5–10 minutes. Standing water puddles indicate inadequate slope or clogged drains—address before winter. Verify downspouts discharge minimum 6′ away from paver edges.
Mid-October / Late October (2–4 weeks before typical first snowfall):
- Sealer application (if needed—DIY 4–6 hours plus cure, or contractor $600–$1,200 for typical patio estimated): Apply breathable penetrating impregnator if water absorption test indicated need. Test sealer on sample board or inconspicuous area first—apply product, allow cure, conduct freeze-thaw cycle test (freeze sample board overnight, thaw next day, inspect for blushing or delamination). Never seal when temperatures may drop below 40°F within cure window.
- Protect sensitive features (1–2 hours): Drain and blow out fountains and water features. Disconnect and drain irrigation lines per local code (Flagstaff and Prescott require irrigation winterization—verify with municipal codes). Cover delicate planters or move to protected locations. Remove furniture cushions to prevent moisture retention.
- Stage winter supplies (30 minutes): Purchase and store limestone-safe deicer (calcium magnesium acetate or equivalent—20–40 lb bag sufficient for typical residential installation), inert traction sand (play sand or similar, not gravel that can scratch pavers), plastic snow shovel or pusher (never metal blades), and stiff broom for sweeping salt residues after thaw.
Ongoing November–March (during winter season):
- Prompt snow removal (variable time—remove snow within 24 hours of snowfall): Clear snow before it compacts and ices over. Multiple light removal passes better than single heavy effort. Use plastic shovel or pusher, working parallel to joints where possible to avoid catching edges.
- Minimal deicing (apply sparingly): Use sand/grit for traction first; apply chemical deicers only when necessary and at minimum effective rates (typically 2–4 oz per square yard—follow product labels). Avoid creating concentrated piles of deicer on stone.
Post-winter (late March / early April):
- Thorough cleaning (2–4 hours): Once freeze risk passes, sweep away all winter sand/salt residues. Rinse pavers thoroughly with garden hose or low-pressure washer (≤1,200 psi) to remove embedded salt. Inspect for any damage that developed during winter (see inspection section below).
Read the Case Study: Dusty Mesa to European Courtyard with Limestone!
Installation & Detail Best Practices for High Altitude (contractor spec items)
Proper installation prevents most winter damage. High-altitude specifications (typical guidance—verify with structural engineer for site-specific conditions):
Subgrade preparation: Proof-roll to identify soft spots. In Flagstaff, frost depth reaches 24″–36″ (typical guidance—verify local building code); Prescott 18″–24″ (typical guidance). Over-excavate and replace frost-susceptible soils (silts, clays with high moisture content) with free-draining granular material.
Geotextile fabric: Install non-woven geotextile between subgrade and base to prevent upward migration of fines that can become ice lenses (horizontal ice layers forming in fine-grained soils, causing heaving).
Base depth and composition: Minimum 10″–12″ compacted angular crushed rock (¾” minus ABC) in Flagstaff; 8″–10″ in Prescott (typical guidance—depths account for frost protection and load distribution). Compact in maximum 4″ lifts to 95% Standard Proctor minimum. Use clean aggregate without fines that trap water.
Underdrain consideration: Where groundwater or seasonal moisture is present, install 4″ perforated pipe in gravel trench at base level, daylighting to appropriate drainage (minimum 1% pipe slope). Prevents water accumulation under pavers that could freeze and heave.
Bedding layer: 1.5″–2″ coarse concrete sand, screeded level. Avoid fine sands that retain moisture. For highest-exposure locations (north-facing patios with limited sun), consider thin mortar bed (1″–1.5″ polymer-modified mortar over concrete slab) for superior moisture isolation—though this increases cost and limits flexibility.
Edge restraint anchoring: Concrete haunch (minimum 8″×10″ cross-section extending below frost line) or commercial steel/aluminum edge systems with anchors driven to frost depth. Insufficient edge restraint allows frost heave to displace perimeter pavers, progressively destabilizing entire field.
Joint material: Field joints (interior of patio): polymeric sand for joints 3/16″–3/8″, properly compacted and activated. Wet edges and exposed perimeters: repoint with polymer-modified mortar recessed 1/8″–1/4″ below paver surface for drainage and expansion accommodation.
Movement joints: Install expansion joints (1/2″–3/4″ width, closed-cell backer rod plus elastomeric sealant) at 10’–12′ intervals and at junctions with structures. Cold temperatures cause stone contraction; proper movement joints accommodate this without cracking.
Specification language: “Installation shall meet or exceed frost-protection standards for [Flagstaff/Prescott] frost depth. Base shall extend minimum [12″] below finished grade, compacted to 95% Standard Proctor in 4″ lifts maximum. Geotextile separation fabric required on all fine-grained subgrades. Edge restraint shall be anchored below frost line with concrete haunch or approved commercial system. Contractor shall provide proof-roll documentation and compaction test reports before paver placement.”
Deicing & Snow Removal — Safe Methods That Don’t Damage Limestone
Safe deicing hierarchy (use methods in this order):
1. Mechanical removal (preferred): Plastic snow shovel, rubber-edged pusher, or soft-bristle broom for light snow. Remove snow within 24 hours of snowfall before it compacts and bonds to stone. Work in same direction as joint lines when possible to avoid catching paver edges. Never use metal-edged shovels, ice chippers, or picks directly on limestone—these gouge and chip edges.
2. Traction materials (safest chemical-free option): Inert sand, fine gravel (3/8″ minus), or commercial traction products (clean sand, non-staining volcanic ash). Spread at 1–2 lb per 10 sq ft. Provides immediate traction without chemical exposure. Cleanup: Sweep up and reuse after ice melts; prevents sand accumulation in joints that can trap moisture.
3. Limestone-safe deicers (use sparingly):
- Calcium magnesium acetate (CMA): Safest for limestone. Effective to approximately 20°F, biodegradable, minimal environmental impact. Application rate: 2–4 oz per sq yd. Cost: Higher than rock salt ($15–$30 per 50 lb bag estimated vs. $5–$10 for rock salt). Pros: No stone damage, works by preventing ice bonding rather than melting. Cons: Slower acting than chloride salts, less effective at extreme cold.
- Calcium chloride (limited use): More effective than CMA at lower temperatures (works to approximately 0°F), faster-acting. Application rate: 2–3 oz per sq yd maximum—over-application damages limestone. Caution: Can cause surface pitting with repeated use; rinse thoroughly after each thaw.
- Potassium chloride: Moderate effectiveness (to 25°F), lower corrosion than sodium chloride. Application rate: 3–4 oz per sq yd. Better than rock salt but not as safe as CMA.
4. Products to NEVER use on limestone:
- Sodium chloride (rock salt): Most damaging to limestone. Causes salt scaling, surface dissolution, and accelerated freeze-thaw damage. Despite low cost and wide availability, rock salt ruins limestone pavers within 2–5 winter seasons.
- Magnesium chloride: Less damaging than sodium chloride but still problematic for limestone—causes surface pitting and staining.
- Urea-based deicers: Can promote organic growth (algae, moss) that retains moisture and worsens freeze-thaw cycles.
Application best practices: Apply deicers before snow/ice events when possible (anti-icing more effective than de-icing), spread evenly at minimum effective rate (more isn’t better—excess damages stone without improving performance), avoid concentrated piles or applications, and rinse thoroughly within 24–48 hours after thaw to prevent residue buildup.
Post-application cleanup: Once ice melts and temperatures stabilize above freezing, sweep away excess deicer and rinse pavers with garden hose. Salt residues left on surface attract moisture, accelerating subsequent freeze-thaw damage and creating visible white staining.
Sealing, Jointing & Edge Protection — high altitude paver care details
Sealing considerations for high-altitude:
Breathable penetrating sealers (silane/siloxane or water-based impregnators) reduce water absorption while allowing trapped moisture vapor to escape—critical in freeze-thaw climates where complete moisture barriers trap water leading to catastrophic delamination. Application timing: Early fall (September) before first freeze, when temperatures remain above 50°F for 72-hour cure window. Never seal when rain forecast within 24 hours or when overnight temperatures approach freezing.
Testing protocol before full application: Apply sealer to 2’×2′ sample board or inconspicuous patio section. Allow full cure. Subject to real-world freeze-thaw cycle (leave outdoors through one complete freeze-thaw event, minimum overnight freeze followed by afternoon thaw). Inspect for blushing (cloudy white appearance indicating trapped moisture), delamination, or excessive darkening. If sample performs well, proceed with full application; if problems develop, try alternative product or leave unsealed.
Sealer reapplication: High-altitude UV and freeze-thaw stress degrade sealers faster than Phoenix installations. Expect 2–3 year service life (vs. 3–5 years in lower Arizona). Conduct water-drop tests annually to assess sealer condition.
Jointing for freeze-thaw resistance:
Polymeric sand joints: Properly activated polymeric sand creates semi-rigid matrix resisting ice expansion better than loose sand. Critical installation requirements: Joints must be clean and dry before application, compact thoroughly before and after sand placement, activate with light mist only (never flood—causes premature binder activation), and allow full cure (48–72 hours, no foot traffic).
Mortar joints at exposed edges: Wherever pavers meet steps, walls, or property perimeters without overhead protection (areas receiving maximum snow/ice exposure), repoint joints with polymer-modified mortar. Recess mortar 1/8″–1/4″ below paver surface to accommodate expansion and provide drainage path. Mortar prevents ice from wedging between pavers at vulnerable edges.
Edge haunch protection: Perimeter pavers experience greatest frost heave stress. Properly haunched edges (concrete or mortared edge course anchored below frost line) prevent displacement. Inspect haunch condition annually—cracks or separation points allow moisture infiltration and frost penetration.
Mid-Winter & Post-Winter Inspections — what to look for and when to act
Inspection schedule:
24–72 hours after each significant thaw (quick walk-through, 15–30 minutes): Look for obvious problems requiring immediate attention—displaced pavers creating trip hazards, large joint voids exposing base material, or visible surface spalling. Address these promptly before next freeze cycle compounds damage.
30-day post-final-thaw inspection (thorough assessment, 1–2 hours): Once freeze risk passes (typically late March/early April), conduct detailed inspection:
Signs requiring professional evaluation:
- Surface spalling: Shallow flaking or scaling, typically 1/16″–1/4″ deep patches appearing randomly across pavers. Indicates freeze-thaw damage from absorbed moisture. Action: Document with photos, contact stone supplier to determine if material defect vs. installation issue, obtain professional assessment before next winter.
- Edge crumbling: Paver edges fragmenting or chipping progressively. Action: Identify cause (mechanical damage from snow removal tools vs. freeze-thaw failure). Replace severely damaged units; chamfer edges of minor damage to prevent progression.
- Joint washout: Polymeric sand eroded or absent over sections >2 linear feet. Action: Remove remaining loose material, vacuum joints, and refill with fresh polymeric sand. If washout is extensive (>20% of joints), investigate drainage issues—water flowing through joints indicates inadequate surface slope.
- Efflorescence (white powdery deposits): Not damage itself but indicates moisture migration through stone—precursor to freeze-thaw problems. Action: Identify moisture source (subsurface water, poor drainage, compromised waterproofing), address root cause, clean efflorescence with pH-neutral cleaner and soft brush.
- Heaving or settlement: Pavers raised above or sunken below surrounding field level. Action: Indicates base failure or frost heave. Requires professional remediation—remove affected pavers, correct base issues, reinstall with proper compaction.
- Cracking: Structural cracks running through paver body (not just surface spalling). Action: Replace cracked units. Investigate whether pattern indicates point loading, inadequate base support, or material defect.
Documentation protocol: Photograph all damage with ruler or coin for scale, note date and location, and keep log tracking progression over multiple seasons. This documentation supports warranty claims and helps identify whether problems are worsening or stable.
When to call contractor: If more than 5–10% of pavers show damage, if same areas show progressive damage year-over-year, if heaving or settlement affects more than 10 sq ft, or if joint failure is widespread (>30% of joints eroded). DIY repairs address isolated problems; systemic issues require professional diagnosis.
Case Notes — Flagstaff vs Prescott Differences (site examples & short notes)
Flagstaff (elevation 6,910′, northern Arizona):
Experiences most severe freeze-thaw conditions in Arizona. Average 180–220 annual freeze-thaw cycles (estimated), winter snow accumulation requiring regular removal, and extended periods below freezing (weeks of sustained <32°F temperatures). Material requirements: Frost-rating mandatory—water absorption <2.5% strongly recommended, <3% absolute maximum. Base construction: Design for 30″–36″ frost depth (verify current code). Typical failure mode: Non-frost-rated limestone shows surface spalling by end of first winter; inadequate base depth causes spring heaving.
Example site (north-facing courtyard, 2021 installation): 450 sq ft honed limestone patio installed with absorption-rated 2.1% stone, 12″ compacted base, polymeric joints, and breathable sealer. After three winters: minimal surface degradation (<2% of pavers showing minor edge wear), no heaving, joints intact except at one exposed corner requiring mortar repointing. Success attributed to proper material selection and base construction.
Prescott (elevation 5,400′, central Arizona):
Milder than Flagstaff but still experiences significant freeze-thaw—80–120 annual cycles (estimated), less snow accumulation, and shorter freezing periods (typically overnight freezes with daytime thaws). Material requirements: Frost-rating recommended, water absorption <3–4% acceptable for most installations. Base construction: Design for 20″–24″ frost depth (verify current code). Typical failure mode: Inadequate drainage causes standing water freeze cycles; salt damage from over-application of deicers.
Example site (south-facing patio, 2020 installation): 600 sq ft brushed limestone with absorption 3.8%, 10″ base, mortar joints at perimeter, unsealed. After four winters: light surface weathering consistent with natural patina development (no spalling), two pavers at drainage low-point showing salt scaling damage requiring replacement (attributed to standing water and heavy rock salt application first winter before owner education). Remainder of installation performing well.
Microclimate considerations: North-facing installations (less sun, longer moisture retention) require more conservative material specs and drainage design than south-facing. Canyon locations (cold air pooling) may experience freeze conditions not predicted by general elevation guidelines. Shadowed areas under overhangs (snow shedding from roofs) face heavier snow loading and should feature mortar joints and haunched edges.
Contractor Checklist & Spec Language (copy/paste items)
Pre-installation verification checklist:
☐ Request and verify frost-rating test certificate (ASTM C666) for lot #[LOT NUMBER]
☐ Confirm water absorption ≤3% per ASTM C97 for production lot
☐ Verify compressive strength ≥8,000 psi per ASTM C170
☐ Review quarry source and confirm previous high-altitude performance history
☐ Photograph lot tags from all delivered pallets
Installation specification requirements:
☐ Subgrade proof-roll documented; soft spots over-excavated and replaced
☐ Geotextile fabric installed on fine-grained or frost-susceptible subgrades
☐ Base depth minimum [12″ Flagstaff / 10″ Prescott or per engineer] compacted angular crushed rock
☐ Compaction verified at 95% Standard Proctor minimum (nuclear density gauge or plate bearing)
☐ Edge restraint anchored below frost line [30″ Flagstaff / 20″ Prescott typical guidance]
☐ Polymeric sand joints properly activated and cured; mortar repointing at exposed edges
☐ Movement joints installed per engineer at [10’–12′] intervals
☐ Drainage verified with water test—no standing water >15 minutes
Post-installation documentation:
☐ Provide compaction test reports with location coordinates
☐ Photograph completed installation including close-ups of edge restraint and joints
☐ Schedule 30-day post-winter inspection (late March/early April)
☐ Supply homeowner with written maintenance guidelines and safe deicer list
Email template—Homeowner to Contractor: “Please confirm the limestone pavers specified for our [Flagstaff/Prescott] installation are frost-rated with water absorption <3%. Provide certified test reports for lot #[LOT NUMBER] including freeze-thaw cycle data per ASTM C666. Include pre-winter joint inspection and post-winter damage assessment in your scope. Confirm edge restraint will be anchored below [30″/20″] frost depth per local code.”
Arizona limestone pavers — quick selection notes
Citadel Stone – top limestone pavers are set out below as purely hypothetical specification notes for six Arizona locations. This brief introduction is conditional in tone and does not describe completed work or named clients — it simply offers practical material choices and testing options that specifiers could consider for local sites.
Phoenix
Phoenix’s very high solar exposure, wide diurnal temperature swings and low ambient humidity make colour stability and thermal movement important design drivers; coastal salt spray and hurricane risk are not applicable and freezes are rare. For Phoenix we would typically advise low-porosity limestone with a honed or light-textured surface to lower glare and improve grip under irrigation; polished finishes would normally be reserved for covered spaces. As general guidance use 20–30 mm for patios; 30–40 mm for light vehicle areas. For specification review Citadel Stone – top limestone pavers could be supplied as sample boards, technical datasheets and palletised delivery, and our pavers might be paired with expansion-joint recommendations.
Tucson
Tucson’s mix of fierce sun, dusty winds and seasonal monsoon rain affects abrasion, dust ingress and runoff behaviour; coastal exposure and hurricane risk are irrelevant and freezes are uncommon. Travertine is frequently considered in Tucson for shaded pool surrounds because of its naturally cool, patterned surface, though its porosity requires different maintenance. For Tucson we would suggest low-absorption limestone or carefully selected travertine with a textured or honed finish; as general guidance 20–30 mm for patios; 30–40 mm for light vehicle areas. Our pavers could be trialled with sealant tests, sample panels and full technical datasheets to compare long-term upkeep.
Mesa
Mesa’s combination of long sunlit periods and occasional heavy monsoon storms makes drainage and slip resistance key concerns; coastal salt spray and hurricane exposure do not apply and freezes are rare. Fossiliferous and tightly grained limestones are often popular locally for their tactile surface and visual depth. For Mesa we would recommend low-porosity fossil limestone with a pronounced texture or honed face to assist run-off and reduce glare; guideline thickness: 20–30 mm for patios; 30–40 mm for light vehicle areas. For specification our pavers could be accompanied by datasheets on slip ratings, sample slates for wet testing and palletised delivery planning.
Chandler
Chandler’s irrigated landscapes and planted medians raise the prospect of irrigation salts and organic staining; UV exposure is high, coastal influences are absent and freezes happen only rarely. Compact, tight-grain limestones are commonly favoured in Chandler for their resistance to staining and easier maintenance. For Chandler we would typically recommend low-porosity limestone with a fine-honed or subtle textured finish; use 20–30 mm for patios; 30–40 mm for light vehicle areas as a starting point. Citadel Stone – top limestone pavers could be sampled for sealer trials and supplied with technical datasheets, specification notes and palletised delivery options to suit neighbourhood projects.
Scottsdale
Scottsdale’s premium outdoor settings combine strong sun with a desire for refined materials; coastal or hurricane exposure is not relevant and freezes are infrequent. Pale uniform limestones and select veined varieties are popular for elegant terraces; where slip resistance is vital a lightly textured finish is often chosen. For Scottsdale we would advise low-porosity limestone in a honed or subtly textured finish to balance appearance and function; general guidance: 20–30 mm for patios; 30–40 mm for light vehicle areas. For specification our pavers could be provided with curated sample sets, finish-longevity datasheets and specification support for integrated lighting and shade treatments.
Gilbert
Gilbert’s growing residential neighbourhoods, irrigated parks and episodic dust mean ease of cleaning and grit-shedding properties are practical priorities; coastal effects and hurricanes are not a concern and freezes are rare. Moderately textured limestones with tight grain are often chosen locally to tolerate garden use and simplify maintenance. For Gilbert we would suggest low-porosity limestone with a medium texture or honed face; as a guideline 20–30 mm for patios; 30–40 mm for light vehicle areas. For specification review our pavers could be issued as on-site mock-ups with technical datasheets, jointing recommendations and palletised delivery coordination.
Frequently Asked Questions
Q: Are limestone pavers safe for use in snow and freezing conditions?
Yes—when properly specified and installed. Request frost-rated limestone with water absorption <3% (verified by ASTM C666 testing), install over adequate base depth (10″–12″ in Flagstaff, 8″–10″ in Prescott—typical guidance), and maintain proper joint integrity. Non-frost-rated or high-absorption limestone will fail within 1–3 winters through freeze-thaw damage. Request a Flagstaff/Prescott Winterization Site Visit for professional material verification.
Q: Which deicer is safe for limestone in Flagstaff and Prescott?
Calcium magnesium acetate (CMA) is safest for limestone—biodegradable, effective to 20°F, no stone damage. Sand or fine gravel provides traction without chemicals. Avoid sodium chloride (rock salt) entirely—it causes salt scaling and accelerates freeze-thaw failure. Calcium chloride can be used sparingly but rinse thoroughly after each application. Always follow product label rates and clean residues promptly after thaw.
Q: Should I seal my limestone pavers before winter?
Consider breathable penetrating sealer if water absorption test shows rapid absorption (<3 minutes). Test sealer on sample board through one freeze-thaw cycle before full application to verify no blushing or delamination occurs. Apply in early fall (September) when temperatures remain above 50°F for 72-hour cure. Never seal immediately before winter—trapped moisture causes more damage than unsealed stone. Order a Sealer & Joint Test Kit — Free With Site Visit to evaluate options.
Q: How do I prevent frost heaving of my patio pavers?
Proper base construction prevents heaving: adequate depth below frost line (30″+ Flagstaff, 20″+ Prescott—verify code), well-draining granular base material, geotextile preventing fines migration, and anchored edge restraint. Address drainage issues preventing water accumulation under pavers. Existing installations showing heaving require professional remediation—contact contractor before next winter to correct base deficiencies.
Q: How soon after a freeze should I inspect my limestone patio for damage?
Inspect within 24–72 hours after significant thaw events during winter for immediate safety hazards (displaced pavers, large joint voids). Conduct thorough post-winter inspection within 30 days of final thaw (late March/early April) looking for spalling, edge damage, joint erosion, and heaving. Early detection allows repairs before next winter season. Document damage photographically and compare year-over-year to track progression.
Q: Can I use a metal shovel on my limestone pavers in winter?
No—metal blades chip and gouge limestone edges, creating damage points where freeze-thaw stress concentrates and accelerates failure. Use plastic snow shovels, rubber-edged pushers, or soft-bristle brooms. For stubborn ice, apply safe deicer (CMA or sand) and allow time to work rather than scraping aggressively. Metal blades are primary cause of preventable winter damage to otherwise sound installations.
Conclusion — Winterization Summary, Owner Checklist & How to Request a Site Visit
Protecting limestone pavers flagstaff winter installations requires proactive attention in three key areas: proper material selection (frost-rated stone with verified testing), installation quality (adequate base depth, anchored edges, proper jointing), and winter maintenance protocols (safe snow removal, appropriate deicers, prompt damage response). High-altitude Arizona presents unique challenges compared to desert valley installations, but limestone performs admirably when specifications match climate demands and owners follow appropriate care protocols.
Your high-altitude limestone winter protection checklist:
Before winter (September–October):
- Clean organic debris from all joints and surfaces
- Inspect and repair eroded joints with polymeric sand or mortar
- Test water absorption; reseal if needed (allow full cure before freeze)
- Verify drainage directs water away from paver field
- Stage limestone-safe deicer, sand, and plastic snow removal tools
During winter (November–March):
- Remove snow within 24 hours using plastic shovel or pusher
- Use sand for traction first; apply CMA deicer only when necessary
- Never use rock salt or metal blades
- Rinse away deicer residues promptly after thaw
After winter (late March–April):
- Conduct thorough inspection for spalling, cracking, joint washout, or heaving
- Clean away all winter sand and salt accumulation
- Repair minor damage immediately; document and get professional assessment for major issues
- Schedule next pre-winter preparation cycle
Download The Citadel Stone Arizona Limestone Paver Specification Sheet & Buyer’s Checklist!