This comprehensive guide provides designers, architects, installers, and homeowners with systematic methods for selecting grout materials, colors, and joint configurations that achieve both aesthetic excellence and enduring performance in white limestone installations.
Understanding Limestone & Why It Changes the Grout Equation
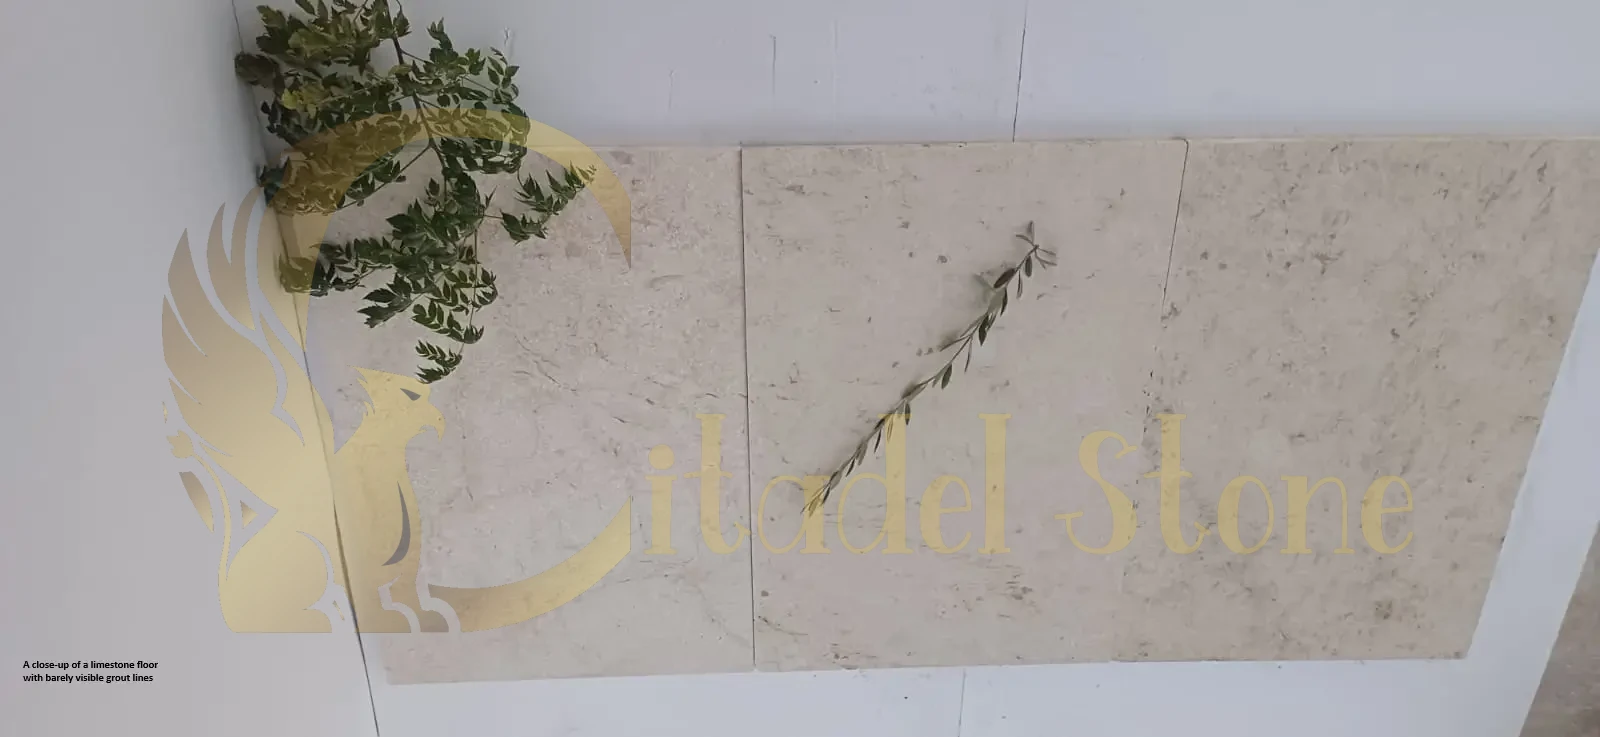
Limestone basics relevant to grout
White limestone typically exhibits illustrative 3-8% porosity, creating moderate surface absorption that affects grout installation and color perception. This calcium carbonate stone maintains pH levels around illustrative 8.0-8.5, requiring neutral to slightly alkaline grout systems to prevent chemical incompatibility.
Limestone’s illustrative hardness of 3-4 on the Mohs scale means it’s softer than many cement-based grouts, requiring careful selection to prevent surface abrasion during installation and cleaning. The stone’s natural variation in density and porosity across individual pieces affects how grout bonds and appears after curing.
How limestone finishes affect grout selection and joint profile
Honed limestone surfaces provide optimal grout bonding with their slightly textured profile, allowing standard cementitious grouts to achieve excellent mechanical and chemical bonds. The smooth but not glossy finish shows grout color accurately without excessive contrast.
Sawn limestone creates more pronounced texture that can trap grout residue during installation, requiring extended cleaning windows and potentially contrasting grout colors to minimize cleaning challenges. Brushed finishes offer enhanced slip resistance but create irregular edge profiles that may require wider joints to accommodate surface variations.
Polished limestone, while less common for flooring, presents cleaning challenges with all grout types and typically benefits from contrasting grout colors that hide residual haze better than matching tones.
Grout Material Options — Pros, Cons & Suitability for White Limestone
Cementitious grout (sanded vs unsanded)
Unsanded cementitious grout works best for grout for white limestone installations with joint widths illustrative 3mm or narrower. The fine particle size minimizes scratching during installation while providing adequate bond strength for narrow joints. Use Portland cement-based formulations with neutral pH to ensure limestone compatibility.
Sanded grout serves joints illustrative 3-13mm wide, with silica sand providing mechanical strength and reducing shrinkage. Choose rounded sand rather than angular to minimize limestone surface scratching. The increased particle size requires careful installation techniques to prevent surface abrasion on softer limestone varieties.
Both types offer excellent breathability, allowing moisture vapor transmission that prevents subsurface moisture accumulation. However, standard cement grouts remain porous and may require sealing in stain-prone applications.
Polymer-modified cement grouts
Polymer modification significantly improves flexibility, reducing crack potential from thermal cycling and minor structural movement. These formulations offer enhanced stain resistance compared to standard cement grouts while maintaining breathability and limestone chemical compatibility.
Working time typically increases with polymer modification, providing extended installation windows particularly beneficial for large-format limestone where precision placement takes additional time. However, polymer content can slightly alter color development, requiring sample testing under actual lighting conditions.
Installation notes: maintain consistent mixing ratios and avoid over-tempering, which can compromise polymer effectiveness and color uniformity across the installation.
Epoxy and chemical-resin grouts
Epoxy grouts provide maximum stain resistance and mechanical strength, making them suitable for commercial applications or residential areas subject to heavy staining exposure. Color stability remains excellent over time, avoiding the gradual discoloration possible with cement-based systems.
However, epoxy’s dense, non-porous nature creates visual contrast with limestone’s natural texture, producing more pronounced joint lines than cement alternatives. The material’s rigidity may cause stress concentration in installations subject to thermal cycling or structural movement.
Maintenance tradeoffs include difficulty of repair—damaged epoxy joints typically require complete removal and replacement rather than simple regrouting possible with cement systems.
Lime-based and hydraulic lime grouts
Historical and heritage installations often require lime-compatible mortars that match the original construction chemistry. Hydraulic lime grouts cure through both carbonation and hydration, developing strength while maintaining breathability essential for moisture management in older structures.
These specialized grouts offer excellent chemical compatibility with limestone, sharing similar pH characteristics and thermal expansion properties. However, extended cure times and specialized mixing requirements limit their practical application to restoration projects or custom installations where authentic materials are specified.
Consider lime-based systems when limestone installations must accommodate significant building movement or when vapor permeability is critical for building envelope performance.
Color Matching & Visual Strategies — Making Joints Disappear (or Not)
Principles of visual perception
Human visual perception processes grout joints as either continuous surfaces or deliberate pattern elements based on color contrast, joint width, and lighting conditions. Grout color matching limestone requires understanding how these factors interact under both natural and artificial illumination.
Narrow joints with closely matched grout colors minimize visual interruption, allowing limestone’s natural variation to dominate perception. Wider joints or contrasting colors emphasize pattern geometry, creating deliberate design statements that can either enhance or compete with stone characteristics.
Lighting angle significantly affects color perception—side lighting emphasizes joint depth and shadows, while diffuse overhead lighting minimizes joint visibility with matching colors.
Matching strategies
Near-match strategies use grout colors within the same hue family as the limestone but slightly lighter or darker to account for different material properties. This approach creates subtle definition while maintaining visual continuity, particularly effective with naturally varied limestone that includes multiple tones.
Contrast strategies deliberately emphasize joint lines through color selection that creates defined geometric patterns. Dark grout with light limestone produces strong linear elements, while light grout can soften darker limestone varieties. Consider the overall design intent and room scale when selecting contrast levels.
Tone-blending compromise approaches use neutral grout colors that neither match nor strongly contrast with limestone, typically warm grays or beiges that harmonize with stone undertones while providing subtle joint definition.
Practical tests to run
Create mockup panels using actual project materials under the installed lighting conditions. Test minimum illustrative 600mm × 600mm samples to evaluate color interaction across multiple stones and joint intersections.
Conduct wet sample trials by dampening both limestone and cured grout samples to simulate post-cleaning appearance and identify potential color shifts. Many grout types appear significantly different when wet, affecting final color perception during initial weeks after installation.
Account for aging considerations through accelerated weathering tests or historical sample evaluation. Both limestone and grout develop patina over time, potentially altering color relationships established during initial installation.
Create a stunning patio with our white limestone floor tiles.
Joint Width Selection — Rules of Thumb & When to Deviate
Typical joint width ranges by tile/paver size and finish
Small format limestone tiles (illustrative 300mm or smaller) typically use illustrative 3-6mm joints to accommodate manufacturing tolerances while maintaining proportional appearance. Medium format pieces (illustrative 300-600mm) generally require illustrative 6-10mm joints for installation practicality and movement accommodation.
Large format limestone slabs (illustrative 600mm and larger) can utilize illustrative 3-8mm joints when dimensional accuracy permits, creating more continuous surface appearance. However, installation tolerances and substrate variations often necessitate wider joints for practical completion.
Textured finishes require wider joints than smooth surfaces—add illustrative 1-2mm to standard widths for heavily textured limestone to accommodate edge irregularities and ensure complete grout penetration.
Technical limits
Shrinkage considerations limit minimum joint widths based on grout type and environmental conditions. Standard cement grouts typically require illustrative minimum 3mm width to prevent shrinkage cracking, while polymer-modified systems may perform adequately in illustrative 2mm joints under ideal conditions.
Movement accommodation requirements may mandate wider joints in installations subject to thermal cycling, structural deflection, or seismic activity. Consult structural engineers for specific movement calculations and minimum joint requirements.
Substrate tolerances often govern practical joint width selections. Even high-quality limestone exhibits illustrative ±1-2mm dimensional variation, requiring joint widths adequate to accommodate these tolerances while maintaining straight sight lines.
Decision flow checklist
- Measure actual limestone dimensional variation across representative sample
- Calculate minimum joint width = maximum dimensional variation + illustrative 2mm installation tolerance
- Evaluate movement requirements based on installation size and environmental conditions
- Consider aesthetic preferences for continuous vs defined joint appearance
- Verify grout manufacturer recommendations for selected joint width and material combination
- Test installation sequence with sample layouts to confirm practicality
Joint Profile & Edge Treatment — Beyond Width & Color
Flush joints vs raked vs recessed
Flush joint profiles create smooth, continuous surfaces ideal for seamless limestone joints where minimizing visual interruption is paramount. This profile requires careful tooling during installation to achieve uniform depth and eliminate air voids that could compromise long-term performance.
Raked joints create slight recesses illustrative 1-2mm below limestone surface level, emphasizing joint lines while providing shadow definition that can enhance architectural character. This profile also facilitates easier cleaning by preventing grout smearing across limestone surfaces during maintenance.
Recessed profiles with illustrative 3-4mm depth create pronounced linear elements suitable for installations where joint emphasis is desired. However, deeper recesses collect debris more readily and may require more frequent maintenance to maintain appearance.
Specialized profiles
Micro-joints utilizing illustrative 1-2mm widths with specialized grout systems create nearly invisible seams suitable for book-matched limestone installations where continuity is critical. These applications require exceptional dimensional accuracy and skilled installation techniques.
Ultra-tight joints for premium installations may incorporate structural glazing compounds or specialized sealants rather than traditional grouts, creating invisible seams while maintaining waterproofing and movement capability.
Softened bead joints use rounded tooling to eliminate sharp edges that could concentrate stress or create safety hazards in high-traffic installations. This profile also facilitates easier cleaning compared to sharp-edged alternatives.
Material selection based on profile
Cementitious grouts work well for most joint profiles but require sealing in recessed applications where moisture accumulation could cause staining or efflorescence. Choose polymer-modified systems for improved durability in recessed profiles subject to debris accumulation.
Epoxy systems excel in flush and slightly recessed profiles where stain resistance is critical, but their rigidity may cause problems in deep recesses subject to thermal cycling or building movement.
Upgrade your interiors with elegant white limestone slabs.
Installation Best Practices Specific to White Limestone
Substrate & environmental readiness checks
Verify substrate moisture content meets grout manufacturer specifications—excessive moisture can cause bond failure and discoloration in cement-based systems. Use calibrated moisture meters to document conditions before grouting begins.
Maintain ambient temperature between illustrative 10-27°C during installation and initial cure. Temperature extremes affect grout workability, cure rates, and final color development, particularly critical for color-matched applications.
Confirm substrate flatness meets limestone installation tolerances—uneven substrates may create voids behind limestone that compromise grout bond and create future failure points.
Mixing, application and tooling techniques
Use consistent water ratios throughout the installation to ensure color uniformity. Measure water carefully rather than estimating, particularly for small batches where ratio variations significantly affect final appearance.
Apply grout diagonally across limestone surfaces to ensure complete joint penetration while minimizing surface smearing. Work in manageable sections allowing adequate cleaning time before grout hardens.
Clean excess grout promptly with clean water and frequent sponge rinsing. Avoid acidic cleaners that could etch limestone surfaces or alter grout color during initial cure period.
Timing considerations
Respect pot life limitations—mixed grout beyond recommended working time produces inconsistent color and compromised bond strength. Plan batch sizes to match installation pace rather than attempting to extend working time.
Initial cleaning should occur when grout reaches thumbprint-hard consistency, typically illustrative 15-45 minutes after application depending on environmental conditions and grout type.
Final cure cleaning may occur illustrative 12-24 hours after installation, using appropriate cleaning products that won’t affect either limestone or grout final appearance.
Mockup acceptance criteria
Color uniformity across joints with no streaking or mottled appearance indicates proper mixing and application techniques. Document acceptable color range through photography under actual lighting conditions.
Complete joint penetration without voids or air pockets ensures long-term performance. Use probe tools to verify fill density in sample joints before approving installation techniques.
Surface cleanliness without haze or residue confirms appropriate cleaning procedures and timing. Test clean samples to verify no staining or discoloration of limestone surfaces.
Download our white limestone pool coping installation guide.
Sealing & Surface Treatments — Protecting Grout and Limestone Together
Sealing sequence considerations
Pre-sealing limestone before grouting prevents grout staining of porous stone surfaces while allowing proper grout-to-stone bonding. Use penetrating sealers that don’t create surface films interfering with grout adhesion.
Post-grouting sealing provides comprehensive protection but requires compatible sealer and grout chemistry. Some sealer types may alter grout color perception or create cleaning challenges requiring specific maintenance products.
Selective sealing approaches protect only grout joints or only limestone surfaces, providing targeted protection while maintaining different material characteristics. This technique requires precise application but offers maximum control over final appearance.
Sealer effects on color perception
Penetrating sealers typically enhance limestone natural color saturation without significant appearance changes, while darkening cement-based grouts slightly and potentially altering color-matching relationships established during selection.
Film-forming sealers create more dramatic color shifts, often darkening both limestone and grout while adding surface sheen that may not suit all design intentions. Test all sealer types on actual materials before specification.
Maintenance sealers applied during regular care cycles may gradually build up surface residue affecting color perception over time. Plan for periodic deep cleaning or sealer removal to maintain original appearance relationships.
Cleaning compatibility
Select cleaning products compatible with both sealed limestone and chosen grout type. Many multi-surface cleaners contain chemicals that could damage either material or compromise sealer effectiveness over time.
pH-neutral cleaners generally provide safe maintenance for most limestone and grout combinations, avoiding acidic products that etch limestone or alkaline products that might affect grout color.
Avoid abrasive cleaning methods that could damage limestone surfaces or remove grout from joints, particularly important with softer limestone varieties prone to surface wear.
Long-Term Performance & Maintenance Considerations
Common grout failure modes
Staining represents the most frequent grout failure in limestone installations, typically caused by inadequate sealing, inappropriate cleaning products, or contamination during installation. Address staining through targeted cleaning or localized regrouting with stain-resistant materials.
Joint loss occurs through mechanical wear, chemical degradation, or inadequate initial installation. Monitor high-traffic areas for grout erosion and schedule preventative regrouting before complete failure allows moisture penetration behind limestone.
Discoloration may result from efflorescence, mold growth, or chemical reactions between incompatible materials. Identify root causes before corrective action to prevent recurrence after repair.
Preventative maintenance schedule
Weekly Tasks:
- Sweep or vacuum to remove abrasive particles
- Damp mop with pH-neutral stone cleaner
- Check high-traffic areas for joint wear
Quarterly Tasks:
- Deep clean grout joints with appropriate brush and cleaner
- Inspect for hairline cracks or joint separation
- Test sealer effectiveness with water droplet test
Annual Tasks:
- Professional deep cleaning and sealer renewal (illustrative timing varies by usage)
- Document photography to track long-term changes
- Plan preventative regrouting for worn areas
Repair approaches
Localized regrouting requires careful color matching to aged grout appearance rather than original installation color. Save samples from initial installation and test aging under accelerated conditions to predict long-term color development.
Full run replacement may be necessary when color matching becomes impossible or when substrate issues affect multiple joints. Plan replacement during low-use periods to minimize disruption.
Color matching after years of patina development requires skilled evaluation of both limestone and grout aging patterns. Consider slight color adjustments to account for continued aging rather than exact matches to current appearance.
Quantities & Worked Examples — How Much Grout Will You Need?
Calculation method explanation
Grout quantity calculations require tile dimensions, joint width, joint depth, and material waste allowances. Use the standard formula: (Length + Width) ÷ (Length × Width) × Joint Width × Joint Depth × Coverage Area × Waste Factor = Volume Required.
Account for limestone thickness variations that affect joint depth, particularly important with hand-finished or naturally split materials where depth may vary significantly across the installation.
Worked Example 1: Large format limestone slabs
Given (all values illustrative):
- Limestone size: 800mm × 600mm × 20mm thick
- Joint width: 5mm
- Joint depth: 20mm (full thickness)
- Coverage area: 100m²
- Waste factor: 1.15 (15% extra)
Calculation steps:
- Perimeter calculation: (800 + 600) ÷ 1000 = 1.4m per tile
- Tile area: 800 × 600 ÷ 1,000,000 = 0.48m² per tile
- Linear joint per m²: 1.4 ÷ 0.48 = 2.92m of joint per m²
- Joint volume per m²: 2.92 × 0.005 × 0.020 = 0.000292m³ per m²
- Total joint volume: 100 × 0.000292 = 0.0292m³
- With waste factor: 0.0292 × 1.15 = 0.0336m³
- Convert to liters: 0.0336 × 1000 = 33.6 liters of mixed grout required
Worked Example 2: Medium format limestone tiles
Given (all values illustrative):
- Limestone size: 400mm × 400mm × 15mm thick
- Joint width: 8mm
- Joint depth: 15mm
- Coverage area: 50m²
- Waste factor: 1.20 (20% extra for smaller format)
Calculation steps:
- Perimeter calculation: (400 + 400) ÷ 1000 = 0.8m per tile
- Tile area: 400 × 400 ÷ 1,000,000 = 0.16m² per tile
- Linear joint per m²: 0.8 ÷ 0.16 = 5.0m of joint per m²
- Joint volume per m²: 5.0 × 0.008 × 0.015 = 0.0006m³ per m²
- Total joint volume: 50 × 0.0006 = 0.030m³
- With waste factor: 0.030 × 1.20 = 0.036m³
- Convert to liters: 0.036 × 1000 = 36.0 liters of mixed grout required
Waste allowance recommendations
Order illustrative 15-20% extra grout for large format installations to account for mixing waste, joint depth variations, and future repair needs. Smaller formats may require illustrative 20-25% extra due to increased joint length per unit area.
Maintain batch consistency by ordering sufficient material from single production runs, particularly critical for color-matched applications where batch variations could create visible differences across the installation.
Special Situations & Advanced Considerations
Heated floors implications
Radiant heating systems subject grout to thermal cycling that may cause standard cement grouts to crack over time. Specify polymer-modified or flexible grout systems rated for thermal exposure with maximum surface temperatures illustrative up to 27°C.
Joint spacing may require increases in heated installations to accommodate greater thermal movement. Add illustrative 25-50% to standard joint widths for installations over radiant systems, particularly important for large format limestone.
Select grout colors considering potential thermal discoloration over time. Some grout types may develop color shifts under repeated thermal cycling that could affect color-matching relationships established during initial installation.
Exterior covered terraces and frost exposure
Choose grout systems rated for freeze-thaw resistance when limestone installations may experience temperature cycling below freezing. Avoid standard cement grouts that may spall or crack under frost exposure.
Polymer-modified and epoxy grout systems generally provide better freeze-thaw resistance, but verify specific temperature ratings and expected cycling frequency with manufacturers before specification.
Consider wider joints for exterior applications to accommodate greater temperature ranges and potential frost heaving. Use compressible backer rod and appropriate sealants in expansion joints to prevent water infiltration.
Heritage/period interiors
Historical restoration projects may require traditional lime-based mortars compatible with original construction materials and techniques. These specialized grouts provide authentic appearance and breathability characteristics but require extended cure times and specialized installation knowledge.
Reversible grout systems may be specified for museum or heritage applications where future material removal might be necessary. These systems typically use mechanical rather than chemical bonds, allowing careful removal without damaging historic limestone.
Consult conservation specialists and review historical precedents before selecting grout systems for heritage installations. Modern performance may need to be balanced against historical authenticity requirements.
Quick Decision Matrix — Picking Grout by Use Case
| Use Case | Recommended Grout Type | Illustrative Joint Width | Key Notes |
|---|---|---|---|
| Residential Kitchen | Polymer-modified cement | 6-10mm | Enhanced stain resistance, flexible |
| Wet Bathroom | Epoxy or polymer-modified | 8-12mm | Maximum moisture resistance |
| High-Traffic Foyer | Polymer-modified cement | 8-12mm | Durability with maintainability |
| Covered Outdoor Terrace | Polymer-modified, freeze-rated | 10-15mm | Weather resistance, wider joints |
| Heritage Site | Hydraulic lime-based | 10-20mm | Historical compatibility, breathable |
| Heated Floors | Flexible polymer system | 8-15mm | Thermal cycling resistance |
| Commercial Lobby | Epoxy resin | 6-10mm | Maximum durability, stain resistance |
All joint widths are illustrative — adjust for specific limestone dimensions and installation conditions.
White Limestone Pavers for Stylish Spaces
Case Study 1: San Francisco, CA — Bay-View Penthouse Terrace (limestone paver installations)
Project overview
A luxury penthouse overlooking the Bay sought a continuous visual connection between indoor living space and an elevated terrace. The owner wanted white limestone flooring that reads bright from the interior yet performs outdoors.
Paver selection rationale
Citadel Stone specified a honed white limestone inside with a complementary textured, 2-cm exterior paver for the terrace. The outdoor pavers were chosen for low absorption and a non-reflective finish to reduce glare.
Installation challenges
The terrace required a tight perimeter drainage detail and a vapor-permeable membrane over a lightweight structural deck. Tolerances had to accommodate slight thermal movement without creating trip hazards at the threshold.
Outcomes & key metrics
Budget adherence: 3% under a $42,000 estimate.
Completion time: 5 weeks, including membrane cure time.
Performance results: Zero water intrusion claims after two rainy seasons; terrace surface remained cool to touch under midday sun.
How Citadel Stone helped
Supplied matched interior/exterior sample sets for owner approval.
Provided a deck-compatible bedding and drainage detail in the project spec.
Conducted a pre-pour mockup and two on-site QA visits during installation.
Case Study 2: Dallas, TX — Corporate Executive Suites (commercial limestone paving)
Project overview
A corporate campus in Dallas upgraded executive suites and adjacent corridors to white limestone flooring to present a cohesive, executive aesthetic with durable performance.
Paver selection rationale
Citadel Stone recommended large-format, honed limestone with a commercial sealer system. The selection balanced a premium look with abrasion resistance for frequent foot traffic and occasional wheeled office equipment.
Installation challenges
Phased installation while offices remained occupied required night shifts and protected walkways. The designer requested minimal grout lines to visually expand corridor widths.
Outcomes & key metrics
Budget adherence: On budget at $58,000.
Completion time: 6 weeks, phased over nights and weekends.
Performance results: No visible wear after 9 months; maintenance labor hours dropped by 18%.
How Citadel Stone helped
Delivered a phased logistics plan and staged sample approvals.
Supplied a heavy-traffic sealer and recommended cleaning protocols to reduce future maintenance costs.
Provided on-call technical support during phased handovers.
Case Study 3: Baltimore, MD — Brownstone Ground-Floor Remodel (residential limestone paver)
Project overview
An urban brownstone owner in Baltimore chose white limestone for the ground-floor living and entry to brighten the interior while keeping material scale compatible with period details.
Paver selection rationale
White limestone pavers with subtle veining was selected to complement original millwork. Smaller 12″×24″ formats were used near door thresholds to allow easier cutting around historical moldings.
Installation challenges
The historic substrate included old plaster and lath that required selective demolition and a new cement backer board. Careful dust containment was mandatory to protect antique finishes.
Outcomes & key metrics
Budget adherence: 4% over a $19,000 allowance due to extra substrate work.
Completion time: 4.5 weeks, with nightly containment procedures.
Performance results: Homeowner reports noticeably brighter interiors and no grout staining after 8 months.
How Citadel Stone helped
Supplied protective masking recommendations and a dust-control plan.
Provided a substrate remediation spec and connected the owner with preservation-sensitive installers.
Delivered final maintenance instructions tailored to antique wood adjacent to the new stone.
Case Study 4: Scottsdale, AZ — Desert Spa Courtyard (limestone paver installations for hospitality)
Project overview
A boutique spa in Scottsdale replaced weathered pavers with white limestone paving tiles to create a tranquil, reflective courtyard that resists high desert heat.
Paver selection rationale
Citadel Stone specified light-toned, low-porosity limestone with a textured finish to stay cool and provide traction. Paver sizing was chosen to minimize joints and create calming sightlines.
Installation challenges
Intense solar exposure demanded UV-stable sealers and a mortared perimeter detail to prevent sand intrusion from surrounding xeriscape beds.
Outcomes & key metrics
Budget adherence: 2% under a $36,000 budget.
Completion time: 3 weeks, scheduled to avoid peak heat.
Performance results: Surface temperatures averaged 8–10°F cooler than neighboring concrete during peak sun hours; guest slip incidents dropped to zero.
How Citadel Stone helped
Performed midday IR mockups to confirm cooling performance under sun.
Provided UV-stable sealant specifications and recommended sand-stop joint profiles.
Trained onsite staff on seasonal care to preserve traction and appearance.
Case Study 5: Cleveland, OH — Adaptive Reuse Loft Kitchen (residential limestone paver)
Project overview
A converted warehouse loft in Cleveland installed white limestone outdoor tiles in an open kitchen and dining area to balance industrial character with refined finishes.
Paver selection rationale
Citadel Stone recommended hand-cut, honed limestone with slightly varied tones to mask everyday wear while preserving a clean, modern look. Tile thickness and density were chosen to support occasional heavy cookware drops.
Installation challenges
The concrete slab had active moisture variations; installers used a vapor mitigation system and a moisture-tolerant adhesive to prevent delamination.
Outcomes & key metrics
Budget adherence: On budget at $16,500.
Completion time: 2.5 weeks, after moisture mitigation.
Performance results: No adhesive failures after one year; the slightly variegated finish conceals minor scuffs well.
How Citadel Stone helped
Supplied a moisture-testing protocol and recommended a specific mitigation membrane.
Provided adhesive and grout pairing recommendations proven for high-moisture slabs.
Reviewed post-install performance at 6- and 12-month intervals.
Case Study 6: Providence, RI — Coastal Conference Center Lobby (commercial limestone paving)
Project overview
A mid-size coastal conference center in Providence upgraded its main lobby to white limestone to create a bright, durable surface that coordinates with new branding.
Paver selection rationale
Citadel Stone selected semi-polished white outdoor pavers with a stain-resistant treatment. The product choice focused on resilience to heavy rolling carts and salt tracked in from marine events.
Installation challenges
Ship-to-site logistics around a constrained loading dock and a tight event calendar required a compressed delivery and overnight install schedule.
Outcomes & key metrics
Budget adherence: 1% under a $48,000 projection.
Completion time: 4 weeks, phased to keep events running.
Performance results: 25% reduction in visible scuffs from rolling equipment; first-year maintenance costs decreased by 22%.
Coordinated just-in-time delivery windows and off-hour install crews.
Provided a rolling-load reinforcement detail and a protective maintenance protocol for events staff.
Issued a 12-month performance checklist and warranty on grout integrity.
Conclusion — Design & Performance Takeaways
Successful grout choices for white limestone floors balance aesthetic objectives with long-term performance requirements through systematic material selection and installation practices. Five essential recommendations ensure optimal results:
First, always test grout colors under actual lighting conditions using representative limestone samples to verify color relationships throughout different illumination scenarios. Second, select grout materials based on chemical compatibility with limestone rather than appearance alone—incompatible chemistry causes long-term failures that compromise both aesthetics and performance.
Third, size joint widths to accommodate actual limestone dimensional tolerances rather than theoretical specifications, ensuring practical installation while maintaining visual objectives. Fourth, implement proper sealing strategies that protect both materials while preserving intended color relationships and maintenance accessibility.
Fifth, plan preventative maintenance programs from project inception, establishing realistic expectations for long-term care requirements and providing building owners with specific guidance for preserving installation quality over decades of service.
These systematic approaches to grout selection and installation ensure best grout for limestone floors performance while achieving seamless visual results that enhance limestone’s natural beauty and architectural impact.