Why Limestone Tile for Arizona Basements?
Limestone’s thermal properties make it exceptionally suitable for Arizona basement environments. The stone’s natural thermal mass absorbs and stores coolness from surrounding earth and foundation walls, maintaining comfortable temperatures even when upper floors heat significantly during summer months. Unlike carpet that insulates and traps heat, or vinyl that can feel warm and sticky, limestone naturally dissipates heat, creating pleasantly cool surfaces underfoot—a valuable characteristic when basement temperatures can still reach 75–80°F during Phoenix’s extreme summer.
Durability advantages position limestone favorably against alternative flooring materials for Arizona basements. The stone resists scratching better than wood and withstands impacts that damage vinyl or laminate. Unlike carpet that harbors dust, allergens, and moisture in Arizona’s challenging environment, limestone wipes clean easily and won’t support mold growth when properly installed over moisture-controlled substrates. Arizona’s arid climate eliminates many moisture-related deterioration issues that plague limestone basements in humid regions—efflorescence and mold problems remain minimal when basic moisture barriers are employed.
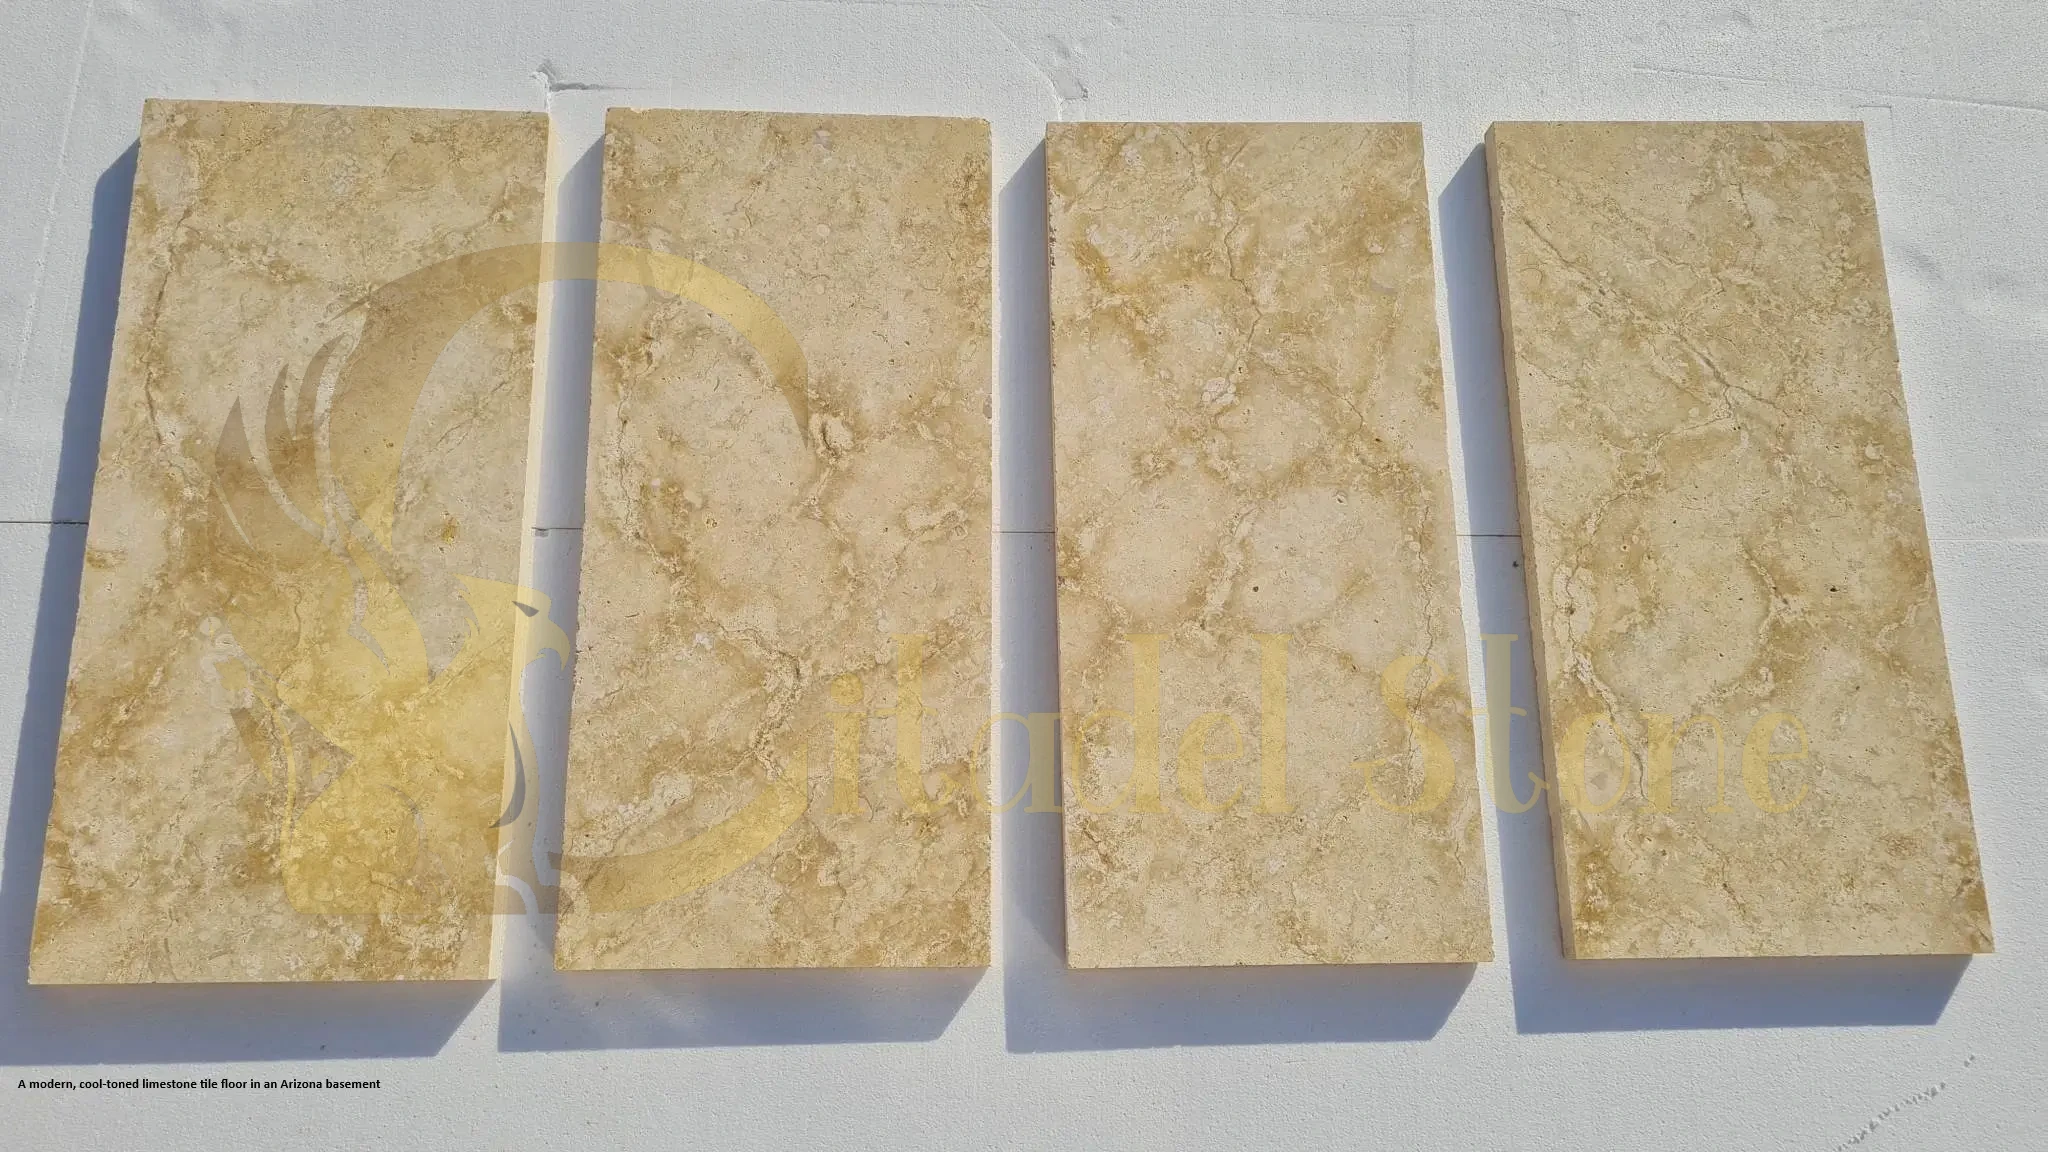
Aesthetically, limestone’s natural beige, gray, and cream tones coordinate effortlessly with Arizona’s popular interior palettes. The stone suits diverse basement functions: honed limestone creates refined media rooms and entertainment spaces, textured finishes provide traction for home gyms and exercise areas, and warm buff tones make comfortable playrooms and family gathering spaces. Limestone’s authentic natural variation delivers premium appearance that enhances property values—particularly important in Arizona markets where finished basements add significant square footage to homes.
Compared to alternatives, limestone offers refinishing potential wood and synthetic materials lack. Professional restoration can hone damaged surfaces, removing scratches and etching accumulated over decades. This extends functional life beyond most competing materials while maintaining authentic stone character that improves with age rather than appearing worn.
Basement Moisture Basics in Arizona
Despite Arizona’s reputation for aridity, basement moisture risks require serious attention. Primary moisture sources include ground moisture from water tables and capillary action through concrete slabs, irrigation system runoff and overspray that saturates soil near foundations, monsoon season infiltration when intense rainfall overwhelms drainage systems, and plumbing leaks from upstairs bathrooms or utility lines running through basement zones.
Seasonal monsoon events (typically July through September) create concentrated moisture challenges. Desert soils with limited organic content often shed water rather than absorbing it, directing runoff toward foundation walls and creating temporary saturation conditions even in normally dry locations. Summer monsoons can deposit 2–3 inches of rain in single storms, overwhelming inadequate drainage and causing water intrusion through foundation cracks, poorly sealed utility penetrations, or hydrostatic pressure pushing moisture through concrete.
Why moisture management matters in arid climates: Even brief moisture exposure can compromise thinset adhesion, cause tile delamination, promote efflorescence (white mineral deposits), and create conditions for mold growth in grout and substrate materials. Limestone’s natural porosity means it absorbs moisture readily when not properly sealed—saturated limestone can discolor, develop organic growth, or suffer freeze damage during Arizona’s occasional winter freezes in higher elevations like Flagstaff or near Tucson.
Key moisture controls include vapor barriers installed beneath concrete slabs or atop existing slabs before tile installation, uncoupling membranes that isolate tiles from substrate moisture movement, perimeter drainage systems directing water away from foundations, proper grading ensuring water flows away from structures at minimum 1/4 inch per foot slope, and crack isolation membranes that accommodate minor concrete movement while preventing moisture transmission to limestone.
Proper slab preparation forms the foundation for successful installations. Test existing basement slabs for moisture using calcium chloride tests or relative humidity probes—readings exceeding 3 pounds per 1,000 square feet per 24 hours or 75% relative humidity indicate moisture levels requiring remediation before limestone installation. Address active moisture problems at their source rather than attempting to seal moisture beneath tile, which causes inevitable failure.
Product & Tile Selection: Sizes, Thickness & Finishes
Tile size selection balances aesthetics with practical basement considerations. Popular sizes for basement floors include:
12×24-inch planks create contemporary linear patterns that make basement spaces appear larger and more open. These install efficiently and suit most residential basement scales without overwhelming smaller rooms.
18×36-inch large-format planks deliver expansive modern aesthetics ideal for open basement living areas, media rooms, and entertainment spaces. The larger scale minimizes grout lines and creates clean visual flow.
24×24-inch squares provide substantial tiles with balanced proportions suitable for various basement layouts, from traditional rec rooms to contemporary home theaters.
16×16-inch tiles offer versatile mid-size options that accommodate typical basement dimensions while providing enough scale to feel substantial rather than busy.
For residential basement applications, standard tile thickness ranges from 3/8 inch to 1/2 inch. This provides adequate strength for furniture loads and foot traffic when installed over properly prepared substrates. Thicker tiles offer no meaningful performance advantage for interior basement applications and unnecessarily increase material and installation costs.
Finish selection significantly impacts basement functionality and comfort. Honed limestone provides smooth, matte surfaces ideal for barefoot comfort in entertainment areas, playrooms, and home theaters. The refined finish complements contemporary and transitional interior designs common in Arizona finished basements. However, honed surfaces can become slippery when wet—important consideration for basements with bathroom facilities or beverage service areas.
Brushed limestone adds subtle texture that improves traction without creating rough surfaces uncomfortable for bare feet. This finish hides minor scratches and wear better than honed surfaces, making it practical for high-traffic family rooms and play areas. Brushed finishes suit casual, relaxed basement aesthetics.
Lightly textured or tumbled finishes provide maximum slip resistance for gym areas and spaces where moisture exposure is likely. However, textured surfaces trap dust and require more cleaning effort—less ideal for Arizona basements where dust infiltration through window wells and stairways is common.
For limestone basement floor design, consider these layout strategies: straight-lay patterns create clean, contemporary appearance; diagonal layouts visually expand narrow basement spaces; modular patterns combining multiple tile sizes add visual interest to large open areas; border treatments define zones within multi-function basements, delineating theater seating from bar areas or exercise zones from lounging spaces.
Subfloor, Moisture Control & Installation Essentials
Professional installation adapted to basement conditions ensures long-term performance:
Step 1: Slab evaluation — Inspect concrete basement slabs for cracks, spalling, contaminants (oil, paint, sealers), and flatness. Surface must be flat within 1/8 inch over 10 feet. Document existing cracks and determine whether they’re active (ongoing movement) or dormant. Major cracks or structural issues require engineering evaluation before proceeding.
Step 2: Moisture testing — Perform quantitative moisture testing using calcium chloride kits placed on the slab for 60–72 hours, or relative humidity probes inserted into drilled holes. Test multiple locations, particularly near exterior walls and utility penetrations. Acceptable readings: below 3 pounds per 1,000 square feet per 24 hours for calcium chloride tests, or below 75% RH for in-situ probes. Elevated readings require moisture mitigation before installation.
Step 3: Damp-proofing and vapor control — For basement flooring limestone Phoenix installations and throughout Arizona, install vapor barrier membranes over concrete slabs before tile work. Options include sheet membranes (polyethylene or specialized vapor barriers) adhered or loose-laid with sealed seams, or liquid-applied elastomeric membranes that create monolithic barriers. These prevent ground moisture from reaching limestone and thinset while allowing the system to cure properly.
Step 4: Setting bed or membrane systems — Install uncoupling membranes designed to isolate tiles from substrate movement and provide additional moisture protection. These orange or red grid-pattern membranes (typically 1/8 inch thick) bond to slabs with thin-layer thinset, then tiles install into fresh thinset applied over membranes. Alternatively, for slabs with excellent moisture control and stability, use crack isolation membranes (liquid-applied or sheet products) that accommodate minor substrate movement without full uncoupling.
Step 5: Tile installation — Use polymer-modified thinset mortar formulated for natural stone, selected in light colors (white or light gray) for light-colored limestone. For basement applications where minor moisture or temperature fluctuations may occur, specify flexible thinset that accommodates slight movement without bond failure. Match trowel notch to tile size: 1/4×3/8×1/4-inch for 12×12 to 16×16-inch tiles; 1/2×1/2×1/2-inch for larger formats. Back-butter tiles exceeding 15 inches to ensure 95% coverage minimum. Maintain consistent grout joints using spacers—typical widths range from 1/8 inch to 1/4 inch depending on tile edge treatment.
Step 6: Grout and sealer selection — Use polymer-modified sanded grout for joints 1/8 inch and wider. For basements with any moisture exposure risk, consider epoxy grout that resists moisture and staining better than cement grout, though it costs more and requires skilled installation. Allow grout to cure fully (typically 72 hours) before applying penetrating sealer to limestone surfaces.
Acceptable tolerances: Substrate flatness within 1/8 inch over 10 feet; tile lippage (edge height difference) maximum 1/16 inch for tiles with edges under 15 inches, maximum 1/8 inch for larger formats; grout joint width variation not exceeding ±1/32 inch throughout installation.
Direct-bond vs floating floors: Direct-bond installations (tile adhered with thinset to slab) suit most Arizona basement conditions when proper moisture barriers and crack isolation are included. Floating floor systems rarely benefit limestone tile applications—these work better for click-lock laminate or engineered wood. For Arizona basement stone tiles, direct-bond over appropriate membranes provides superior stability and durability.
When to use uncoupling membranes: Specify uncoupling in basements with: history of slab cracking, active minor cracks under 1/4 inch wide, new construction where concrete is still curing and settling, or any situation where substrate movement risk exists. The modest additional cost ($2–4 per square foot) provides insurance against tile cracking from substrate issues.
See Citadel Stone’s Attention to Detail in Every Arizona Project!
Moisture Management Strategies
Beyond installation membranes, implement these practical moisture controls:
Perimeter drainage: Ensure functional drainage around foundation exteriors. French drains, gravel-filled trenches, or modern drain tile systems should direct water away from foundations to daylight discharge points or sump systems. Verify these systems function properly before basement finishing—clogged or damaged exterior drainage is the primary cause of basement moisture in Arizona.
Control irrigation runoff: Adjust landscape irrigation to prevent overspray onto foundation walls and overwatering that saturates soil near basements. Create 18–24 inch gravel or rock buffer zones between irrigated turf and foundations to manage incidental water. Schedule irrigation during morning hours when evaporation rates are highest, reducing soil saturation duration.
Redirect downspouts: Extend downspouts minimum 6 feet from foundations using solid piping or splash blocks. Never allow roof runoff to discharge directly adjacent to basement walls—this concentrates water exactly where moisture control matters most.
Temporary monsoon mitigation: During monsoon season, consider temporary berms or sandbags directing heavy runoff away from basement window wells and foundation walls. Clean gutters and downspouts before monsoon season begins (late June) to ensure maximum capacity during heavy storms.
Interior measures: For basements in areas with periodic high groundwater or known moisture challenges (some Gilbert and Mesa locations near historical irrigation canals), consider installing interior perimeter drains connected to sump pumps. These collect water before it reaches living spaces, maintaining dry conditions even during extreme events.
Sub-slab drainage systems: In new construction or major renovations, specify sub-slab drainage consisting of gravel beds, perforated piping, and vapor barriers beneath concrete. This provides the most robust moisture protection but requires access during construction. Retrofitting sub-slab drainage in existing basements is rarely cost-effective compared to surface vapor barriers and perimeter drainage improvements.
Thermal Comfort & Cooling Performance
Limestone basement floors provide natural cooling through thermal mass effects. The stone absorbs coolness from surrounding earth (typically 60–70°F year-round at basement depths) and surrounding foundation walls, maintaining comfortable surface temperatures even when upper floors reach 80–85°F during Phoenix summers. This passive cooling reduces air conditioning demands for basement spaces and creates pleasant barefoot comfort during warm months.
Surface temperature depends on several factors: limestone with darker colors (grays, browns) absorbs slightly more radiant heat than lighter beiges and creams, though in basements with minimal direct sunlight this difference remains minor. Honed finishes feel slightly cooler than textured surfaces due to increased thermal contact with skin. Basement depth and insulation affect temperatures—fully below-grade basements stay cooler than partially exposed foundations with windows.
For cool tile basement Arizona heat management, pair limestone with appropriate furnishings and HVAC. Area rugs in seating zones provide warmth during Arizona’s mild winters when limestone floors may feel cool (65–70°F). Rugs also define spaces visually and protect high-traffic paths from wear. For basements used year-round, integrate radiant floor heating (see dedicated section below) to provide supplemental warmth during occasional cold periods while maintaining limestone’s cooling benefits in summer.
Color and texture influence heat behavior: very light limestone reflects more radiant energy, maintaining cooler surfaces in partially above-grade basements with window exposure. Mid-tone grays balance cooling performance with practical dust-hiding characteristics. Textured finishes create micro air-gaps that slightly reduce thermal conductivity—limestone feels marginally warmer to touch but retains overall cooling properties from thermal mass.
Basement HVAC design should account for limestone’s thermal characteristics. The stone’s mass stabilizes temperature swings, reducing peak cooling loads but requiring continuous moderate conditioning rather than intermittent high-capacity cooling. This suits mini-split systems or dedicated basement HVAC zones better than oversized central systems that cycle frequently.
Durability, Wear & Heavy-Use Considerations
Limestone’s moderate hardness (typically 3–4 on Mohs scale) provides adequate abrasion resistance for residential basement applications. Foot traffic from family members, entertainment guests, and typical furniture movement won’t damage properly installed and sealed limestone over normal use lifespans. However, understanding wear characteristics helps set realistic expectations and implement protective measures.
Dense limestone varieties with tight crystalline structures resist surface wear better than highly porous, soft grades. When selecting limestone for high-use basements—home theaters hosting regular gatherings, game rooms with frequent activity, or gyms with equipment movement—specify “Grade 1” or “first quality” limestone with absorption rates below 3%. These harder, denser stones maintain appearance longer under heavy use.
Abrasion performance: While limestone lacks formal PEI (Porcelain Enamel Institute) ratings used for ceramic tile, similar wear concepts apply. Choose limestone described by suppliers as suitable for “heavy residential” or “moderate commercial” use for busy basement spaces. Avoid limestone marketed for “light residential” or “wall applications only”—these softer varieties wear visibly under traffic.
Edge chipping risk increases at transitions, doorways, and areas where hard objects drop. Limestone edges chip more readily than granite or porcelain but less than marble. Protect vulnerable edges with furniture coasters, area rugs extending 6–12 inches beyond furniture perimeters, and careful handling when moving equipment or furniture.
Impact resistance: Limestone withstands typical household impacts (dropped remote controls, toys, exercise equipment) without damage. However, sharp impacts from heavy objects can chip or crack tiles. For basement gyms, use rubber mats beneath free weights and heavy equipment to prevent damage from dropped implements.
Practical protection measures for basement longevity:
- Install area rugs in primary traffic paths and beneath furniture groupings, rotating quarterly to distribute wear
- Use felt pads under all furniture legs; replace annually as they compress
- Place door mats at basement stairway entries to trap dirt and grit from upper floors
- Establish “no wheeled toys” rules for play areas—toy cars and scooters create concentrated wear patterns
- Clean spills immediately, particularly in bar and beverage areas where acidic drinks can etch limestone
- Inspect grout annually and repair cracks promptly to prevent moisture infiltration
- Avoid dragging furniture or equipment across limestone—use furniture sliders or lift items when repositioning
For basements hosting regular gatherings or parties, consider heavier-duty sealing schedules (annual rather than every 2–3 years) to maintain stain resistance under increased exposure to spills and tracked-in debris.
Sealing, Cleaning & Long-Term Maintenance
Sealing guidance for basements: All limestone basement floors require penetrating sealers that absorb into the stone’s porous structure, providing invisible protection against staining without creating surface films. Penetrating sealers allow limestone to breathe, preventing moisture from becoming trapped—critical in basement environments where vapor drive from slabs can occur despite barrier systems. Apply initial sealer immediately after grout cures (typically 72 hours after grouting), then reapply based on traffic and performance testing.
What sealing provides: Penetrating sealers repel water-based and oil-based liquids, giving you time to wipe spills before they penetrate and stain. However, sealers provide limited protection against etching from acidic substances—acids can still react with limestone’s calcium carbonate before evaporating. Sealers are preventive maintenance, not bulletproof protection. Immediate spill cleanup remains essential.
Reapplication intervals: High-traffic basement family rooms and entertainment spaces require annual resealing. Moderate-traffic media rooms and guest suites can extend to every 2–3 years. Test sealer effectiveness every 6–12 months by sprinkling water drops on limestone—if water beads and remains on the surface, sealer is working; if water absorbs darkening the stone, reseal immediately.
Daily and periodic cleaning protocols:
- Daily: Sweep or vacuum with soft brush attachments to remove dust and debris. Arizona basements accumulate surprising amounts of dust from window wells, stairways, and HVAC returns.
- Weekly: Damp-mop using pH-neutral stone cleaner diluted per manufacturer instructions. Use clean water and microfiber mop heads. Avoid excessive water—damp-mop, don’t flood floors.
- Monthly: Deep-clean high-traffic areas and spill zones. Inspect grout for staining or damage.
- Annually: Professional cleaning and resealing for high-use basements. Inspect for any signs of moisture intrusion or efflorescence.
Immediate spill response: Blot (don’t wipe) spills immediately with absorbent cloths. For acidic spills (wine, soft drinks, citrus), flood area with water to dilute, then apply pH-neutral cleaner. Never use vinegar, lemon juice, or acidic household cleaners on limestone—these cause permanent etching.
Never use on basement limestone: Acidic cleaners, vinegar-based solutions, abrasive scrubbing pads, bleach (except heavily diluted for stubborn organic stains), or any product not explicitly labeled safe for marble and limestone. These cause damage that requires professional restoration to correct.
Design Your Space: Get the Limestone Tile Living Room Guide for Arizona!
Compatibility with Radiant Heat & HVAC Considerations
Limestone works excellently with radiant floor heating systems, providing optimal thermal conductivity and mass for efficient, comfortable heating. Electric mat systems or hydronic tubing installed during basement finishing transform cool limestone into luxuriously warm surfaces during Arizona’s occasional cold periods (December through February when nighttime temperatures can drop to 40–50°F).
Radiant heating installation considerations: Install heating systems directly atop vapor barriers and beneath thinset beds. Use flexible thinset formulated for heated floors—these accommodate thermal expansion without bond failure. Wire electric systems into dedicated circuits with GFCI protection and programmable thermostats. Size heating capacity to warm floors to 75–80°F—sufficient for comfort without risk of damaging limestone or grout from excessive heat.
Benefits for Arizona basements: Radiant heat provides comfortable warmth without forced air that distributes dust—valuable in desert environments. The system operates efficiently with limestone’s thermal mass, warming slowly but maintaining temperature with minimal energy input. During mild winter days, radiant heat maintains pleasant basement temperatures while upper floors require minimal conditioning.
Cooled slab strategies: Some high-end Arizona homes integrate chilled water radiant systems that actively cool limestone floors during summer. These rare but effective systems circulate cool water through hydronic tubing, using limestone’s thermal mass to absorb heat from basement air. However, condensation risk requires careful humidity control and insulation—consult HVAC engineers before attempting cooled slab installations.
Year-round HVAC interface: Limestone floors integrate seamlessly with mini-split heat pumps, ducted HVAC systems, or dehumidification equipment maintaining comfortable basement conditions. The stone’s thermal stability reduces temperature fluctuations, creating more efficient HVAC performance. For basements with home theaters or exercise areas generating significant heat, limestone’s cooling mass helps moderate temperatures naturally.
Cost, Timeline & Project Planning
Limestone material costs for basement installations range from $5–$15 per square foot depending on tile size, finish, grade, and origin. Standard honed tiles in 12×24 or 16×16-inch formats cost $5–$9 per square foot. Large-format tiles (24×24 inches or larger) and specialty finishes range $9–$15 per square foot.
Professional installation adds $10–$20 per square foot including substrate preparation, moisture barrier installation, thinset, grout, and labor. Complex layouts, extensive substrate remediation, or uncoupling membrane systems increase costs toward the higher end. Moisture testing and engineering consultation add $300–$800 per project depending on basement size and complexity.
Total installed cost typically ranges $18–$35 per square foot for standard basement limestone installations, or $25–$45 per square foot for projects requiring significant moisture mitigation, radiant heating integration, or premium materials.
Cost variables include: existing slab condition (extensive repairs increase costs), moisture complexity (active moisture problems require expensive remediation), access challenges (narrow stairways or small basement entries increase labor), project size (larger basements achieve better per-square-foot rates), and finish selections (premium honed large-format tiles cost more than standard brushed medium formats).
Realistic scheduling: Plan basement limestone installations during Arizona’s mild seasons (October through April) when moderate temperatures optimize thinset and grout curing. Avoid scheduling during monsoon season (July–September) when humidity affects drying times and moisture intrusion risk peaks. Allow minimum 2–3 weeks for complete projects including substrate prep, moisture testing, tile installation, grout cure, and sealing. Complex projects with extensive moisture mitigation may require 4–6 weeks.
Cure time considerations: In Phoenix summer heat, thinset may cure faster than manufacturer specifications suggest, but grout requires full 72-hour cure regardless of temperature before foot traffic. During cooler months (December–February), extend cure times by 25–50% to ensure proper strength development. Never rush installation schedules—premature use compromises adhesion and long-term performance.
City-by-City Recommendations — 8 Arizona Cities
Phoenix
Phoenix’s extreme summer heat and low humidity create challenging installation conditions. Test basement slab moisture content even though Phoenix’s aridity suggests low risk—irrigation systems and monsoon events still cause periodic moisture issues in below-grade spaces. Schedule major sealing and installation work during October through April when temperatures moderate and products cure optimally without excessive heat stress.
Action: Perform in-situ moisture testing using calcium chloride or relative humidity probes before bidding or material purchase. Document moisture readings at multiple slab locations to verify installation feasibility and membrane requirements. This prevents costly surprises during construction.
Tucson
Tucson experiences larger diurnal temperature swings than Phoenix—summer days exceed 105°F while basement temperatures remain stable around 70–75°F. This creates significant thermal stress at foundation penetrations and window wells. Tucson’s dusty environment also requires more frequent basement cleaning since dust infiltrates through window wells and stairways.
Action: Plan quarterly light cleaning schedules focusing on dust removal before particles become ground into limestone surfaces. Test limestone samples in both daytime and nighttime basement lighting conditions—Tucson’s distinct lighting may reveal undertones not apparent in showroom settings.
Mesa
Mesa’s suburban developments often feature extensive landscape irrigation that saturates soil near foundations. Irrigation runoff presents the primary moisture risk for Mesa basement limestone installations. Many Mesa properties also have relatively high water tables in areas near historical canal systems.
Action: Inspect exterior grading around the entire foundation perimeter before basement finishing. Redirect irrigation away from foundation walls using gravel strips, French drains, or modified sprinkler positioning. Document drainage corrections before proceeding with limestone installation.
Chandler
Chandler’s newer residential developments typically include automated irrigation systems on timers that may overwater landscaping, particularly during monsoon season when natural rainfall supplements irrigation. Coordinate basement work with landscape scheduling to avoid moisture issues during installation.
Action: Review landscaping irrigation schedules and coordinate with homeowners to reduce or suspend irrigation during basement finishing, particularly the week before and after limestone installation. Verify exterior grading directs water away from foundations at all points.
Scottsdale
Scottsdale’s luxury market features upscale finished basements used for wine cellars, home theaters, and entertainment spaces where aesthetic quality matters critically. These high-end installations justify premium limestone grades, refined honed finishes, and tight installation tolerances that demand experienced installers.
Action: Select honed limestone finishes for refined appearance suitable for luxury basements. Require installers to create a mock-up section (minimum 4×4 feet) showing exact tile layout, grout joint width, and lippage control for owner approval before proceeding with full installation.
Glendale
Glendale’s housing stock includes many older homes where basement slabs may have settled, cracked, or developed moisture issues over decades. Retrofit basement finishing projects require thorough condition assessment before limestone installation to avoid failures from inadequate substrate preparation.
Action: Require comprehensive slab flatness testing using 10-foot straightedges and moisture testing before finalizing material selections and installation methods. Budget for substrate remediation including crack repair, grinding high spots, and potential self-leveling overlays. Older slabs often require more prep work than anticipated.
Gilbert
Gilbert’s extensively irrigated residential landscapes and some neighborhoods with higher water tables (particularly those near historical irrigation districts) create elevated moisture risk. Partial-shade conditions from mature trees and north-facing exposures can maintain higher humidity in basement zones.
Action: Include perimeter drainage improvements or interior moisture mitigation plans in project scope where irrigation systems are located within 10 feet of foundations. Consider installing interior perimeter drains in basements with any history of dampness or in areas with known high groundwater.
Tempe
Tempe’s urban density often results in compact lots with shallow basement depths (partially above-grade or daylight basements) and proximity to neighboring properties affecting drainage patterns. Older Tempe properties may have shallow slabs over poorly compacted fill.
Action: Document actual basement slab depth and existing drainage conditions before selecting tile systems. Shallow basements or partially above-grade spaces may benefit from different membrane selections or require less robust moisture barriers than fully below-grade installations.
Conclusion
Limestone tile delivers cool, durable, and elegant flooring for Arizona finished basements when moisture risks are properly assessed and mitigated, installation methods account for basement-specific conditions, and ongoing maintenance protocols maintain sealer protection and appearance. The stone’s natural thermal mass provides passive cooling benefits during intense summer heat while creating comfortable surfaces for diverse basement functions from entertainment and exercise to family gatherings and relaxation. Success depends on thorough moisture testing before installation, proper vapor barriers and crack isolation membranes protecting tile systems from substrate moisture and movement, selecting appropriate tile grades and finishes for intended uses, and maintaining regular sealing schedules that preserve stain resistance. Implement the city-specific recommendations provided here to address local moisture sources and climate conditions unique to your Arizona location. With proper planning, professional installation, and straightforward maintenance, limestone basement floors enhance your home’s livable space and value for decades.