Arizona Soil Context: Caliche & Clay Behavior
Caliche Characteristics: Caliche (calcium carbonate cemented soil layer) forms naturally in Arizona’s arid climate through millennia of mineral deposition and cement formation. This hardpan layer ranges from partially cemented nodules to solid rock-like strata several feet thick. Caliche depth varies dramatically—some properties encounter caliche at 6-12 inches below grade while others find it at 3-4 feet or deeper. The cemented layer creates an impermeable barrier blocking downward water infiltration and root penetration. Caliche’s hardness resists standard excavation equipment, often requiring jackhammers, rock saws, or specialized machinery for removal.
Clay Soil Expansion: Expansive clays prevalent throughout Phoenix metro, Tucson basin, and surrounding valleys contain montmorillonite minerals that absorb water and swell dramatically when wet, then shrink during drying. Volume changes can exceed 10% between fully saturated and dry states, generating considerable heaving and settlement forces. The expansion potential varies by clay content and mineralogy—some Arizona clays qualify as highly expansive with significant engineering implications.
Drainage Limitations: Both caliche and clay exhibit poor drainage characteristics. Caliche’s cemented structure prevents water percolation, causing moisture accumulation above the hardpan layer. Clay’s fine particle structure and low permeability create slow infiltration rates and waterlogged conditions during irrigation or rainfall. Standing water weakens subgrade bearing capacity and exacerbates clay expansion cycles.
Seasonal Moisture Fluctuations: Arizona’s climate creates dramatic seasonal moisture variations. Summer monsoons deliver intense rainfall after extended dry periods, rapidly saturating upper soil layers. Winter rains provide sustained moderate moisture. Spring and early summer bring prolonged drought. These cycles drive repeated clay expansion-contraction and create moisture-related movement in improperly prepared installations.
Risk Factors for Limestone Paver Installations: Inadequate accommodation of these soil characteristics leads to predictable failure modes including differential settlement creating uneven surfaces and tripping hazards, heave from clay expansion lifting pavers and disrupting grade, joint material washout from poor drainage and surface ponding, edge spreading from lateral soil pressure without adequate restraint, and structural base failure from inadequate thickness or compaction over weak subgrades. Proper specification and installation practices mitigate these risks through engineered solutions addressing Arizona’s specific conditions.
Applicable Standards & Contractor Notes
Professional limestone paver installations should reference established industry performance standards and testing protocols to ensure quality outcomes, though specific implementation adapts to Arizona conditions.
Compaction Standards: Specify minimum relative compaction percentages for subgrade and base layers. Typical requirements include 95% relative compaction (modified Proctor) for subgrade under pedestrian applications, 98% relative compaction for base aggregate under pedestrian loads, and 100% relative compaction for subgrade and base under vehicular applications. Field density testing using nuclear gauge or sand cone methods verifies compliance.
Base Thickness Targets: Minimum aggregate base depths depend on subgrade classification and intended loads. Performance-based specifications state required base thickness to achieve target bearing capacity rather than prescribing arbitrary depths. Typical minimums range from 4-6 inches compacted depth for pedestrian loads on competent subgrades to 8-12+ inches for vehicular loads or weak subgrades.
Slope and Grade Tolerances: Specify minimum drainage slopes (typically 1.5-2.0% for outdoor paving) and allowable grade deviations. Surface flatness tolerances typically allow 1/4 inch maximum deviation over 10 feet for premium installations, 3/8 inch for standard work.
Proof Rolling: Large installations benefit from proof rolling the prepared subgrade using loaded vehicles or vibratory equipment to identify soft spots requiring remediation before base placement. Document weak areas and address through additional compaction, excavation and replacement, or localized stabilization.
Infiltration Testing: On critical projects or suspected problem soils, conduct percolation tests to quantify drainage capacity and determine if enhanced drainage systems are necessary. Simple field tests involve excavating test pits, filling with water, and measuring drainage time—prolonged ponding indicates need for engineered drainage solutions.
Material Testing: Verify aggregate base materials meet gradation specifications and contain minimal fines that would reduce permeability. Request sieve analysis from suppliers for critical projects. Bedding sand should meet specified gradations without excessive fines or organic content.
These standards provide objective performance targets rather than prescriptive methods, allowing contractors to adapt techniques to site-specific Arizona conditions while meeting quality benchmarks.
Joint Spacing & Joint Materials
Proper joint specification balances aesthetic preferences, functional requirements, and material characteristics to ensure long-term installation integrity.
Joint Width by Paver Type:
- Sawn/gauged limestone pavers: 1/8 to 3/8 inch joints suit dimensionally consistent rectangular pavers with straight edges. Tighter joints (1/8 to 1/4 inch) create refined formal appearances but require precision installation and high-quality pavers with minimal dimensional variation. Standard 1/4 to 3/8 inch joints provide installation tolerance while maintaining clean lines.
- Tumbled/antiqued limestone: 3/8 to 5/8 inch joints accommodate irregular edges and dimensional variation inherent in tumbled products. Wider joints (1/2 to 5/8 inch) suit heavily tumbled or hand-chipped edges.
- Flagstone/irregular cut limestone: 1/2 to 1 inch joints work for natural cleft flagstone installations where dimensional consistency is limited. Very wide joints (over 3/4 inch) may require consideration of alternative joint materials beyond standard polymeric sand.
Joint Material Selection:
- Polymeric sand: Polymer-modified jointing sand provides weed suppression, insect resistance, and improved washout resistance compared to standard sand. Critical for Arizona limestone paver base requirements where monsoon rains test joint stability. Select products rated for wide temperature ranges (Phoenix summer heat exceeds many product specifications) and UV stability. Application requires dry conditions and careful water activation following manufacturer protocols.
- Washed concrete sand: Traditional option for installations not requiring maximum joint stability. Use clean, angular sand free of fines, salts, and organic matter. Less resistant to washout than polymeric products but more forgiving of installation errors and easier to repair.
- Grout joints: Mortar or epoxy grout suits applications requiring permanent joints impervious to weeds and washout. Typically used for vehicular applications, pool coping, or luxury installations justifying higher cost. Requires mortar-set installation over concrete base rather than flexible sand-set systems.
Joint Function in Caliche/Clay Soils: Joint spacing affects installation performance on challenging soils. Wider joints provide more tolerance for differential movement from clay expansion or settlement, reducing paver cracking risk from constrained movement. However, excessively wide joints (over 5/8 inch with standard polymeric sand) may experience material settling or washout. Proper joint width balances movement accommodation with material stability.
Contractor Tolerances: Specify acceptable joint width variation—typically ±1/16 inch for formal installations, ±1/8 inch for standard work. Consistent joint width matters more than absolute dimension for professional appearance. Document target joint width in specifications and verify during installation using gauge tools.
Drainage Considerations: Joints provide minor drainage pathways supplementing overall site drainage. However, joints should never be relied upon as primary drainage—proper site grading and base permeability must handle water management. In caliche areas where subsurface drainage is limited, joints help surface water reach perimeter drainage systems.
Base Preparation — Depths, Compaction & Materials
Adequate base preparation represents the single most critical factor determining limestone paver installation longevity, particularly on Arizona’s challenging soils.
Base Depth Requirements by Application:
Pedestrian applications (patios, walkways, pool decks):
- Competent sandy or gravelly subgrade: 4-6 inches compacted aggregate base minimum
- Clay subgrade with moderate expansion potential: 6-8 inches compacted aggregate base
- High expansion clay or caliche at shallow depth: 8-12 inches compacted aggregate, potentially with geotextile separation
- Subgrade bearing capacity below 95% relative compaction: increase base depth 2-4 inches beyond standard or remediate subgrade
Vehicular applications (driveways, occasional vehicle access):
- Well-draining competent subgrade: 8-10 inches compacted aggregate base minimum
- Clay or caliche subgrade: 12-16 inches compacted aggregate base
- Heavy vehicle loads or weak subgrade: 16+ inches or engineer-designed structural section with possible cement stabilization
Base Material Specifications:
- Use crushed angular aggregate (3/4-inch minus or similar gradation) for primary base material. Angular particles interlock effectively under compaction, creating stable load-bearing structure.
- Avoid rounded river gravel or pea gravel—poor interlock allows shifting and settlement
- Verify aggregate contains less than 5% fines passing #200 sieve to maintain permeability
- Consider washed aggregate in areas with highly expansive clay to minimize fines introduction
- For vehicular applications, specify road base or aggregate base meeting local DOT specifications for structural capacity
Compaction Protocol:
- Place base aggregate in lifts no thicker than 4-6 inches loose measurement
- Compact each lift to specified density (typically 95-98% modified Proctor) using plate compactors for small areas or vibratory rollers for large installations
- Verify compaction through field density testing—at minimum test one location per 500 square feet or per specifications
- Moisture condition aggregate to near-optimum moisture content (typically 4-8% by weight) during compaction—too dry material won’t compact properly, too wet creates unstable muddy conditions
- Proof roll completed base to identify soft spots requiring additional compaction or remediation
Caliche Treatment Options:
When caliche layers are encountered at subgrade elevation, contractors have several approaches:
- Mechanical removal: Excavate caliche layer to depth providing adequate aggregate base thickness above remaining competent soil. Most reliable approach but increases cost due to difficult excavation and material disposal. Recommended when caliche encountered at 12 inches or less below finished grade.
- Spot removal: Remove caliche only in concentrated load areas or where thickest, leaving thinner caliche in place elsewhere. Requires engineering judgment to avoid creating differential support conditions.
- Aggressive drilling/fracturing: Break up caliche layer to improve drainage and reduce rigid layer effects without complete removal. Limited effectiveness unless caliche is relatively thin and fractured.
- Increased base thickness: If caliche depth is adequate (3+ feet below finish grade), specify thicker aggregate base to bridge over caliche layer and distribute loads. Only viable when removal is impractical and caliche provides stable platform.
- Geotechnical consultation: For projects exceeding $50,000 installed value or critical applications, engage geotechnical engineer to evaluate caliche conditions and provide specific recommendations.
Geotextile Fabric Application:
Use geotextile separation fabric between native subgrade and aggregate base when:
- Clay subgrade shows pumping or contamination of base aggregate during construction
- Subgrade bearing capacity is marginal (below 90% relative compaction and non-improvable)
- Cutting through multiple soil strata creating varying support conditions
- Preventing upward clay migration into drainage aggregate
Select non-woven geotextile rated for separation and filtration function. Overlap fabric minimum 12 inches at seams. Avoid woven geotextiles that may allow clay pumping through fabric openings.
Cement-Treated Bases:
High-load applications or extremely poor subgrades may justify cement-stabilized base:
- Mix 5-8% portland cement (by weight) into aggregate base before compaction
- Achieve 95%+ compaction within cement’s initial set time (4-6 hours typically)
- Cure with moisture or curing compound for minimum 7 days before paver installation
- Creates semi-rigid structural layer distributing vehicular loads effectively
- Significantly increases cost but provides superior performance for driveways on poor Arizona soils
Clay Subgrade Moisture Conditioning:
Expansive clay subgrades require moisture management before base placement:
- Test subgrade moisture content—target near-optimum moisture (typically 12-18% for Arizona clays)
- If too dry, lightly water and allow moisture equilibration for 24-48 hours before compaction
- If too wet (after irrigation breaks or rainfall), allow drying or use lime stabilization to reduce plasticity
- Compact clay subgrade to specified density at proper moisture content
- Never place aggregate base over saturated clay—schedule installation during dry periods
This attention to caliche soil limestone pavers base preparation requirements prevents the settlement and heave issues that plague inadequate installations on Arizona’s challenging subgrades.
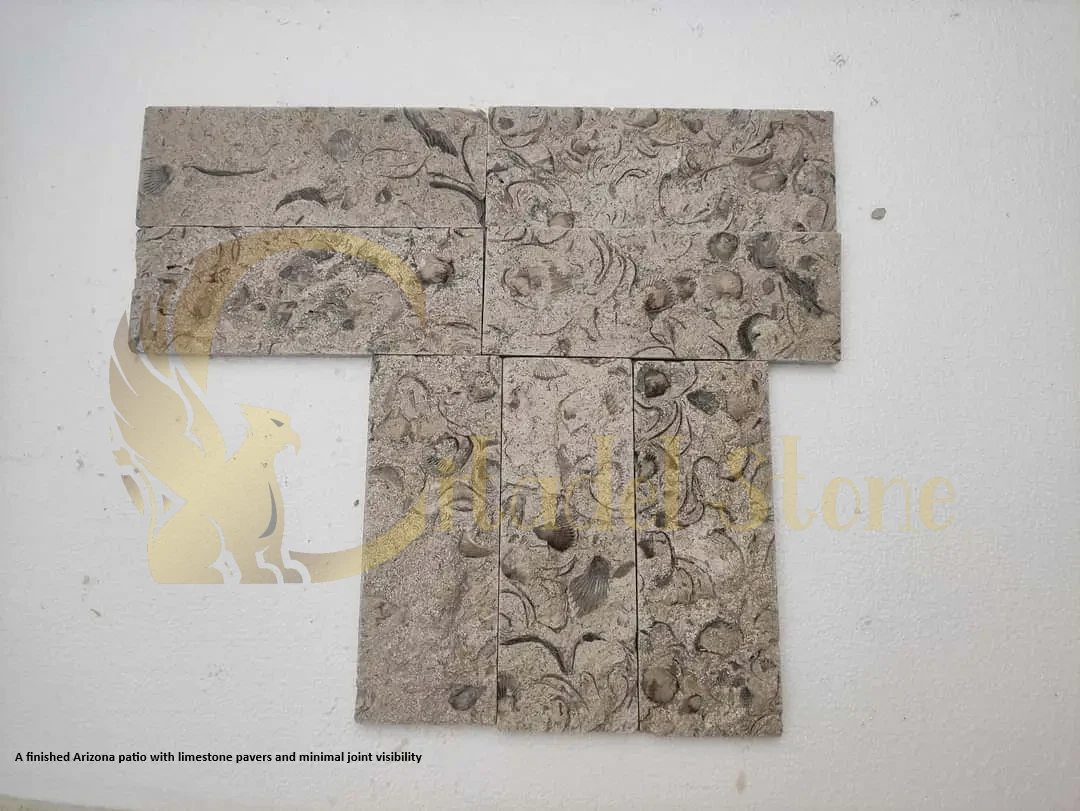
See the 2026 Limestone Paver Color Trends and Which Shades Stay Coolest in Arizona!
Drainage, Slope & Subgrade Stabilisation
Effective drainage design prevents water accumulation that weakens bases, activates clay expansion, and causes joint material washout.
Minimum Slope Requirements:
- Patios and pool decks: 2% slope minimum (1/4 inch per foot), 2.5% preferred for reliable drainage
- Walkways: 1.5% minimum, 2% preferred
- Adjacent to structures: 2.5-3% for first 10 feet from building to ensure positive drainage away from foundations
- Large paved areas: incorporate subtle crowning or multi-directional slopes preventing water concentration in paved surface center
Slope Direction Strategy:
- Direct drainage away from buildings toward landscape areas, drainage structures, or street
- Avoid directing concentrated runoff across paved surfaces—route around perimeter where possible
- Create defined drainage paths preventing sheet flow across large paved areas
- Never slope pavers toward structures regardless of other site constraints—foundation protection supersedes paving convenience
Caliche Area Drainage Challenges:
Caliche’s impermeability creates unique drainage problems requiring engineered solutions:
Surface drainage emphasis: Since subsurface infiltration is minimal when caliche exists at shallow depth, prioritize surface collection and conveyance. Use generous slopes (2.5-3%), perimeter collection, and positive routing to drainage structures.
Perimeter drainage systems: Install perforated pipe in gravel-filled trench around paved area perimeters:
- Trench depth: 12-18 inches below base bottom elevation
- Pipe: 4-inch perforated PVC or ADS in clean 3/4-inch drainage rock
- Route to positive discharge point (street, drainage basin, dry well where code permits)
- Prevents water accumulation beneath paved area edges where joint material loss concentrates
French drain integration: For installations on slopes or receiving uphill runoff, intercept water before it reaches paved area:
- Place French drain trench upslope of paved area
- Size for anticipated runoff volume
- Connect to outlet preventing water redirection back toward pavement
Subbase drainage layer: When caliche prevents downward infiltration, create lateral drainage within aggregate base:
- Use clean, single-size drainage aggregate (3/4-inch or similar) for bottom 2-4 inches of base
- Slope this drainage layer to perimeter collection
- Overlay with road base or crusher fines preventing bedding sand infiltration
- Provides temporary water storage and lateral conveyance during intense monsoon rainfall
Connection Details:
Building thresholds: Coordinate finished paver elevation with door thresholds:
- Maintain 2-inch minimum step-down from threshold to exterior paving for weather protection
- Use transition materials (threshold strips, door sweeps) preventing water entry
- Slope away from building minimum 2.5% for first 10 feet
Existing pavement tie-ins: Where limestone pavers adjoin concrete slabs or asphalt:
- Maintain positive drainage preventing water ponding at interface
- Provide movement joint at material transition
- Consider limestone slightly lower than rigid pavement to prevent tripping hazard from differential settlement
Proper drainage specification and execution prevents the chronic water-related problems that compromise Arizona limestone paver installations on caliche and clay soils.
Edge Restraints — Types, Installation & Spec Details
Robust edge restraint prevents lateral spreading, maintains joint integrity, and ensures long-term installation stability—especially critical on expansive clay soils generating lateral pressure.
Concrete Curb Edge Restraint:
- Cast-in-place concrete: 6-inch width × 6-8 inch depth minimum below paver bottom for adequate anchorage. Use 3000 psi concrete minimum. Reinforcement optional for straight runs, recommended for curved applications (3/8-inch rebar continuous). Provides permanent, maintenance-free edge restraint.
- Precast concrete curb: Similar dimensions to cast-in-place. Set in concrete footing or haunched with concrete for stability. Verify curb height suitable for application—flush with pavers, or raised 4-6 inches for defined edge.
Soldier Course Edge Restraint:
- Set limestone pavers perpendicular to field on concrete haunch or footing
- Concrete haunch dimensions: 4-6 inches wide × 6-8 inches deep
- Use 3000 psi concrete and ensure adequate cure before backfilling
- Provides visually coordinated edge using same material as field
- Less robust than full concrete curb—best for pedestrian applications with moderate soil pressure
Manufactured Edge Restraint Systems:
- Aluminum or steel edge restraint: Commercial systems with staking flanges. Embed minimum 1 inch below paver bottom. Anchor with 10-inch galvanized or stainless steel spikes at 12-16 inch spacing, closer on curves. Suitable for pedestrian loads and stable soils. Less reliable on expansive clays without supplemental concrete backing.
- HDPE plastic edge restraint: Heavy-duty polyethylene extrusions with staking flanges. Similar installation to aluminum. Lower cost but less rigid—requires closer stake spacing (8-12 inches) for stability. Best for small installations or residential walkways.
Mortar-Set Curb and Coping:
- Pool coping and premium applications often use limestone set in mortar on concrete beam
- Concrete beam: 8-12 inches wide × 8-12 inches deep, reinforced with continuous rebar
- Set coping/curb stones in 1-inch mortar bed, joint with mortar or grout
- Provides permanent, stable edge ideal for pool applications and luxury installations
Edge Restraint for Limestone Paver Edge Restraint Phoenix Installations on Expansive Soils:
Clay expansion generates lateral forces that can shift inadequately restrained edges:
- Increase edge restraint depth 2-4 inches beyond standard on confirmed expansive clays
- Use concrete-based restraint systems (cast curbs, soldier courses on concrete) rather than spike-only systems
- Provide continuous restraint around entire perimeter—no gaps allowing lateral escape
- On large installations (over 500 SF), consider intermediate restraint bands every 20-30 feet preventing lateral creep from center areas
Anchoring and Jointing:
- Space edge restraint anchors per manufacturer recommendations, typically 12-16 inches for aluminum/steel, 8-12 inches for plastic
- On curves, reduce spacing to 8-10 inches maintaining restraint against pavers pushing outward
- Drive spikes fully seated—protruding spikes create trip hazards and fail to restrain effectively
- At joints between restraint sections, overlap or splice per manufacturer details ensuring continuity
- Backfill behind edge restraint with compacted soil or concrete for additional stability
Restraint Installation Sequence:
- Excavate edge restraint trench to specified depth and width
- Place and compact base of trench
- Position edge restraint to finished elevation and alignment
- Anchor per specification with appropriate spacing
- Pour concrete footing/haunch if specified, carefully maintaining restraint alignment during pour
- Allow concrete cure minimum 24 hours before placing adjacent aggregate base
- Backfill and compact behind restraint
Proper edge restraint prevents the lateral spreading and joint material loss that compromises installations on Arizona’s challenging soils.
Movement Joints, Expansion & Isolation
Movement joints accommodate thermal expansion, structural differential movement, and soil-related settlement without causing paver cracking or installation distress.
Movement Joint Locations:
- Adjacent to buildings, walls, and fixed structures: Always provide isolation joint preventing load transfer from structure to pavement
- Large paved areas: Install movement joints every 20-30 feet in each direction breaking large areas into manageable sections
- Changes of plane: At steps, grade changes, and level transitions, provide movement joint separating sections
- Material transitions: Where limestone pavers meet concrete, asphalt, or other materials, install movement joint
- Over structural elements: When paving over expansion joints in concrete slabs or footings, continue movement joint through paver installation
Movement Joint Width and Filler:
- Joint width: 3/8 to 3/4 inch typical, wider for large installations or severe climate
- Filler materials: Closed-cell foam backer rod sized to joint width, topped with flexible polyurethane or silicone sealant for exposed joints. Alternative: fill with pea gravel or sand for natural appearance accepting some migration.
- Depth: Movement joint should extend full depth through pavers, bedding, and base to function effectively
Interaction with Edge Restraints:
Movement joints must be compatible with edge restraint systems:
- Terminate edge restraint sections at movement joints or use flexible connectors allowing movement
- Avoid continuous rigid edge restraint crossing movement joints—this defeats joint purpose
- Detail movement joints to prevent edge spreading—may require thickened concrete at joint or alternative restraint
Drainage Through Movement Joints:
Movement joints create potential water infiltration paths:
- Slope pavement away from joints where possible minimizing water collection
- If joints must be perpendicular to slope, ensure adequate base drainage beneath joint location
- Consider sealing critical joints (adjacent to structures) with flexible sealant preventing water intrusion
Arizona-Specific Considerations:
Phoenix-area installations experience significant thermal cycling (winter lows near 30°F, summer highs 120°F+), creating 90°F+ temperature swings that generate measurable expansion and contraction. Caliche and clay soils add movement from moisture cycling and potential settlement. These combined factors make movement joints more critical in Arizona than moderate climates. Don’t omit movement joints attempting to save costs—repair expenses from constrained movement exceed prevention costs significantly.
Installation Practices & Quality Control
Systematic installation workflow with defined quality control checkpoints ensures consistent results meeting specification requirements.
Step-by-Step Installation Sequence:
1. Site Preparation:
- Clear vegetation, topsoil, and unsuitable materials to specified depth
- Proof stake excavation depth accounting for all layers (subgrade preparation, base, bedding, paver thickness)
- Identify and address underground utilities before excavation
- Establish benchmark elevations and slope directions with string lines or laser level
2. Subgrade Preparation and Testing:
- Grade subgrade to specified elevations maintaining design slopes
- Address caliche or unsuitable soils per specifications (removal, treatment, stabilization)
- Compact subgrade to specified density (typically 95% modified Proctor minimum)
- Conduct field density tests verifying compaction compliance
- Proof roll to identify soft areas requiring remediation
- Place geotextile if specified, with proper overlap and anchoring
3. Base Aggregate Placement and Compaction:
- Spread aggregate base in maximum 4-6 inch loose lifts
- Moisture condition to near-optimum moisture content
- Compact each lift to specified density (95-98% modified Proctor typical)
- Test compaction—minimum one test per lift per 500 SF or per specifications
- Grade top of base maintaining design slopes and accounting for bedding thickness
- Proof roll final base surface checking for deflection or pumping indicating inadequate compaction
4. Edge Restraint Installation:
- Install per specifications at this stage (before bedding) for sand-set installations
- Verify elevation, alignment, and anchoring
- Allow concrete cure if using concrete haunches or footings
5. Bedding Layer:
- Sand-set method (flexible pavement): Spread 1-inch coarse concrete sand (meeting ASTM C33 or similar) and screed to uniform thickness. Do not compact sand before paver placement. Use screed rails ensuring consistent thickness.
- Mortar-set method (rigid pavement): Place over concrete slab base. Spread 1-inch mortar bed and set pavers into fresh mortar with slight tamping. Joint with mortar after mortar cure.
6. Paver Installation:
- Establish string lines for alignment and elevation control
- Set pavers to specified joint width using spacers or gauge tools
- Work from established areas toward unfinished areas—never walk on uncompacted bedding
- Check alignment and grade frequently against control lines
- Cut edge pavers as needed using masonry saw with diamond blade—never force undersized pavers
7. Initial Compaction (sand-set only):
- After area section completion (minimum 100 SF), compact pavers using plate compactor with neoprene or rubber protective pad
- Make 2-3 passes in different directions
- Compaction seats pavers into bedding sand creating interlock
- Never run plate compactor directly on limestone—surface damage will occur
8. Joint Filling:
- Polymeric sand: Sweep dry polymeric sand into joints from multiple directions until full. Compact, then sweep again, repeating until joints remain full after compaction. Remove all excess from surfaces using broom and blower. Mist with water per manufacturer protocols—typically multiple light passes over 30-45 minutes. Allow cure per product requirements (24-72 hours) before traffic.
- Standard sand: Sweep in clean concrete sand, compact, repeat until joints full. Mist lightly to settle. Accept that ongoing maintenance will require periodic re-sweeping.
9. Final Compaction and Cleaning:
- After joint filling, perform final compaction with protective pad
- Sweep or blow all residual sand and dust from paver surfaces
- For polymeric sand, this cleaning must be thorough before water activation—residue creates difficult-to-remove haze
10. Initial Inspection:
- Verify slopes and drainage with water test—hose down areas and confirm proper runoff
- Check joint width consistency and fill level
- Confirm edge restraint secure and flush
- Document completion with photos before leaving site
Quality Control Checkpoints and Tolerances:
Flatness: Maximum 1/4 inch deviation over 10-foot straightedge for premium work, 3/8 inch for standard installations. Check at multiple locations and orientations.
Grade and Slope: Within ±1/4 inch of specified elevation at control points. Slope within ±0.25% of specification.
Joint Width: Within ±1/16 inch of specified width for formal installations, ±1/8 inch for standard work. Verify consistency more than absolute dimension.
Edge Alignment: Straight runs within 1/4 inch of string line over 20 feet. Curves smooth and fair without flat spots or kinks.
Lippage: Adjacent pavers should be within 1/8 inch elevation difference—excessive lippage creates trip hazards and poor aesthetics.
Protection and Curing:
- Restrict traffic during polymeric sand cure period (typically 24-48 hours minimum)
- Protect installation from rain during cure using plastic sheeting if storms threaten
- Barricade or mark installation preventing accidental traffic during settling period
- Schedule final walkthrough with owner after 48-72 hours when installation has stabilized
Material Selection & Accessories
Specifying appropriate materials and accessories ensures installation performance and contractor limestone specs Arizona professionals can execute efficiently.
Limestone Paver Thickness by Application:
- Pedestrian traffic (patios, walkways, pool decks): 1.25 to 1.5 inches minimum thickness. Premium flagstone installations may use 1.5 to 2 inches for substantial appearance.
- Vehicular traffic (driveways, parking courts): 2 inches minimum thickness. Some contractors prefer 2.5 inches for full-size vehicles or commercial applications. Verify limestone compressive strength adequate for vehicular loads—some softer varieties may not be suitable.
- Pool coping: 2 to 3 inches thickness with bullnose or other profiled edge. Additional thickness provides adequate material for edge profiling.
Surface Finish Selection:
- Tumbled/antiqued: Irregular surface texture and softened edges. Provides best slip resistance for pool decks and barefoot areas. Dimensional variation requires wider joint spacing and relaxed installation tolerances.
- Honed: Smooth matte surface for formal appearance. Requires tight tolerances and careful installation for proper visual effect. Specify non-slip treatment for wet areas.
- Brushed: Light surface texture through wire brushing. Moderate slip resistance and easier maintenance than heavily tumbled finishes.
- Natural cleft/sawn: Exhibiting stone’s natural split face. Rustic appearance with moderate texture. Dimensional variation moderate.
Accessory Materials and Specifications:
Joint sand: Polymeric sand rated for wide joints (if using 3/8 inch+), UV-stable, and heat-tolerant for Arizona conditions. Alternatively, specify washed concrete sand meeting ASTM C33, angular particles, minimal fines (under 3% passing #200 sieve).
Edge restraint fasteners: Galvanized or stainless steel spikes 10-12 inches length for manufactured restraints. Avoid plain steel that rusts and degrades. For heavy-duty applications, use rebar anchors driven through restraint into compacted base.
Geotextile fabric: Non-woven needle-punched geotextile, minimum 4 oz/yd² for separation applications, 8 oz/yd² for stabilization over weak subgrades. Verify fabric meets AASHTO M-288 Class 1 or equivalent for strength and filtration properties.
Base aggregate: Crushed angular stone, 3/4-inch minus or road base gradation, meeting local DOT specifications for base course. Plasticity index less than 6, minimal deleterious materials. For drainage layers, use clean single-size aggregate (3/4-inch or 1-inch).
Bedding sand: Coarse concrete sand meeting ASTM C33 or equivalent. Avoid fine mason sand or material with excessive fines that inhibit drainage and proper interlock.
Stabilizing additives (optional): Cement for stabilized base (Type I/II portland cement, 5-8% by weight). Hydrated lime for clay subgrade stabilization (2-4% by weight) reducing plasticity.
Mortar and Grout (for mortar-set applications): Type S or N mortar for setting bed, Type S for joints exposed to traffic. Mix per ASTM C270. For epoxy joints, use commercial two-part epoxy grout systems rated for exterior use and temperature extremes.
Bedding Mortar Tolerances (if used):
- Mortar bed thickness: 3/4 to 1 inch compacted thickness
- Mortar should achieve 2000-2500 psi compressive strength minimum
- Set pavers within mortar’s initial set time (typically 2-4 hours)
- Maintain consistent mortar thickness—variations create lippage problems
Proper material selection based on application requirements and Arizona’s environmental conditions ensures installations meet contractor limestone specs Arizona standards for quality and longevity.
Inspection, Maintenance & Warranty Considerations
Systematic post-installation inspection and proactive maintenance preserves installation quality and identifies issues before they become major problems.
Recommended Inspection Schedule:
Initial post-installation (within 7 days): Verify proper drainage during first irrigation or rainfall. Check joint material integrity and settlement. Confirm edge restraint remains secure. Address any immediate concerns with installer while project is fresh.
30-day inspection: Assess joint settlement requiring re-sweeping. Check for unexpected movement or settlement patterns. Verify drainage performs as designed. This inspection occurs after initial settlement period when installation has stabilized.
90-day inspection: Comprehensive review including flatness, joint condition, edge integrity, and any signs of base failure or unexpected movement. Final opportunity to address installation defects under typical warranty periods.
Annual inspections (ongoing): Inspect after monsoon season (October) each year. Monsoon rains provide worst-case stress testing of installations—post-monsoon inspection reveals any drainage, joint, or structural issues. Check joint material condition, edge restraint integrity, paver condition, and grade maintenance.
Common Maintenance Items:
Joint material replacement: Polymeric sand joints may require topping after 3-5 years as material slowly degrades under UV exposure and mechanical wear. Standard sand joints require more frequent maintenance (annually or biannually). Remove deteriorated material, clean joints, and reapply following original installation procedures.
Re-compaction: Settling may require re-compaction of specific areas. Use plate compactor with protective pad. If settlement is significant or recurring, investigate base failure requiring more extensive repair.
Sealing (if specified): Penetrating sealers require reapplication every 1-3 years depending on product and exposure. Clean limestone thoroughly before resealing. Test water absorption—if water soaks in within 5-10 minutes, resealing is due.
Edge restraint maintenance: Verify anchors remain tight and restraint sections intact. Tighten or replace deteriorated anchors. Address any edge spreading immediately before it worsens.
Weed control: Despite polymeric sand, occasional weeds may appear. Remove promptly and repair joints if material is disturbed. Pre-emergent herbicides (where permitted) help control weed germination.
Warranty Considerations for Challenging Soils:
Contractors installing on Arizona’s caliche and clay soils should clearly define warranty coverage:
- Installation workmanship warranty: Typically 1
-2 years covering defects in installation quality (improper compaction, joint installation errors, edge restraint failure from improper anchoring). Explicitly exclude movement from documented expansive soil conditions beyond reasonable control.
- Material warranty: Limestone quality issues (spalling, cracking from inherent defects) typically covered by supplier warranties, not contractor installation warranties. Define responsibility clearly in contracts.
- Settlement exclusions: Warrant base preparation and compaction quality but exclude settlement from undisclosed subsurface conditions (unknown caliche layers, underground voids, buried debris). Recommend geotechnical investigation for sites with unknown conditions and document when owners decline investigation—this protects contractors from warranty claims related to undisclosed soil problems.
- Maintenance requirements: Specify that warranty validity requires owner maintenance including maintaining proper drainage, not altering grades, avoiding heavy vehicle loads on pedestrian-rated installations, and maintaining joint materials. Neglected maintenance voids warranties.
Documentation Practices: Photograph installations at completion from multiple angles showing overall appearance, edge conditions, drainage features, and specific details. Document compaction test results, materials used, and any site-specific conditions encountered. This documentation supports warranty defense if claims arise and helps diagnose problems requiring repair.
Proactive inspection and maintenance programs, combined with clear warranty terms, protect both contractors and owners while ensuring long-term installation performance on Arizona’s challenging soils.
Cost & Scheduling Considerations
Understanding cost drivers and optimal scheduling helps contractors provide accurate bids and owners budget appropriately for limestone paver installations on difficult Arizona soils.
Cost Factors Specific to Caliche and Clay Soils:
Deeper excavation: Removing unsuitable soils or caliche layers adds $2-$6 per square foot depending on depth and hardness. Caliche removal costs significantly exceed standard excavation—plan $4-$8 per cubic yard for mechanical removal including hauling.
Haul-away expenses: Caliche and clay materials often can’t be used elsewhere on site, requiring off-site disposal. Factor disposal fees ($15-$35 per ton) and trucking costs. Large projects may generate 50-100+ cubic yards requiring disposal.
Imported aggregate base: Increased base depth for poor soils directly increases material costs. Each additional 2 inches of compacted base adds approximately $0.75-$1.50 per square foot for materials and placement labor.
Geotechnical consultation: Formal geotechnical investigation costs $1,500-$5,000 depending on scope but provides valuable design guidance preventing costly failures. Recommend for projects over $50,000 or when soil conditions are uncertain.
Enhanced drainage systems: Perimeter drains add $15-$35 per linear foot installed. French drains, dry wells, and drainage structures add several hundred to several thousand dollars depending on scope. However, these systems prevent chronic problems justifying the investment.
Premium edge restraint: Concrete curbs cost $12-$25 per linear foot installed compared to $3-$8 per foot for basic manufactured restraints. For challenging soils, the robust containment justifies premium cost.
Geotextile fabric: Adds $0.40-$0.80 per square foot including material and installation labor. Minor cost increase providing significant benefit when needed.
Cost Estimation Guidelines: For budget planning on confirmed caliche/clay sites, add 15-30% to standard limestone paver installation costs (which typically run $16-$35 per square foot installed for residential work). Complex sites with deep caliche, extensive drainage needs, or large excavation quantities may exceed this range.
Scheduling Recommendations:
Avoid monsoon season: Schedule major installations outside July-September monsoon period when possible. Sudden storms disrupt base preparation, prevent proper compaction at correct moisture content, and delay joint material curing. If monsoon installation is unavoidable, maintain flexible schedule accommodating weather delays and have protective measures (tarps, plastic sheeting) ready.
Compaction timing: Clay soils require proper moisture content for successful compaction. Schedule installation when natural moisture is near-optimum (typically spring after winter rains or fall after monsoon). Avoid mid-summer when extreme drying makes moisture conditioning difficult and expensive.
Curing windows: Polymeric sand requires 24-72 hours cure time before rain exposure. Plan installation completion timing around weather forecasts—don’t start joint filling Friday afternoon if weekend storms are predicted.
Sequential work: On large projects, complete sections fully (base, pavers, joints) rather than spreading each phase across entire site. This allows partial area use while work continues and reduces weather vulnerability—completed cured sections withstand storms while uncompleted areas remain vulnerable.
Temperature considerations: Extreme Phoenix summer heat (115°F+) makes installation physically challenging and affects material behavior (polymeric sand curing, mortar setting). Schedule installation for early morning hours (6 AM start) completing primary work before noon heat. Alternatively, schedule projects for October-May when temperatures moderate.
Labor productivity: Difficult excavation through caliche reduces productivity—budget additional labor hours or equipment costs. Base preparation on challenging soils typically requires 50-75% more labor time than sandy sites.
Realistic cost estimation and strategic scheduling prevent budget overruns and weather-related delays while ensuring quality installations on Arizona’s demanding soils.
City-by-City Specification Notes — 8 Arizona Cities
Phoenix
Phoenix metro installations commonly encounter caliche layers at 12-36 inches depth, with deeper deposits in undisturbed native areas and shallower layers in developed neighborhoods with previous grading. Urban heat island effects and high summer temperatures stress installations—specify heat-tolerant polymeric sand and schedule installation for October through May avoiding brutal summer conditions. Many Phoenix properties have alkaline irrigation water that can contribute to efflorescence—detail proper drainage preventing water accumulation in base layers. Contractor action item: Require pre-bid site probes on projects over 1,000 square feet to identify caliche depth and hardness, allowing accurate excavation cost estimation and avoiding change order disputes. Budget for mechanical caliche removal on 60-70% of Phoenix projects.
Tucson
Tucson basin features extensive clay deposits mixed with caliche zones, creating variable conditions often within single properties. The area’s large diurnal temperature swings (30-40°F) and seasonal moisture variation from winter rains and summer monsoons drive significant clay expansion-contraction cycles. Specify base depths at upper end of ranges (minimum 6 inches for pedestrian, 12+ inches for vehicular) to accommodate movement without installation distress. Tucson’s slightly higher rainfall (12 inches annually vs Phoenix’s 8 inches) increases drainage system importance. Contractor action item: Conduct moisture conditioning of clay subgrades before compaction—test moisture content and adjust through controlled watering or drying periods. Verify 95%+ subgrade compaction at near-optimum moisture (typically 14-18% for Tucson clays) to minimize post-installation movement.
Mesa
Mesa’s suburban development includes extensive areas with mixed fill soils from previous grading operations, creating variable support conditions. Watch for isolated pockets of highly expansive clay within generally competent fill—these create differential movement problems. Properties with mature landscape irrigation near proposed paver areas experience chronic moisture introduction activating clay expansion even in desert climate. Base preparation quality matters more than exotic specifications—ensure thorough compaction and adequate depth rather than relying on specialty treatments. Contractor action item: Proof roll 100% of prepared subgrade on Mesa projects using loaded vehicle or heavy equipment. Mark any areas showing deflection or pumping (indicating inadequate compaction or unsuitable material) and remediate through additional compaction or excavation and replacement before base placement. This simple test prevents settlement problems.
Chandler
Chandler’s planned community developments typically feature compacted fill lots from mass grading operations. While engineered fill generally provides better support than native soils, compaction quality varies and settlement can occur. Many Chandler installations include driveways requiring vehicular-rated base depths. The city’s design review processes mean specifications must be clear and complete for HOA architectural approval—include base depth, paver thickness, edge restraint type, and joint material in submittal documents. Contractor action item: For driveway and vehicular applications, increase base depth to 12 inches minimum regardless of apparent subgrade quality. Specify cement-stabilized base (6% cement content) for driveways on any suspected weak soils. The modest cost increase ($2-3 per SF) prevents premature failure from vehicular loading on inadequate base.
Scottsdale
Scottsdale’s luxury residential market demands tight installation tolerances and premium finishing details. Specify grade tolerances at ±1/8 inch over 10 feet and joint width consistency within ±1/16 inch for high-end work. Many Scottsdale installations integrate limestone with pool construction, requiring coordination between pool contractor (structural shell and coping) and paver contractor (surrounding deck). Caliche conditions in north Scottsdale (newer development areas) differ from central Scottsdale (established areas with previous excavation). Premium edge restraint systems (cast concrete curbs, mortar-set coping) suit Scottsdale’s aesthetic expectations better than basic manufactured restraints. Contractor action item: Detail edge restraint and pool coping integration explicitly in drawings and specifications. Require pre-installation meeting with pool contractor and owner reviewing elevation coordination, drainage slopes away from pool, and coping-to-deck transition details. Document agreed elevations and details in writing preventing future disputes.
Glendale
Glendale’s established neighborhoods feature variable soil conditions reflecting decades of development without consistent geotechnical investigation. Older properties may have buried debris, uncompacted fill, or unknown caliche depths. Budget-conscious specifications meeting performance requirements without premium materials suit Glendale’s market. Standard manufactured edge restraints with concrete backing provide adequate performance at reasonable cost. Deeper excavation in suspect areas costs less than rebuilding failed installations—err toward caution. Contractor action item: On properties built before 1990, increase base depth by 2 inches (to 6 inches minimum for pedestrian, 10 inches for vehicular) as insurance against unknown conditions. Use geotextile separation fabric over suspect subgrades providing additional protection against base contamination from underlying soils. These modest specification increases ($1.50-$2.00 per SF) provide significant failure risk reduction.
Gilbert
Gilbert’s suburban growth pattern means many installations occur in recently developed areas with engineered grading and documented soil conditions—generally more predictable than older neighborhoods. However, the town’s emphasis on lush landscaping and irrigation creates moisture introduction near many outdoor living spaces. Excess irrigation activates clay expansion despite otherwise stable conditions. Edge drainage systems preventing moisture accumulation beneath paver edges become critical. Gilbert properties often feature extensive covered ramadas and outdoor kitchens—coordinate paver elevations with structure footings and provide proper isolation joints. Contractor action item: Install perimeter drainage (4-inch perforated pipe in gravel trench, 18 inches deep) around paved areas within 15 feet of regularly irrigated landscape zones. Route drainage to positive outlet. This prevents subsurface moisture accumulation that activates clay expansion causing heave and joint failure. Detail drainage system in specifications and include in base bid pricing.
Tempe
Tempe’s urban density creates access challenges for equipment and materials—narrow side yards, limited staging areas, and proximity to neighboring structures complicate installation logistics. Smaller lot sizes mean installations average 300-500 square feet rather than 800-1,000+ SF typical in suburban locations—this affects equipment selection (smaller plate compactors, hand tools vs. large machinery) and pricing (fixed mobilization costs spread over fewer square feet). Tempe’s proximity to ASU means some installations serve rental properties requiring durable specifications withstanding potential neglect. Soil conditions vary dramatically between older established neighborhoods (variable fill, unknown conditions) and newer developments near Tempe Town Lake (engineered fill). Contractor action item: For Tempe projects with difficult access (no direct vehicle access to work area), increase labor estimates by 25-30% accounting for hand-carrying materials and using smaller equipment. Specify smaller aggregate sizes (1/2-inch base vs. 3/4-inch) that can be transported in wheelbarrows if necessary. Price material handling realistically—access constraints significantly impact installation costs regardless of technical soil specifications.
Conclusion
Successful limestone paver installations on Arizona’s caliche hardpan and expansive clay soils require specification adjustments addressing these challenging conditions. Key contractor-level takeaways include: adjusting base depth and compaction requirements to soil type and load conditions—deeper bases (6-12+ inches) and higher compaction targets (95-98%) than standard specifications for difficult soils; specifying robust edge restraint systems using concrete curbs or manufactured restraints with supplemental concrete backing to resist lateral soil pressures; using appropriate joint spacing for paver type and accommodating movement potential—wider joints (3/8-5/8 inch) for tumbled stone and installations on variable soils; implementing effective drainage through proper slopes (2%+ minimum), perimeter collection systems, and provisions for caliche’s impermeability; and incorporating city-level considerations reflecting local soil patterns, development history, and typical installation conditions.
Geotechnical consultation for projects over $50,000 or on sites with unknown soil conditions provides valuable design guidance preventing costly failures. Conservative specifications on marginal sites—deeper bases, geotextile separation, enhanced drainage—cost modestly more than standard approaches but dramatically reduce failure risk and long-term maintenance expenses. The investment in proper base preparation, quality materials, and robust edge restraint pays dividends through decades of reliable performance despite Arizona’s demanding soils and climate. High-quality limestone pavers for Arizona’s climate by Citadel Stone.