Why Paver Pathways Make Sense for ADUs
Choosing paver pathways for ADU Arizona projects delivers multiple advantages over poured concrete or asphalt alternatives. First, individual pavers handle Arizona’s dramatic temperature swings far better than monolithic slabs. As temperatures shift from freezing winter nights in Prescott and Flagstaff to 115°F summer days in Phoenix, pavers expand and contract independently rather than developing the large cracks that plague concrete slabs.
Pavers offer unmatched repairability. If a section settles after monsoon rains or a utility line requires access, you can lift and reset affected pavers without visible patching or costly saw-cutting. This quick repair capability is particularly valuable for rental properties where minimizing maintenance downtime directly impacts income.
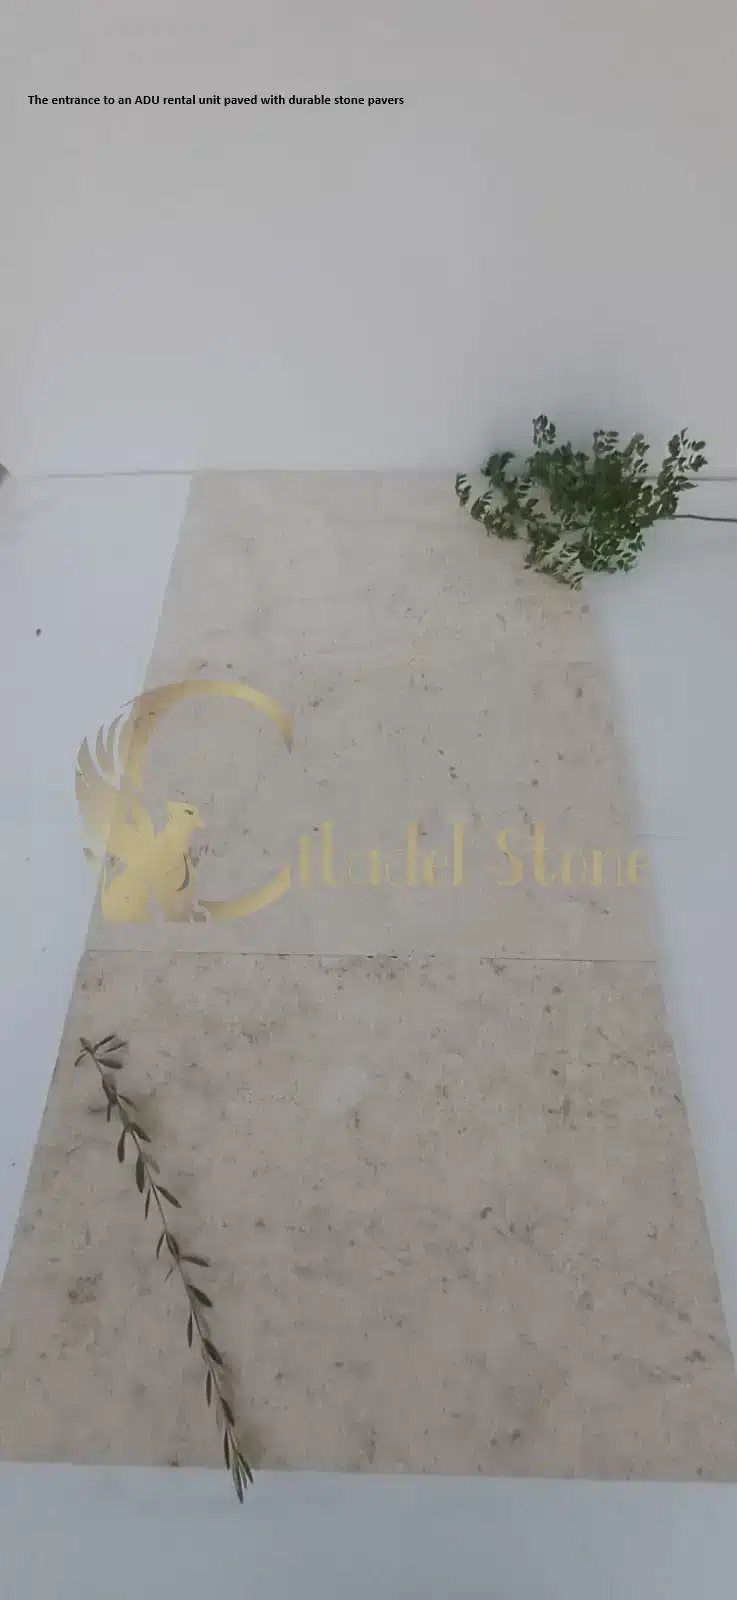
Design flexibility stands out as another major benefit. Pavers allow you to create clearly defined separate entrances that help ADU tenants and guests feel they have their own distinct space. You can incorporate contrasting border bands, integrate low-voltage lighting between pavers, or use decorative inlays to guide visitors—all design elements that enhance both function and rental appeal.
Permeable paver systems provide stormwater management benefits by allowing water to infiltrate through joints into the base layer below. During Arizona’s intense monsoon storms, this reduces runoff, prevents pooling, and can satisfy municipal stormwater requirements. Finally, properly installed paver pathways typically cost less over their lifecycle than alternatives when you factor in repair expenses, longevity, and the ability to adapt designs as property needs evolve.
Explore Our Arizona Paver Collection: Request a Free Sample Kit Today!
Common Paver Materials for ADU Pathways (Pros & Cons)
Concrete Modular Pavers
Concrete pavers dominate the Arizona ADU market due to affordability and versatility. Modern manufacturing produces units in dozens of colors, shapes, and surface textures. Standard 60mm (2.36-inch) thick pavers handle pedestrian traffic easily, while 80mm versions support occasional vehicle crossings if your ADU driveway shares the path.
Pros: Cost-effective at $2–$6 per square foot for materials, widely available at local suppliers, excellent compressive strength (typically 8,000+ PSI), and easy to source replacements. Many manufacturers offer heat-reflective color options that reduce surface temperatures by 15–20°F compared to standard gray.
Cons: Require periodic sealing (every 2–4 years) to resist staining from desert dust and monsoon sediment. Color can fade after 8–10 years of intense UV exposure without UV-stable pigments. Surface can become slippery when wet unless you specify textured finishes.
Best use: Main walkways, entrance aprons, budget-conscious rental properties.
Natural Stone Pavers
Arizona’s landscape supply yards offer several stone options suited to the desert climate. Flagstone (typically sandstone or limestone) provides irregular shapes for rustic pathways. Cut granite or basalt pavers deliver formal, contemporary aesthetics. Shellstone has become popular for its natural cooling properties and regional appearance.
Pros: Superior heat resistance—natural stone stays significantly cooler underfoot than concrete. Exceptional durability (30+ years without degradation), naturally slip-resistant surface texture, and upscale appearance that boosts property value. Stone requires no sealing in most applications.
Cons: Higher material cost at $8–$16 per square foot depending on stone type and finish. Irregular flagstone requires more labor for fitting and leveling. Heavy weight increases transportation and installation costs.
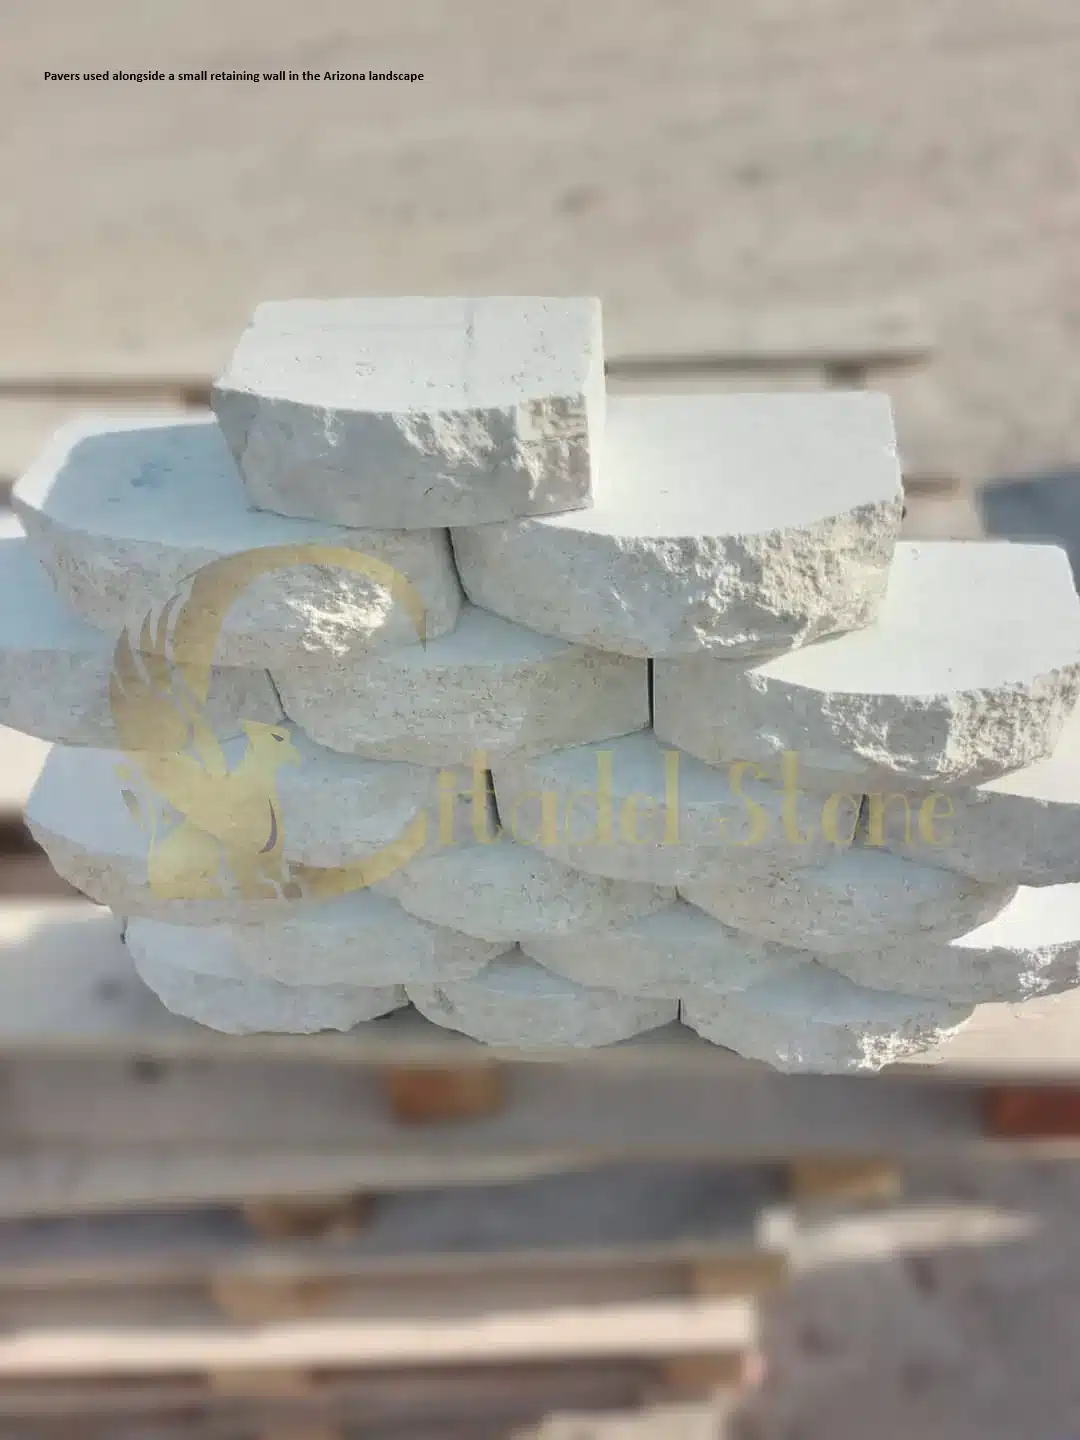
Best use: High-end ADU rentals, pool deck extensions, properties emphasizing natural desert landscaping.
Porcelain Pavers
Porcelain pavers have entered the Arizona market as a premium option combining aesthetics with performance. These factory-produced tiles mimic natural stone or wood while offering consistent dimensions and extremely low water absorption (less than 0.5%).
Pros: Won’t fade even under Arizona’s intense UV exposure, extremely stain-resistant, available in large format sizes (up to 24″ × 48″) that create modern, seamless looks. Rated for freeze-thaw cycles, making them suitable across all Arizona elevations.
Cons: Premium pricing at $10–$22 per square foot for materials. Brittle during installation—requires experienced installers to prevent cracking. Edges can chip if struck. Requires proper base preparation to avoid hollow spots that lead to breakage.
Best use: Contemporary ADU designs, poolside paths, high-traffic rental entries where maintenance-free performance justifies initial cost.
Clay Brick Pavers
Traditional clay brick pavers offer timeless appeal and proven Arizona performance, though they’ve become less common than concrete alternatives.
Pros: Manufactured color goes throughout the unit rather than surface-applied, so chipping doesn’t reveal different-colored cores. Naturally porous structure provides some breathability. Classic aesthetic suits historic neighborhoods and traditional home styles.
Cons: Limited color palette (mostly earth tones and reds). Higher cost than concrete at $10–$20 per square foot installed. Softer bricks can spall (surface flaking) after years of freeze-thaw exposure in northern Arizona.
Best use: Historic district ADUs, matching existing brick hardscape, traditional architectural styles.
Permeable Paver Systems
Permeable pavers feature wider joints (typically 3/8 inch) filled with small aggregate that allows water infiltration. Some systems use grid structures filled with gravel or turf.
Pros: Excellent stormwater management—can infiltrate 5–10 times more water than standard pavers. May qualify for stormwater credits in Phoenix and Tucson. Reduces site runoff and protects foundations during monsoons.
Cons: Requires periodic joint maintenance (vacuum sweeping every 1–2 years) to maintain infiltration capacity. Limited color and style options. Higher initial cost due to specialized base requirements. Not suitable for narrow pathways where wheelchair or walker users might catch wheels in wide joints.
Best use: ADU driveways, combined parking and access areas, properties with strict stormwater management requirements.
Designing Guest House Walkways: Widths, Patterns & Accessibility
Proper pathway dimensions ensure comfortable, safe access for ADU residents and visitors. A minimum clear width of 36 inches allows a single person comfortable passage, but 48 inches (4 feet) is strongly recommended for ADU pathways. This width accommodates two people walking side by side, wheelchairs and walkers, delivery dollies, and furniture moving without forcing guests to navigate single-file or step off the path.
If your ADU serves rental tenants or elderly relatives, consider accessibility guidelines even if not legally mandated. A 60-inch width at any turns or direction changes allows wheelchairs to maneuver comfortably. Keep pathway slopes below 5% (5 feet of elevation change per 100 feet of horizontal distance) to avoid requiring handrails. Any slope exceeding 8.33% becomes a ramp and triggers additional code requirements.
Pattern selection impacts both aesthetics and function. Running bond patterns (like offset brick) are easy to install and provide good slip resistance. Herringbone patterns offer superior interlock that resists shifting but require more cutting and installation time, increasing labor costs by 15–25%. For ADU pathways where residents will move appliances or roll trash bins, avoid patterns with small units that create many joint lines perpendicular to travel direction—these can cause wheels to bounce and containers to tip.
Edge definition is crucial for creating separate entrance with pavers. A contrasting border band—such as darker pavers outlining a lighter field—clearly delineates the pathway and prevents edge pavers from shifting. Soldier course borders (pavers placed perpendicular to the field) create strong visual definition. For rental properties, clear edge treatment helps tenants understand property boundaries and care responsibilities.
If your ADU pathway includes steps, consider intermediate landings every 5–6 feet of elevation change. Steps should use non-slip tread pavers with distinct color or texture changes at each nose so users can clearly identify step edges, particularly important for evening access before lighting is installed.
Cost Guide: Choosing Cost-Effective Pavers for Rental Property
Understanding installed costs helps you budget appropriately and select cost-effective pavers for rental property that balance initial investment with long-term performance.
Low-Cost Tier ($8–$14 per square foot installed): Standard concrete pavers in basic colors with straightforward patterns. This tier uses a 4-inch compacted base, sand bedding, and regular polymeric sand joints. Suitable for straight pathways under 50 feet where design simplicity keeps labor costs down. Expect 15–20 year lifespan before replacement becomes necessary due to fading or surface wear.
Mid-Range Tier ($14–$22 per square foot installed): Enhanced concrete pavers with textured surfaces and heat-reflective pigments, or natural stone like sandstone flagstone. This tier includes upgraded base preparation (6-inch compacted depth), geotextile fabric beneath the base, and may incorporate decorative banding or curves. Lifespan extends to 20–30 years with minimal maintenance. This represents the best value proposition for most rental ADUs.
Premium Tier ($22–$35+ per square foot installed): Porcelain pavers, high-end natural stone like cut granite, or complex permeable paver systems. These projects feature architectural patterns, integrated lighting, drainage engineering, or challenging site conditions (slopes, elevation changes, utility conflicts). Expected lifespan exceeds 30 years with virtually maintenance-free performance.
For a typical 8-foot-wide by 30-foot-long ADU pathway (240 square feet), budget $1,920–$3,360 for low-cost options, $3,360–$5,280 for mid-range quality, or $5,280–$8,400+ for premium installations. These ranges include all materials, labor, and site preparation for accessible job sites.
When evaluating lifecycle costs for rental properties, factor in maintenance expenses. Concrete pavers require sealing every 3–4 years at approximately $1–$2 per square foot. Natural stone needs only occasional cleaning. Calculate replacement timing—if cheaper pavers need replacement at year 15 while premium pavers last 30+ years, the premium option may cost less per year of service.
Rental property investors should consider ROI beyond pure cost calculations. Well-designed pathways creating separate entrance with pavers increase perceived privacy, command higher rents (typically $50–$100 more per month), reduce vacancy periods by 10–15%, and generate more tenant applications. Professional photos showcasing attractive pathways improve online listing performance significantly.
Installing ADU Pathways: Practical Specs & Step-by-Step Workflow
Professional vs DIY Decision Framework
Typical ADU pathways under 300 square feet with minimal slope and no drainage complexity are DIY-feasible for homeowners with basic landscaping experience and proper equipment. Projects requiring grading changes over 12 inches, slopes exceeding 3%, integration with drainage systems, or vehicle-rated construction should involve professional installers.
Installation Specifications
Excavation Depth: 10–12 inches total for pedestrian pathways (4–6 inches compacted base + 1 inch bedding sand + 2.5-inch pavers). Increase to 14–16 inches if occasional vehicle traffic is anticipated.
Base Material: Class II road base (crushed aggregate passing 3/4-inch screen) or 3/4-inch crushed stone. Arizona’s caliche soil requires base material to create proper drainage and prevent heaving. Target compaction of 95% standard Proctor density using a plate compactor making 4–6 passes.
Geotextile Fabric: Install beneath base layer to prevent mixing with native soil and maintain separation. This is especially important in silty desert soils. Use non-woven geotextile rated for separation applications.
Bedding Layer: 1 inch of concrete sand (not mason sand or decomposed granite). Strike level and do not compact before laying pavers—compaction happens after pavers are placed.
Paver Thickness: 60mm (2.36 inches) for pedestrian-only pathways. 80mm (3.15 inches) if residents will occasionally drive across the path or if using natural stone with less consistent thickness.
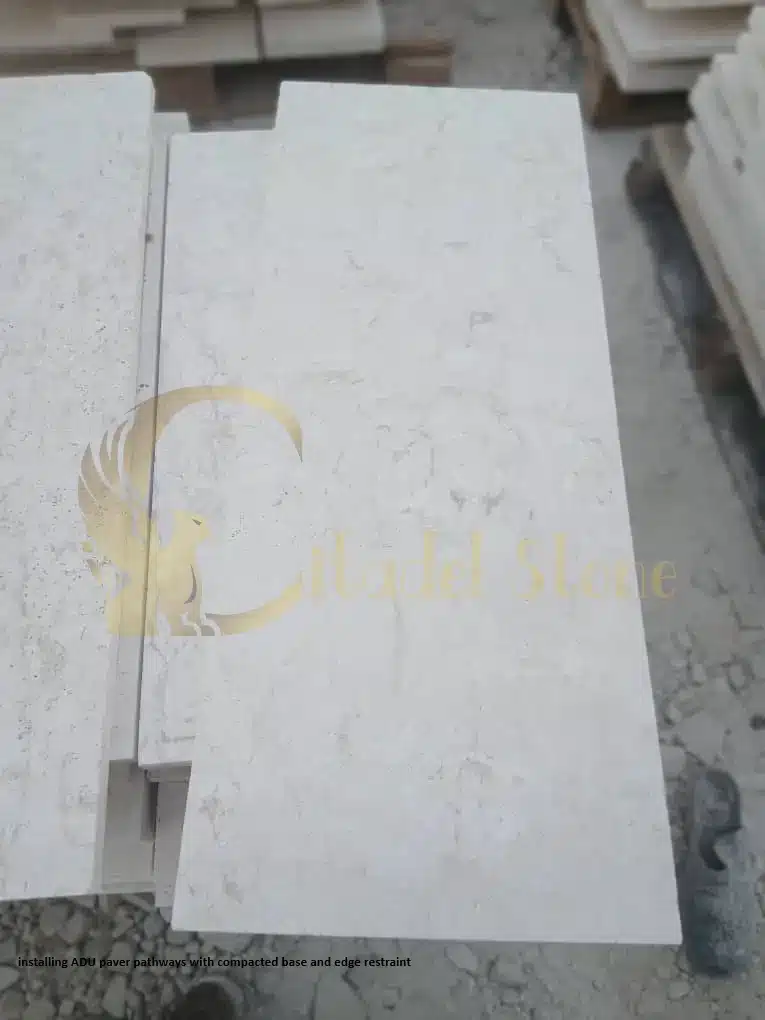
Edge Restraint: Mandatory for all professional installations. Plastic spike-in edging works for straight runs and gentle curves. Metal paver edging secured with 10-inch spikes provides superior long-term performance. Concrete curb edging offers maximum stability but increases cost.
Joint Filling: Polymeric sand is recommended for most Arizona ADU pathways. It contains binding agents that harden when misted, preventing ant colonization and weed growth while allowing drainage. Standard joint sand costs less but requires more frequent topping. Spread polymeric sand when temperature is below 100°F and no rain is forecast for 24 hours.
Step-by-Step Installation
- Layout: Mark pathway centerline with stakes and string. Mark edges with marking paint. Verify no utility conflicts (call 811 before digging).
- Excavation: Remove vegetation and excavate to specified depth. Slope base 2% (1/4 inch per foot) away from structures for drainage. Compact native soil before adding base material.
- Base Installation: Place and spread base material in 3-inch lifts. Compact each lift to 95% density. Check levels frequently and adjust for drainage slope.
- Edge Restraint: Install edging along both pathway sides before placing bedding sand. Secure with spikes every 12–18 inches.
- Bedding Sand: Spread 1-inch sand layer and strike level using screed rails. Do not walk on screeded sand.
- Paver Placement: Begin at one end (typically nearest the structure) and work outward. Lay pavers tight together without gaps. Use string lines to maintain straight courses.
- Cutting: Use a masonry saw with diamond blade for cuts. Wet-cutting reduces dust—important for both health and neighbor relations in residential areas. Make all necessary cuts before compacting.
- Compaction: Pass plate compactor over entire surface in multiple directions. This seats pavers into bedding, levels surface, and sets edge restraints.
- Joint Filling: Spread polymeric sand over surface and sweep into joints. Remove all excess from paver faces. Mist lightly according to manufacturer instructions. Keep foot traffic off for 24 hours.
Tool Requirements: Plate compactor (5,000–6,000 pound centrifugal force for most pathways), masonry saw with diamond blade, hand tamper for edges, levels, shovels, wheelbarrow, push broom, garden hose with mist nozzle.
Time Estimate: Experienced DIYer can complete 240 square feet (8′ × 30′) straight pathway in 2–3 full days including excavation and base prep. Professional crew completes same project in 6–10 hours.
Permeability & Stormwater Considerations for ADUs
Arizona’s monsoon season delivers intense rainfall that tests site drainage. While narrow ADU pathways (under 4 feet wide) contribute minimal impervious surface area, combining pathway installation with thoughtful stormwater management provides multiple benefits.
Standard pavers with polymeric sand joints allow limited infiltration through joints—typically 10–20% of rainfall permeates. This “incidental permeability” helps but doesn’t qualify as engineered stormwater management. True permeable paver systems feature wider joints (3/8 inch to 1/2 inch) filled with open-graded aggregate and require an open-graded base reservoir underneath.
In Arizona’s arid climate, infiltration-based permeable systems work better than detention-based approaches common in wetter climates. Water that infiltrates directly into soil aquifer rather than being detained and slowly released. This natural infiltration approach requires verifying adequate soil permeability—clay-heavy soils with infiltration rates below 0.5 inches per hour need underdrains to avoid water ponding in the base reservoir.
Permeable pavers make most sense for ADU driveways or combined parking and pathway areas where impervious surface area exceeds 500 square feet. For narrow walkways, focus on proper drainage slope (minimum 2% grade away from buildings) and integration with existing drainage patterns. If your ADU pathway crosses a natural drainage swale, install a shallow French drain or channel drain to convey water under the pathway rather than allowing it to flow across the surface.
Phoenix and Tucson offer stormwater credits or reduced fees for projects incorporating green infrastructure including permeable pavements. Contact your city’s stormwater management department during ADU planning to determine if pathway design can contribute toward meeting site requirements.
Maintenance expectations differ significantly between standard and permeable systems. Standard pavers need only occasional sweeping to remove dust and debris. Permeable systems require vacuum sweeping 1–2 times annually to remove sediment that accumulates in joints and clogs infiltration capacity. This specialized maintenance can be DIY using a heavy-duty shop vacuum or contracted through landscape maintenance companies familiar with permeable paving systems.
Maintenance & Long-Term Care for ADU Walkways
Well-installed paver pathways require minimal ongoing maintenance compared to concrete or asphalt alternatives. Establish a routine schedule to preserve appearance and performance over decades.
Monthly Tasks: Sweep pathway to remove leaves, dust, and debris. In urban areas with street trees, fallen leaves should be cleared weekly to prevent staining when wet leaves decompose on pavers. Spot-check for ant activity at joints—early intervention prevents colony establishment.
Quarterly Tasks: Inspect joints for sand loss. Top off any joints that have settled below 1/8 inch from paver surface using dry polymeric sand or regular joint sand depending on original installation. Check edge restraints for any movement or exposed spikes. During monsoon season (July–September), inspect after heavy rains for any settlement or drainage problems.
Annual Tasks: Deep cleaning with leaf blower followed by water wash removes built-up dust and restores color. For concrete pavers, assess if sealer reapplication is needed—water should bead on surface rather than soaking in. Power washing (using wide-angle nozzle at low pressure) removes stubborn stains but can erode joint sand, requiring reapplication.
As-Needed Tasks: Stain removal depends on stain type. Oil-based stains (automotive fluids) respond to degreasing cleaners or poultice compounds. Efflorescence (white mineral deposits) usually resolves naturally after the first year; if persistent, use efflorescence remover products. Rust stains from metal furniture or fixtures require specialized rust removers safe for masonry.
Sealer application for concrete pavers remains optional but recommended for rental properties where stain resistance matters. Penetrating sealers (rather than film-forming types) allow moisture vapor transmission while providing stain protection. Reapply every 3–4 years or when water absorption testing shows sealer has worn away. Never seal in summer when temperatures exceed 95°F—spring and fall provide optimal application conditions.
After monsoon seasons, walk the entire pathway checking for settlement. Individual settled pavers can be lifted, additional bedding sand added, and pavers reset and releveled in under 30 minutes—a repair impossible with cracked concrete requiring costly removal and replacement.
Budget approximately $50–$100 annually for maintenance supplies (joint sand, cleaning products, occasional sealer) for a typical 240-square-foot ADU pathway. This minimal cost compares favorably to concrete pathway maintenance once cracking begins requiring caulking or replacement.
DIY vs Hiring a Pro: When to Call the Installer
Suitable DIY Projects
Homeowners with basic construction skills and proper equipment can successfully tackle ADU pathways meeting these criteria:
- Straight or gently curved paths under 300 square feet
- Level sites or consistent slopes under 3%
- No utility conflicts or drainage complications
- Standard concrete or natural stone pavers (not porcelain)
- Accessible for material delivery (no stairs, narrow gates, or long distances from street)
- No HOA or city permits requiring licensed contractor involvement
If you have experience with grading, understand drainage principles, own or can rent a plate compactor, and can invest 2–4 full days into the project, DIY installation can save 40–60% compared to contractor pricing while delivering professional-quality results.
When to Hire Professionals
Engage licensed landscape contractors or hardscape specialists for:
Complex Site Conditions: Slopes exceeding 5%, elevation changes requiring retaining walls, poor drainage requiring subsurface correction, expansive soils, high water tables, or rocky terrain requiring jack-hammering.
Design Complexity: Intricate patterns, mixed materials, integrated lighting or irrigation, curved pathways with radius changes, or projects where design visualization exceeds your confidence level.
Structural Requirements: Pathways doubling as vehicle access, ADU entrance aprons connecting to driveways, handicap ramps meeting ADA specifications, or any installation requiring engineered drawings.
Permit-Required Work: If your city requires permits for the pathway (common when pathway is part of ADU permit package), many jurisdictions require licensed contractor installation. HOAs with architectural review may also mandate professional installation.
Equipment Limitations: If material delivery requires bobcat access, excavation exceeds 12 inches depth, site access prohibits homeowner equipment, or you lack plate compactor access, professional crews bring necessary equipment and expertise.
Time Constraints: If you need the pathway completed within a specific timeframe (before ADU occupancy, prior to rental showing, coordination with other construction phases), professional crews work faster and hit deadlines reliably.
Red Flags Suggesting Professional Help Needed
- Standing water in proposed pathway location after rains
- Caliche layer at less than 8 inches depth (requires specialized breaking equipment)
- Slopes visible to eye (steeper than 3%) without accurate measurement
- Existing drainage that will be interrupted by pathway
- Conflicting opinions about whether permits are required
- HOA requiring sealed plans before approving project
Contractor Selection and Costs
Obtain 3–5 written estimates detailing: materials specified by brand and product line, base depth and compaction specifications, edge restraint type, excavation disposal method, warranty terms, and installation timeline. Verify contractor holds appropriate licenses (varies by city—Phoenix requires ROC license for hardscape work exceeding $1,000), current liability insurance, and workers’ compensation coverage.
Professional installation for 240 square feet averages $3,600–$6,000 depending on materials and site conditions—significantly less than DIY gone wrong requiring removal and reinstallation. The investment in professional installation includes warranty coverage (typically 1–3 years), proper equipment and techniques ensuring longevity, and accountability if problems develop.
City-by-City: ADU Pathway Tips for Arizona
Arizona’s varied elevations and municipal regulations create distinct considerations across the state’s major cities.
Phoenix
Phoenix’s extreme summer heat makes material selection critical for guest house walkway materials Phoenix residents actually want to use. Heat-reflective concrete pavers in tan, beige, or light gray reduce surface temperatures significantly compared to dark colors. Schedule installation work during morning hours (starting before 7 AM) in summer months when ambient temperatures and material workability are optimal.
Monsoon considerations are paramount—Phoenix averages 3–4 inches of rain during July and August delivered in intense bursts. Ensure adequate drainage slope away from both main house and ADU. If pathway crosses natural drainage patterns, install catch basins or channel drains to convey water safely. Phoenix building permits for ADUs now permit up to two units per lot under updated state law effective January 2025. Pathway work included in ADU permits typically doesn’t trigger separate permitting unless modifying drainage patterns or creating vehicle access. Confirm with Phoenix Planning and Development Department (602-256-4103) during early planning.
For polymeric sand joint installation, avoid afternoon installation when pavement surface exceeds 100°F—heat causes premature curing before sand settles into joints properly. Early morning or late afternoon application works best. Phoenix’s ubiquitous Palo Verde trees drop tiny leaves year-round; plan for weekly sweeping in landscape areas near these trees to prevent organic staining on lighter-colored pavers.
Tucson
ADU landscaping stone Tucson property owners select must handle dust control as a primary concern. Tucson experiences persistent dust conditions during pre-monsoon months (May–June) that coat outdoor surfaces. Natural stone pavers show less visible dust accumulation than smooth concrete pavers. Flagstone, decomposed granite borders, and textured concrete pavers all hide dust better than polished surfaces.
Monsoon drainage deserves special attention—Tucson’s 12 inches of annual rainfall arrives primarily during summer storms. Design pathways with minimum 2% slope and avoid low spots where water can pond. Tucson’s soil often contains caliche layers requiring excavation planning and possibly rental equipment beyond standard DIY tools.
Color palette preferences in Tucson lean toward earth tones and stone-like appearances that blend with desert landscaping. Buff, tan, sandstone, and terra cotta colors complement popular native plant xeriscaping. Tucson’s ADU regulations allow one ADU per lot, with maximum size of 75% of main dwelling or 1,000 square feet (whichever is less) per state House Bill 2720. All lots qualify for at least 650 square feet regardless of main house size. Contact Planning and Development Services Department (520-837-4960) for pathway permit questions.
Scottsdale
Scottsdale’s resort-style aesthetic extends to ADU pathway design. Property owners in this upscale market should consider pathways as integral design elements rather than utilitarian connections. Travertine pavers popular around pools offer luxury appearance and stay remarkably cool under direct sun. Porcelain pavers mimicking natural stone or wood grain create high-end contemporary looks appealing to discriminating tenants.
Lighting integration elevates pathway appeal—low-voltage LED path lights embedded between pavers or strip lighting along edges create safe evening access while showcasing design quality. Scottsdale’s HOAs are numerous and design-focused; expect architectural review committee involvement requiring professional drawings, material samples, and potentially hiring designers familiar with committee expectations.
Natural desert landscaping borders enhance pathway visual appeal. Low-profile plantings like desert marigold, brittlebush, or purple trailing lantana in 3–4 foot buffers on pathway sides create soft edges without maintenance intensity. Scottsdale building department requires permits for ADU construction including pathways that are part of project; coordinate pathway design during initial ADU permitting to ensure comprehensive approval.
Mesa
Mesa homeowners appreciate practical, cost-conscious approaches to ADU development. Standard concrete pavers in earth tones offer best value proposition—widely available through local suppliers, compatible with Mesa’s architectural character, and installer-friendly reducing labor costs. Focus investment on proper base preparation rather than premium paver materials for optimal lifecycle value.
Contractor availability is strong in Mesa with multiple hardscape companies serving the area. Obtain estimates from companies specifically experienced with residential pathway work rather than large commercial contractors—residential specialists typically charge 15–20% less and understand single-family property access limitations. Mesa’s permitting process through Development Services Department is straightforward for ADUs meeting standard criteria. Pathway permits are typically included with ADU permit package rather than requiring separate application.
Summer heat considerations mirror Phoenix—light colors, morning installation scheduling, and heat-reflective pavers extend usability during peak heat months. Mesa’s relatively flat terrain simplifies drainage design for most properties, though monsoon planning remains important. Design pathways connecting to existing sidewalks or driveways at same level to avoid trip hazards and simplify transitions.
Chandler
Chandler’s suburban character includes extensive HOA presence with varying ADU and improvement policies. Before finalizing pathway design, review HOA governing documents and architectural guidelines. Many Chandler HOAs require formal submittals including site plans, material specifications, and color samples before approving work. Some associations mandate specific paver brands, color palettes, or even professional installation.
ADU development in Chandler follows state mandate allowing at least one attached or detached ADU per lot in single-family zones. HOA restrictions cannot prohibit ADUs entirely but may impose design requirements. Pathway design should complement neighborhood character—in traditional neighborhoods, brick or concrete pavers in standard patterns work well; contemporary subdivisions allow more design freedom.
Chandler’s growing rental market makes ADU pathway quality important for property presentation. Well-designed pathways creating separate entrance with pavers help tenants feel they have distinct living spaces rather than add-on units. Consider privacy screening (low walls, strategic plantings) along pathways to enhance separation between main house and ADU.
Gilbert
Gilbert’s family-oriented communities often include covered patios and outdoor living spaces on both main houses and ADUs. Design pathways that integrate naturally with existing hardscape, matching or complementing patio paver materials for visual continuity. If main house features travertine patio, consider travertine pathway or complementary concrete pavers in similar tones.
Low-maintenance design matters for busy families—specify polymeric sand joints to minimize weed growth and ant colonization. Consider wider pathways (5–6 feet) accommodating multiple family members walking together between spaces, stroller access, or kids on bikes. Gilbert’s minimal slope across most properties simplifies drainage but requires attention to positive drainage away from structures.
Shade integration improves pathway usability during summer months. If pathway runs along south or west exposures, consider pergola covers over portions of path, or plan for shade tree planting along pathway edges (choosing species with non-invasive roots like Willow Acacia or Palo Brea). Sun exposure also affects material selection—lighter-colored pavers remain more comfortable during midday use.
Prescott
Prescott’s 5,400-foot elevation brings freeze-thaw cycles requiring material and installation considerations uncommon in lower-elevation Arizona cities. Select dense concrete pavers with low water absorption (less than 5%) or natural stone like granite that handles freezing conditions. Avoid softer materials like adobe brick or high-absorption concrete that can spall when absorbed water freezes and expands.
Installation specifications should address frost depth—extend base depth to 12–14 inches and consider base materials that drain freely rather than retaining moisture. Ensure pathway has adequate slope for water runoff; standing water that freezes can heave pavers. Winter weather also affects installation timing—schedule pathway projects for spring through fall when overnight temperatures consistently remain above freezing.
Snow management during winter months requires consideration. Choose paver patterns and edge treatments compatible with snow shoveling without catching blade edges. Avoid using de-icing salts that damage concrete pavers—sand provides traction without chemical degradation. Prescott’s ADU regulations follow state law allowing one ADU per single-family lot. Contact Community Development Department (928-777-1207) for specific permit requirements.
Flagstaff
Flagstaff’s 7,000-foot elevation and 100+ inches annual snowfall create Arizona’s most challenging paver installation environment. Material storage and protection become critical—pavers should be delivered on pallets and covered with tarps if installation won’t be immediate. Frozen pavers must thaw completely before installation to prevent trapped moisture from later causing cracks.
Base preparation at elevation requires careful attention to drainage since snowmelt creates extended wet conditions. Use open-graded base materials (3/4-inch crushed stone) rather than finer materials that can retain water. Consider subsurface drainage if natural soil percolation is slow. Installation timing is constrained to approximately May through October when ground isn’t frozen and materials cure properly.
Winter maintenance differs significantly from lower elevations—plan for regular snow removal, ice management, and inspection after freeze-thaw cycles. Dense concrete pavers (8,000+ PSI compression strength) or granite pavers handle freezing conditions best. Natural stone also provides superior traction when wet compared to smooth concrete surfaces. Flagstaff’s ADU permitting through Community Development Department includes pathway review as part of overall site plan approval.
Permits, HOA Rules & Accessibility for ADU Entrances
Navigating permitting and compliance requirements ensures your ADU pathway project avoids costly delays or required modifications after construction.
Permit Triggers
Most Arizona cities include pathway work in overall ADU permit packages rather than requiring separate pathway permits. However, specific situations may trigger additional review: pathways creating new vehicle access (connecting to street or alley), modifications to public sidewalks or right-of-way, significant grading changes (over 12 inches cut or fill), installation of retaining walls over 4 feet, and projects disturbing more than 1,000 square feet triggering erosion control requirements.
If your ADU itself doesn’t require a permit (if it’s under size thresholds or using exemptions), adding a permanent pathway over 120 square feet may trigger permitting requirements in some jurisdictions. Contact your city’s building or planning department early in design—most offer free pre-application consultations identifying permit needs and approval timelines.
Permanent pathways meeting state ADU law requirements cannot be prohibited by cities but may require permits ensuring proper construction, drainage, and setback compliance. Processing timelines vary—Phoenix typically reviews straightforward ADU permits within 20 working days, while more complex projects or cities with smaller staffs may require 4–8 weeks.
HOA Considerations
Homeowners association restrictions present the most variable regulatory landscape. State ADU law prevents HOAs from prohibiting ADUs entirely, but associations retain authority over architectural design, materials, colors, and construction standards. Many HOAs require advance approval through architectural review committees before beginning any exterior work including pathways.
Prepare submittals including: site plan showing pathway location and dimensions relative to property lines and structures, material specifications (manufacturer, product line, color names), photographs or renderings showing anticipated appearance, and drainage plan if HOA reviews stormwater management. Allow 30–60 days for HOA review and be prepared to modify designs based on feedback.
Common HOA restrictions include: approved paver brands or material types, specific color palettes matching neighborhood character, required professional installation and certificates of completion, prohibitions on certain materials (like permeable pavers showing aggregate), and maintenance standards.
Accessibility Guidance
While private ADU pathways aren’t subject to Americans with Disabilities Act requirements, designing with accessibility in mind expands usability and future-proofs your property. Recommended (not legally mandated) accessibility features include: 48-inch minimum width allowing wheelchair passage and turning, maximum 5% running slope (avoiding ramp classification), firm, stable, slip-resistant surfaces, level landings at doors (60 inches deep minimum), and tactile warning strips if pathway crosses vehicle areas.
If your ADU serves elderly relatives or you anticipate aging-in-place needs, consult with a certified aging-in-place specialist or occupational therapist during design. Small details like contrasting edge pavers for visual guidance, adequate lighting, and bench placement for rest points significantly improve usability.
For specific accessibility requirements or if your ADU receives government funding or operates as a commercial rental, consult with your city’s accessibility coordinator and consider hiring a design professional familiar with accessibility standards. This guidance is informational only—not legal or code advice. Always confirm requirements with your local building department and HOA before finalizing designs.
Sample Project: 8-ft x 30-ft ADU Walkway (Budget & Spec Example)
This detailed specification provides a realistic project example for a typical Arizona ADU pathway installation.
Project Scope: Connect main house back door to detached ADU casita entrance, 240 square feet (8 feet wide × 30 feet long), gentle 2% slope away from main house, Phoenix metropolitan area location, mid-range quality for rental property appeal.
Material Selection: 60mm textured concrete pavers in Desert Tan color (heat-reflective formula), standard 4″ × 8″ modular size, running bond pattern. Material cost: $4.50 per square foot × 240 SF = $1,080, plus 8% waste allowance = $1,165 total paver cost.
Base Specifications:
- Excavation: 11 inches total depth
- Geotextile fabric: Non-woven separation fabric, 240 SF
- Base course: 6 inches compacted depth, Class II road base, compacted to 95% standard Proctor density
- Bedding layer: 1 inch concrete sand, screeded level
- Edge restraint: Heavy-duty plastic paver edge with 10-inch spikes every 16 inches
Installation Specifications:
- Running bond pattern (50% offset)
- 1/8-inch joint spacing
- Polymeric sand joints (tan to match pavers)
- 2% cross-slope for drainage
- Surface compaction with plate compactor (6,000 lb centrifugal force minimum)
Estimated Costs (Phoenix area, mid-2026):
- Pavers: $1,165
- Base materials (aggregate, sand, fabric): $425
- Edge restraint and spikes: $145
- Polymeric sand: $95
- Equipment rental (compactor, saw): $180
- Labor (professional installation): $1,800
- Total Installed Cost: $3,810 ($15.88 per square foot)
DIY installation would eliminate labor cost but require 2.5–3 full days of work, resulting in approximately $2,010 total investment plus homeowner time.
Installation Timeline:
- Day 1 (6 hours): Layout, excavation, base installation and compaction
- Day 2 (3 hours): Edge restraint, bedding sand, paver placement
- Day 3 (2 hours): Cutting, compaction, joint filling
- Cure time: 24 hours before foot traffic, 48 hours before allowing wheeled carts
Maintenance Plan:
- Monthly sweeping and spot inspection
- Annual deep cleaning and joint sand topping
- Sealer application at year 3 and every 4 years thereafter
- Annual maintenance budget: $75
Supplier/Contractor Checklist:
- Verify paver lot numbers match for color consistency
- Confirm delivery includes offloading to work area (not street curb)
- Obtain material safety data sheets for polymeric sand
- Request sample board showing actual paver and joint appearance
- Verify contractor license, insurance, and workers’ comp coverage
- Confirm warranty terms (typical: 1 year workmanship, materials per manufacturer)
This specification sheet can be provided to contractors when soliciting bids to ensure apples-to-apples comparison between estimates.
Sourcing & Buying Tips: Where to Buy Pavers in Arizona for ADUs
Strategic purchasing saves money while ensuring material quality for your ADU pathway project.
Supplier Types
Landscape Supply Yards: Local landscape material yards offer the broadest paver selection with knowledgeable staff who understand Arizona installation conditions. Advantages include seeing and touching materials before ordering, typically better pricing than big-box stores (especially on volume), delivery services with boom trucks or forklifts for placement, and relationships with local installers for referrals. Phoenix-area examples include Southwest Boulder & Stone, A&A Materials, and Arizona Tile & Stone. Tucson options include CDO Stone and Patio Plus.
Big-Box Home Centers: Home Depot and Lowe’s stock limited paver selections focused on popular concrete paver styles. Advantages include convenient locations, online ordering, and frequent sales. Disadvantages include limited color ranges, variable stock levels, self-loading requirements, and staff typically less knowledgeable about installation specifics.
Specialty Paver Dealers: Companies specializing exclusively in pavers (like Belgard, Pavestone dealers) offer premium selections and detailed technical support. Best for high-end projects requiring specific architectural products. Pricing runs 20–30% higher than landscape yards but includes design assistance.
Tile and Stone Importers: For natural stone or porcelain pavers, specialty tile importers provide extensive selections. Require more lead time (2–4 weeks for special orders) but offer unique materials unavailable elsewhere.
Evaluation Criteria
When comparing suppliers, assess these factors beyond price:
Sample Boards: Request actual samples, not just photos. Paver color and texture vary significantly between product lines and even between production runs. Bring samples home to view in your actual lighting conditions before ordering full quantities.
Technical Data Sheets: Serious suppliers provide manufacturer TDS specifying compression strength, absorption rates, freeze-thaw ratings, and recommended installation methods. If a supplier cannot provide technical data, consider that a red flag about product quality.
Delivery Logistics: 240 square feet of pavers weighs approximately 2,400–3,000 pounds. Confirm delivery includes placement at your work area rather than curbside dumping. Boom truck or forklift delivery costs $75–$150 but saves significant effort. Verify access requirements—can their truck navigate your street and driveway?
Return Policies: Order overages to account for cutting waste (5–10% depending on pattern complexity), but verify return policies for unopened, undamaged materials. Many suppliers charge 15–25% restocking fees; some offer no returns on special-order items.
Cut-to-Size Services: If your design includes custom sizes or shapes, ask about cutting services. Some suppliers offer this for $2–$5 per cut—worthwhile to avoid purchasing or renting a masonry saw for a handful of cuts.
Color Lot Matching: Concrete pavers vary slightly in color between production runs. Order all materials from the same production lot to ensure color consistency. If project phases require multiple deliveries, note lot numbers and order from the same lot for later phases.
Ordering Quantities
Calculate base square footage, then add waste allowances:
- Straight patterns (running bond, stack bond): 5% waste
- 45-degree patterns (herringbone): 8% waste
- Random patterns with many cuts: 10% waste
- Natural stone irregular shapes: 8–12% waste
For the 240 SF example project with running bond pattern: 240 SF × 1.05 = 252 SF order quantity.
Base materials should be ordered by cubic yards: (length × width × depth in feet) ÷ 27 = cubic yards needed. For 8′ × 30′ × 0.5′ (6 inches) base: 120 ÷ 27 = 4.5 cubic yards. Add 10% for compaction and spillage = 5 cubic yards.
Sand quantities: (length × width × depth) ÷ 27. For 1-inch bedding: 8′ × 30′ × 0.083′ ÷ 27 = 0.75 cubic yards. Minimum purchase at most yards is 0.5–1 cubic yard, so order 1 cubic yard.
Verify all measurements with supplier staff who calculate material quantities daily—they’ll catch math errors before delivery arrives short or excessive.
Design Ideas to Boost Rental Appeal & Privacy
Thoughtful design transforms basic pathways into distinctive features that elevate your ADU’s rental appeal and tenant satisfaction.
Visual Separation
Creating separate entrance with pavers means more than just paving a route—it involves defining territory. Consider framing the pathway with low decorative walls (12–18 inches high) using stacked stone, decorative concrete block, or matching paver soldiers set vertically. These low walls don’t require footings in most cases and create clear boundaries between main house and ADU zones.
Integrated planter beds along pathway edges using desert-adapted species add softness and natural screening. Choose low-maintenance options like trailing rosemary, desert marigold, angelita daisy, or purple trailing lantana that stay under 18 inches, require minimal water, and provide year-round interest. Grouping planters at pathway intersections or direction changes creates natural visual pauses.
Wayfinding and Lighting
Contrasting border bands guide visitors intuitively toward the ADU entrance. A soldier-course border in charcoal pavers outlining a tan paver field creates bold definition visible even at dusk. For properties hosting short-term rentals or frequent guests, consider simple directional pavers or decorative inlays showing arrows or “Guest House” text—custom-cut pavers cost $15–$30 each but eliminate confusion.
Integrated lighting dramatically improves safety and ambiance. Low-voltage LED systems (12V) install easily with surface-mounted fixtures or recessed lights between pavers. Budget $40–$80 per fixture plus transformer ($150–$300 depending on system size). Warm white (2700–3000K) creates inviting atmosphere while providing adequate illumination for safe walking. Step lights at elevation changes are essential for liability protection.
Consider strip lighting along pathway edges—flexible LED strips installed in shallow channels covered with clear polycarbonate create modern, continuous illumination that’s particularly effective for contemporary ADU designs.
Practical Enhancements
Durable stepping pads at strategic locations prevent wear patterns where tenants naturally pause—at doors, gates, or direction changes. Using contrasting pavers or slightly larger format units (12″ × 24″ vs. 4″ × 8″ field pavers) at these high-traffic nodes distributes load and adds visual interest.
Permeable planting edges along one or both pathway sides soften hardscape while managing runoff. A 12–18 inch strip of decomposed granite or small river rock edged with decorative steel or aluminum creates clean transitions and allows water percolation. These soft edges reduce heat island effect and integrate pathways naturally with xeriscaping.
For properties with limited storage, integrating small equipment closets or bike storage alcoves along the pathway increases functionality. A 3′ × 4′ paver pad with overhead cover stores trash/recycling bins, provides bike parking, or houses pool equipment away from primary living spaces.
Privacy screening becomes crucial for close-quarter ADU arrangements. Rather than solid fencing that creates closed-in feelings, consider open screening using gabion walls filled with decorative stone, laser-cut metal panels, or vertical gardens on cable trellis systems. These approaches provide visual screening while maintaining airflow and natural light.
Citadel Stone supplies pavers throughout Arizona.
Conclusion & 8-Point Action Checklist for ADU Pathways
Well-designed paver pathways for ADU Arizona properties deliver lasting value through improved access, enhanced curb appeal, clear property definition, and tenant satisfaction. By selecting materials suited to Arizona’s demanding climate, following proper installation specifications, and understanding local permit requirements, you create durable infrastructure that serves your property for decades.
The pathway connecting your main house to your ADU isn’t merely functional—it’s the first impression tenants and guests experience. Investment in quality materials, proper installation, and thoughtful design pays dividends through higher rent commands, shorter vacancy periods, and reduced maintenance costs over the pathway’s 20–30 year lifespan.
Whether you choose budget-friendly concrete pavers or premium natural stone, prioritize proper base preparation, adequate drainage, and appropriate material selection for your specific Arizona location. Remember that elevation matters—what works perfectly in Phoenix requires modification for Prescott or Flagstaff.
8-Point Action Checklist for ADU Pathways
1. Confirm Primary Use: Pedestrian only, occasional wheeled traffic (carts, bikes), or occasional vehicle crossing—this determines paver thickness and base depth requirements.
2. Choose Material Tier: Low-cost concrete ($8–$14/SF), mid-range enhanced pavers or stone ($14–$22/SF), or premium porcelain/designer stone ($22–$35+/SF) based on budget and rental positioning.
3. Get Mockup or Samples: Order samples of top 2–3 paver choices; view at property in actual lighting and against existing structures before final selection.
4. Confirm Drainage Plan: Identify where water will flow, verify 2% minimum slope away from buildings, determine if drainage structures needed for water crossing pathway.
5. Book Contractor or Commit DIY Timeline: If hiring professional, book 3–6 weeks in advance during busy season (spring, fall); if DIY, block off 3–4 consecutive days plus cure time.
6. Order Materials with Lead Time: Place orders 2–3 weeks before installation start for special colors or non-stock items; verify delivery logistics and placement location.
7. Verify Permits and HOA Approval: Contact city building/planning department and HOA architectural committee; allow 30–60 days for approvals before starting work.
8. Create Maintenance Plan: Establish monthly inspection routine, source polymeric sand and cleaning supplies, schedule sealing (if applicable) at 3-year interval, document warranty information.